Table of Contents
Advertisement
Quick Links
$
I
It
i
_
$
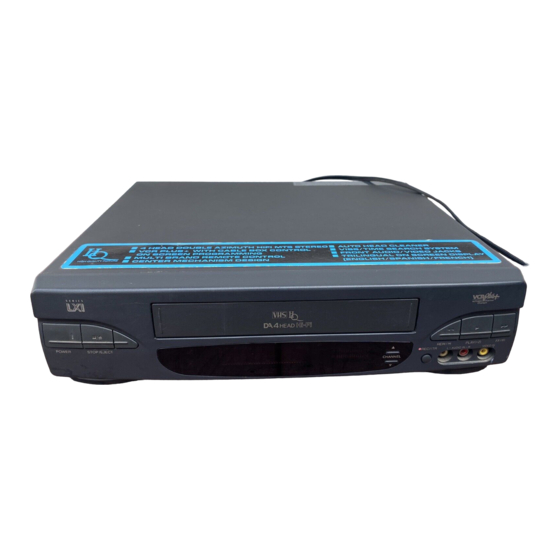
OWNERS
MANUAL
MODEL
NO.
580.55154490
KNOW YOUR UNIT
Read this booklet so you will be
able to enjoy all the features in your
video cassette recorder.
Record in space provided below
the Model No. andthe Serial No.
as found on the rear of your video
cassette recorder.
Model No.
Serial No.
Retain this information for future
reference.
[vgs]
VIDEO CASSETTE
RECORDER
Operation
Sears, Roebuck
and Co., Hoffman
Estates,
IL 60179.
U.S.A.
Advertisement
Table of Contents

Related Manuals for Sears LXI series 580.55154490


Summary of Contents for Sears LXI series 580.55154490
- Page 1 Record in space provided below the Model No. andthe Serial No. VIDEO CASSETTE as found on the rear of your video cassette recorder. RECORDER Model No. Operation Serial No. Retain this information for future reference. Sears, Roebuck and Co., Hoffman Estates, IL 60179. U.S.A.
- Page 2 WARNING: TO PREVENT FIRE OR SHOCK HAZARD, DO NOT EXPOSE THIS APPLIANCE TO RAIN OR MOISTURE. [,o,I:_lljnlll[o]_ The exclamation point within an equilateral triangle is intended to alert the user to the presence of RISK OF ELECTRIC SHOCK important operating and maintenance (servicing) DO NOT OPEN...
-
Page 3: Table Of Contents
Visual search (F-Search and R-Search) ..VCR to VCR dubbing ....Pause/Still ......Troubleshooting ......Routine maintenance ....Frame advance ......Sears service ......Double speed playback ....How to order repair parts ....Slow ......... Specifications ......Auto playback function .... -
Page 4: Important Safety Instructions
IMPORTANT SAFETY INSTRUCTIONS Read Instructions-All safety operating instructions should be read before the product is operated. Retain Instructions-The safety and operating instructions should be retained for future reference. Heed Warnings-A_l warnings on the product and in the operating instructions should be adhered to. - Page 5 Object and Liquid Entry-Never push objects Protective Attachment Plug-The product is of any kind into this product through openings equipped with an attachment plug having as they may touch dangerous voltage points overload protection. This is a safety feature. or short-out parts that could result in a fire or See Instruction Manual for replacement...
-
Page 6: Installation
INSTALLATION Placing your VCR on the top of or under the TV receiver may result in interference appearing on the TV screen when the VCR is on. If this occurs, move the VCR to a position alongside the TV receiver. WIRING DIAGRAM To use your VCR connect it with your TV receiver and antenna system as illustrated below. -
Page 7: Antenna/Vcr Connections
ANTENNA/VCR CONNECTIONS ANTENNAS WITH ONE LEAD (Combined VHF-UHF) VHF/UHF Antenna ..®J O000nDnDo00 To "IN FROM ANT" 1. Disconnect the antenna leads from the rear of the If your antenna lead wire is a flat type antenna cable, connect it to the Antenna Adaptor (300-ohm TV receiver. -
Page 8: Vcr/'Rv Connections
VCR/TV CONNECTIONS :To "OUT TO TV" Antenna Adaptor accessory number 1.) (75-ohm to ohm) (not supplied) 300-ohm 75-ohm ® UHF IN VHF IN 1. Connect the 75-ohm Coaxial Cable with 3. Connect the wires marked "VHF"'on the Splitter Antenna adaptor (accessory number 1) to "OUT to the VHF terminals on the... -
Page 9: Cable Antenna (Catv) Connections
Please consult with your If you connect your VCR like this, set the A-B switch local Sears Store or Service Department. to the A position for VCR Plus+programming. -
Page 10: On Screen Display
Diagram No. 3 Cable Antenna To"IN FROM ANT" IIIIIIIII IIIII_II "I Cable Converter VHF ANT Use A position of A-B switch for watching and /or Use B position of A-B switch for watching and/or recording channels that do not require a cable recording channels that require a cable converter... -
Page 11: Identification And Operation Of Controls
IDENTIFICATION AND OPERATION OF CONTROLS Now that you have experienced the simple operation of your VCR, let's get familiar with the complete operation of your VCR and all its capabilities. I REAR "VHF/UHF INPUT" Lead wire from antenna connects to this 75- ohm input. - Page 12 FRONT "POWER" ON/OFF BUTTON CASSETTE LOADING DOOR Press to turn the power on. When the VCR is tun_ed When a cassette is inserted, loading will be on, the display window will get brighter. The indicator +_fcompleted automatically and the Cassette '_+:_ indicator ( _--_ ) will light.
- Page 13 "FF" FAST FORWARD/ "REW" REWIND/ "VISUAL SEARCH" FORWARD SEARCH "VISUAL SEARCH" REVERSE SEARCH Press "FF" button during stop or rewind mode, and Press_"REW" button during Stop or Fast forward fast forwarding starts. mode and fast rewinding starts. " F-F " indication appears on the Display. _E-_ indication appears on the Display.
- Page 14 INDICATORS OF VCR DISPLAY NOTE: All indicators will not light up at one time. The indicator panel brightness is increased when the I il i-ii i VCR power is ON and lowered when the VCR power is OFE (_)CASSETTE IN/I'APE RUN INDICATORS @ "A/V"...
-
Page 15: Mbr (Multi Brand Remote) Remote Control
MBR (Multi Brand Remote) REMOTE CONTROL The remote control is used for most of the operations and features of the VCR. Before proceeding, install batteries into the remote and get familiar with the buttons on the remote. The remote control provided with the VCR may also be used to operate the TV. Aim the remote control at the receiver on the front panel of the VCR. - Page 16 TV PRESET BUTTON Toprogram the remotecontrol t o operate a TV,set the VCR/TV mode select s witchtothe "TV"position. Pressthe TV PRESETbuttonand hold it down. Whileholdingdownthe TV PRESET button,press oneof the NUMBER buttonsdepending uponthe makerof TV as shownpage19.Thenrelease both buttons. NOTES: •...
- Page 17 TV CONTROL BUTTONS These buttons control the TV volume up/down and ..S_ _'¸ muting. • MUTE BUTTON To turn the sound off. Press again and the sound will return..• VOLUME BUTTONS (UP/DOWN) Press either VOLUME UP(A) or DOWN(V) button to change the sound level.
- Page 18 VISS/TIME BUTTON POWER TV TV PRESE VISS-Press this button once to enter the VISS function mode. MUTE CHANNEl TIME-Press this button twice to enter the TIME search mode. ® "100" BU'B'ON Use to select TV channels with number 100 or above.
- Page 19 CLOCK!COUNT/REMAIN BUTTON switch display between counter, remaining tape time, and clock modes. NOTE: To "CLOCK/COUNT/REMAIN" button does not work when the tape is not inserted. POWER TV TVPRESET COUNTER "RESET" BU'B'ON readout of the tape counter will return "0:00:00" when this button is pressed. MUTE CHANNEt ©...
- Page 20 USING THE MBR (TV AND VCR) REMOTE CONTROL The Multi Brand Remote control is capable of operating the VCR as well as major functions of most Sears Remote Control Color Televisions. In addition, this remote control is programmed with remote control codes of Remote Control Color Televisions by listed below.
-
Page 21: Set Your Television To The Vcr Channel
SET YOUR TELEVISION TO THE VCR CHANNEL NOTES: 1. Set your TV to Channel 3 unless Channel 3 is 1. An object between the VCR and remote control one of the TV stations in your area. If Channel 3 may block the invisible light beam and operation is used in your area, set your TV to Channel 4. -
Page 22: On Screen Menu Features
ON SCREEN MENU FEATURES You only need to press the MENU button on the remote cotrol. Each number buttons are indicated next to the feature displayed on the OSD menu. When you select a feature turn to the section in this manual and read the full description accompanying the instruction there. - Page 23 RENTAL POSITION DISPLAY AUDIO MODE SET DISPLAY Set to ON position when playing back rental tapes. Your VCR allows remote control adjustment of audio mode set on screen feature. In the ON position the details of images will be better defined thanks to the vertical enhancer. •...
- Page 24 AUDIO MODE DISPLAY For normal operation, the display should be in the STEREO position. The VCR will then record The VCR has two separate audio recording systems STEREO program when available, and record a the high quality "VHS Hi-Fi" system and standard mono program IF NOT IN STEREO.
-
Page 25: Channel Presetting (By Using The Remote Control)
CHANNEL PRESETTING (By using the Remote Control) This VCR is equipped with a frequency synthesized tuner capable of receiving up to 181 channels (VHF channels 2-13, UHF channels 14~69 and CATV channels 1-125), but channel presetting is required described below after "ANTENNA/VCR CONNECTIONS"... - Page 26 TO ADD OR ERASE CHANNELS FROM CHANNEL MEMORY 3. Press "1" button to select "TV" or "CATV". If your This feature allows you to manually add or remove connected a home antenna channels from the channel scan. To do so, please system,select "TV", select "CATV"...
-
Page 27: Viewing Tv Only
CABLE OPERATION If cable television is available in your area, it can be received on your new VCR by subscribing to your local cable television company. Cable TV channels will then be supplied into your home through a cable. Your local cable television company can advise you of the channels available in your area and any special adaptors that may be required. -
Page 28: Video Cassette Tapes
VIDEO CASSETTE TAPES This VCR will operate with any video cassette which WHEN HANDLING VIDEO CASSETTES: has the mark. The table shows the recording/ • Do not expose video cassette to extreme heat, playback time of the available cassette when they high humidity or strong magnetic fields. -
Page 29: Clock Setting (By Using The Remote Control)
CLOCK SETTING (By using the Remote Control) __Things to know before starting -- • The clock uses the 12-hour system. (Be sure to set AM and PM correctly.) • When you first plug in your VCR, the clock will read " "... - Page 30 Set the hour by pressing two number buttons on CLOCK SET the remote control and two more for the minute TIME 02:15-- (for example, 0 2 15 for 2:15). The display AM-_I PM-_2 prompts you to select AM or PM. MONTH/DAY/YEAR DATE --/--/--...
- Page 31 CALENDAR A perpetual calendar, from 1992 to 2091, is available for display. If 88 is entered for the year, the selected month for 2088 will be displayed. If 00 is entered, a month from the year 2000 will be displayed. If 49 is entered, a month from 2049 will be displayed.
-
Page 32: Normal Playback
NORMAL PLAYBACK Insert a prerecorded video cassette. cassette indicator will light. At this time, the VCR is automatically turned on(AUTO POWER ON). Turn the TV set ON, and select channel 3 or 4, the same as VCR's output channel. NOTE:If a direct VIDEO/AUDIO connection made between the VCR and TV, set the source... -
Page 33: Visual Search (F-Search And R-Search)
VISUAL SEARCH (F-SEARCH AND R-SEARCH) When you press "FF(I_I_ )" (Forward SEARCH) "REW(,,)" (Reverse SEARCH) button during playback, the tape will be played back at a speed °00 about 15 times faster than the normal playback speed (EP recorded tape), 9 times faster than the normal playback speed (LP recorded... -
Page 34: Pause/Still
PAUSE/STILL When "PAUSE/STILL" button is pressed during recording. " _E__P " will appear and the VCR will stop recording. This feature can be used eliminating unwanted station breaks or program material while recording a TV program or when using a camera from one scene to another. To start again press "PAUSE/STILL"... -
Page 35: Slow
SLOW When you press "SLOW"V or • button during playback, the tape will be played back at a speed about 1/6 times through 1/32 times slower than the normal speed becomes slower• When you press "SLOWv " button, the speed becomes slower. -
Page 36: Viss (Vhs Index Search System)/Time Search
VISS (VHS INDEX SEARCH SYSTEM)/TIME SEARCH The VHS INDEX SEARCH SYSTEM enables you to locate the beginning of any recording made on this VCR. Whenever a recording is begun, an invisible INDEX mark is recorded on the tape. This feature makes use of VISS signals to search out a specified tape segment and begin playback automatically. -
Page 37: Making A Sample Recording
MAKING A SAMPLE RECORDING 5. NOW,pt_ss 13uitor_ui_uu ur_tt_u VL;H OI 1. Insert the Cassette with the transparent window "Hi-L,;il i H" up and the arrow pointing toward the Cassette remote control. The" _ " indication appears on Loading Door. Push the cassette in until the VCR the Display and you are now recording mechanism... -
Page 38: Recording While You Are Away
RECORDING WHILE YOU ARE AWAY (You can use Programmable Timer or VCR Plus+) 3. Press "POWER" ON/OFF button to OFF. The Be sure that the clock is set to the correct time. TIMER indication " (_) " will appear on the (Refer to "CLOCK SETTING"... -
Page 39: Program Timer Setting (You Must Use The Remote Control)
PROGRAM TIMER SETTING (You must use the Remote Control) This VCR can be programmed to record up to 8 programs within a period of 1 year. For unattended recording, the timer needs to know the channels to be recorded and the times to start and to end. __Things to know before starting__ •... - Page 40 (_ Press MENU to return to first screen as shown. PUSH SELECTION NUMBER Press "2" to enter a NORMAL program, "3" to 1 CLOCK SET enter a DAILY program, or "4" to enter 2 NORMAL PROGRAM WEEKLY program. 3 DAILY PROGRAM 4 WEEKLY PROGRAM Normal event...
- Page 41 Press a digit from "1" to "3" on the remote control select recording speed want program("1" for SP, "2" for EP, "3" for AUTO NORMALPROGRAM mode). NOTE: If you select the "AUTO" mode, PROGRAM1 CH04 SPEED "AUTO" mode automatically determines STARTTIME much tape is left and §witches speed according.
- Page 42 NOTES: To change an incorrect entry, or an undesired entry, proceed as follows; 1. Press "CLEAR" button repeatedly until the digit to be changed flashes. 2. Enter the correct number. Press 'MENU" to enter your program and return to the menu display. NORMALPROGRAM If the program preset time is past, the "PAST...
- Page 43 ERASING A TIMER PROGRAM NORMALPROGRAM 1. Press "MENU" button on the remote control to PROGRAM 1 display the menu. OH 04 SPEED 2. Press "5" to erase a program. (Program Review) START TIME 06:00 PM 3. Press "5" again if you want to review the next STOP TIME 07:30 PM program information.
-
Page 44: Vcr Plustm+Programming/Recording
VCR PLUS 4- PROGRAMMING/RECORDING INTRODUCTION TO VCR Plus+ ® After a few simple steps, Plus+ Tuesday programming feature will allow you to program your 11AM VCR for unattended recordings by simply entering a COLLEGE BASKETBALL; 2 hrs. 175029 PlusCode* number. The PlusCode numbers are the Miami at Davidson, ta[_d Feb. - Page 45 VCR PLUS 'M +ANTENNA/CABLE CONNECTIONS Cable Box Code Numbers List The Channel Mapping instructions for VCR Plus+ Archer : 1,29, 42, 44, 76 Cabletenna vary depending on how you have connected your Cableview : 42, 44, 63 antenna or cable-TV system to the VCR.
- Page 46 VCR PLUS -t- CHANNEL MAPPING FOR CONNECTION TO MAP CHANNELS Channel Mapping for Home Antenna or Cable-TV (no cable box) _)Autoprogram the VCR's channel memory decribed on page Use these Channel Mapping instructions only if your OPress the VCR Plus+ button on the remote VCR connected as shown in Connection...
- Page 47 _]) The screen that appears next lists all of the VCR Page from Listing Showing Channel Lind-up Chart VCR Plus+ Guide Channels from Cable Company Plus+ guide numbers that you receive through GUIDE Channel Channel CATV your cable-TV or antenna system. Channel Name Name...
- Page 48 VCR PLUS_M-F CHANNEL MAPPING FOR CONNECTION Channel Mapping for Cable-TV with Cable Box O Use the number buttons on your remote control to enter the output channel of your cable box Use these Channel Mapping instructions only if your (usually 2, 3, 4, 5 or 6). VCR connected as shown in connection B on page When you are finished, press DISPLAY button.
- Page 49 RECORDING with VCR Plus+ IMPORTANT: Before you try to record with VCR _) Press number button "1", "2", or "3" to choose Plus+ for the first time, be sure you have completed which type of program you want to record. The the channel mapping procedure...
- Page 50 Checking and Clearing VCR Plus+ program Programs can be checked(or cleared) whenever the Press the number button "2" again if you want to VCR is turned on. review the information for the next program memory. _]) Press the VCR Plus+ button twice on the remote If you press "2"...
-
Page 51: Instant Timer Recording (Itr)
INSTANT TIMER RECORDING (ITR) Instant Timer Recording allows you to easily make recordings of a preset leng[h without usury the piuy=d=J_ timer. • FOR ITR RECORDING 1. Be sure that the clock is set to the correct time. (Refer to "CLOCK SETTING".) 2. -
Page 52: Recording One Program While Viewing Another
RECORDING ONE PROGRAM WHILE VIEWING ANOTHER 8. If you want to periodically check what you are 1. Insert the cassette (one with erase prevention tab recording, simply set the channel selector on the intact) into cassette loading door. 2. Press "TAPE SPEED" button to select the desired television to the VCR channel_ or 4) and press "VCR/TV"... -
Page 53: Using The Counter Memory Feature
USING THE COUNTER MEMORY FEATURE The tape counter on this VCR indicates the tape travel time in hours, minutes and seconds during recording and playback. The memory feature allows you to return to a specific spot on the cassette after recording i ¸I!I i _,- _=-- .. -
Page 54: Hi-Fi Audio Sound System
Hi-Fi AUDIO SOUND SYSTEM This VCR is equipped with the VHS Hi-Fi audio sound system for recording and playback. The information below gives a brief description of Hi-Fi audio and how to record and playback in the Hi-Fi audio mode. •... -
Page 55: Stereo Recording/Playback Connections And Operation
STEREO RECORDING/PLAYBACK CONNECTIONS OPERATION This VCR is capable of receiving stereo and SAP broadcasts where available-no modification or special equipment is required. External stereo system or compatible stereo TV is required for stereo playback. • ..; StereoSystem _;_;';;i_i,_i_ To "VIDEO IN" 1511 ",-- _o°... - Page 56 SAP (Second Audio Program) RECORDING/VIEWING Some stations transmit a "Second Audio Program", which may be used for a second language. When the indicator lights. Follow the procedure below to record station broadcasts a Second Audio Program, the the SAP. 1. Insert a cassette into the cassette loading door. "...
-
Page 57: Sap (Second Audio Program)
MULTI-CHANNEL TV SOUND (MTS) This VCR will decode MTS stereo and bilingual (SAP) off-the-air broadcast sound signals. This VCR also decodes Stereo TV sound from local CArV companies, as long as they operate on assigned CATV frequencies and use the EIA recommended MTS stereo/bilingual TV sound system. - Page 58 CLOCK/COUNT REMAIN RESET Plus+ MENU MONITOR DISPLAY 2. Press the "7" button to select SI ® ® ® 3. Press the "7" button to select AUDIO MODE SET menu. ® ® ® ® ® TV/VCR @ ® © • ..v_Ji_!_ ¸i_,_, ¸....
-
Page 59: Auto-Rewind
AUTO-REWIND In the record, playback or fast forward mode the VCR automatically rewinds the tape at the end of tape. VCR will stop at the beginning of the tape. AUTO MEMORY POWER SHUT-OFF During rewind, press "POWER" button once: Rewind complete _ Auto Power off. -
Page 60: Operating Hints
OPERATING HINTS ..• Do not attempt to hook up more than • After you have finished using the VCR, rewind, television set to the VCR for either recording eject and remove cassette. Place playback. cassette in its protective sleeve to protect it from •... -
Page 61: Troubleshooting
RF Channel Select Switch. • Try different cassette tape. • Take VCR to Sears Service Center for service. No picture, but audio is clear. Interference on playback picture. Adjust fine tuning knob on television set to obtain best picture. - Page 62 CLOCK Check Point & Correction Symptom " " appears on the display. • Reset time according to instructions. Power has VCR does not start at preset record starting time. been interrupted. VCR does not start at preset record starting time. •...
-
Page 63: Routine Maintenance
Sears has service units nationwide staffed with Sears trained technicians..- professional technicians specifically trained on Sears home entertainment products; having the parts, tools and equipment to insure that we meet our pledge to you ... "We Service What We Sell."... -
Page 64: Specifications
SPECIFICATIONS 1Vp-p, 75 ohms unbalanced Video input 1Vp-p, 75 ohms unbalanced Video output 0.308 Vrms Audio input 0.308 Vrms Audio output 33.35 mm/sec (SP), 16.67 mm/sec (LP), 11.12 mm/sec (EP) Tape speed Less than 6 minutes with T-160 cassette Fast forward/Rewind time 120V AC. - Page 65 Cut off here These are simplified instructions for recording and playback with the VHS Video Cassette Recorder. It is recommended that you first thoroughly read the instructions in the owners manual before referring to this sheet. This may be Olnsert a cassette. kept handy by placing it near the VCR.
- Page 66 Olnsert a cassette. Olnsert a cassette. IIII IIII IIII off power. i_Turn on TV and select Recording will start "CH3" or "CH4". automatically at the time have _Select the channel to be recorded. selected. F_OPress "REC/ITR" button for record I_i lpi starting time, which is Selected 30-minute increments.
-
Page 68: Warranty
What We Sell." Should a need ever exist for repair parts or service, simply contact any Sears Service Center/Department. WARRANTY For 90 days from the date of purchase, Sears Will repalr any defect in material or workmanship in this video...
Need help?
Do you have a question about the LXI series 580.55154490 and is the answer not in the manual?
Questions and answers