Table of Contents
Advertisement
Quick Links
|IIII|
tl ll
OWNERS
MANUAL
MODEL
NO.
580.53425390
KNOW YOUR UNIT
Read this booklet so you will be
able to enjoy all the features in your
video cassette recorder.
Record in space provided below
the Model No. and the Serial No.
as found on the rear of your video
cassette recorder.
Model
No.
Serial No.
Retain this information for future
reference.
. o q_L6l
0®01
®o®
I
: 0®®
I
+ +6
I
I
E
IPtSTILL
IbR£C'Im
--?@@
ID F'_
l
P"
VIDEO CASSETTE
RECORDER
Operation
Sears, Roebuck
and Co., Hoffman
Estates,
IL. 60179.
U.S.A.
Advertisement
Table of Contents

Related Manuals for Sears LXI series 580.53425390


Summary of Contents for Sears LXI series 580.53425390
- Page 1 Record in space provided below the Model No. and the Serial No. as found on the rear of your video VIDEO CASSETTE cassette recorder. RECORDER Model Serial No. Operation Retain this information for future reference. Sears, Roebuck and Co., Hoffman Estates, IL. 60179. U.S.A.
- Page 2 WARNING: TO PREVENT FIRE OR SHOCK HAZARD, DO NOT EXPOSE THIS APPLIANCE TO RAIN OR MOISTURE. The exclamation point within an equilateral triangle is intended to alert the user to the presence of RISK OF ELECTRIC SHOCK important operating and maintenance (servicing) DO NOT OPEN instructions...
-
Page 3: Table Of Contents
Troubleshooting ......Clock setting (By using the remote control)..22 Routine maintenance ....Recording while you are away ..... Sears Service ......Program timer setting How to order repair parts ....(You must use the remote control) ..Specifications ......Instant Timer Recording (ITR) ..... -
Page 4: Important Safety Instructions
IMPORTANT SAFETY INSTRUCTIONS Read Instructions-All safety operating instructions should be read before the product is operated. Retain Instructions-The safety and operating instructions should be retained for future reference. Heed Warnings-All warnings on the product and in the operating instructions should adhered to. - Page 5 Protective Attachment Plug-The product is Object and Liquid Entry-Never push objects equipped with an attachment plug having of any kind into this product through openings overload protection. This is a safety feature. as they may touch dangerous voltage points See Instruction. Manual for replacement or or short-out parts that could result in a fire or resetting of protective device.
-
Page 6: Installation
INSTALLATION Placing your VCR on the top of or under the TV receiver may result in interference appearing on the TV screen when the VCR is on. If this occurs, move the VCR to a position alongside the TV receiver. WIRING DIAGRAM To use your VCR connect it with your TV receiver and antenna system as illustrated below. -
Page 7: Antennancr Connections
ANTENNANCR CONNECTIONS ANTENNAS WITH ONE LEAD (Combined VHF-UHF) DOff OI]O_]Ql]OI]O IOOl]_OUo_OL iDI]D ,, F---ql To "IN FROM ANT" 75-ohm Coaxial (round) Cable 300-ohm Twin-lead Flat Cable ..Adaptor (3_-ohm to 7S-ohm)(notsupplied) 1. Disconnect the antenna leads from the rear of the If your antenna lead wire is a flat type antenna "iV receiver. -
Page 8: Vcr/'Fv Connections
VCRFI'V CONNECTIONS ®-® ionDnonnnn "LI jooooonooo DI]OOOD To "OUT TO TV" 75-ohm Coaxial Cable with Antenna Adaptor (accessory number 1.) To "IN" Antenna Splitter (75-ohm to VHF/UHF 300- ohm) (not supplied) TV Antenna Terminals 3. Connect the wires marked "VHF" on the Splitter 1. -
Page 9: Cable Antenna (Catv) Connections
To use this hook-up, you should here. Their use depends upon the type of cable have a cable compatible television receiver. system you have and on the type of equipment you wish to connect. Please consult with your local Sears Store or Service Department. -
Page 10: On Screen Display
Diagram No. 3 I Cable Antenna I Coupler 2-Set To "IN FROM ANT" -- ®.® 100aa0uHal l 'I II- I Cable _l_a. I Converter VHF ANT To "OUT TO TV" Use A position of A-B switch for watching and /or Use B position of A-B switch for watching and/or recording... -
Page 11: On Screen Menu Features
ON SCREEN MENU FEATURES You only need to press the MENU button on the remote cotrol. Each number buttons are indicated next to the feature displayed on the OSD menu. When you select a feature turn to the section in this manual and read the full description accompanying the instruction there. -
Page 12: Channel Presetting
CHANNEL PRESETTING (By using the Remote Control) This VCR is equipped with a frequency synthesized tuner capable of receiving up to 181 channels (VHF channels 2-13, UHF channels 14-69 and CATV channels 1-125), but channel presetting is required described below after "ANTENNA/VCR CONNECTIONS"... - Page 13 TO ADD OR ERASE CHANNELS FROM 3. Press "1" button to select "IV" or "CATV". If your VCR is connected to a home antenna system, CHANNEL MEMORY select "TV", select "CATV" when your VCR is connected to a cable antenna. Switching This feature allows you to manually add or remove performed between "TV"...
-
Page 14: Set Your Television To The Vcr Channel
SET YOUR TELEVISION TO THE VCR CHANNEL NOTES: Set your TV to Channel 3 unless Channel 3 is • If the range is short, try new batteries. one of the TV stations in your area. If Channel 3 • An object between the VCR and remote control is used in your area, set your "IV to Channel 4. -
Page 15: Making A Sample Recording
MAKING A SAMPLE RECORDING 1. Insert the Cassette so the transparent window is Now, press "REC/ITR" button once, on the VCR or on the remote control. The "REC" indication up and the arrow toward the Cassette Loading Door until the VCR mechanism starts to pull the appears on the Display... -
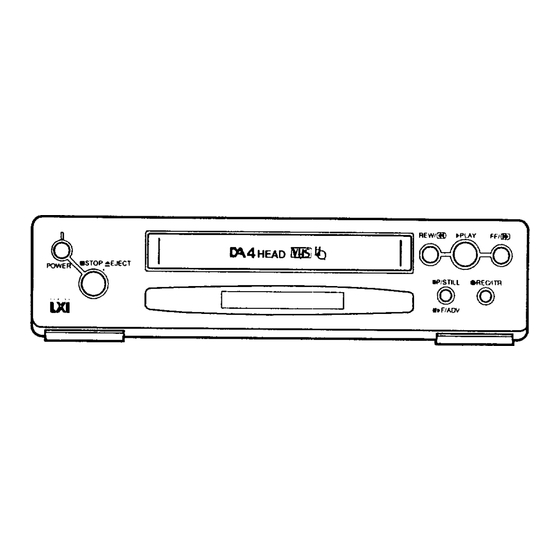
Page 16: Identification And Operation Of Controls
IDENTIFICATION AND OPERATION OF CONTROLS Now that you have experienced the simple operation of your VCR, let's get familiar with the complete operation of your VCR and all its capabilities. I REAR I "AUDIO IN" "VHF/UHF OUTPUT" 75-ohm round Cable Connector connects to this _,When this "AUDIO IN"... - Page 17 I FRONT CASSETTE LOADING DOOR "POWER" ON/OFF BUTTON Press to turn the power on. The indicator will _; When a cassette is inserted, loading will be completed automatically and Cassette indicator illuminate. To turn the unit off, press the button _i (O--O) will light.
- Page 18 "FF" FAST FORWARD/ "REW" REWIND/ "VISUAL SEARCH" FORWARD SEARCH "VISUAL SEARCH" REVERSE SEARCH Press "FF" button during Stop or Rewind mode, and Press "REW" button during Stop or Fast forward fast forwarding starts. mode and fast rewinding starts. "FF" indication appears on the screen. "REW"...
- Page 19 INDICATORS OF VCR DISPLAY CASSETTE IN INDICATOR Lights to indicate a cassette is loaded. CLOCK DISPLAY Shows the clock mode. AM \ . c\0u u,_ "TIMER" INDICATOR Indicates the VCR is in the timer recording stand-by mode, RECORD INDICATOR (REC) "VCR"...
-
Page 20: Remote Control
REMOTE CONTROL The remote control is used for most of the operations and features of the VCR. Before proceeding, install batteries into the remote and get familiar with the buttons on the remote. Aim the remote control at the receiver on the front panel of the VCR•... - Page 21 OSD (On Screen Display) FUNCTION BUTTONS MENU BUTTON Used to enter the On-Screen Programming mode. CLEAR BUTTON Used to go backward and correct the programmed information. DISPLAY BUTTON Press to display the VCR operation mode, tape POWER counter, channel number, date and clock. Press this button once again to remove the on-screen display.
- Page 22 INPUT SELECT BUTTON (TU/AV) TUNER: (TU) To record signals coming from the built-in tuner (Video and Audio). AUDIONIDEO: (AV) To record signals coming from the VIDEO IN and AUDIO IN terminals. NOTE: This VCR can be used as an Audio deck when Input Select button is in AV position.
-
Page 23: Clock Setting (By Using The Remote Control)
CLOCK SETTING (By using the Remote Control) _Things to know before starting __ • The clock uses the 12-hour system. (Be sure to set AM and PM correctly.) • When you first plug in your VCR, the clock will read " - • - - " •... - Page 24 Set the hour by pressing two number buttons on CLOCK SET the remote control and two more for the minute (for example, 0 2 15 for 2:15). The display prompts you to select AM or PM. AT}_.I - 02:15_'L_/- TO END PUSH MENU i_ Press "1"...
-
Page 25: Recording While You Are Away
RECORDING WHILE YOU ARE AWAY Be sure that the clock is set to the correct time. 3. Press "POWER" ON/OFF button to OFF. The TIMER indication will appear on the Display. (Refer to "CLOCK SETTING" on page 22.) NOTES: Insert the cassette. 1. -
Page 26: Program Timer Setting (You Must Use The Remote Control)
PROGRAM TIMER SETTING (You must use the Remote Control) This VCR can be programmed to record up to 8 programs within a period of 1 year. For unattended recording, the timer needs to know the channels to be recorded and the times to start and to end. _Things to know before starting •... - Page 27 Press MENU to return to first screen as shown. PUSH SELECTION NUMBER Press "2" to enter a NORMAL program, "3" to enter a DAILY program, or "4" to enter a WEEK- 1 CLOCK SET 2 NORMAL PROGRAM LY program. 3 DALLY PROGRAM 4 WEEKLY PROGRAM Normal event...
- Page 28 Press two digits for the channel to be recorded NORMAL PROGRAM (for example, "0" "4" for channel 4). The display will prompt you to select a recording speed. PROGRAM 1 CH,..04 >...,SPEE_IT,,_-- SP-: .--_-1 LP-,-_-2 EP:'-t-_'-3 /1" " TO END PUSH MENU _) Press a digit from "1"...
- Page 29 Press four digits, two for the start month and two more NORMAL PROGRAM for the start date, (for example, "0" "9" "0" "2" to begin recording on September 2). The year and day of the PROGRAM 1 week are displayed automatically. OH 04 SPEED START TIME 06:00...
- Page 30 ERASING A TIMER PROGRAM NORMALPROGRAM 1. Press "MENU" button on the remote control to PROGRAM1 display the menu. CH04 SPEED 2. Press "5" to erase a program. (Program Review). START TIME 06:00 PM 3. Press "5" again if you want to review the next STOP TIME 07:30 PM program information.
-
Page 31: Instant Timer Recording (Itr)
INSTANT TIMER RECORDING Instant -13merRecording allows you to make simplified timer recording without using the program timer. • FOR ITR RECORDING F'---" 1. Be sure that the clock is set to the correct time. (Refer to "CLOCK SEI-FING".) 2. Insert the cassette (one with the erase prevention tab intact) into the cassette loading door. -
Page 32: Recording One Program While Viewing Another
RECORDING ONE PROGRAM WHILE VIEWING ANOTHER 1. Insert the cassette (one with erase prevention tab 8. If you want to periodically check what you are intact) into cassette loading door. recording, simply set the channel selector on the 2. Press "TAPE SPEED" button to select the desired television to the VCR channel (3 or 4) and press "VCR/TV"... -
Page 33: Vhs Index Search System (Vlss)
VHS INDEX SEARCH SYSTEM (VISS) The VHS INDEX SEARCH SYSTEM enables you to locate the beginning of any recording made on this VCR. Whenever a recording is begun, an invisible INDEX mark is recorded on the tape. This feature makes use of VISS signals to search out a specified tape segment and begin playback automatically. -
Page 34: Visual Search (F-Search And R-Search)
VISUAL SEARCH (F-SEARCH AND R-SEARCH) When you press "FF(!,I_ )" (Forward SEARCH) or "REW(4< )" (Reverse SEARCH) button during play- back, the tape will be played back at a speed about 15 times faster than the normal playback speed (EP recorded tape), 9 times faster than the normal play- ©©... -
Page 35: Pause/Still
PAUSE/STILL When "PAUSE/STILL" button is pressed during recording. "RECP" will appear and the VCR will stop recording. This feature can be used for eliminating unwanted station breaks or program material while recording a TV program or when using a camera "PLAY, Button from one scene to another. -
Page 36: Auto Playback Function
AUTO PLAYBACK FUNCTION When a cassette with erase prevention tab removed is inserted, playback will start automatically. This automatic function eliminates the need for pressing "PLAY" button. 1. Inserting a cassette into the Cassette Loading Slot automatically switches on the VCR's power. (Auto Power-on) 2. -
Page 37: Auto-Rewind
REAL TIME COUNTER The real time counter can be calculated by pressing "CLOCK/COUNT" button. Each time the "CLOCK/COUNT" button is pressed, the display switches as follows. REAL TIME CLOCK COUNTER M0:00:00 02:15 PM Hour indication Hour Mir, ute Second Minute indication indication indk.-ation indication... -
Page 38: Operating Hints
OPERATING HINTS..• After you have finished using the VCR, rewind, • Do not attempt to hook up more than one eject and remove the cassette. Place the cassette television set to the VCR for either recording or playback. in its protective sleeve to protect it from dust. It is •... -
Page 39: Troubleshooting
RF Channel Select Switch. • Try different cassette tape. • Take VCR to Sears Service Center for service. No picture, but audio is clear. Interference on playback picture. • Adjust fine tuning knob on television set to obtain best picture. -
Page 40: Routine Maintenance
The necessity of maintenance will generally be indicated by a slight degeneration in picture or sound quality. Because of the delicate nature of VCR, it is recommended that you take the VCR to a Sears Service Center to have it cleaned and restored to "like new" operation. -
Page 41: Specifications
SPECIFICATIONS Video input 1Vp-p, 75 ohms unbalanced Video output 1Vp-p, 75 ohms unbalanced 0.308 Vrms Audio input 0.308 Vrms Audio output Tape speed 33.35 mm/sec (SP), 16.67 mm/sec (LP), 11.12 mm/sec (EP) Fast forward/Rewind time Less than 6 minutes with "1"-160 cassette 120V AC. -
Page 42: Warranty
..We Service WhatWe Sell". Should a need ever exist for repair parts or service, simply contact any Sears Service Center/Department. WARRANTY For 90 days from the date of purchase, Sears will repair any defect in material or workmanship in this video cassette...
Need help?
Do you have a question about the LXI series 580.53425390 and is the answer not in the manual?
Questions and answers