
Related Manuals for Qlogic QLA4010


Summary of Contents for Qlogic QLA4010
- Page 1 S i m p l i f y QLA4010/4010C User’s Guide 1-Gb iSCSI to PCI-X Host Bus Adapters IS0053302-00 7 PRELIMINARY Page i...
- Page 2 QLogic Corporation reserves the right to change product specifications at any time without notice. Applications described in this document for any of these products are for illustrative purposes only. QLogic Corporation makes no representation nor warranty that such applications are suitable for the specified use without further testing or modification.
-
Page 3: Table Of Contents
Table of Contents Section 1 Introduction How to Use this Guide ........General Description . - Page 4 Building a RAMDISK Image to Load the Driver Automatically ..5.3.5 Building a Custom Kernel with the QLogic Driver ....5.3.5.1 Prerequisites .
- Page 5 QLA4010/4010C User’s Guide 1-Gb iSCSI to PCI-X Host Bus Adapters QLA4010/4010C User’s Guide 6.3.3 Exiting the SANsurfer Control iX GUI ......6-19 6.3.4 Getting Help with the SANsurfer Control iX GUI .
- Page 6 QLA4010/4010C User’s Guide 1-Gb iSCSI to PCI-X Host Bus Adapters Host Information Tabbed Page (Main Window) ......Target Information Tabbed Page .
-
Page 7: Introduction
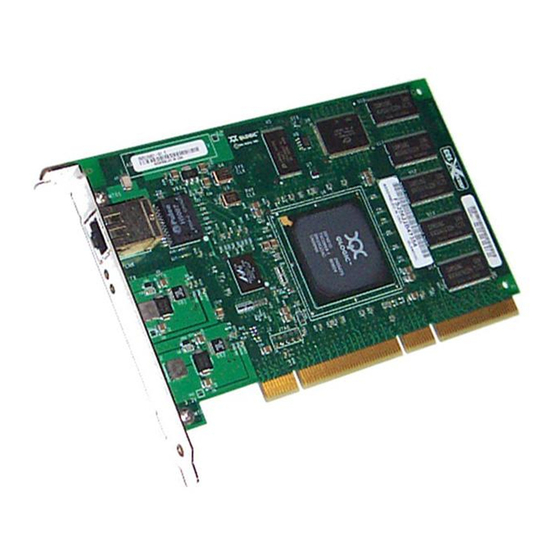
Section 1 Introduction How to Use this Guide The SANblade™ QLogic host bus adapters (HBAs) supported in this document are described in the following paragraphs: QLA4010 (single channel, full-height bracket, optical media) ■ QLA4010C (single channel, full-height bracket, copper media) ■... -
Page 8: Features
1.4.1 Availability QLogic Technical Support is available from 7:00 AM to 7:00 PM Central Standard Time, Monday through Friday, excluding QLogic-observed holidays. 1.4.2 Training QLogic offers certification training for the technical professional for both the SANblade™... -
Page 9: Contact Information
1 – Introduction Technical Support 1.4.3 Contact Information Address: QLogic Corporation 6321 Bury Drive Eden Prairie, Minnesota 55346 (keep or change to AV for iSCSI)? Telephone: +1 952-932-4040 Fax: +1 952-932-4018 Email: Technical Service support@qlogic.com Technical Training tech.training@qlogic.com HBA Support Web Site: http://support.qlogic.com... - Page 10 1 – Introduction Technical Support Notes PRELIMINARY IS0053302-00 7...
-
Page 11: Part I
Part I Hardware This part of the QLA4010/4010C User’s Guide describes the host bus adapters (HBAs) and how to install and configure them. See the section that corresponds to your HBA. Section QLA4010/4010C IS0053302-00 7 PRELIMINARY... - Page 12 I – Hardware Notes PRELIMINARY IS0053302-00 7...
-
Page 13: Qla4010/4010C
Section 2 QLA4010/4010C Installation in the Computer Before you install the QLA4010/4010C HBA in your computer, you need the following: A screwdriver (usually a Phillips #1) ■ An optical mutimode cable with an LC-style duplex connector for the QLA4010 ■ HBA. - Page 14 2 – QLA4010/4010C Installation in the Computer NOTE: Some motherboards have two kinds of PCI bus slots: master and ■ slave. The QLA4010/4010C HBA must be in a PCI bus master slot. (Some motherboards have PCI bus master slots that are shared with onboard devices.
-
Page 15: Specifications
2 – QLA4010/4010C Agency Certification Specifications Tables 2-1 define the QLA4010/4010C HBA specifications. Table 2-1. QLA4010/4010C HBA Operating Environment Environment Minimum Maximum Operating temperature 0°C/32°F 55°C/131°F Storage temperature –20°C/–4°F 70°C/158°F Relative humidity (noncondensing) Storage humidity (noncondensing) Table 2-2. QLA4010/4010C HBA Specifications Type Specifications Universal PCI specifications... - Page 16 2 – QLA4010/4010C Agency Certification Notes PRELIMINARY IS0053302-00 7...
-
Page 17: Software
Before you install the software drivers, you need to locate and download the appropriate drivers for your operating system. The drivers are located on the QLA4010/4010C? CD-ROM. However, check the QLogic web site to be sure you have the latest version (www.qlogic.com). IS0053302-00 7... - Page 18 II – Software Notes II-2 PRELIMINARY IS0053302-00 7...
-
Page 19: Windows 2000 Driver Installation
(QL4010.SYS) Supported Features The Windows 2000 driver (QL4010.sys) supports the iSCSI features provided by the QLogic QLA4010/4010C iSCSI PCI HBA. Driver Files The following files are provided for installation of the Windows 2000 driver: QLA4010\W2K\QLOGIC—Diskette identification file ■ QLA4010\W2K\TXTSETUP.OEM—Driver installation script for text mode ■... -
Page 20: Installing The Driver
3 – Windows 2000 Driver Installation Installing the Driver b. To download the driver from the QLogic web site, follow these steps: Locate the driver you want on the QLogic web site (www.qlogic.com) and ❑ click Download. When prompted Would you like to open the file or save it to your ❑... -
Page 21: Adding The Qla4010/4010C Hba To The Existing Os
4. Select Other and press ENTER. 5. Insert the QLogic driver disk created in section 3.3 and press ENTER. 6. Select the QLogic QLA4010 PCI iSCSI Adapter, then press ENTER. 7. Continue with standard installation procedure. 3.4.2 Adding the QLA4010/4010C HBA to the Existing OS NOTE: The QLA4010 adapter is a multifunction device. -
Page 22: Updating The Existing Driver
Do you want to restart your computer now? Click Yes. After QLogic obtains a Digital Signature for the driver through the official WHQL process from Microsoft, the Digital Signature Not found dialog box will not display. (can this sentence, which is in other HBA user’s guides, be removed?) 3.4.3... -
Page 23: Removing The Driver
3.3. 8. In the Install From Disk dialog box, type or browse the path to the QLogic driver directory. For example: Click OK. 9. In the Upgrade Device Driver Wizard/Select a Device Driver dialog box, click Next. - Page 24 3 – Windows 2000 Driver Installation Removing the Driver Notes PRELIMINARY IS0053302-00 7...
-
Page 25: Windows Server 2003 Driver Installation
(QL4010.SYS) Supported Features The Windows Server 2003 driver (QL4010.sys) supports the iSCSI features provided by the QLogic QLA4010/4010C iSCSI PCI HBA. Driver Files The following files are provided for installation of the Windows Sever 2003 driver: QLA4010\W2K\QLOGIC—Diskette identification file ■... -
Page 26: Installing The Driver
4 – Windows Server 2003 Driver Installation Installing the Driver b. To download the driver from the QLogic web site, follow these steps: Locate the driver you want on the QLogic web site (www.qlogic.com) and ❑ click Download. When prompted Would you like to open the file or save it to your ❑... -
Page 27: Adding The Qla4010/4010C Hba To The Existing Os
4. Select Other and press ENTER. 5. Insert the QLogic driver disk created in section 4.3 and press ENTER. 6. Select the QLogic QLA4010 PCI iSCSI Adapter, then press ENTER. 7. Continue with standard installation procedure. 4.4.2 Adding the QLA4010/4010C HBA to the Existing OS NOTE: The QLA4010 adapter is a multifunction device. -
Page 28: Updating The Existing Driver
4.3. Click Have Disk. 8. In the Install From Disk dialog box, in the Copy manufacturer’s files from field, type or browse the path to the QLogic driver directory. For example: Click OK. 9. The Hardware Update Wizard/Select a Device Driver dialog box displays. -
Page 29: Removing The Driver
4 – Windows Server 2003 Driver Installation Removing the Driver Removing the Driver To uninstall the QLA4010.SYS driver, power down your computer and remove the QLA4010/4010C HBA from your computer according to the manufacturer’s instructions. NOTE: You do not have to use the Device Manager or the Hardware Wizard to uninstall the QLA4010/4010C HBA. - Page 30 4 – Windows Server 2003 Driver Installation Removing the Driver Notes PRELIMINARY IS0053302-00 7...
-
Page 31: Red Hat Linux Driver Installation
5.2). Creating the Driver Floppy Disk Perform the following steps to create a driver disk from the QLogic web site: 1. Download the qla4xxxsrc-vx.xx.tgz file from the QLogic Web site. 2. The File Download window prompts: Would you like to open the file or save it to your computer? Click the Save button. -
Page 32: Building A Uniprocessor (Up) Version Of The Driver
5 – Red Hat Linux Driver Installation Installing the Driver 5.3.1 Building a Uniprocessor (UP) Version of the Driver Perform the following steps to build a UP version of the qla4xxx driver: 1. Extract the kernel-header and kernel-source RPM files from the first Red Hat CD-ROM. -
Page 33: Building A Symmetric Multiprocessor (Smp) Version Of The Driver
5 – Red Hat Linux Driver Installation Installing the Driver 5.3.2 Building a Symmetric Multiprocessor (SMP) Version of the Driver Perform the following steps to build an SMP version of the qla4xxx driver: 1. Extract the kernel-header and kernel-source RPM files from the first Red Hat CD-ROM. -
Page 34: Loading The Driver Manually
5 – Red Hat Linux Driver Installation Installing the Driver 5. Create a new directory, /qla4xxx. Using the driver disk created in section 5.2, copy the qla4xxxsrc-vx.xx.tgz file to /qla4xxx and extract the files. For example: # mkdir qla4xxx # cd qla4xxx # mcopy a:*.tgz . - Page 35 5 – Red Hat Linux Driver Installation Installing the Driver Before building a RAMDISK image, you must build a UP or SMP version of the driver, as described in section 5.3.1 or 5.3.2. Perform the following steps to load the qla4010 driver using a RAMDISK image: 1.
-
Page 36: Building A Custom Kernel With The Qlogic Driver
Installing the Driver 5.3.5 Building a Custom Kernel with the QLogic Driver Should this section be in the manual? This is new to me. Also, how do these instructions fit with the rest of this section? Is this procedure instead of, or in addition... - Page 37 3. Edit the Config.in file under the kernel scsi directory by typing: # cd /usr/src/linux/drivers/scsi # vi Config.in Locate the following lines: For RedHat Advanced Server 2.1: dep_tristate ’Qlogic QLA 2100 FC SCSI support’ CONFIG_SCSI_QLOGIC_QLA2100 $CONFIG_SCSI dep_tristate ’Qlogic QLA 2200 FC SCSI support’ CONFIG_SCSI_QLOGIC_QLA2200 $CONFIG_SCSI For Red Hat 8 and 9: dep_tristate ’Qlogic QLA 1280 FC SCSI support’...
- Page 38 5 – Red Hat Linux Driver Installation Installing the Driver 4. Configure the kernel to load the QLogic driver by typing: # cd /usr/src/linux # make menuconfig Make sure built-in support is selected for the following options by doing the following: a.
-
Page 39: System Driver Parameter Max_Scsi_Luns
5 – Red Hat Linux Driver Installation System Driver Parameter max_scsi_luns d. Restart the system. The new kernel image containing the qla4010 driver is now the default boot image. For GRUB, perform the following steps: a. Add a section for newKernel in the /etc/grub.conf file. For example: title Red Hat Linux-newKernel (2.4.7-10) root (hd0,0) kernel /newKernel ro root=/dev/hda2... -
Page 40: Driver Command Line Parameters
Proc Filesystem Support The /proc filesystem for the QLA4010/4010C driver can be found in the /proc/scsi/qla4010/ directory. This directory contains a file for each QLogic iSCSI HBA in the system. Each file presents information about the adapter and transfer statistics for each discovered LUN. The following example command lines display... -
Page 41: Applications
Uninstallation instructions ■ Operating instructions ■ At the time of publication, the latest version of SANsurfer Control iX is available on on the QLogic web site (www.qlogic.com). Will it be on its own CD with the drivers? IS0053302-00 7 PRELIMINARY III-1... - Page 42 III – Applications Notes III-2 PRELIMINARY IS0053302-00 7...
-
Page 43: Sansurfer Control Ix
Follow these steps to install the SANsurfer Control iX GUI: 1. Download SANsurfer Control iX from the QLogic web site: a. Locate SANsurfer Control iX on the QLogic web site (www.qlogic.com) and click Download. b. When prompted Would you like to open the file or save it to your computer?, click the Save button. - Page 44 6 – SANsurfer Control iX Installing SANsurfer Control iX For a Red Hat Linux system, do the following: ❑ (1) Open a shell. (2) Change to the directory where you downloaded the SANsurfer installer. (3) Type the following and then press ENTER to ensure that the SANsurfer Control iX installer file is executable.
- Page 45 6 – SANsurfer Control iX Installing SANsurfer Control iX Figure 6-2. Choose Install Folder Dialog Box 5. The Choose Shortcut Folder dialog box displays (see figure 6-3). Use the radio buttons to make your selection. Click Next. Figure 6-3. Choose Shortcut Folder Dialog Box IS0053302-00 7 PRELIMINARY...
- Page 46 6 – SANsurfer Control iX Installing SANsurfer Control iX 6. If you are installing the SANsurfer Control iX GUI on a Windows 2000 system, the Create Desktop Icon Selection dialog box displays (see figure 6-4). Figure 6-4. Create Desktop Icon Selection Dialog Box (Windows 2000/Server 2003) Do the following: a.
-
Page 47: Uninstalling Sansurfer Control Ix
6.2.2.1 Windows 2000 To uninstall the SANsurfer Control iX GUI for Windows 2000, do the following: From the Start menu, point to Programs, point to QLogic Corporation, point to SANsurfer Control iX, then click Uninstall SANsurfer Control iX. 6.2.2.2 Red Hat Linux Follow these steps to uninstall the SANsurfer Control iX GUI for Red Hat Linux: 1. -
Page 48: Getting Started
(see figure 6-7). Figure 6-7. SANsurfer Control iX Icon Click Start, select Programs, select the install group (the default is QLogic ■ Corporation), select SANsurfer Control iX, then click SANsurfer Control iX. Click the Start button, click Run, and then do one of the following: ■... -
Page 49: Starting Sansurfer Control Ix On Red Hat Linux
6 – SANsurfer Control iX Getting Started 6.3.1.2 Starting SANsurfer Control iX on Red Hat Linux On a Red Hat Linux system, perform the following steps to start the SANsurfer Control iX GUI. When done, the SANsurfer HBA Manager main window displays (see section 6.3.2). -
Page 50: Host Information Tabbed Page (Main Window)
6 – SANsurfer Control iX Getting Started When SANsurfer Control iX starts, the first screen is the main window, which defaults to the Host Information tabbed page (see figure 6-8). HBA Tree Menu Bar Tabbed Pages Figure 6-8. Host Information Tabbed Page (Main Window) The Host Information tabbed page provides the following information about the local machine (host): Host name... - Page 51 6 – SANsurfer Control iX Getting Started The menu bar has three options: File ■ Exit. Select this option to exit SANsurfer Control iX. ❑ View ■ Refresh. Select this option to refresh the information displayed by SANsurfer ❑ Control iX. Preferences.
-
Page 52: Target Information Tabbed Page
6 – SANsurfer Control iX Getting Started To view target information, click the target in the HBA tree. The Target Information tabbed page displays (see figure 6-9). Figure 6-9. Target Information Tabbed Page Clicking the button attached to a target further expands the tree and shows all the LUNs in that device. -
Page 53: Lun List Tabbed Page
6 – SANsurfer Control iX Getting Started To view LUN information, click the LUN in the HBA tree, or click the LUN List tab if the Target Information tabbed page is already displayed. The LUN List tabbed page displays (see figure 6-10). -
Page 54: Host Tabbed Page
6 – SANsurfer Control iX Getting Started 6.3.2.1 Host Tabbed Page When SANsurfer Control iX starts, the first screen is the main window, which defaults to the Host Information tabbed page (see figure 6-11). Figure 6-11. Host Information Tabbed Page The Host Information tabbed page provides the following information about the local machine (host): Host name... -
Page 55: Hba Tabbed Pages
6 – SANsurfer Control iX Getting Started 6.3.2.2 HBA Tabbed Pages Use the HBA Options tabbed page first to set basic QLA4010/4010C HBA information, such as IP address, iSCSI alias, etc. The Firmware and Network tabbed pages enable you to configure the QLA4010/4010C HBA (see figures 6-12 and 6-13). -
Page 56: Target Settings Tabbed Page
6 – SANsurfer Control iX Getting Started Figure 6-13. HBA Options Tabbed Page (Network) 6.3.2.3 Target Settings Tabbed Page Target Settings is the primary tabbed page for interactive use. Use this page to configure iSCSI targets (see figure 6-14). Figure 6-14. Target Settings Tabbed Page 6-14 PRELIMINARY IS0053302-00 7... -
Page 57: Target Information Tabbed Page
6 – SANsurfer Control iX Getting Started 6.3.2.4 Target Information Tabbed Page The Target Information tabbed page provides information about iSCSI targets (you cannot configure iSCSI targets on this page) (see figure 6-15). Figure 6-15. Target Information Tabbed Page IS0053302-00 7 PRELIMINARY 6-15... -
Page 58: Hba Information Tabbed Page
6 – SANsurfer Control iX Getting Started 6.3.2.5 HBA Information Tabbed Page The HBA Information tabbed page is for information only. It provides code versions, etc. (see figure 6-16). Figure 6-16. HBA Information Tabbed Page 6-16 PRELIMINARY IS0053302-00 7... -
Page 59: Statistics Tabbed Page
6 – SANsurfer Control iX Getting Started 6.3.2.6 Statistics Tabbed Page The Statistics tabbed page contains information about the HBA (see figure 6-17). Figure 6-17. Statistics Tabbed Page IS0053302-00 7 PRELIMINARY 6-17... -
Page 60: Diagnostics Tabbed Page
6 – SANsurfer Control iX Getting Started 6.3.2.7 Diagnostics Tabbed Page The diagnostics tabbed page allows you to ping an IP address with a specified number of packets (see figure 6-18), as well as view the ARP log and connection error log files. -
Page 61: Exiting The Sansurfer Control Ix Gui
6 – SANsurfer Control iX Getting Started 6.3.3 Exiting the SANsurfer Control iX GUI Do one of the following to exit the SANsurfer Control iX GUI: On the SANsurfer Control iX main window File menu, select Exit. ■ Click the close (x) button in the upper right-hand corner of the screen. ■... -
Page 62: Viewing Sansurfer Control Ix Software Information
6 – SANsurfer Control iX Getting Started If you do not know the location, click Browse to display a file selection dialog. Select the file. The Browser Location dialog box re-displays. 3. Do one of the following: Click OK to save the location to the SANsurfer Control iX configuration file. ❑... -
Page 63: Host Security Tabbed Page
6 – SANsurfer Control iX Getting Started NOTE: The default SANsurfer Control iX application access password is config. Change this password after installation to ensure that security is not compromised. Perform the following steps to set the application access password for a host: 1. -
Page 64: Configuring The Qla4010/4010C Hba
6 – SANsurfer Control iX Configuring the QLA4010/4010C HBA Configuring the QLA4010/4010C HBA The following sections provide instructions on how to configure the QLA4010/4010C HBA: Setting the IP address (see section 6.4.1) ■ Setting the domain name system (DNS) server address (see section 6.4.2) ■... -
Page 65: Setting The Ip Address
6 – SANsurfer Control iX Configuring the QLA4010/4010C HBA 3. Configure the HBA as described in the following sections. When configuration is complete, click Save. After configuring the QLA4010/4010C, you can configure targets (see section 6.5), configure the firmware (see section 6.6), and run diagnostics (see section 6.7). -
Page 66: Setting The Dns Server Address Manually
6 – SANsurfer Control iX Configuring the QLA4010/4010C HBA To set the DNS server address automatically through DHCP, select the Obtain DNS server address automatically (via DHCP) radio button. 6.4.2.2 Setting the DNS Server Address Manually To set the DNS server address manually, perform the following steps: 1. -
Page 67: Configuring Targets
6 – SANsurfer Control iX Configuring Targets Configuring Targets After configuring the QLA4010/4010C HBA, you can enter iSCSI targets you want to discover. Start SANsurfer Control iX (see section 6.2), select your host and HBA, then click the Target Settings tab. When the QLA4010/4010C HBA arrives from the factory, there are no targets listed. - Page 68 6.5.3. 10. Click Save. 11. QLogic recommends restarting the host PC for the operating system to recognize the new targets. The discovery method is an excellent timesaver for finding and entering iSCSI targets. You can use this method to find all available targets, delete targets you do not want, and then have access only to the remaining devices.
-
Page 69: Configuring Specific Targets
6 – SANsurfer Control iX Configuring Targets CAUTION! The iSCSI port number defaults to 3260. Do not change this number unless required by the configured target. 6.5.2 Configuring Specific Targets To configure a specific iSCSI target, follow these steps: 1. Start SANsurfer Control iX, select your host and QLA4010/4010C HBA, then click the Target Settings tab. -
Page 70: Changing The Target Configuration Parameters
6 – SANsurfer Control iX Configuring Targets 11. QLogic recommends restarting the host PC for the operating system to recognize the new targets. 12. The QLA4010/4010C HBA restarts and attempts to connect to the configured targets. 6.5.3 Changing the Target Configuration Parameters... -
Page 71: Authenticating Targets (Chap)
6 – SANsurfer Control iX Configuring Targets Enable. When the check box is selected in this read-only field, the target ❑ is visible and accessible to the QLA4010/4010C. When this check box is not selected, the target is visible, but not accessible, to the QLA4010/4010C. -
Page 72: Chap Tabbed Page
6 – SANsurfer Control iX Configuring Targets 4. At the prompt, enter your password. The CHAP tabbed page displays (see figure 6-25). Figure 6-25. CHAP Tabbed Page 5. Select the Enable check box for the targets for which you want to use CHAP. 6. -
Page 73: Configuring The Firmware
6 – SANsurfer Control iX Configuring the Firmware 8. If the enabled targets are configured to use the same initiator name and secret, perform the following steps. Otherwise, skip to step a. Select the Set Default Initiator Name and Secret box. The Initiator Name and Secret part of the page becomes inactive (you cannot specify different names and secrets for each target). -
Page 74: Firmware Parameters Table (Read Only)
6 – SANsurfer Control iX Configuring the Firmware 3. Next to the phrase Configured Firmware Values, click Open. A read-only table displays, listing all of the firmware values and their current settings (see figure 6-26). Figure 6-26. Firmware Parameters Table (Read Only) 4. -
Page 75: Save Firmware Parameters Message
6 – SANsurfer Control iX Configuring the Firmware parameter column. When you are done changing the parameters, click OK. The following message displays: Figure 6-28. Save Firmware Parameters Message Click OK. Snack. When this check box is set and the firmware is configured as an ❑... - Page 76 0 indicates unlimited data units. RSVAddFWOpBinary. This field is used for debug and test purposes. ❑ Contact QLogic for more information. Jumbo Packets Enable. When this check box is selected, jumbo packets ❑ are enabled on an Ethernet network. This feature is not currently supported.
- Page 77 6 – SANsurfer Control iX Configuring the Firmware Ethernet Pause. When this check box is selected, the QLA4010/4010C ❑ HBA accepts pause frames from a connected device. In addition, the QLA4010 HBA will issue an ethernet pause to momentarily stop incoming traffic when the SDRAM is almost full.
-
Page 78: Restoring The Factory Defaults
If you are upgrading a QLA4010/4010C HBA, follow the instructions in this section to load the latest firmware from the QLogic web site. The HBA Information tab in SANsurfer Control iX displays the firmware version you are using. -
Page 79: Firmware Download Warnings Dialog Box
6 – SANsurfer Control iX Configuring the Firmware 9. The Firmware Download Warnings dialog box displays (see figure 6-29). Click Yes to continue. Figure 6-29. Firmware Download Warnings Dialog Box 10. You are prompted to enter your password. (see figure 6-30). -
Page 80: Updating The Rom
16. Restart the host PC for the operating system to recognize the new firmware. 6.6.4 Updating the ROM Contact QLogic technical support for assistance when updating the ROM. 6.6.5 Viewing the HBA Crash Record If the firmware crashes, perform the following steps to save the log information to a file: 1. -
Page 81: Performing Diagnostics
4. Enter a name and location for the crash file. If you do not know the location, click Browse to display a file selection dialog. Select or create the file. The Save Crash Record dialog box re-displays. 5. Click Save. The crash file will be in saved. Send this file to QLogic technical support. Performing Diagnostics 6.7.1... -
Page 82: Viewing The Arp And Connection Error Tables
6 – SANsurfer Control iX Performing Diagnostics 6.7.2 Viewing the ARP and Connection Error Tables Perform the following steps to view the address resolution protocol (ARP) and connection error tables: 1. Select an HBA in the HBA tree. 2. Click the Logs tab. 3.
Need help?
Do you have a question about the QLA4010 and is the answer not in the manual?
Questions and answers