Table of Contents
Advertisement
Quick Links
Advertisement
Chapters
Table of Contents

Related Manuals for Olivetti Fax_Lab 710


Summary of Contents for Olivetti Fax_Lab 710
- Page 1 INSTRUCTIONS...
- Page 2 All rights reserved. No parts of this manual may be photocopied, reproduced or translated into other languages with- out prior written authorization from Olivetti S.p.A. The manufacturer reserves the right to make any changes to the machine described in this manual, at any time, and without prior warning.
-
Page 3: Table Of Contents
ABLE OF CONTENTS FIRST SECTION BEFORE YOU START CONSULTING THE MANUAL ............3 ENVIRONMENTAL RECYCLING ........... 3 SAFETY PRECAUTIONS .............. 3 ABOUT THE INSTALLATION AND SETUP PARAMETERS ... 4 ABOUT THE FAX MACHINE CONSOLE ..................5 COMPONENTS ................7 HOW TO GET STARTED QUICKLY PACKAGE CONTENTS .............. -
Page 5: Before You Start
ISK OF ACCIDENT - Olivetti guarantees the activation of the treat- ment, collection, recycling and disposal pro- • Place it on a stable, flat surface free of all vibrations so as to... -
Page 6: About The Installation And Setup Parameters
PERATING PRECAUTIONS • Keep the fax machine in a dust-free place away from sources of water, steam and excessive heat. Do not expose it to direct sunlight. • Ensure that no books, documents, or other objects obstruct normal ventilation in any way. •... -
Page 7: About The Fax Machine
BOUT THE FAX MACHINE ONSOLE • Adjusts the resolution of the documents to be sent and copied (only with the document inserted in the ADF). • Puts the line on hold during a telephone conversation (with the handset raised. • Turns off the microphone, during a "handsfree"... - Page 8 • Unloads a document from the ADF. • Turns off the " " LED indicator. • Returns the fax machine to the stand- by mode. Display • Used to dial a telephone or fax number without A two-line liquid crystal display with a capacity of 16 •...
-
Page 9: Components
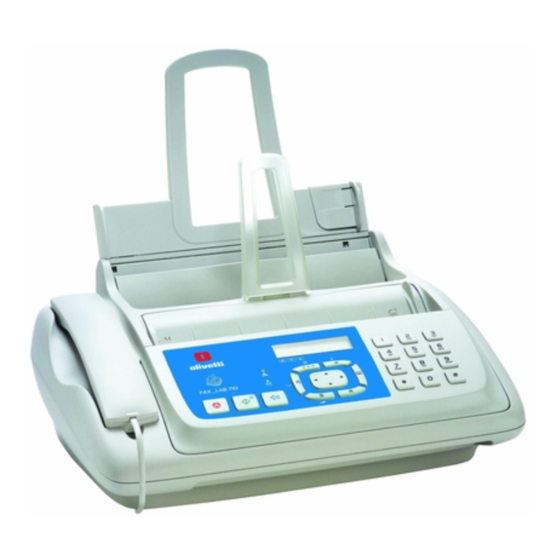
OMPONENTS The figure shows the external and internal parts of fax machine. LAIN PAPER FEED COMPARTMENT Adjustable to the following paper sizes: A4, Letter and Legal. Maximum capacity: 100 sheets (80gr/m RINTING PAPER SUPPORT ONNECTION SOCKETS APER ADJUSTING LEVER SEE BASE OCUMENT SUPPORT ECEIVED OR COPIED DOCUMENT OUTPUT... -
Page 10: How To Get Started Quickly
OW TO GET STARTED QUICKLY 3. Insert the connector or the plug This section provides a basic description of the fax ma- (if applicable) at the other end of chine, explaining how to install it and get started quickly, us- ing its basic functions only. -
Page 11: Setting Some Parameters
To select a different country, see the table below: ONNECT THE FAX MACHINE TO THE POWER SUPPLY COUNTRY COUNTRY TO BE SELECTED Argentina AMERICA LATINA 1. Insert the female connector (A) Australia AUSTRALIA at one end of the power cable Austria ÖSTERREICH into the male connector on the... - Page 12 2. Press the keys 5. Press the key: until the display shows: The display shows the default language, for example: 3. Press the key: 6. To display the other available languages, press the keys: The display shows: 7. To confirm your choice, press the key: 4.
- Page 13 6. To confirm the setting, press the key: 6. Press the key: The fax machine automatically returns to its initial stand- The display shows: by mode. "XX-XX-XX XX:XX" indicate the current date and time. Stand-by mode is the status in which the fax machine is idle 7.
- Page 14 7. To choose the other option, "LINE TYPE - PRIVATE (PBX)", press the keys: If you have chosen the 12-hour time format, the display will show the letter "p" (post meridiem) or the letter "a" (ante meridiem). To switch from one format to the other: 8.
- Page 15 10. To insert a character in the name, move the cursor to 9. To confirm the setting, press the key: the point where you want to insert the new character, by pressing the keys: 10. To return the fax machine to its initial stand-by mode, press the key: 11.
-
Page 16: Setting Up The Fax Machine
8. To select the alternative parameter, press the keys: 7. If you want to move back one function, press the key: The display shows: Position of your name and fax number: The information at the top of the document to be sent (name, fax number, date and time and number of pages) 9. - Page 17 5. Close the ASF panel as indicated 7. To choose one of the other available settings, "PAPER by the arrows. SIZE - LETTER" or "PAPER SIZE - LEGAL", press the keys: 8. To confirm the setting, press the key: 9. To return the fax machine to its initial stand-by mode, press the key: If you add sheets (max.
-
Page 18: To Print The Menu And Its Functions
Attention: Examine the print test sheet as follows: 4. Avoid touching the nozzles and 1. Check that the numbered scale is not broken at any point the electrical contacts. and that the black areas do not present any horizontal white lines: if these conditions, which confirm that the car- tridge has been inserted correctly and is working properly, are respected, set the value 1. -
Page 19: Transmission
RANSMISSION O HEAR THE DIALLING TONE WHEN SENDING A DOCUMENT If you follow the procedures described below, you can imme- 1. If these diagrams are not enough, diately use the fax machine to carry out simple trans- see "To send a document", mission operations. -
Page 20: Reception
ECEPTION ANUAL RECEPTION For all occasions in which you are present and you can You can set up the fax machine to receive the documents sent therefore answer the calls yourself. by your correspondents in four different modes, that you may access by carrying out the procedure described below. -
Page 21: Using The Telephone
" " ECEPTION IN PHONE MODE SING THE TELEPHONE The behaviour of the fax machine in this mode depends on When you engage the line by lifting the telephone hand- who is calling and whether you are in or not when the fax set, you may use all the telephone functions available on is received. - Page 22 4. To start dialling, press the key: O DIAL A NUMBER BEFORE ENGAGING THE LINE Once the number has been dialled, if the correspond- If desired, before engaging the line, you can dial a ent is free, you can start talking. number on the numeric keypad, a number in the phone book or any of the last 20 numbers of incoming calls or O TELEPHONE USING THE QUICKEST METHOD...
-
Page 23: Making Copies
8. To confirm your choice, press the key: AKING COPIES The display shows: HAT DOCUMENTS CAN BE COPIED 9. To choose the desired copy size setting, "200%", "140%", "70%" or "50%", press the keys: As for transmission, copying requires the document to be inserted in the automatic document feeder (ADF). - Page 24 If you want to make enlargements or reductions, lay the origi- nal in the centre in a lengthwise direction. Use the middle step in the sheet feeder as an orientation aid. The maximum printing width is 204 mm and the maximum print- ing length is 282 mm.
- Page 25 ABLE OF CONTENTS SECOND SECTION TRANSMISSION AND RECEPTION OPERATIONS MAINTENANCE OPERATIONS TO SEND A DOCUMENT ............25 TO REPLACE THE PRINT CARTRIDGE ........64 TO RECEIVE A DOCUMENT ............29 CLEANING THE PRINT CARTRIDGE AND TESTING THE NOZZLES ..................65 PHONE BOOK ................
-
Page 27: Transmission And Reception Operations
RANSMISSION AND RECEPTION OPERATIONS 3. Once the document has been inserted in the automatic docu- O SEND A DOCUMENT ment feeder (ADF), the display shows on the top line: and on the bottom line, the default contrast value: "NORMAL". HAT DOCUMENTS MAY BE USED Dimensions O ADJUST THE CONTRAST AND RESOLUTION Sizes:... - Page 28 9. To confirm your choice, press the key: 3. To start sending the document, press the key: If the document is sent correctly, once this operation has been completed, the display will show the message "TX 10. To return the fax machine to its initial stand-by mode, COMPLETED"...
- Page 29 O SEND A DOCUMENT WITH THE RECEIVER RAISED O SEND A DOCUMENT FROM THE MEMORY 1. Insert the document in the automatic document feeder 1. Insert the document in the automatic document feeder (ADF). (ADF). The display shows on the top line: The display shows on the top line: and on the bottom line, the default contrast value: "NOR- and on the bottom line, the default contrast value: "NOR-...
- Page 30 10. Press the key: O CHANGE REPEAT DELETE A TRANSMISSION FROM THE The fax machine prompts you to enter another number: MEMORY THAT IS ALREADY SET If you want to send the document to more than one 1. Press the key: correspondent, repeat the previous two steps once for each correspondent.
-
Page 31: To Receive A Document
n o t e O RECEIVE A DOCUMENT To activate reception with TAD mode, you must first record the OUTGOING MESSAGE 1 (see "The Telephone Answer- You can set up the fax machine to receive the documents sent ing Device"). by your correspondents in four separate modes: •... -
Page 32: Phone Book
n o t e 8. To leave a space, to correct typing mistakes or to enter characters or special symbols, proceed as explained in Any kind of reception may be stopped by pressing the "All that is missing now is your name and fax number", chapter "How to get started quickly". - Page 33 4. Press the keys 6. To find the telephone number or name you want to delete, you can: until the display shows: 1. Press the keys until the desired number or name appears on the display. 5. To confirm the setting, press the key: 2.
-
Page 34: To Print Reports And Lists
4. Press the keys O SEND A DOCUMENT USING THE QUICKEST METHOD until the display shows: 1. Insert the document in the automatic document feeder (ADF). The display shows on the top line: 5. To confirm the setting, press the key: and on the bottom line, the default contrast value: NOR- MAL. - Page 35 4. Press the keys OW TO READ THE REPORTS until the display shows: • Act.N. Progressive number of the transactions (transmission/reception) carried out. 5. Press the key: • Type Type of transaction: TX or TX ECM for transmission. The display shows: RX, RX ECM or RX POLLING for recep- tion.
- Page 36 3. Press the key: O PRINT THE TRANSMISSION ACTIVITY BROADCAST The display shows: TRANSMISSION AND CALLER ID REPORTS ON REQUEST 1. Press the key: 4. Press the keys The display shows: until the display shows: 5. To confirm the setting, press the key: 2.
- Page 37 O PRINT THE LIST OF RECEPTION SETUP PARAMETERS 1. Press the key: The display shows: 2. Press the key: The display shows: 3. Press the keys until the display shows: 4. To confirm the setting, press the key: Having printed the report, the fax machine automati- cally returns to its initial stand-by mode.
-
Page 38: The Telephone Answering Device
HE TELEPHONE ANSWERING DEVICE If you have purchased the model of fax equipped with a built- HE TAD CONSOLE in telephone answering device you can perform the same functions as those performed by external telephone answer- ing devices. Keys only present on model with a telephone an- You can therefore: swering device: •... - Page 39 9. To return the fax machine to the initial stand-by mode, ECURITY AND ACCESS FUNCTIONS press the key: To operate the TAD from a remote location (except to leave 10. If you want to move back one function, press the key: messages), you must set a four-digit numeric code which you can change or delete at any time (see "To change/de- lete the TAD access code").
-
Page 40: Outgoing Messages And Memos
11. If you want to move back one function, press the key: UTGOING MESSAGES AND MEMOS You can record several different types of outgoing mes- O ENABLE DISABLE ACCESS TO THE TELEPHONE sages: ANSWERING DEVICE IN LOCAL MODE • OGM 1, which has a maximum length of 20 seconds, prompt- ing the caller to leave a message on the TAD, for example: Follow the procedure described in "To set the TAD "You have called the telephone number ... - Page 41 5. Press the key: 5. Press the key: The display shows: The display shows: 6. Press the keys 6. To listen to message 1 recorded previously, press the key: until the display shows: The display shows: When it gets to the end of the message, the fax machine 7.
- Page 42 3. Press the key: O LISTEN TO THE TRANSFER MESSAGE The display shows: Play back the transfer message as you played back OUTGO- ING MESSAGE 1, modifying the step 4 as follows: 4. Press the keys Press the keys until the display shows: until the display shows: 5.
-
Page 43: To Set The Length Of Memos And Incoming Messages
O SET THE LENGTH OF MEMOS AND O LISTEN TO INCOMING MESSAGES AND INCOMING MESSAGES MEMOS 1. Press the key: If there is one or more incoming messages or memos in the memory of the telephone answering device that have The display shows: not yet been played back, the (MESSAGES) LED... -
Page 44: To Transfer Messages And Memos To A Remote Telephone
O TRANSFER MESSAGES AND MEMOS TO A O DELETE THE MESSAGE OR MEMO YOU ARE LISTENING TO REMOTE TELEPHONE 1. To start listening to the messages or memos, press the key: If you wish, you can program the TAD to call you The display shows: on a remote telephone at a given time to let you listen to any new messages received. -
Page 45: To Operate The Telephone Answering Device From A Remote Location
9. To confirm the setting, press the key: CODE OPERATING FUNCTION The display shows: Plays new messages. Plays all messages. Stops playing current message and returns to previous message. 10. Type the time at which you want the messages to be Stops playing current message and skips to next transferred, for example: "11:45", by pressing the keys: message. - Page 46 7. To confirm the setting, press the key: PECIAL FUNCTIONS OF THE TELEPHONE ANSWERING DEVICE 8. To return the fax machine to the initial stand-by mode, press the key: You can set up the TAD for the following special functions: •...
-
Page 47: To Print The Tad Configuration Parameters
8. To confirm the setting, press the key: 7. To return the fax machine to the initial stand-by mode, press the key: The display shows: 8. If you want to move back one function, press the key: If you have already recorded OGM 1, the display will show the message "PLAYING"... -
Page 48: More Sophisticated Operations
ORE SOPHISTICATED OPERATIONS 11. If you want to move back one function, press the key: THER USEFUL RECEPTION SETTINGS O RECEIVE A DOCUMENT THAT IS LONGER THAN THE O REDUCE THE AREA OF A DOCUMENT RECEIVED PAPER SIZE USED 1. Press the key: If you receive a document that is longer than the paper size used, you can have the surplus text printed by The display shows:... - Page 49 10. To return the fax machine to its initial stand-by mode, 7. To return the fax machine to its initial stand-by mode, press the key: press the key: 11. If you want to move back one function, press the key: 8.
- Page 50 2. Press the keys O CHANGE THE NUMBER OF RINGS until the display shows: This function is only enabled in some countries. If set in "AUTOMATIC", "PHONE/FAX" or "TAD/FAX" 3. Press the key: reception mode, the fax machine automatically answers calls after a certain number of rings.
- Page 51 We recommend you disconnect the TAD, if connected, O CHANGE THE RING VOLUME from the power supply before carrying out the recogni- tion procedure. 1. Press the key: 1. Press the key: The display shows: The display shows: 2. Press the key: 2.
- Page 52 12. To confirm your choice, press the key: 6. Press the keys until the display shows: 13. To return the fax machine to its initial stand-by mode, press the key: 7. Press the key: 14. If you want to move back one function, press the key: The display shows: n o t E 8.
- Page 53 6. Press the keys 3. Press the key: until the display shows: The display shows: 7. Press the key: 4. Press the keys The display shows: until the display shows: 5. Press the key: 8. To view the other available values, "SILENCE LAPSE - 3 SECS", "SILENCE LAPSE - 4 SECS", "SILENCE The display shows: LAPSE - 8 SECS", "SILENCE LAPSE - 10 SECS"...
- Page 54 O SET THE BLACK LIST O MODIFY THE BLACK LIST As mentioned previously, you can save a series of un- 1. Press the key: wanted numbers on a black list (max. 10) so as to avoid receiving documents from the correspondents on this The display shows: list.
-
Page 55: Other Useful Transmission Settings
4. Press the key: 5. Press the keys until the display shows: The display shows: 6. To confirm the setting, press the key: 5. Press the keys Having printed the report, the fax machine automati- until the display shows: cally returns to its initial stand-by mode. 6. - Page 56 7. Press the key: 6. Press the keys until the display shows: The display shows: 7. Press the key: 8. To select the alternative parameter, press the keys: The display shows: The display shows: 9. To confirm the setting, press the key: 8.
- Page 57 O REGULATE THE BUZZER VOLUME O ENABLE DISABLE THE FLASH FUNCTION The buzzer indicates particular operating conditions and If the fax machine is connected to a private branch ex- faults or errors. change (PBX) with Flash pulse management, this func- tion enables a call to be made on the public line.
-
Page 58: Receiving A Document In Polling Mode
N O T E 8. To confirm your choice, press the key: Having enabled the Flash function, to switch from the private branch exchange (PBX) to the public line, press the 9. To return the fax machine to its initial stand-by mode, key before dialling the number (the letter "E"... - Page 59 3. Press the key: O CHANGE A POLLING RECEPTION THAT HAS BEEN SET The display shows: 1. Press the key: The display shows: 4. Press the key: The display shows: 2. Press the keys until the display shows: At this point, you can confirm the current time or overwrite the time with the correct one, for example "18:20".
- Page 60 4. Press the keys until the display shows: 5. Press the key: The display shows: 6. To view the other available option, "DELETE? - YES", press the keys: 7. To confirm your choice, press the key: Polling reception is cancelled automatically and the fax machine returns automatically to it initial stand-by status.
-
Page 61: Troubleshooting Guide
ROUBLESHOOTING GUIDE OR MINOR PROBLEMS HAT HAPPENS IF THERE IS A POWER FAILURE If a power failure occurs, the fax machine keeps the The list below may be used as a guide to the solution of minor problems. following data in the memory: the numbers set in the phone book and the reports, while the documents present in the memory will be lost. -
Page 62: Error Codes
RROR CODES The error codes printed both on the transmission report and the activity report consist of two digits indicating the cause of the error. To save space, the two-digit code without any message is printed on the activity report. CODE MESSAGE CAUSE OF ERROR... - Page 63 IGNALS AND MESSAGES • The fax machine does not detect the presence of the print cartridge because you have forgotten to install it or you have installed it incorrectly: install/reinstall the print cartridge. Any problems that may arise are generally indicated by •...
- Page 64 The date and time have not been set correctly: see "To set You set polling reception and the connection was not estab- the date and time for the first time" and "To change the lished due to line errors or because the correspondent is date and time", in the "How to get started quickly"...
- Page 65 The cover is raised. You aborted reception by pressing the key. The fax machine is dialling the number of the correspondent The fax machine is saving the pages of the document to be you called. copied. You have set a document transmission from the memory and A document is being sent.
-
Page 66: Maintenance Operations
AINTENANCE OPERATIONS 6. Replace the print cartridge in its O REPLACE THE PRINT CARTRIDGE seat. Ensure that the electrical contacts face downwards. The print cartridge must be replaced, when the ink runs out (used print cartridges cannot be used) or when you notice a deterioration in the print quality. -
Page 67: Cleaning The Print Cartridge And Testing The Nozzles
N O T E 5. To view the other available option, "NEW CARTRIDGE - YES", press the keys: The procedure may be aborted at any time, if desired, by pressing the key. 6. Press the key: N O T E The fax machine resets the cartridge and tests the noz- If the quality of the test result still fails to meet your expecta- zles, and then prints out the result of the diagnostic test. -
Page 68: To Clean The Optical Reader
4. Clean the electrical contacts us- O CLEAN THE CASING ing a slightly damp cloth. Warning! Do not touch the nozzles! 1. Unplug the fax machine from the power outlet and the telephone socket. 2. Use exclusively a soft, lint-free cloth dampened with a neutral detergent diluted with water. - Page 69 If the paper gets jammed in the received/copied docu- ment output: 1. Remove the jammed sheet. En- sure that it does not tear. N O T E Never use pointed objects to remove jammed sheets of paper.
-
Page 70: Manufacturer And Customer Service
ANUFACTURER AND CUSTOMER SERVICE ANUFACTURER Olivetti S.p.A. con unico azionista Gruppo Telecom Italia Direzione e coordinamento di Telecom Italia S.p.A. Via Jervis, 77 - 10015 IVREA (TO) ITALY USTOMER SERVICE If the fax machine is not working as it should, or you want to ask the manufacturers something, call the number indicated on the "Warranty Card". -
Page 71: Technical Data
ECHNICAL DATA ENERAL CHARACTERISTICS ECEPTION CHARACTERISTICS Model ......Desktop transceiver Printing system ..... Printing on plain paper, bubble ink jet printer Display ......LCD 16 + 16 char. Max. printing width ......... 204 mm Capacity memory ..max. 150 pages Printing paper ......... -
Page 72: Index
NDEX Access to the telephone answering device ECM (Error Correction Mode) 56 to enable/disable 38 Electrical contacts Acoustic signals 62 print cartridge carriage 65 Automatic document feeder (ADF) 7 , 17 , 25 Environment Automatic redial 27 environmental recycling 3 Environmental recycling to dispose of our devices correctly 3 Error codes 59 , 60... -
Page 73: Security And Access Functions
Memos and incoming messages length 41 to delete 41 Reception to listen 41 automatic reception 18 , 29 to transfer to a remote telephone 42 with recognition of the type of call 29 Message language manual reception 18 , 29 to change 10 reception in "PHONE/FAX"... - Page 74 Transmission broadcast transmission 27 sending a document using the quickest method 32 TAD access code to adjust the contrast and resolution 25 to change 37 to enable/disable ECM 56 to delete 37 to enable/disable the Flash function 55 to set 37 to hear the dialling tone when sending 17 , 26 TAD configuration parameters to hear the line signals 54...
- Page 75 2) The Quality System is in compliance with the UNI EN ISO 9000 series of Standards. Olivetti S.p.A. Sede Sociale Ivrea, Via Jervis, 77 - Cap. Soc. Euro 154.000.000 - C.C.I.A.A. Torino n. 547040 - Trib. Ivrea Reg. Soc. n.1927 - Cod. Fisc. e Part. IVA 02298700010...
- Page 79 − Designs consumables and packages in such a way that they can be recycled easily. In the pursuit of this policy, Olivetti has started to manufacture, also for its new fax machines, a new generation of ECO- FRIENDLY consumables, following the implementation of complete and constant improvements in its development and production processes.
- Page 80 380550N...
Need help?
Do you have a question about the Fax_Lab 710 and is the answer not in the manual?
Questions and answers