Table of Contents
Advertisement
Advertisement
Table of Contents

Related Manuals for Novation ReMOTE SL


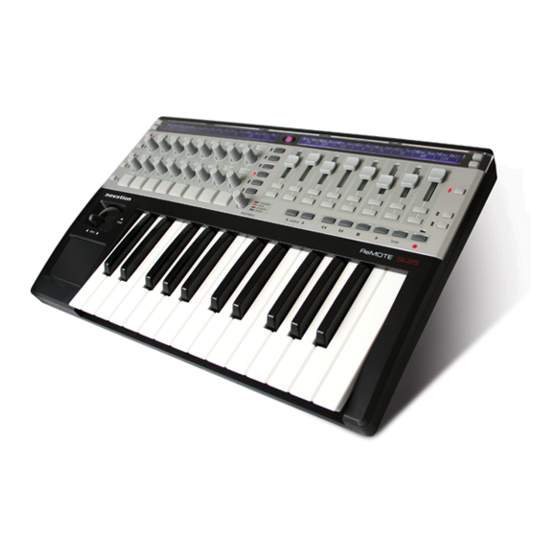
Summary of Contents for Novation ReMOTE SL
- Page 1 OS 4. 1 AND AUTOMAP UNIVERSAL 2.0 Rev-02...
-
Page 2: Table Of Contents
4.1 POWERING THE REMOTE SL 4.2 INSTALLATION - PC 4.3 INSTALLATION - MAC 4.4 CONNECTING THE REMOTE SL 4.5 USING THE REMOTE SL AS A MIDI INTERFACE 4.6 MODES AND MENUS OVERVIEW 4.7 TEMPLATES 5 AUTOMAP OVeRVIeW 5.1 AUTOMAP UNIVERSAL 5.2 SEQUENCER AUTOMAP... - Page 3 8 CONTROLLING A SeQUeNCeR MIXeR WITH AUTOMAP UNIVeRSAL 8.1 CUBASE/NUENDO SETUP 8.2 SONAR SETUP 8.3 TRACKTION SETUP 9 THe AUTOMAP MIDI CLIeNT 9.1 MIDI PORTS 9.2 MIDI CONTROL MAPS 9.3 ASSIGNING MIDI MESSAGES 9.4 USING LEARN MODE TO ASSIGN MIDI MESSAGES 9.5 SAVING A MIDI CONTROL MAP 10 SeQUeNCeR AUTOMAP 10.1 LOGIC...
- Page 4 17 SAVING AND NAMING TeMPLATeS 17.1 RESTORING TEMPLATES APPeNDIX I SPECIFICATIONS II LIST OF FACTORY TEMPLATES III GUIDE TO FACTORY STANDARD TEMPLATES IV STANDARD SYNTH PARAMETER LAYOUT FOR FACTORY STANDARD TEMPLATES...
-
Page 5: Intro
1 INTRO Welcome to the Novation ReMOTE SL User Guide! This guide is designed to help you get started with the controller, as well as to provide comprehensive information about its operational features and Automap software. The content is structured in a way that should allow you to read only as far as you need to. -
Page 6: Hardware Overview
Automap (see sections 7 to 10 for further info). 11. Mode/Menu buttons (WRITE, TEMPLATE, EDIT, GLOBAL and PLAY): Use these to access the different modes and menus of the ReMOTE SL. 12. TAP TEMPO button: Press this repeatedly to set the tempo. -
Page 7: Rear Panel Connections And Other Features
Pitch/Mod Joystick Spring Selector: Found on the bottom of the ReMOTE SL, this slider selects whether the pitch/mod joystick springs to the bottom or moves freely in the vertical (mod) direction. Slide it towards the back of the ReMOTE SL to enable the spring or towards the front for free movement. -
Page 8: Getting Started With The Remote Sl
Win Vista Click ‘Continue Anyway’ (Win XP) or ‘Install’ (Win Vista) to continue installation. 4. Once the driver is installed, you will be prompted to select whether you have a keyboard version of the ReMOTE SL or a ReMOTE SL ZeRO. -
Page 9: Installation - Mac
The latest ReMOTE SL installer is compatible with OS X 10.3.9 or later. Connect the ReMOTE SL to your computer via USB and ensure it is switched on. If you already have an older version of Automap Universal installed, make sure the Automap Server is NOT running. -
Page 10: Connecting The Remote Sl
The ReMOTE SL Sysex Upgrade application will also run automatically and prompt you to select whether you have a keyboard version of the ReMOTE SL or a ReMOTE SL ZeRO (watch out - this window may open behind the Plug-in Manager and Installer windows!): The Sysex Upgrade application will guide you through updating your ReMOTE SL with on-screen instructions. -
Page 11: Using The Remote Sl As A Midi Interface
The ReMOTE SL has two physical MIDI ports. Port 1 has IN, OUT and THRU connectors and port 2 has an OUT connector only. These ports are labelled as M1 and M2 in the menus on the ReMOTE SL where you set how MIDI data is routed in, out or through the unit. - Page 12 MIDIOUT3 (ReMOTE SL) The Global menu on the ReMOTE SL contains options that allow you to set which ports incoming MIDI data is routed to (see section 11 for further info). The following diagram shows how data can be routed through the ReMOTE SL between the...
-
Page 13: Modes And Menus Overview
Use the SCROLL buttons to scroll through all pages of available settings when accessing a menu. Play Mode: This is the default mode for the ReMOTE SL and the one that will be active when it powers up. In this mode you can use the ReMOTE SL to control software and hardware MIDI devices. -
Page 14: Templates
The names of 16 templates will appear on the left-hand ReMOTE SL display. The upper left-hand row of buttons on the ReMOTE SL can be pressed to jump to one of the 8 templates shown on the top line of the display and the lower left-hand row of buttons can be pressed to jump to one of the 8 templates shown on the bottom line of the display. -
Page 15: Automap Overview
You can open as many Automap-wrapped plug-ins as you like (up to a limit of 253) but you can only control one at a time from the ReMOTE SL. To select a plug-in for control, click on the Automap logo in the bottom-left hand corner of the plug-in window so that it turns red. -
Page 16: Automap And The Remote Sl's Midi Ports
ReMOTE SL (i.e. Sequencer Automap). Port 3 is used for transferring Automap data between the Automap Server software and the ReMOTE SL. If you are using Automap, it is important to only select port 2 or 3 in your software where instructed in this guide. - Page 17 (not record). Automation data will then be written when you operate a control on the ReMOTE SL. Remember to set the Automation mode for the track back to ‘read’ when you have finished recording control movements.
-
Page 18: Automap Universal
Clients connect to the Automap Server and tell it what parameters they have available to control. The Server assigns these parameters to controls on the ReMOTE SL. A maximum number of 253 clients can be connected to the Server at one time. -
Page 19: The Automap Server
Automap Universal. If it is selected but the Server is not running, ‘Automap is OFFLINE’ will appear on the ReMOTE SL displays. If it is selected and the Server is running then, unless a client is selected for control, the ReMOTE SL displays will... -
Page 20: The Automap Settings
Automap Focus Follows Plug-in UI: This option applies to controlling Automap-wrapped plug-ins in your sequencer. If this is active then the ReMOTE SL will automatically map to whichever plug-in you select in your sequencer. If this is not active then you must manually select a different plug-in to control, either by clicking the Automap logo in the bottom left-hand corner of a plug-in window or selecting one from the Browser View of the Automap Universal window. -
Page 21: The Plug-In Manager
Show View Window On Startup: This option allows you to select whether or not the Automap Universal window appears when you launch the Automap Server. Window Transparency: This option is used to set the transparency of the Automap Universal window. MIDI Input Port, MIDI Output Port & MIDI Channels: These options relate to the Automap MIDI Client. See section 9 for further information on using the Automap MIDI Client. -
Page 22: Controlling Plug-Ins With Automap Universal
Automap logo switch: This indicates which plug-in currently has ‘Automap focus’ i.e. which plug-in can currently be controlled from the ReMOTE SL. It will be red for the plug-in which has Automap focus and white for all other plug-ins. Click it when it is white to turn it red and give Automap focus to that plug-in. It will then automatically turn white on the plug-in that previously had Automap focus. -
Page 23: The Automap Universal Template
Enter. Min Number Box: Displays the min value of the last control operated on the ReMOTE SL. To edit the min value click on the box, type in a new value and press Enter. -
Page 24: The Automap Universal Window
Use the TAP TEMPO button or the DATA/SELECT encoder (set to tempo mode) to control the tempo in your sequencer. The ‘BPMPort’ setting in the Global menu on the ReMOTE SL must be set to ‘ON’ for tempo control to work (this ensures the ReMOTE SL sends ReWire tempo messages when you change tempo –... - Page 25 This section shows the following info about the control map: Instance Name: This is the name of the control map as it will appear in Browser View and on the ReMOTE SL displays when selecting a control map. The instance name defaults to the name of the plug-in, however you can change the instance name by clicking on it, typing in a new one and then pressing enter.
- Page 26 You can select a control map by clicking on it with the mouse or by using the upper and lower rows of buttons on the left-hand side of the ReMOTE SL. Selection from the hardware allows you to switch between...
-
Page 27: Control Map Options
To open the Automap Universal window in Help View, select ‘Interactive Help’ from the Automap Universal ‘Help’ menu (Mac) or from the Automap settings menu (PC). Also if you press the VIEW button on the ReMOTE SL when no control map is selected, the Automap Universal window will open in Help View. -
Page 28: Plug-In Parameter Layout
When you open an Automap-wrapped plug-in for the first time, or when you use the ‘Rebuild Control Map’ feature, the plug- in parameters will be mapped to the ReMOTE SL in the order in which they are presented by the plug-in. It is unlikely that this order will be intuitive and you will probably want to clear some or all controls and re-assign them in a more organised way. -
Page 29: Default And Instance Control Maps
If you want to see the full parameter name on the ReMOTE SL display (rather than an abbreviation of it) then clear the control to the right of it. The ReMOTE SL will automatically use the extra blank display space to show the full parameter name. -
Page 30: Control Settings - Name Range And Step Size
If you use Learn Latch (instead of Learn Once) then you can continue assigning parameters by altering them with the mouse and operating a control on the ReMOTE SL until you turn learn mode off (don’t forget to turn it off once you are done assigning!). -
Page 31: Saving A Control Map
If the assigned parameter is a continuous type e.g. filter cutoff, the button can be used to step up through the parameter range. With the min value set to 0 and step value set to 1, you can simply adjust the max value to determine the number of button presses it takes to step up through the whole parameter range. -
Page 32: Controlling A Sequencer Mixer With Automap Universal
The default parameter mapping for the mixer control map is as follows: When using the ReMOTE SL to control a sequencer mixer, you can clear and assign parameters just as you would when controlling a plug-in, as described in section 7.7. Only the following mixer parameters can be assigned:... -
Page 33: Cubase/Nuendo Setup
In the ‘Device Setup’ window click ‘+’ and add ‘Novation Automap Universal’. Leave the MIDI input and MIDI output ‘not connected’. Select the ‘MIDI Port Setup’ page of Device Setup and ensure ReMOTE SL ports 2 and 3 are not selected in the ‘Visible’ or ‘All MIDI Inputs’ columns, then click ‘Apply’. -
Page 34: Sonar Setup
Inputs and Outputs list, then click ‘OK’, open a project and start controlling! When controlling bus send level of track in Sonar, it is only possible to assign controls on the ReMOTE SL to bus send level 1. Bus send levels 2-4 cannot be learned to controls on the ReMOTE SL. -
Page 35: Tracktion Setup
Select ‘Novation Automap Universal’ in the ‘Supported Control Surfaces’ list and click ‘Enable’ in the properties panel. Select the ‘MIDI’ page of the Tracktion settings and make sure ReMOTE SL ports 2 and 3 are disabled, then open a project and start controlling! When the Tracktion mixer control map is selected, the encoders on the ReMOTE SL will be unassigned because the tracks in a Tracktion project do not, by default, have any aux sends to control. - Page 36 When controlling native filters and non-wrapped VST plug-ins, you can clear and assign controls as described in section 7.7, however saving of default and instance control maps will not work (see section 7.6). If you change the control map for a native filter or non-wrapped VST plug-in, you must use the ‘Save As…’ option to save the control map before quitting the project.
-
Page 37: The Automap Midi Client
MIDI messages. The Automap MIDI client can also receive MIDI data, allowing MIDI feedback and learning of MIDI messages to the controls on the ReMOTE SL. The following sections give a guide to how the Automap MIDI client works. -
Page 38: Assigning Midi Messages
Since the MIDI client can receive MIDI data, it is possible to use learn mode to assign MIDI messages to controls on the ReMOTE SL. When learn mode is active the Automap Server will listen for MIDI messages on the MIDI client’s MIDI input port. -
Page 39: Sequencer Automap
Click ‘OK’, then click ‘Done’ (Logic 7) or close the ‘Install’ window (Logic 8). Click on the ReMOTE SL in the Control Surface Setup window to view its settings (on the left-hand side of the window). Ensure the Input and Out Port are set to ‘Port 2’. Note that if you have any other MIDI interfaces or USB MIDI devices, their ports will be listed as ‘port 1’, ‘port 2’... - Page 40 Once you have followed the above set up instructions, the ReMOTE SL will automatically switch to the Logic Automap template and will do so each time you subsequently launch Logic. Whilst using the ReMOTE SL in Logic Automap mode, you...
- Page 41 Mixer Mode In Mixer mode you will see the track names on the ReMOTE SL displays and you can use the ReMOTE SL controls as follows: Track Select Instrument Mode In instrument mode you will see the parameters of the currently selected instrument on the ReMOTE SL displays. If the currently selected track does not have an instrument loaded into it, or is not an instrument track, then you will see dashes across the ReMOTE SL displays indicating that there is nothing to control.
-
Page 42: Ableton Live
NOTE: The Input AND Output of the ReMOTE SL in the ‘Control Surfaces’ section must be set to ReMOTE SL Port 2. 3. Exit the preferences and start using Live! The Ableton Live Automap template (template 40) must be selected on the ReMOTE SL when using it in Ableton Live Automap mode. - Page 43 To lock the ReMOTE SL to the currently selected plug-in, press the ROW-SELECT button for the upper left-hand buttons. The LED next to the button will light to indicate that the ReMOTE SL is locked to a plug-in in Live. Press the ROW-SELECT button for the upper left-hand buttons again to unlock the ReMOTE SL.
-
Page 44: Pro Tools
Windows 2. On the ReMOTE SL, press the GLOBAL menu button to enter the Global menu, scroll up to the 3rd page and set the HUI parameter to ‘ON’. Press WRITE to save the setting and then the PLAY mode button to return to Play mode. - Page 45 6. In Pro Tools, load a project then select ‘MIDI -> Input Devices…’ from the ‘Setup’ menu and ensure ‘ReMOTE SL Port 3’ is unchecked, then click ‘OK’. This prevents Automap Universal data, intended for the Automap Server, from being routed into Pro Tools.
- Page 46 The 8 sliders control track level of the currently selected bank of tracks. The slider levels are displayed on the right-hand ReMOTE SL display as a MIDI value (0-127). To see the slider value in dB, hold down the SLIDER ROW-SELECT button whilst operating a slider and the abbreviated track name on the left-hand display will temporarily change to show level in dB.
- Page 47 The currently selected automation mode is shown above the AUTOMATION MODE SELECT pot on the top line of the left-hand ReMOTE SL display. If you simply want to see the current automation mode of a track without changing it, set the automation mode to ‘*View’...
- Page 48 In Insert Select mode, the left-hand ReMOTE SL display shows the insert slots of the currently selected track. There are 5 insert slots for each track in Pro Tools but only 4 can be displayed at one time on the ReMOTE SL so use the PAGE buttons to access the 5th insert slot.
- Page 49 ReMOTE SL will automatically switch to Insert Edit mode. Up to 8 parameters of the currently selected plug-in will appear on the left-hand ReMOTE SL display (4 on the top line and 4 on the bottom line): Use buttons 1-4 to control the parameters shown on the top line and encoders 1-4 to control parameters shown on the bottom line.
-
Page 50: Digital Performer
HUI Support’. 2. On the ReMOTE SL, press the GLOBAL menu button to enter the Global menu, scroll up to the 3rd page and set the HUI parameter to ‘ON’, then press WRITE to save the setting and the PLAY mode button to return to Play mode. - Page 51 MOTU DP Automap template to control Digital Performer again. It is important to ensure that ‘ReMOTE SL port 1’ is selected as the input for all MIDI and Instrument tracks in Digital Performer so that Automap data on ports 2 and 3 does not get routed to soft-synths and MIDI devices. To allow specific input ports to be selected, you need to turn on Multi Record by selecting it from the ‘Studio’...
-
Page 52: Reason
Snd5: Encoders have no function (this applies to Pro Tools only) The upper left-hand row of buttons on the ReMOTE SL can be used to set track automation mode. Select an automation mode using the AUTOMATION MODE SELECT pot and then press a button to set the corresponding track to that mode. - Page 53 ReMOTE SL displays. Where the same type of parameter is found on different Reason devices, it will generally be mapped to the same control on the ReMOTE SL e.g.
- Page 54 If you use Logic, Ableton Live, Pro Tools or Digital Performer as your main sequencer and run Reason in ReWire mode then you will need to set up Reason so that it communicates with the ReMOTE SL using USB port 3. Although port 3 is reserved for communication between the ReMOTE SL and the Automap Universal Server, the Automap system has been designed so that the Server will ignore messages intended for Reason.
-
Page 55: Vjamm
4.7 to switch between templates on the ReMOTE SL. With Reason set up to use port 3 it will still be possible to use the ReMOTE SL with Reason when it is running in stand-alone mode. - Page 56 VJamm user, you can try out the software and Automap by downloading the free demo. Once installed and booted up, the MIDI communication port must be set to ReMOTE SL Port 2 in the VJamm setup preferences. Then, the SL...
-
Page 57: The Global Menu
M1 M2: routed to both MIDI OUT port 1 and MIDI OUT port 2 MIDITo: This sets where MIDI data received at the MIDI in connector on the back of the ReMOTE SL is routed to (see section 4.5). The routing options are:... - Page 58 If this is set to ‘OFF’ then the ReMOTE SL will only store control values when you manually save the template.
- Page 59 For Sequencer Automap to work correctly, this should be set to ‘U2’. HUI: This sets whether HUI mode is on or off. This should only be set to ‘ON’ when using the ReMOTE SL in Automap mode with Pro Tools or Digital Performer.
- Page 60 Do not force the wheel at the end of its travel. Repeat this and look at the value under ‘Pitch’ on the ReMOTE SL display. It should now reach 0 when the stick is fully left, 255 when it is fully right and 128 when it is at rest in the centre.
-
Page 61: Saving Global Settings
Page 7 The seventh page of the Global menu is the second of the two pages for calibrating the drum pads. This is for soft hit calibration: Hit a pad softly and view the hit velocity value. If the value does not update when you hit the pad then the threshold is too high. -
Page 62: Standard Templates
If you want to control a hardware MIDI device then you will need to create one or more standard templates for it. All information in this user guide from this point on applies to using the ReMOTE SL as a standard MIDI controller and describes how to use and edit standard templates. -
Page 63: Play Mode
13 PLAY MODE Play mode is the default ReMOTE SL mode and will be active after powering the keyboard up. In Play mode, the ReMOTE SL can be used to control software and hardware MIDI devices. When a template first loads, either on power up or when a different template is selected, its name and number will appear briefly on the ReMOTE SL displays. - Page 64 Tempo: Rotating the encoder will control the tempo of the ReMOTE SL’s internal clock. If you are sending MIDI clock from the ReMOTE SL to other MIDI devices then changing the tempo will only affect the synced devices if MIDI Clk is set to ‘INTERNAL’...
-
Page 65: Edit Mode
The joystick and X-Y touchpad are the only controls on the ReMOTE SL that can have more than one MIDI message assigned to them. The joystick can be assigned separate messages for the horizontal (pitch) and vertical (mod) axes. Press and hold EDIT mode button and move the joystick left to right to access the settings for the horizontal (pitch) axis or move it up and down to access the settings for the vertical (mod) axis. -
Page 66: Control Change (Cc)
14. 1 CONTROL CHANGE (CC) DispType (Display Type): This setting allows you to select how the value for the control is displayed on the ReMOTE SL. For encoders it can also be used to change the mode of operation. The options are: 0-127: Control value displayed with range 0 to 127. - Page 67 By default the Low Value will be set to the lowest possible value and the High Value will be set to the highest possible value. In this case the control will affect a parameter throughout its whole range. Adjust these settings if you want the control on the ReMOTE SL to affect a parameter though only part of its range.
- Page 68 The range of values allowed for both of these settings will depend on the DispType setting as follows: With an encoder or pot, the control value will scale from the Low Value to the High Value as you rotate it clockwise. Consequently if you want the control value to increase as you rotate the encoder clockwise, make sure the High Value is larger than the Low Value.
- Page 69 Solo to turn on and the High Value is the one which causes Solo to turn off, otherwise the labelling will be incorrect on the ReMOTE SL displays. STEP: If this option is selected then an extra setting, StepVal (Step Value), will appear next to BtnType. With the ‘STEP’...
-
Page 70: Non-Registered Parameter Number (Nrpn)
Name: This setting can be found on the second page of control settings so scroll up to access it. Here you can set the name for the control that appears on the ReMOTE SL displays. The control name can be a maximum of 8 characters long. -
Page 71: Registered Parameter Number (Rpn)
The DispType, LowVal, HighVal, Ports, MidiChan, Response, BtnType, TchMode and Name settings are the same as for Control Change (CC) so see the previous section for information on these settings. NRPN lsb (Non-Registered Parameter Number Least Significant Byte): This allows you to set the NRPN lsb value for the control to a value from 0 through 127. -
Page 72: Midi Machine Control (Mmc)
To edit the value of each of the non-variable bytes in the sysex message scroll up to the sysex message page. All bytes are displayed in hexadecimal format. By default the ReMOTE SL will place an F0h at the start and F7h at the end of the message and set all other non-variable bytes to 00h. -
Page 73: Note On/Off (Note)
Command: This sets the type of MMC command that the control will transmit from the following options: STOP, PLAY, DEF PLAY (deferred play), FORWARD, REWIND, RECORD, REC EXIT (record exit), REC PSE (record pause), PAUSE, EJECT, CHASE, ERRRESET (error reset), MMCRESET. DeviceID: This sets the Device ID number transmitted in the MMC command message (range 0-127). -
Page 74: Bank Change (Bank Chg)
(or if Auto-Off is set to ‘NONE’ no note off message will be sent at all). The other options allow you to set a note length, in which case the ReMOTE SL will ignore the Auto-Off setting. Instead it uses MIDI clock as a timing reference and sends... -
Page 75: Template
If you are recording notes into a sequencer then you will need to make sure that you are sending MIDI clock from the sequencer to the ReMOTE SL and that the ReMOTE SL is set to sync to incoming MIDI clock (see section 11 for information on setting the MIDI clock source). -
Page 76: The Template Menu
KeybPort (Keyboard Port): This sets the port(s) on which MIDI data from the keyboard (note and aftertouch messages) are sent from the ReMOTE SL. Additionally when bank and program messages are sent using the DATA/SELECT encoder in Play mode (see section 13.1) they are sent on the ports set here. Any assignable controls that have MidiPort set to ‘KeybPORT’... - Page 77 The factory programmed standard templates on the ReMOTE SL have been created such that all assignable controls have MidiChan set to ‘ComnCHAN’...
- Page 78 For template groups to work correctly it is important to make sure that grouped templates are stored in consecutive memory locations on the ReMOTE SL. For example, if you have three templates that form a group then you could store them in e.g.
-
Page 79: Keyboard Zones
16 KEYBOARD ZONES It is possible to split the ReMOTE SL keyboard into up to four zones and set the MIDI channel, port routing and other settings separately for each zone. This feature allows you to trigger different software or hardware MIDI instruments from different areas of the keyboard. - Page 80 AfterTch (Aftertouch): This sets whether or not aftertouch messages will be sent using the MIDI channel and ports settings for that zone. Note that the ReMOTE SL has a channel aftertouch mechanism (not polyphonic aftertouch) meaning that any keyboard key you press, whether it is within the zone range or not, will cause aftertouch messages to be sent using the MIDI channel and ports settings for the that zone.
- Page 81 DATA/SELECT encoder when in Edit mode, the Template menu or the Template Keyboard Zones menu. The ReMOTE SL displays will then look as follows: The name and number of the template that you last edited will be shown. Press WRITE to restore the template with the edited settings.
-
Page 82: Assignable Controls
APPENDIX I SPECIFICATIONS KEYBOARD Keys: 25/37 /61 Type: semi-weighted with channel aftertouch Velocity Curves: 7, ranging from soft to hard, plus option for fixed velocity in range 8-127 DISPLAYS 2 x 144-character giant LCD displays CONNECTIONS Data: USB (USB 1.1 and USB 2.0 compatible) MIDI: 2 x MIDI out, 1 x MIDI in, 1 x MIDI thru EXTERNAL CONTROL INPUTS 1 x ¼”... - Page 83 II LIST OF FACTORY TEMPLATES Novation – V-Station 1 Novation – V-Station 2 Novation – V-Station 3 Novation – Bass Station Native instruments – FM7 Native instruments – Pro53 1 Native instruments – Pro53 2 Native instruments – Battery 2 Native instruments –...
- Page 84 ‘Load’ in the ‘Controller Define’ section. Locate the file ‘RemoteSL.f7c’ in the FM7 resources folder on the ReMOTE SL DVD and click ‘Open’. Once you have done this click ‘Pref’ to access the FM7 preferences and make...
- Page 85 A group of two standard templates is used for the CS-80V. Before using these templates you must copy a mapping file to your computer. Locate the file ‘controlMidi’ in the CS-80V resources folder on the ReMOTE SL DVD and copy it to the...
- Page 86 In the MIDI Settings Window you will see ‘ReMOTE SL: Port 1’, ‘ReMOTE SL: Port 2’ and ‘ReMOTE SL: Port 3’ in the ‘Input’ list. Ensure that only ‘ReMOTE SL: Port 1’ is active by clicking on it in the list and then clicking the ‘Enable’ box.
- Page 87 ‘Remote control settings’ for that parameter. Ensure ‘Auto detect’ is enabled and then operate the control on the ReMOTE SL that you want to assign to that parameter. The controls available for learning to parameters in FL Studio work in different ways as follows: Encoders 1-5: These are relative type controls with encoder acceleration.
- Page 88 IV STANDARD SYNTH PARAMETER LAYOUT FOR FACTORY STANDARD TEMPLATES...
Need help?
Do you have a question about the ReMOTE SL and is the answer not in the manual?
Questions and answers