Advertisement
Available languages
Available languages
Advertisement
Table of Contents

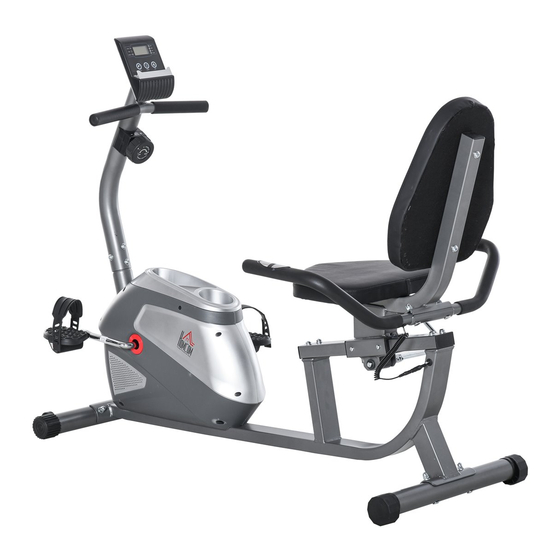
Related Manuals for HOMCOM A90-232


Summary of Contents for HOMCOM A90-232
- Page 1 IN230400370V01_IT A90-232 IT: ISTRUZIONI DI ASSEMBLAGGIO EN: ASSEMBLY INSTRUCTION IT: IMPORTANTE - CONSERVARE QUESTE INFORMAZIONI PER CONSULTARLE IN SEGUITO: LEGGERE ATTENTAMENTE EN: IMPORTANT, RETAIN FOR FUTURE REFERENCE: READ CAREFULLY.
- Page 2 (IT) IMPORTANTI ISTRUZIONI DI SICUREZZA A Efitment la vostra sicurezza è la nostra massima priorità e per assicurarvi che voi e il prodotto siate in perfetta forma, vi invitiamo a leggere tutte le istruzioni prima di montare e utilizzare il vostro nuovo macchinario Efitment.
-
Page 3: Diagramma Esploso
AVVERTENZA: Questo prodotto può esporre l'utente a una o più sostanze chimiche note allo Stato della California che causano cancro e difetti alla nascita o danni alla riproduzione. DIAGRAMMA ESPLOSO... - Page 4 Elenco delle parti Descrizione Qta’. Descrizione Qta’. Telaio principale Bullone M5*10 dentato Montante anteriore Involucro cuscinetto Ø56*15.5 Stabilizzatore anteriore Pedivella 140*220 1/2 Telaio cuscino Spaziatore volano 16*10.2*17 Manubrio Molla di tensione 18*48 Tubo regolazione sedile Magnete nero 40*25*10 Piastra magnetica Magnete rotondo 15*6 Collegamento del giunto Ruota inerziale 10*125*M10*1*17...
- Page 5 Giunto ad arco Ø 43.5*25 include Bullone M5*45 dentato cuscinetto da 6000 Rondella ad arco 20*6*1 Manopola di tensione 280mm cavo Cavo di tensione 760mm Gruppo del freno 24*77*foro 12 Ruota di trasporto 41*8.5*20 Cuscinetto Ø46*8 Blocco freno 40*38*32 Due dadi scanalati Ø46*12 dentati a sinistra Cuscinetto EV 40*20*3 Rondella di sicurezza Ø46*2...
- Page 6 CONTENUTO DELLA CONFEZIONE Passo 1 Passo 2 Bullone Rondella ad arco Rondella piatta Bullone Bullone di supporto Dado cieco Passo 5 Passo 3 Passo 4 Vite Rondella Screw Falt Washer piatta Screw Falt Washer Falt Washer Bullone Dado cieco Rondella elastica Rondella piatta Bullone di supporto Falt Washer...
- Page 7 MONTAGEANLEITUNG Passo 1: Fissare lo stabilizzatore anteriore (n. 3) al telaio principale (n. 1) utilizzando 2 bulloni di supporto (n. 19), 2 rondelle ad arco (n. 26) e 2 dadi ciechi (n. 27). Stringere con la chiave (No.90). Fissare lo stabilizzatore posteriore (n. 9) al telaio principale (n.
- Page 8 Passo 3: Inserire la leva del freno (n. 49) nel foro dell'albero eccentrico (n. 50), assicurandosi di rivolgere il lato corretto verso l'alto, quindi bloccare con 2 viti (n. 33). Stringere con la chiave a brugola (n ° 91). Passo 4: Fissare il manubrio (n.
- Page 9 Passo 5: Fissare il telaio del cuscino (n. 4) al telaio principale (n. 1) utilizzando 4 bulloni (n. 22), 4 rondelle elastiche (n. 24) e 4 rondelle piatte (n. 23). Stringere con la chiave a brugola (n ° 91). Quindi collegare il sensore di rilevamento del polso (n.
- Page 10 Passo 7: Collegare 3 cavi del computer (n. 77) con 2 cavi per rilevazione del polso (n. 82) e il cavo posteriore (n. 78) uno ad uno. Quindi collegare il computer (n. 77) al montante anteriore (n. 2) utilizzando 2 bulloni (n. 37).
- Page 11 REGOLARE IL SEDILE Fig. 1 Fig. 2 Tirare la maniglia del freno (N. 49) verso l'alto per allentarla (Fig 1). Mantenere i piedi sul pavimento come fossero una leva, quindi regolare il telaio del cuscino (n. 4) nella posizione desiderata. Spingere la leva del freno (N.
- Page 12 REGOLARE LA RESISTENZA Regolare la resistenza della bicicletta utilizzando la manopola di tensione (n. 72). Aumentare il livello di resistenza ruotando la manopola di tensione verso DESTRA (senso orario), diminuire il livello di resistenza ruotando la manopola di tensione verso SINISTRA (senso antiorario). REGOLARE L’ALTEZZA E IL BILANCIAMENTO Per ottenere una guida fluida e in comodita’, è...
- Page 13 ISTRUZIONI DEL COMPUTER PULSANTI DI FUNZIONAMENTO: MODE: Premere per selezionare le funzioni. SET: Premere per impostare i valori di tempo, distanza, calorie o rilevazione polso quando non si ha selezionato la modalità SCAN. RESET: Premere per azzerare tempo, distanza e calorie quando non si è in modalità...
- Page 14 FUNZIONE DI CONTO ALLA ROVESCIA: Questo strumento ha una funzione di conto alla rovescia per TIME, DISTANCE o CALORIES. Per utilizzare la funzione di conto alla rovescia, premere MODE per selezionare TIME, DISTANCE o CALORIES. Premere SET per impostare il valore da cui partire. Potete ora iniziare a pedalare. Lo strumento eseguirà...
-
Page 15: Important Safety Instructions
IMPORTANT SAFETY INSTRUCTIONS At Efitment your safety is our top priority and to make sure both you and the unit remain in perfect working order, we encourage you to read all the instructions before assembling and using your new Efitment machine. Do not skip, substitute or modify any steps or procedures herein, as doing so could result in personal injury and will void your warranty. -
Page 16: Exploded Drawing
EXPLODED DRAWING... -
Page 17: Parts List
PARTS LIST Description Qty. Description Qty. Main Frame Bolt M5*10 Full Teeth Front Post Bearing Housing Ø56*15.5 Front Stabilizer Crank 140*220 1/2 Cushion Frame Flywheel Spacer 16*10.2*17 Handlebar Tension Spring 18*48 Seat Adjusting Tube Black Magnet 40*25*10 Magnetic Board Round Magnet 15*6 Idler Link Inertia Wheel 10*125*M10*1*17 Rear Stabilizer... - Page 18 Tension Wire 760mm Brake Handset 24*77*Hole 12 Transportation Wheel 41*8.5*20 Bearing Ø46*8 Brake Block 40*38*32 Two Groove Nut Ø46*12 Teeth on Left EV Pad 40*20*3 Locking Washer Ø46*2 Computer Hex Nut 32*32*4 Trunk Line 1 600mm Three Slot Nut Ø46*12 Needle Sensor Line 500mm with Washer Ø40.5*3 Seat...
- Page 19 HARDWARE PACKAGE...
- Page 20 ASSEMBLY INSTRUCTIONS Step1: Attach the Front Stabilizer (No.3) to the Main Frame (No.1) using 2 Carriage Bolts (No.19), 2 Arc Washers (No.26) and 2 Cap Nuts (No. 27). Tighten with Spanner (No.90). Attach the Rear Stabilizer (No.9) to the Main Frame (No.1) using 2 Carriage Bolts (No.19), 2 Arc Washers (No.26) and 2 Cap Nuts (No.
- Page 21 Step 3: Insert the Brake Handle (No.49) into the hole of Eccentric Shaft (No.50), making sure the correct side is facing up, and then lock with 2 Screws (No.33). Tighten with Allen Wrench (No.91). Step 4: Attach the Handlebar (No.5) to the Cushion Frame (No.4) using 2 Carriage Bolts (No.25), 2 Flat Washers (No.23) and the 2 Cap Nuts (No.27).
- Page 22 Step 5: Attach the Cushion Frame (No.4) to the Main Frame (No.1) using 4 Bolts (No.22), 4 Spring Washers (No.24), and 4 Flat Washers (No. 23). Tighten with Allen Wrench (No.91). Then connect the Hand Pulse Sensor (No.80) with the Hand Pulse Wire (No.81).
- Page 23 Step 7: Connect 3 lines of Computer (No.77) with 2 Hand Pulse Wires (No.82) and Trunk Line (No.78) in turn. Then attach the Computer (No.77) to the Front Post (No.2) using 2 Bolts (No.37). Tighten with Spanner (No.90). Step 8: Connect the Pedals (No.60L/R) onto the Crank (No.39).
-
Page 24: Adjusting The Seat
ADJUSTING THE SEAT Fig. 1 Fig. 2 Pull the Brake Handle (No.49) up to loosen (Fig 1). Keep your feet on the floor as leverage, then move the Cushion Frame (No.4) to the desired position. Push the Brake Handle (No.49) down to tighten (Fig 2). - Page 25 ADJUSTING THE RESISTANCE Adjust the resistance of the bike using the Tension Knob (No.72). Increase the level of resistance by turning the tension knob to the RIGHT (clockwise), decrease the level of resistance by turning the tension knob to the LEFT (counter-clockwise). ADJUSTING THE HEIGHT AND BALANCE In order to achieve a smooth and comfortable ride, you must ensure that the bike is stable.
-
Page 26: Computer Instructions
COMPUTER INSTRUCTIONS FUNCTION BUTTONS: MODE: Press to select functions. SET: Press to set values of time, distance, calories, or pulse when not in SCAN mode. RESET: Press to reset time, distance and calories to zero when not in SCAN mode. Press and hold for a few seconds to reset all values. - Page 27 NOTE: If the display is faint or shows no figures, replace the batteries. When you replace batteries, replace both at the same time. Do not mix battery types. Do not mix old and new batteries. Dispose old batteries according to your state and regional guidelines. SPECIFICATIONS: AUTO SCAN Every 4 seconds...
Need help?
Do you have a question about the A90-232 and is the answer not in the manual?
Questions and answers