
Related Manuals for HOMCOM A90-196


Summary of Contents for HOMCOM A90-196
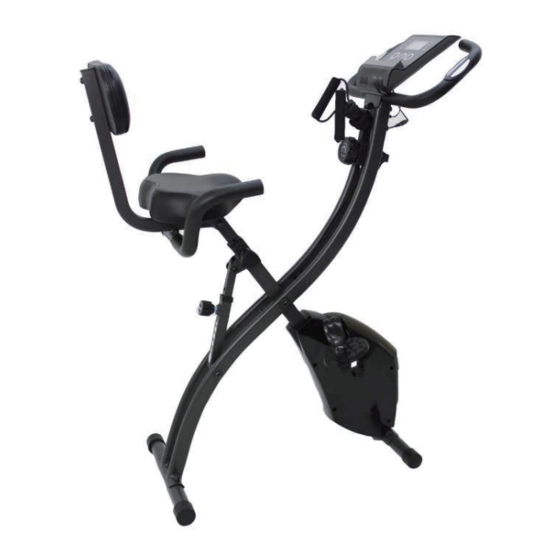
- Page 1 INada084V01_UK A90-196 EXERCISE BIKE READ AND SAVAE THIS INSTRUCTION FOR FUTURE USE ASSEMBLY INSTRUCTION...
-
Page 2: Table Of Contents
CONTENTS SAFETY INFORMATION ............................. 1 COMPONENTS – PARTS ............................3 COMPONENTS - TOOLS ............................4 ASSEMBLY INSTRUCTIONS ............................5 ADJUSTMENT/FOLDING ............................9 COMPUTER OPERATION ............................10 EXERCISING INSTRUCTIONS..........................12 CARE AND MAINTENANCE ............................. 14 EXPLODED PARTS DIAGRAM..........................15 PARTS LIST ................................16 Important! - Please read and understand these instructions before assembly or using... -
Page 3: Safety Information
SAFETY INFORMATION Important! Please read and understand this instruction manual fully before assembly or using. To reduce the risk of serious injury, read the entire manual before you assemble or operate the Folding Magnetic Exercise Cycle. Pay particular attention to the following safety precautions: ASSEMBLY Check you have all the components and tools listed on pages 3 and 4. - Page 4 • Injuries to health may result from incorrect or excessive training. The equipment shall be installed on a stable base and properly levelled. • The braking system is adjustable. BATTERY SAFETY Warning: Incorrect installation of batteries may cause battery leakage and corrosion, resulting in damage to the computer.
-
Page 5: Components - Parts
COMPONENTS – PARTS Please ensure you have all the parts listed below. Most of the listed assembly hardware has been packaged separately, but some hardware items have been preinstalled in the identified assembly parts. In these instances, simply remove and reinstall the hardware as assembly is required. -
Page 6: Components - Tools
COMPONENTS - TOOLS Please ensure you have the tools listed below to assemble your bike. ~ 4 ~... -
Page 7: Assembly Instructions
ASSEMBLY INSTRUCTIONS NOTICE! Before assembly: a) Please ensure you have enough space around the machine. b) Please use the provided tools. c) Check the parts and the hardware first. STEP 1 Remove and unpack the Main frame (1) from the carton, unfolding it and aligning the inner adjust tube(25). - Page 8 STEP 3 Connect the cushion (11) to the seat tube (9) using a M8 flat washer (12), M8x62) nut (13). Then screw in the seat support tube (26) with knob (10). STEP 4 Connect the backpack frame (14) to the seat tube (9) with bolt (15), washer (12), Nut (13) and screw the backpack (18) to the backpack frame (14) with a bolt (19).
- Page 9 STEP 5 Attach the rear handlebar (16) to the backpack frame (14) with bolt (17) and a curved washer (5). Screw the left (8) and right (7) pedal to their respective cranks. Note: The left pedal (8) should be locked clockwise, and he right pedal (7), should be locked counter clockwise.
- Page 10 STEP 7 First connect the Monitor wire (30) with the Sensor wire (31), Handle pulse wire (32), then screw the Monitor (22) to the monitor support (33) with 2 x M5x10 (23) screw. STEP 8 Finally, double check each screw to ensure they are tightened. ~ 8 ~...
-
Page 11: Adjustment/Folding
ADJUSTMENT/FOLDING ADJUSTMENT POSITION Loosen the Bike Angle Adjustment knob (28) and pull outward. At the same time, adjust the Front frame to your preferred position. Release and fix the Bike Angle Adjustment Knob (28). There are 3 positions for workouts and 1 position for storage SEAT HEIGHT ADJUSTMENT Unlock the adjustable knob and pull or push the seat to adjust your desirable height. -
Page 12: Computer Operation
COMPUTER OPERATION FUNCTIONS AND OPERATIONS FUNCTIONAL BUTTONS: MOD: Push down for selecting functions. Press and hold down the MODE button to reset the values to zero. SET: to set the values of time, distance, pulse, and calories when not in SCAN mode. RESET: - push down to reset all values. - Page 13 SPECIFICATIONS: OPERATION Auto Scan Every 5 seconds 00:00 – 99:59 Running Time Current speed 0.0-999.9 (ML/KM/hour) FUNCTION Trip Distance 0.0-999.9 (ML/KM/hour) Total Distance (ODO) 0.0-999.9 (ML/KM/hour) Calories 0.0-9999Kcal Pulse Rate 40-240BPM 2 x AAA Battery Type C - +40 Operating Temperature C - +60 Storage Temperature ~ 11 ~...
-
Page 14: Exercising Instructions
EXERCISING INSTRUCTIONS Before starting.. Exercise has been proven essential for good health and general wellbeing. Regular exercise will: Relieve tension and stress Provide enjoyment and fun Stimulate the mind Help maintain stable weight Control appetite ... - Page 15 2. THE EXERCISE PHASE This is the stage where you put the effort it. After regular use, the muscles in your legs will become more flexible. Work at your own pace but it is especially important to maintain a steady tempo throughout.
-
Page 16: Care And Maintenance
CARE AND MAINTENANCE 1. Examine the equipment regularly to ensure any damage or wear caused through usage is detected to maintain a safe working condition. 2. Lubricate moving parts with light oil periodically to prevent premature wear. 3. Inspect and tighten all parts before using the equipment, replace any defective parts immediately and DO NOT use the equipment again until it is in perfect working order. -
Page 17: Exploded Parts Diagram
EXPLODED PARTS DIAGR AM ~ 15 ~... -
Page 18: Parts List
PARTS LIST ~ 16 ~...
Need help?
Do you have a question about the A90-196 and is the answer not in the manual?
Questions and answers
Can I change from km to miles if so how
To change the measurement from kilometers to miles on the HOMCOM A90-196, hold the red button down long enough until it switches from K (kilometers) to M (miles).
This answer is automatically generated
@Mr. Anderson "Hold the red button..." i don't have a red button on the control panel?
How can I set the distance to measure in km?
The HOMCOM A90-196 displays distance in miles by default. There is no information in the provided context about changing the distance measurement from miles to kilometers.
This answer is automatically generated
@Mr. Anderson My control panel is displaying km by default
There is no information regarding the sensor positioning or operation in the manual, where is that information to be found
Information about sensor positioning and operation for the HOMCOM A90-196 can be found in the "COMPUTER OPERATION" section of the manual. Specifically, the "PULSE" function details how to use the heart rate monitor grips on the handlebars to display heart rate readings.
This answer is automatically generated
Computer not recording any differences in speed distance or time and no alarm sounds
The HOMCOM A90-196 computer may not be recording speed, distance, time, or sounding alarms due to the following reasons:
1. No Input Detected – The machine has an auto start/stop function, meaning if it does not detect movement or input, it may not record data.
2. Power Issue – The computer operates on 2 x AAA batteries. If the batteries are drained or incorrectly installed, the computer will not function.
3. Sensor Connection – If the sensor that detects movement is disconnected or faulty, the computer will not record speed or distance.
4. Auto Power Off – The system automatically turns off after 4 minutes of inactivity, which may stop data recording.
5. Button Response – If the “MODE,” “SET,” or “RESET” buttons are unresponsive, the alarm may not sound due to a malfunction.
Checking the battery installation, ensuring proper sensor connection, and verifying movement detection should help resolve the issue.
This answer is automatically generated
Why won't the computer screen measure my exercising? I have tried again and again to reset etc, then spent half hour cycling but no speed distance etc is registering only pulse. There seems to be one anomaly which is in the top Left hand side it says stop would this have any bearing on why it's not registering anything?
The HOMCOM A90-196 computer screen may not be measuring exercise metrics like speed and distance if the machine does not detect any input for 4 minutes, as it will automatically switch off. Also, if the pedals have stopped moving completely, no new data will be recorded. The "stop" indication can affect functionality because movement is required for the computer to track metrics such as speed and distance.
This answer is automatically generated
The computer screen is not functioning as not recording any distance, time , calories or speed only pulse. This is brand new bike A90-196
The computer screen on the HOMCOM A90-196 bike may not be recording distance, time, calories, or speed due to the following potential reasons:
1. RESET Button Pressed: If the RESET button has been pressed, it can reset all data (except ODO values) to zero, so these values may not display.
2. Batteries Issue: The device may not function properly if batteries are mixed (e.g., mixing old and new batteries or different types like alkaline and rechargeable). Ensure the correct and consistent type of batteries is used.
3. Improper Setup: The computer may not have been set up correctly. Use the “MODE” button to navigate to the specific function and the “SET” button to configure duration or other parameters.
4. Malfunction or Interference: The equipment’s electronic components may face interference or malfunction. Verify that it is installed and used as per the instructions to prevent issues.
Ensure these potential causes are checked to resolve the issue.
This answer is automatically generated
The control panel shows Stop in top left hand corner. What does this mean? How to remove this