
Related Manuals for HOMCOM A90-196


Summary of Contents for HOMCOM A90-196
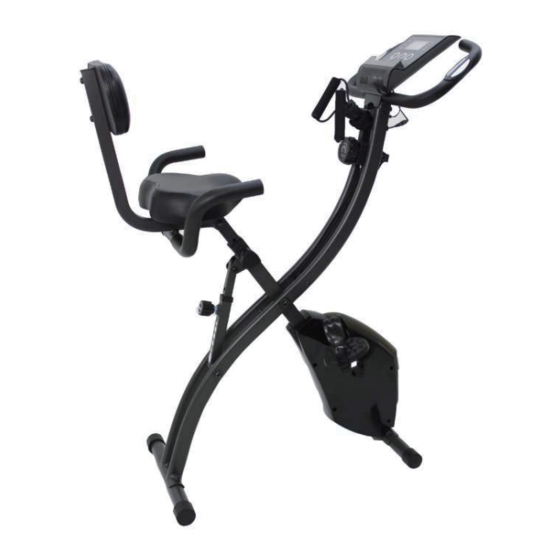
- Page 1 INada084V04_UK A90-196 READ AND SAVE THIS INSTRUCTIONS FOR FUTURE USE ASSEMBLY & INSTRUCTION MANUAL...
-
Page 2: Table Of Contents
CONTENTS WARNINGS PARTS LIST ASSEMBLY INSTRUCTIONS INFORMATIONEN ZUM TRAINING CONTROL PANEL ADJUSTING RECLINE ANGLE ADJUSTING SEAT HEIGHT ADJUSTING PEDAL TENSION ADJUSTING RESISTANCE BANDS USING THE FOLDING MAGNETIC EXERCISE CYCLE... -
Page 3: Warnings
WARNINGS BEFORE starting any fitness or strength program, consult with your physician or health official. This will ensure that you engage in the proper strength or fitness program for your age and physical condition. Before using the Folding Magnetic Exercise Cycle answer these questions: •... - Page 4 • ALWAYS keep your pelvis positioned over the center line of the Folding Magnetic Exercise Cycle stationary bike. • NEVER adjust the resistance of the flywheel and the resistance of the Folding Magnetic Exercise Cycle Handlebar System while standing. • NEVER use accessory attachments that have not been recommended by the manufacturer - using these attachments may cause injury or damage to the bike and will affect the warranty of the bike.
-
Page 5: Parts List
PARTS LIST 1.Main frame 11.Washers and screws 2.Seat post •2 washers for seat handles 3.Rear foot •2 screws (M8*40) for seat handles 4.Front foot with rollers •4 screws (M8*10) for backrest (Other screws, 5.Backrest support washers, and nuts come installed in parts. See 6.Seat handles ASSEMBLY INSTRUCTIONS for details.) 7.Handlebars... -
Page 6: Assembly Instructions
ASSEMBLY INSTRUCTIONS Loosen circular knob on main frame and Take both nuts and washers off of rear pull outward to adjust recline angle to 1 foot. (tallest setting) Place the nuts and washers to the side Install rear foot into rear main frame leg. for now. - Page 7 Tighten nut onto screw with included Take both nuts and washers off of front wrench. Repeat on other side. foot with rollers. Place the nuts and washers to the side for Install front foot onto front main frame leg. now. The rollers help to move the bike when it is tilted forward and should not touch the floor when the bike is in a regular standing position.
- Page 8 Tighten nut onto screw with included wrench. Take nuts and washers off of the seat Repeat on other side cushion. Place the nuts and washers to the side for Fit seat post onto seat cushion screws. now. Place the washers over the screws from Finger tighten each nut onto the screws seat cushion.
- Page 9 Tighten nut onto screw with included Loosen triangular knob and remove from wrench. Repeat on other two nuts. the main frame. Insert seat post into main frame. Secure knob back into place at desired height. Remove screw, nut, and washer from the Place the screw, nut, and washer to the backrest support.
- Page 10 Align backrest support with hole in the seat Insert screw through hole in backrest post. support. Place washer onto the screw. Place nut on screw and finger tighten. If difficult to tighten, nut may be upside-down. Tighten the nut with the included wrench. Place washers onto screws for the seat handles (see parts diagram).
- Page 11 Align backrest support with hole in the seat Place screws into holes and finger tighten. post.Insert screw through hole in backrest support. Tighten down screws with included large hex Align backrest against backrest support. key/screwdriver tool. Insert screws and finger tighten (see parts diagram).
- Page 12 Remove screws from handle bar. Place screws to the side for now. Feed handle bar posts into the slots on the top Place screws into holes and finger tighten. of the main frame. Tighten down screws with included small hex Remove screws from the back of the key tool.
- Page 13 Starting with the largest connector, feed Place control panel onto the handle bar each of the three wires through the hole in bracket. the center of hander bar bracket. Insert screws and finger tighten. Tighten screws with included large hex key/screwdriver tool.
- Page 14 Connect the right pedal to the right crank Hold the right pedal with one hand and arm. Both parts are marked R. screw the pedal bolt onto the crank arm with the other hand in a standard clockwise motion. Finish tightening with the included wrench.
-
Page 15: Informationen Zum Training
INFORMATIONEN ZUM TRAINING Requires 2 AAA batteries (included). Do not mix old and new batteries. Do not mix alkaline, standard (carbon-zinc), or rechargeable (NiCd, Ni-Mh, etc) batteries. 1. Open battery compartment door on the back 2. Note the diagram inside the compartment of the Folding Magnetic Exercise Cycle that shows the correct battery installation control panel. -
Page 16: Control Panel
CONTROL PANEL BUTTONS: [RESET] clears data from selected mode. • To reset all stored information from previous SCAN DIST workout, press for 3 seconds. TIME • Does not clear total exercise miles (ODO). SPEED PULSE [MODE] selects mode. • To reset all stored information from previous workout, press for 3 seconds. -
Page 17: Adjusting Recline Angle
ADJUSTING RECLINE ANGLE Twist circular knob on main frame to the left to loosen the bolt (do not fully remove). While stepping on the rear foot, lift up on the bike while pulling the knob to adjust angle. Level 1 Level 2 Level 3... -
Page 18: Adjusting Seat Height
ADJUSTING SEAT HEIGHT Level 1: Seat is lowered as far as the seat post will go. Unscrew and remove triangular knob. Pull up on seat to move levels. Screw knob back into place at desired level. Level 1 Level 2 Level 3 Level 4... -
Page 19: Adjusting Pedal Tension
ADJUSTING PEDAL TENSION Turn the tension control knob to adjust pedal tension from 1 to 8. ADJUSTING RESISTANCE BANDS SHORTEN BANDS LENGTHEN BANDS INCREASES RESISTANCE DECREASES RESISTANCE Push the band up into the band Push the band on one side of handle locking compartment. -
Page 20: Using The Folding Magnetic Exercise Cycle
USING THE FOLDING MAGNETIC EXERCISE CYCLE...
Need help?
Do you have a question about the A90-196 and is the answer not in the manual?
Questions and answers
Why is STOP showing in top left hand corner. How do you remove this
how to set the control panel to MPH