Table of Contents
Advertisement
Quick Links
Advertisement
Table of Contents

Related Manuals for Insportline Gardian G12


Summary of Contents for Insportline Gardian G12
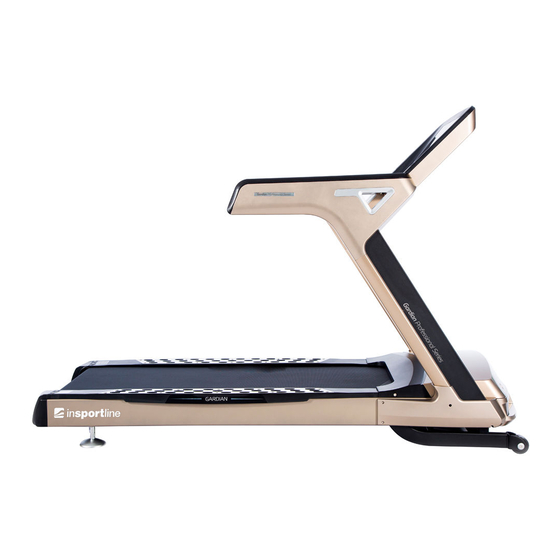
- Page 1 USER MANUAL – EN IN 13971 Motorized treadmill inSPORTline Gardian G12...
-
Page 2: Table Of Contents
CONTENTS SAFETY PRECAUTIONS ........................3 ATTENTION ............................3 SAFE USE ............................... 3 ASSEMBLY INSTRUCTIONS ......................... 4 TECHNICAL PARAMETERS ........................ 11 GETTING START ..........................11 WARM – UP EXERCISE ........................12 OPERATION INSTRUCTIONS ......................14 DISPLAY ............................14 BUTTONS FUNCTIONS ........................15 OPERATION INSTRUCTIONS ...................... -
Page 3: Safety Precautions
SAFETY PRECAUTIONS WARNING! In order to avoid an accident, you have to pay attention to the following instructions: 1. Attach the safety key clip tightly to your clothes before exercising. 2. Swing your arms naturally when you are exercising. Don’t look downwards. 3. -
Page 4: Assembly Instructions
7. When you use the treadmill for the first time, hold the handrails until you are familiar with the device. 8. The treadmill equipment is made for special use. Please do not modify it and don’t make any improper maintenance. If the treadmill suddenly or continually increases its speed due to an electronic system problem, pull out the safety switch. - Page 5 Step 1 First, use a coin to push into the key hole on the motor cover and turn it by 90° When the motor cover is open, it will raise automatically. Step 2 Fix the left and right upright on the frame assembly (172) with M12*65 bolts (86). To lock it inside use 12*25 (73) bolt with flat washer (89).
- Page 6 Step 3 Connect the right side signal wire (151) with upright upper wire (150). Connect the left end light wire with to the signal wire. Step 4 After putting the motor cover back to its original place by hands, use a coin to push into the key hole on the motor cover and turn it by 90°...
- Page 7 Step 5 Plug the left and right handrail wire to the control panel connecting wire. Then fix the control panel on the frame assembly. Use M6 wrench from the toolkit. Lock the four screws M8*15 (81) and flat washers ∮9∮16*t1.6 (98) tightly.
- Page 8 Wire connecting specification 1. Picture 1: Control panel assembly. 2. Picture 2: Left end light and handrail light wire. 3. Picture 3: Right signal wire and handrail light wire.
- Page 9 Step 6 First take out the wire that needs to be connected (as shown in pictures 2 and 3). Step 7 Then put the left end light and handrail light wire in the hole on the left side of the control panel (as shown in pictures 4 and 5).
- Page 10 Step 10 Put the wires into the control panel. At last assemble the storage box which is in the control panel accessory box (as pictures 12 and 13). Pic. 12 Pic. 13 Step 11 First lock all the screws on the upright (including the inner), then lock tightly the front covers (39L/R) with M5*25 bolts (77).
-
Page 11: Technical Parameters
TECHNICAL PARAMETERS 1 — 23 Km/h Assembly size (mm) 2280*945*1500 mm Speed range Incline range 1 - 20% Motor spec. (HP) 8 HP (PEAK) 220 – 240 V Running size (mm) 1650*600 mm Input Volt (V) N.W. 265 Kgs Max. output power 3000 W Operating 0 –... -
Page 12: Warm - Up Exercise
FREQUENCY The optimal exercise frequency is 3 - 5 times per week for 15 – 60 min. It is better to make a schedule first and not exercise randomly. You can control the intensity of the movement through adjusting the speed and inclination. - Page 13 Calves and Achilles tendon stretches Support yourself with two hands on a wall or a tree with one leg stretched behind you. Keep the leg straight and the heel on the ground. Keep the position for 10 - 15 seconds. Repeat 3 times for each leg.
-
Page 14: Operation Instructions
OPERATION INSTRUCTIONS DISPLAY 1. Time window:Displays the running time, counting from 0:00 - 99:59 min. When the limit is reached, it starts counting from 0:00 again. Countdown mode – counts from the set time to zero. When it counts down to 0:00, the treadmill slows down steadily and then stops moving. When the treadmill stops completely it will enter the standby mode. -
Page 15: Buttons Functions
6. Incline window: Displays the current inclination. The range of the inclination display is 0 - 18°. 7. Matrix window: Displays a race track in the manual mode. The inclination and speed values are displayed in the middle of the screen. At the preset programs, it displays speed and incline changing image. -
Page 16: Preset Programs
2. Press “START” and start exercising. When the countdown is complete, the treadmill will stop automatically. You can adjust speed and incline while running. CALORIES COUNTDOWN MODE 1. While in the standby mode, press the “MODE” button twice so that the calories window starts blinking. -
Page 17: User Program
Incline Speed Incline Speed Incline Speed Incline Speed Incline Speed Incline Speed Incline Speed Incline Speed Incline Speed Incline Speed Incline Speed Incline USER PROGRAM While in the standby mode, press the “PROGRAM” button and choose one of the two user programs (U1, U2). -
Page 18: Power Saving Mode
POWER SAVING MODE This device has a power saving function. It will automatically enter power saving mode after 4 minutes without any activity. The display will shut down. To turn it on again, press any key. While the machine is turned on, connect a MP3 device or another audio device. You can play music on the control panel. -
Page 19: Safe Exercising
Er-6: Motor doesn’t work Check the connection of the motor. Check the wires and the plug and make sure the connection is well. Check the controller or the motor for damage. Er-7: The controller failed to detect signal ... -
Page 20: Maintenance Instructions
Speed 1 - 3.0 km/h people with weak constitution Speed 3.0 - 4.5 km/h people who do not exercise often Speed 4.5 - 6.0 km/h normal walking speed Speed 6.0 - 7.5 km/h fast walking Speed 7.5 - 9.0 km /h jogging Speed 9.0 - 12.0 km/h intermediate speed runner... -
Page 21: Belt Adjustment
clockwise by 1/4 turn, plug in the power cord and the safety key – belt starts to run. Watch the running belt deviations. Repeat the above steps until the running belt is in the middle. Picture A If the running belt drifts to the left, pull off the safety key and unplug the treadmill from power. -
Page 22: Exploded Drawing
EXPLODED DRAWING... -
Page 23: Part List
PART LIST Q´TY Q´TY ITEM DESCRIPTION ITEM DESCRIPTION Main frame Incline bracket Control panel 3L/R L/R Upright bracket L/R Handrail Transporting wheel 5L/R welded elbow screw cover Motor cover Motor cover fixed 8L/R connecting sheer left board right Cover connecting Incline connecting 9L/R base left right... - Page 24 Safety key switch Small pulse tube 58L/R board decorative left Pulse tube under TFT fixing frame cover Rear cover end Handrail decorating 61L/R light decorating 62L/R light L/R sheet L/R Handrail decorating light Mat anti-slip topple presser Foot plate Silicon Brush Oil-fill plug USB sticker...
- Page 25 ∮6*22 Motor locating pin Screw ST4.0*15 Screw ST3.0*15 M5 nickle Wrench Wrench Wrench Wrench Wrench Wrench 13#14#17# Wrench 17-22 opening Wrench 34 opening Screw M6*8 Compress spring Front roller Rear roller Single wire 150 mm Single wire 450 mm Single earthen 450 mm Single earthen wire 500 mm...
-
Page 26: Terms And Conditions Of Warranty, Warranty Claims
TERMS AND CONDITIONS OF WARRANTY, WARRANTY CLAIMS General Conditions of Warranty and Definition of Terms All Warranty Conditions stated hereunder determine Warranty Coverage and Warranty Claim Procedure. Conditions of Warranty and Warranty Claims are governed by Act No. 40/1964 Coll. Civil Code, Act No. - Page 27 VAT ID: CZ26847264 Phone: +420 556 300 970 E-mail: eshop@insportline.cz reklamace@insportline.cz servis@insportline.cz Web: www.insportline.cz INSPORTLINE s.r.o. Headquarters, Warranty & Service centre: Elektricna 6471, 911 01 Trencin, Slovakia CRN: 36311723 VAT ID: SK2020177082 Phone: +421(0)326 526 701 E-mail: objednavky@insportline.sk reklamacie@insportline.sk servis@insportline.sk Web: www.insportline.sk...
Need help?
Do you have a question about the Gardian G12 and is the answer not in the manual?
Questions and answers