Table of Contents
Advertisement
Quick Links
Advertisement
Table of Contents

Related Manuals for Insportline inCondi T70i II


Summary of Contents for Insportline inCondi T70i II
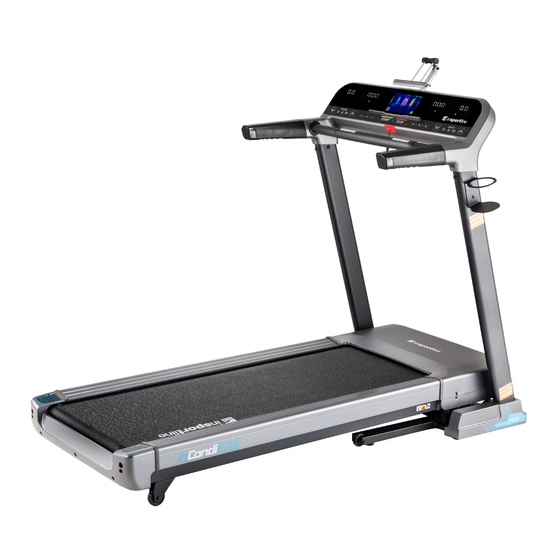
- Page 1 USER MANUAL – EN IN 16529 Treadmill inSPORTline inCondi T70i II...
-
Page 2: Table Of Contents
CONTENTS SAFETY PRECAUTIONS ........................3 PACKAGE LIST ............................4 ASSEMBLY TOOLS ..........................5 ASSEMBLY STEPS ..........................5 FOLDING STEPS ............................ 9 TRANSPORT TIPS ..........................9 OPERATION INTRODUCTION ......................10 HOMEPAGE INTRODUCTION ......................11 ICON DESCRIPTION ..........................12 FUNCTION DESCRIPTION ........................13 SIMPLE MALFUNCTION AND SOLUTION (SHOWN IN TFT SCREEN) .......... -
Page 3: Safety Precautions
SAFETY PRECAUTIONS Thank you for purchasing this product that has been designed to provide you with many years of trouble-free using. Read this manual carefully before first using and retain it for future reference to increase your safety. • Observe all warnings and precautions to reduce possible risk of an injury. •... -
Page 4: Package List
• Pay attention while lifting or transporting it to avoid back injury. Use proper lifting techniques or ask some other adult person for assistance. • A safety key is supplied for personal safety. Use it while operating this treadmill for safe stopping. -
Page 5: Assembly Tools
Left bottom cover Right bottom cover Bolt M8*15 Bolt M5*12 Lock washer Ø5* Ø13*1.0 Big flat washer ASSEMBLY TOOLS Description Specification 5# inner hex wrench 5 mm Cross solid wrench S=13, 14, 15 Solid wrench 19 mm WARNING: Don’t switch on before finishing the assembly. ASSEMBLY STEPS STEP 1 •... - Page 6 STEP 3 • Connect the monitor cable D03 with cable D04. • Attach monitor B to the left and right column A06/A07 using bolt E13 and lock washer E32 with 5# Allen wrench B09. • WARNING: Make sure the cables are properly connected before fastening. STEP 4 •...
- Page 7 STEP 6 • Fix the left and right bottom cover C14/C15 to the mainframe. • WARNING: The structure of the left and right bottom cover is a buckle design. Please make sure, all the buckles are securely fastened. STEP 7 •...
- Page 8 SAFETY KEY USAGE: • Before running, attach the safety key clip D07 to your clothes. • In some danger pull rope of the safety key and the machine will stop. STEP 9 • Take apart the bolt M8*15 (E13) in the bottom side of the steel cable (E) using 5# Allen wrench B09.
-
Page 9: Folding Steps
FOLDING STEPS FOLDING UP • Hold the running deck which showed in the F position and then fold it up in the arrow direction until you hear a bang sound from the air cylinder. • WARNING: It is forbidden to fold up it when the machine is in running or incline mode. FOLDING DOWN •... -
Page 10: Operation Introduction
• To transport, hold the treadmill from F position and tilt until the wheels are able to move on the ground. OPERATION INTRODUCTION Icon Function description Inclination/Calorie window Generally, it shows runners calories that worked out. It counts from 0 to 999. -
Page 11: Homepage Introduction
Incline + button: each press increases by 1 section. Press it over 0.5 second and incline will be increased continually. Play/pause key to stop or to restart the music or video. VOL- button: Push it to turn down the volume in booth music and video mode. -
Page 12: Icon Description
ICON DESCRIPTION User image and user name: click to set or to modify the user image and user name. Back button: click to go back to the last page. Wifi button: click to search and to connect to available wifi. FitShow QR code: Scan to download FitShow APP with your mobile phone. -
Page 13: Function Description
FUNCTION DESCRIPTION 1. Local Media: Manage and display music or video from local or external USB card. • Support to display music and video format of MP3, APE, MP4, MOV. • It is better to play music with bright rhythm during music. Music with fast or changeful rhythm will disrupt your running pace. - Page 14 Slide up and down with your finger and play the music by clicking on the song. ICON DESCRIPTION: SONG1 The green words stand for the name of playing music and the file size. 8.36 MB The white words stand for the rest of the music and the size of the file. PLAY Play in order PAUSE...
- Page 15 PAUSE The green words stand for the name of the video and size of the file. Progress bar 2. Internet • Internet is available after connecting to WIFI. • Support to display music and video format of MP3, APE, MP4, MOV.
- Page 16 3. Programs • Make sure the safety key function works well before running. • It is better to exercise 30-60 mins. after having a meal. Click on the program icon to enter the page as shown below. There are three countdown modes and five pre-set programs available.
- Page 17 Road Heart rate control a. Countdown mode – take time countdown mode for reference. Click on the countdown mode and the page as below will show. During the process of time countdown, click anywhere of the screen to enter incline and speed adjustment page as below.
- Page 18 ICON DESCRIPTION: Annular map: displays the percentage of current process to the target setting value. Coordinate graphs: horizontal display current running time, ordinate display current running speed. Incline: display incline section. Hold the pulse sensor for several seconds and it shows the current pulse in range from 50 to 200 bpm.
- Page 19 ICON DESCRIPTION: Annular map: display the percentage of current running time to the target setting time. Speed and incline column diagram: horizontal display segments. Each pre-set program is divided into 16 sections. Ordinate displays running speed and incline of each section. Light green stands for speed.
- Page 20 Pre-set time/16=Each exercising time. Stage/ Formula SPEED Body Sculpting INCLINE SPEED burning INCLINE SPEED Mountain INCLINE SPEED Road INCLINE c. Heart rate control program – it is an optional function. It is only available, if the treadmill comes with heart rate reviver and a chest belt. Click on the heart rate control program icon to enter the setting page as above.
- Page 21 4. Pace • During the pace process, it is better to adjust the speed and incline by the quick buttons on the panel. • Choose a suitable pace program according to your physical condition. • Run in the centre of the running belt. Click on the PACE icon to enter the page as below.
- Page 22 Pace Marathon Half Marathon 3 km pace 5 km pace 10 km pace 15 km pace Pace Pace Take the marathon pace for reference. Click on the marathon pace icon and the page as below will appear. ICON DESCRIPTION: Annular map: display the percentage of current running distance to the target distance.
- Page 23 5. Real View Sport • It will give the user feeling of outdoor running. • Don’t exercise strenuously in fasting state. • Observe a water intake and don’t run for more than 60 minutes continually. Click on the REAL VIEW SPORT icon. There are three real view for selection (canyon, grassland, seaside).
- Page 24 6. User • Set personal information. Such as image, name, sex, height. • You can check your history records. The system keeps it automatically. • Connect to WIFI before running. The data will upload to the service management centre. You can check your ranking among all users. Data only for ranking.
- Page 25 a. User register and logging in 1. Click on the “guest” on the left top to fill in your account number and password. 2. Click on register to fill in your account number, name and password. Press done after finishing. 3.
- Page 26 b. Statistics Click on the statistic icon to look over your running records. Distance: accumulated running distance Time: accumulated running time Calories: accumulated consumed calories Click on the red column to check the history records Click on the blue column to check daily records Click on the HISTORY RECORDS icon to check your history records.
- Page 27 Click on RANKING icon to check your position among all users. 7. System manage • Don’t download too much APP to avoid system breakdown. • Uninstalling the pre-set APP is prohibited. • Please remove the APP data and cache regularly. Click on the SYSTEM MANAGE icon to go to the setting page.
- Page 28 Click on WIFI icon to search and connect to WIFI. Click on CLEAN CACHE ICON and the page as below will appear. Tick the box on the right and then click on the clean cache. The cache will be wiped.
- Page 29 Click on the TREADMILL MANAGE icon to check the total distance that the treadmill has to go and how many KM are to next lubrication.
-
Page 30: Simple Malfunction And Solution (Shown In Tft Screen)
SIMPLE MALFUNCTION AND SOLUTION (SHOWN IN TFT SCREEN) -
Page 31: Stretching Tips
STRETCHING TIPS • Start with gradual mobility exercises of all the joints, simply rotate the wrists, bend the arm and roll your shoulders. This will allow the natural body lubrication and protects the bones surface. • Always do warm-up exercises before starting your workout to protect your muscles from an injury. -
Page 32: Maintenance
Hamstring stretching • Keep front leg straight, hands on bent leg (thigh). Push down and out until you begin to feel the stretch in back of the knee (or straight leg). • Keep knees unlocked and back straight. • Hold for about 10 seconds. •... - Page 33 • The running belt can get out of centre with time. First let the machine run automatically for automatic centralisation. If it is not successful, you can adjust the position by screwing the bolt shown in the images below. If the running belt has shifted to right, you need to tighten the screw on the right of the belt or loosen the screw on the left.
-
Page 34: Exploded Drawing
EXPLODED DRAWING... -
Page 36: Parts List
PARTS LIST Description Qty. Bottom frame Main frame Incline frame Monitor frame Handlebar pulse frame Left column Right column Motor seat Bottle holder Front roller Rear roller Air cylinder Sleeve Sleeve of transport wheel Cross solid wrench Inner hex wrench Handle pulse sheet Safety key seat iPad shaft... - Page 37 Left bottom cover Right bottom cover Rear protection cover Side rail Left side rail cap Right side rail cap Foam Running belt Top cover of the pulse Bottom cover of the pulse Motor belt Black cushion Blue cushion Black cushion Cone-shaped cushion Flat foot pad Transportation wheel...
- Page 38 DC motor Incline motor Running board Square switch Socket Overload protector Magnet ring Magnet core Power cable Non-locked nut M6 Lock nut M8 Lock nut M10 Bolt M10*90 Bolt M10*45 Bolt M10*30 Bolt M8*80 Bolt M8*70 Bolt M8*40 Bolt M8*40 Bolt M8*30 Bolt M8*20 Bolt M8*15...
-
Page 39: Terms And Conditions Of Warranty, Warranty Claims
Screw ST2.9*6.0 Lock washer Lock washer Lock washer Spring washer Flat washer Big washer Wave washer Bolt M8*45 Big flat washer Filter (optional) Inductance (optional) AC single wire L500 (optional) Grounding wire L350 (optional) Screw ST4.2*12 (optional) USB mould Screw ST2.9*8 Speaker Screw MP3 connection wire... - Page 40 “The Buyer who is not the End Customer” is a Businessman that buys Goods or uses services for the purpose of using the Goods or services for his own business activities. The Buyer conforms to the General Purchase Agreement and business conditions to the extent specified in the Commercial Code.
- Page 41 VAT ID: CZ26847264 Phone: +420 556 300 970 E-mail: eshop@insportline.cz reklamace@insportline.cz servis@insportline.cz Web: www.insportline.cz INSPORTLINE s.r.o. Headquarters, Warranty & Service centre: Elektricna 6471, 911 01 Trencin, Slovakia CRN: 36311723 VAT ID: SK2020177082 Phone: +421(0)326 526 701 E-mail: objednavky@insportline.sk reklamacie@insportline.sk servis@insportline.sk Web: www.insportline.sk...
Need help?
Do you have a question about the inCondi T70i II and is the answer not in the manual?
Questions and answers