Table of Contents
Advertisement
Quick Links
Advertisement
Table of Contents

Related Manuals for Insportline IN 6937 Aluvis


Summary of Contents for Insportline IN 6937 Aluvis
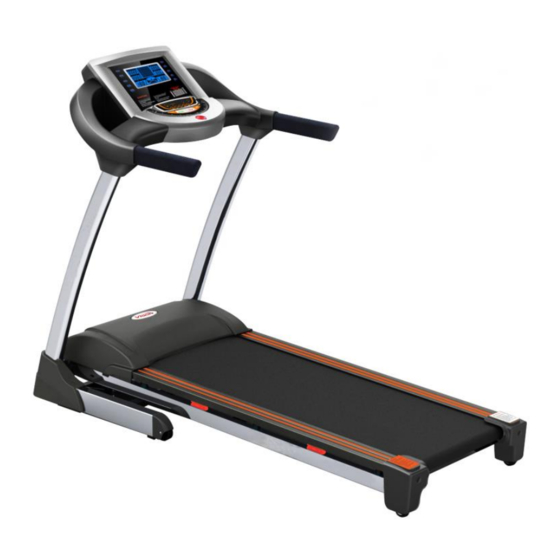
- Page 1 USER MANUAL – EN IN 6937 Motorized Treadmill inSPORTline Aluvis...
-
Page 2: Table Of Contents
CONTENTS SAFETY INSTRUCTIONS ............................ 1 PACKING DETAILS ............................. 2 EXPLODED VIEW ..............................3 LIST OF COMPONENTS ............................4 TREADMILL STRUCTURE ..........................5 ASSEMBLY INSTRUCTIONS ..........................5 USAGE ................................... 7 POWER SWITCH .............................. 7 SAFETY KEY ..............................7 FOLDING & UNFOLDING ..........................7 INSTRUCTION FOR CONSOLE .......................... -
Page 3: Safety Instructions
Special tips: Before installation and operation, please read this operation manual carefully and save this manual for future reference. SAFETY INSTRUCTIONS We have considered more for safety when we design and produce this item. However, in case of any unhappiness, please pay attention to these tips. We don’t assume responsibility if any accident cased by follow tips. -
Page 4: Packing Details
Don’t let power wire touch roller, and also don’t put power wire on the running belt. Don’t use damaged plug. Before cleaning, moving and maintaining the machine, please pull off the plug for the socket. Warning: If don’t pull off, it will cause injury or damage for the machine. PACKING DETAILS Warning: Carefully install the product, avoid to make any damage. -
Page 5: Exploded View
EXPLODED VIEW These are all the components used in installation. All components are listed in the following form. -
Page 6: List Of Components
LIST OF COMPONENTS No. Component Quantity Component Quantity Base frame Long bumper Frame Locating pad for decorative bead Left pillar accessory Rubber wheel Right pillar accessory Upper cover of meter Dashboard frame Meter panel Incline frame Right decorative cover for upright Pressure rod Left decorative cover for upright Motor stator... -
Page 7: Treadmill Structure
TREADMILL STRUCTURE ASSEMBLY INSTRUCTIONS Step 1: Set meter tube on the base frame a) Make the communication line through the right meter tube. b) Set meter tube on the base frame. Use 2 pcs of Screw M8*20 with 2 pcs of washer and 2pcs of Screw M8*60 with 2 pcs of washer, 2 pcs of nut to solid the meter tube. - Page 8 Step 2: Put meter on the meter tube a) Put decorating cover for meter on meter tube. b) Make sure that communication lines are connected correctly, in case they are connected in reverse. c) Put meter on the meter tube. Use 4 pcs of Screw M8*20 with 4 pcs of washer, 2 pcs of nut to solid the meter.
-
Page 9: Usage
Step4: Disassemble connecting screw for base frame USAGE POWER SWITCH Insert the power plug into the socket and switch on the machine. The switch light will be on and you will hear a voice “Di”. You will find the meter light will also be on. SAFETY KEY The machine can work only when you put safety key at the appointed position. -
Page 11: Instruction For Console
INSTRUCTION FOR CONSOLE TECH INFO Time 00:00-99:59 Min Speed 1.0-20.0 km/h Incline 0-20% Distance 0.00-99.9 km Calorie 0-999 KCAL Heart rate 50-200 / Min Preset Program P1-P99 Program Body Fat Test U1-U3 Customized program... - Page 12 PANEL KEYS START Key: Press "Start" key, there will be 3 seconds countdown displayed on the window! After countdown, the machine will run at the speed of 1.0km/h. STOP Key: Under running condition, press “Stop” key, it will slow down then stop. Reset: Press "Stop"...
- Page 13 SPEED Direct Key: Use these keys, you could set speed for 5km/h, 10km/h, 15km/h directly. INCLINE Direct Key: Use these keys, you could set incline for 5%, 10%, 15% directly. DISPLAYED WINDOW INCLINE:Display the incline data DISTANCE:Display the distance data TIME:Display the time data SPEED:Display the speed data PULSE:Display the pulse data...
-
Page 14: Detailed Instructions
DETAILED INSTRUCTIONS Quick start (for manual mode) Turn on power switch, put safe key in the right position. Press “START” key, there will be 5 seconds countdown displayed on the window! After countdown, the machine will run at the speed of 1.0km/h. ... -
Page 15: Maintenance
Data range Param Setting range Displayed range Time(minute:scond) 5:00-99:00 0:00-99:59 Incline(%) 0-20 0-20 Speed(KM/H) 1.0-20 1.0-20 Distance(KM) 0.5-99.9 0.00-99.9 Heart rate(time/minute) 60-185 calorie(cal) 10-999 0-999 Body fat test Under ready condition, press “PROG”. key continuously to come into BMI. Press “MODE” key, you could find “HEIGHT”,“WEIGHT”, “AGE”, “SEX”, “BMI”... - Page 16 b) Turn the speed to be around 3km/h, step on the running belt by pressure and try your best to make the running belt stop. If running belt stops, together with the front roll, but the motor still runs, under this condition, it means the poly V-belt needs to be adjusted.
-
Page 17: Cleaning
Step 2. After loosening the screws, lift up the running belt and clean in-between the running board. Squeeze the small white bottle of SILICONE oil which was supplied with your purchase and wipe it evenly across the board. Step 3. After lubricating the board, screw the belt tension back to its correct tension. Tighten evenly on both sides. - Page 18 Heart rate can’t be The pole of heart rate sensor is not Wet the pole with water or liquor displayed wet enough for hard contact lenses. Disturbed by electromagnetism Stay away from electromagnetism. Incline doesn’t work The motor wire is not well connected Open the motor cover and reconnect it.
-
Page 19: Terms And Conditions Of Warranty, Warranty Claims
Displayed E08 on the Overload protector If it is not overload, then add oil for screen running board, change the running belt or running board, change the PCB in turn to check! Displayed E09 on the Overhot protector Stop the machine and make it to be screen cold. - Page 20 Mechanical damages Regular use (e.g. wearing out of rubber and plastic parts, joints etc.) Unavoidable event, natural disaster Adjustments made by unqualified person Improper maintenance, improper placement, damages caused by low or high temperature, water, inappropriate pressure, shocks, intentional changes in design or construction etc. Warranty Claim Procedure The Buyer is obliged to check the Goods delivered by the Seller immediately after taking the responsibility for the Goods and its damages, i.e.
Need help?
Do you have a question about the IN 6937 Aluvis and is the answer not in the manual?
Questions and answers