Advertisement
Quick Links
Advertisement

Related Manuals for Insportline Gardian G10


Summary of Contents for Insportline Gardian G10
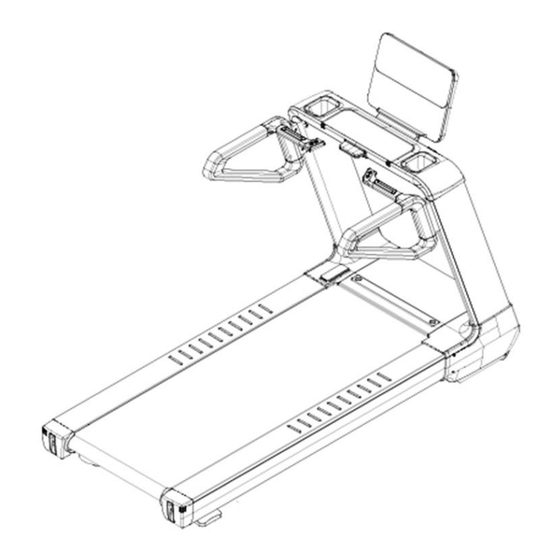
- Page 1 USER MANUAL – EN IN 26293 Treadmill inSPORTline Gardian G10...
- Page 2 CONTENTS SAFETY INSTRUCTIONS ........................3 ASSEMBLY ............................. 4 SPECIFICATIONS ........................... 9 CONSOLE ............................... 9 FUNCTION............................9 BUTTONS ............................10 PROGRAMS ............................10 MAINTENANCE AND STORAGE ......................12 REGULAR INSPECTION ........................13 SAFE EXERCISING ..........................13 GETTING START ..........................13 WARM – UP EXERCISE ........................14 STORAGE .............................
- Page 3 SevenSport s.r.o. reserves the right to make any changes and improvements to its product without prior notice. Visit our website www.insportline.eu where you will find the latest version of the manual. SAFETY INSTRUCTIONS • Read the manual carefully and keep it for future reference.
- Page 4 • Any part of the treadmill cannot prohibit the movement of the user. • Do not use outdoors. • Do not expose to direct sunlight. • Do not place in areas with high humidity (pools, sauna etc.) • Continuous use cannot be longer than 2 hours. •...
- Page 5 Step 1 Attach the posts (3 L/R) to the main frame (1) with M10x15 bolts (94). Connect the cables (138 and 139) on the left side. Connect the cables (138 and 134) on the right side.
- Page 6 Step 2 Connect the cables leading from the posts (3 L/R) to the cables leading from the main console frame (4). Attach the main console frame (4) to the posts (3 L/R) with 4x M6x10 bolts (103), 4x M6x10 bolts (88) and then attach the end caps (160).
- Page 7 Step 3 Connect the cable (141) from the console holder (5) to the cable (140) leading from the main console holder (4). Attach the console holder (5) to the main console holder (4) using 4x M8x25 bolts (90). Pull the cables (135 and 143) out of the posts. Step 4 Connect cable (142) from console (38) with cable (141) from console holder (5).
- Page 8 Step 5 Connect the cables (135 and 143) from the posts to the cables (136 and 144) from the handles (7). Fix the handles (7) to the posts using 5x M8x15 bolts (162). Then attach the covers (40) to the handles using BT4.0x15 screws (109).
- Page 9 Step 7 Level the treadmill using the feet. SPECIFICATIONS 0,8 – 20 km/h Dimensions 2055x870x1500 mm Speed incline 0–18 % Engine 6,0 HP (max) Running surface (mm) 580 x 1600 Input 240V/50 Hz Net weight 185 kg Power 2200 W 0 –...
- Page 10 If the value exceeds the maximum, it will start to display from 0. If countdown is set, the value will count down from the set value to 0, then it will switch to standby mode. Pulse/calories Pulse: 22 – 250 Calories: 0 –...
- Page 12 User programs Users can prepare their own U1 and U2 programs. The default time is 30:00, you can adjust the value using the SPEED +/- buttons. Press MODE to confirm the time, then set the speed with the SPEED +/- buttons and the incline with the INCLINE +/- buttons.
- Page 13 REGULAR INSPECTION DAILY • Before each use, make sure that no object in the area prevents the user from moving freely. • Before each use, check that the belt edges are properly locked and check for wear. • After each use, wipe away sweat and moisture. •...
- Page 14 Before you use the motorized treadmill, please stand aside and learn how to use it, e.g. how to start, stop and adjust the speed. You can use it after you familiarize yourself with its functions. EXERCISE Stand aside to learn how to operate the machine (adjusting the speed and inclination). Start exercising after you familiarize yourself with the functions.
- Page 15 Calves and Achilles tendon stretches Support yourself with two hands on a wall or a tree with one leg stretched behind you. Keep the leg straight and the heel on the ground. Keep the position for 10 - 15 seconds. Repeat 3 times for each leg.
- Page 16 If the running belt (20) drifts to the right, turn the adjusting bolt on the right side ¼ turn clockwise, then turn the left adjustment bolt ¼ turn counter- clockwise. If the belt does not move, repeat this step until it centers. Refer to image A. If the running belt (20) drifts to the left, turn the adjusting bolt on the left side ¼...
- Page 17 PARTS LIST Name Name Main frame Nut M10 Incline frame Bolt M8x10 L/R post Bolt M6x10 Main console holder Bolt M6x20 Console holder Bolt M8x25 Fuse Bolt M8x65 L/R handle Bolt M8x70x45 Fixing the engine cover Bolt M8x45 Engine connection cover Bolt M10x15 Tread lock Nut M6...
- Page 18 Bearing nut Bolt M4*10 Security key axis Bolt M4*12 Spring washer ø10.2*ø18.8*t3 Fixing the speaker Washer ø5.1*ø10*t1.0 Oval pressure plates Washer ø6.6*ø11.8*t1.6 UPS power supply holder Washer ø11*ø20*t2.0 Running board Washer ø9*ø16*t1.6 Running belt Drive belt Signal cable 150 mm Console top cover Signal cable 300 mm Console bottom cover...
- Page 19 Seal Micro switch Acrylic plate Console adapter Brush Mp3 USB disk Silicone Incline button Wrench #5 Speed button Wrench #6 Inverter Wrench #8 Sidebar Wrench #13, #14, #17 Button sticker Wrench 17-22 Console power supply Wrench 34 Power cord Front cylinder Safety lock clip Rear cylinder Strapping tape...
- Page 20 DIAGRAM...
- Page 21 ENVIRONMENT PROTECTION After the product lifespan expired or if the possible repairing is uneconomic, dispose it according to the local laws and environmentally friendly in the nearest scrapyard. By proper disposal you will protect the environment and natural sources. Moreover, you can help protect human health.
- Page 22 Seller is obliged to provide the Buyer with a financial compensation in the form of a refund. SEVEN SPORT s.r.o. Stores inSPORTline SK, s.r.o. Strakonická 1151/2c, Praha 5, 150 00, ČR Headquaters, warranty & service center: Električná 6471, Registered Office: Dělnická...
Need help?
Do you have a question about the Gardian G10 and is the answer not in the manual?
Questions and answers