Table of Contents
Advertisement
Quick Links
Advertisement
Table of Contents

Related Manuals for Microtek FileScan 2325


Summary of Contents for Microtek FileScan 2325
- Page 1 Document Imaging Scanner FileScan 2325 User's Manual www.microtek.com...
-
Page 2: Preface
The contents of this manual have been checked carefully for accuracy, and every effort has been made to ensure that there are no errors. However, Microtek makes no guarantee as to the accuracy of the contents of this document and reserves the right to make changes to the contents without prior warning. -
Page 3: Safety Precautions
Do not use this scanner near water. Never spill liquid of any kinds on the product, or it may result in electric shock or other hazards. • This scanner should be situated away from heat sources such as radiators, heat registers, stoves, or other products (including amplifiers) that produce heat. FileScan 2325 User's Manual... - Page 4 When you need a repair service, unplug the scanner from the power outlet and consult qualified service personnel. • When replacement parts are required, use replacement parts that are specified by the manufacturer or have the same characteristics as the original parts. FileScan 2325 User's Manual...
-
Page 5: Table Of Contents
Scanning Documents from an Application .......... 28 Utilizing Scanned Documents ............29 Scanning for OCR ................29 Scanning for E-mail ................ 31 Scanning for Copying ..............32 Scanning to Cloud ................33 Scanning as Text-to-Speech (TTS) ............ 34 FileScan 2325 User's Manual... - Page 6 Care and Cleaning ................40 Cleaning the Scanner Glass Surfaces ..........40 Cleaning the Rollers ................. 41 Maintenance ..................42 Replacing the Rubber Pad ..............42 Appendix ...................43 Fixing Paper Jams ................43 Troubleshooting ................44 Specifications ................. 45 FileScan 2325 User's Manual...
-
Page 7: Knowing About Your Scanner
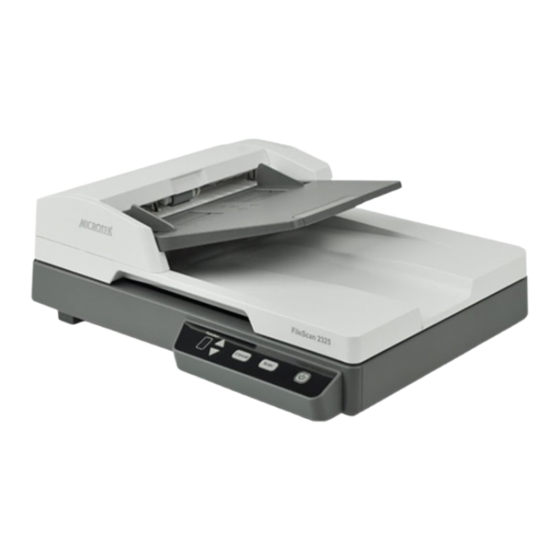
Knowing about Your Scanner The FileScan 2325 is a flatbed document scanner with built-in Automatic Document Feeder (ADF) that can hold up to 35 sheets of papers for the unattended volume scanning. It features optical resolution of 1200-dpi (flatbed)/600-dpi (ADF), duplex (double-sided) scanning, and a Hi-Speed USB interface for the fast and plug-and-play connectivity ability. -
Page 8: Installation Requirements
2GB DDR2 RAM or more • Intel Core2 Duo processor at 2.5 GHz PC or higher with a SATA2/SATA3 at 7200 rpm HDD (or SSD) and USB 2.0 port • Windows 7, 8, 10 or 11 FileScan 2325 User's Manual... -
Page 9: Taking A Closer Look
Starts a scan job immediately based the the Scanner Button Settings interface. • Stop button Cancels the ongoing scan job. • Up/Down button Toggles through the numbers of predefined function buttons. • LED display Displays the selected function button number. FileScan 2325 User's Manual... -
Page 10: Open/Back View
Calibration and scan area for ADF scanning, which should be kept clear and free of obstruction at all times. Power Connector Connects the scanner to the power adapter. Hi-Speed USB Port Connects the Hi-Seed USB (USB 2.0) cable to the computer. FileScan 2325 User's Manual... -
Page 11: Initial Setup
Save the carton and all packing materials of the scanner if you have a need to transport the scannerthe in the future. Step 1: Unpacking Package Contents After unpacking your scanner package, please check for the major components listed below. FileScan 2325 scanner Software CDs/DVDs Power adapter Hi-Speed USB cable FileScan 2325 User's Manual... -
Page 12: Step 2: Installing The Software
After you finish the installation of software, if you found that the installed drivers and software cannot run your product or your computer system properly later, please go to the Microtek Download Service site at microtek.com/en/download to download and install any updates you may require. -
Page 13: Step 3: Unlocking The Scanner
When the carriage has been moved to the standby position. Then, push the locking switch to the position as indicated in the graphic, with the icon on the lock showing as “Locked”. 4. Turn off your scanner. The scanner is now ready for transport. Standby position FileScan 2325 User's Manual... -
Page 14: Step 4: Connecting The Scanner
2. Plug the other end of power adapter into a power source. To the Hi-Speed USB Cable 3. Connect one end of the Hi-Speed USB cable to your computer. 4. Connect the other end of the Hi-Speed USB cable to the scanner’s USB port. FileScan 2325 User's Manual... -
Page 15: Step 5: Turn On The Scanner
When the light stops blinking and stays on steady, the scanner is detected by the system automatically. This indicates that the scanner is ready to scan. To turn off the scanner, press and hold on the Power button ( ) for about 3 seconds. The scanner will be off. FileScan 2325 User's Manual... -
Page 16: Positioning Documents
3. Load the stack of papers into the Document Feed Tray, with the side to be scanned facing up and the top edge of the paper facing toward the feeder. Push the stack of papers into the tray until the paper's edges touch the end of tray. FileScan 2325 User's Manual... -
Page 17: Notice On Using The Adf
Notice on Using the ADF • The ADF is not designed for scanning photos; doing so may damage your originals. Microtek accepts no responsibility for damage that may arise from misuse of equipment. • The ADF can handle the paper within the following specifications: –... -
Page 18: On The Flatbed
3. Lower the scanner lid on the scanner glass surface. Keep calibration area on the glass surface clear and free of any obstruction at all time. FileScan 2325 User's Manual... -
Page 19: Scanning Scenarios
Scanning Scenarios Using ScanWizard DI ScanWizard DI is a scanning software designed by Microtek for document scanning in color, black and white, and grayscale in both duplex and simplex modes. Its user-friendly interface enables you to easily start the scanning process. - Page 20 6. Click the Preview button to perform a preliminary view of the entire image. When done, a preview image appears in the Preview window. Do not forget to put the document back into the document feed tray if the document feeds through the ADF. FileScan 2325 User's Manual...
- Page 21 Thumbnail View window and labeled with the file name and file format specified earlier. 13. Click the Open Folder button to locate the scanned images if you want to view. FileScan 2325 User's Manual...
- Page 22 File Location menu box Click on a thumbnail image to enlarge it in the Image View Window at the right side of the interface. AP control panel (Main interface) TWAIN driver control panel (Scan Setup interface) FileScan 2325 User's Manual...
-
Page 23: Scanning Documents With Barcodes
“Barcode+Suffix” from its drop-down menu for the scanned images. NOTE: If you want to know more about how to deal with documents with barcodes, refer to the ScanWizard DI Reference Manual in the Microtek Software CD/DVD. 8. In the Main interface, select and click the Normal Scan button to start scanning. - Page 24 File Location menu box Click on a thumbnail image to enlarge it in the Image View Window at the right side of the interface. AP control panel (Main interface) TWAIN driver control panel (Scan Setup interface) FileScan 2325 User's Manual...
-
Page 25: Scanning Documents Automatically
When the Normal Scan button is pressed, an “Automatic Paper Sensor” window appears on the screen. If necessary, adjust slider bars to increase/decrease the value of user settings for the “Paper Sensitively” and “Stop the Auto Scan after...”options. FileScan 2325 User's Manual... - Page 26 File Location menu box. At the same time, the scanned images will be displayed in thumbnail sizes in the Thumbnail View window and labeled with the chosen file format. 9. Click the Open Folder button to locate the scanned images if you want to view. FileScan 2325 User's Manual...
- Page 27 File Location menu box Click on a thumbnail image to enlarge it in the Image View Window at the right side of the interface. AP control panel (Main interface) TWAIN driver control panel (Scan Setup interface) FileScan 2325 User's Manual...
-
Page 28: Scanning Documents From An Application
1. Place the document to be scanned either on the scanner glass surface or into the ADF’s Document Feed Tray. 2. Launch your application (e.g., Adobe PhotoShop). 3. Select the “Microtek ScanWizard DI (TWAIN)” driver in the Import options from the File menu. When succeeded, the ScanWizard DI (TWAIN) driver interface appears on the screen. -
Page 29: Utilizing Scanned Documents
Thumbnail View window Selection tools If you like to select all images at one time, click the All button. 2. Click the OCR button in the Thumbnail View window to activate the OCR Settings window. FileScan 2325 User's Manual... - Page 30 OCR is complete. 4. When done, click the Recognize button to perform OCR. Once OCR is complete, the converted file is sent to your chosen folder. FileScan 2325 User's Manual...
-
Page 31: Scanning For E-Mail
All button. 2. Click the E-Mail button in the Thumbnail View window to activate the default E-Mail application. Then, follow instructions of the E-Mail application you are using to send out the selected image files. FileScan 2325 User's Manual... -
Page 32: Scanning For Copying
If you like to select all images at one time, click the All button. 2. Click the Print button in the Thumbnail View window to activate the Print window. 3. Specify the number of copies to be made, then click OK. FileScan 2325 User's Manual... -
Page 33: Scanning To Cloud
4. When done, click the OK button to start uploading of scanned files. Once the uploading process is complete, there will be a “cloud” mark appearing at the left corner of the image in the Thumbnail View window. FileScan 2325 User's Manual... -
Page 34: Scanning As Text-To-Speech (Tts)
“Text to Speech” window. OCR Languages: Select a language in which the original text document is written. Supported options include most common used languages in the world. FileScan 2325 User's Manual... - Page 35 4. When done, click the OK button to perform TTS. Once TTS is complete, The scanned and recognized file will be opened in “Text to Speech” window. FileScan 2325 User's Manual...
-
Page 36: Scanner Buttons
Scanner Buttons The FileScan 2325 is equipped with one LED display and four physical buttons (Up/Down, Cancel, and Scan), used to automate a number of predefined operations, such as scanning to a file, sending an image to your printer or e-mail account, scanning for OCR, etc. -
Page 37: Starting Up Scanner Button Settings Interface
Show hidden icons button 2. Locate the Scanner icon in the hidden icons box and right-click it; then, select Button Settings (or Settings) from the options menu to activate the Scanner Button Settings interface. Scanner Button Settings Interface FileScan 2325 User's Manual... -
Page 38: Customizing The Scanner Buttons
Next, specify a file’s name, saving location, and saving format for the scanned images. When done, click the Save button to save the parameters currently used for the selected button. FileScan 2325 User's Manual... -
Page 39: How The Scanner Button Works
4. If necessary, specify new settings for each button. Follow the procedures (steps 1 through 5) for the “Customizing the Scanner Buttons” section to specify your new requirements for the buttons that you wish to redefine. FileScan 2325 User's Manual... -
Page 40: Care And Cleaning
2. When you clean the glass surface of the ADF, watch out for small four pieces of plastic sheets attached along the side of the ADF glass. Please avoid to damage them when wiping the glass surface there. FileScan 2325 User's Manual... -
Page 41: Cleaning The Rollers
3. Close the ADF cover and you will hear the cover snap and close. Rollers Notch NOTE: Do not attempt to spin or rotate the rollers while cleaning, for it may damage the drive train mechanism of the ADF. FileScan 2325 User's Manual... -
Page 42: Maintenance
3. Insert and push the new rubber pad into its the compartment until it snaps into place. 4. Close the ADF cover and you will hear the cover snap and close. Rubber pad FileScan 2325 User's Manual... -
Page 43: Appendix
Locate the notch at the edge of the cover and then hold it to pull the cover 2. Carefully pull out the jammed paper from the feeder. Close the ADF cover and you will hear the cover snap and close. FileScan 2325 User's Manual... -
Page 44: Troubleshooting
“Fixing Paper Jams” section. • If the problem is occurring from situations other than a paper jam, follow the procedures laid out in the “Position Documents” section. Finally, close the ADF cover and restart scanning. FileScan 2325 User's Manual... -
Page 45: Specifications
(AC/DC adapter) 100V to 240V WA-36A24R Environment Operating temperature: 50° to 95°F (10° to 35°C) Relative humidity: 10% to 85% Important: Specifications, software bundles, and accessories are subject to change without notice. Not responsible for typographic errors. FileScan 2325 User's Manual...
Need help?
Do you have a question about the FileScan 2325 and is the answer not in the manual?
Questions and answers