Microtek ArtixScan 120tf Installation And Operation Manual
Microtek artixscan 120tf: operation manual
Hide thumbs
Also See for ArtixScan 120tf:
- Template manual (1 page) ,
- Reference manual (150 pages) ,
- Specifications (2 pages)
Table of Contents
Advertisement
Advertisement
Table of Contents

Related Manuals for Microtek ArtixScan 120tf


Summary of Contents for Microtek ArtixScan 120tf
- Page 1 Microtek ArtixScan 120tf Installation and Operation Manual...
- Page 2 Important Documents that you scan may be protected under copyright law. The unauthorized use of such documents could be a violation of the rights of the copyright holder. Microtek bears no responsibility for the unauthorized use of copyrighted materials. To obtain optimal results from the Microtek scanning software and user's manual, you should be familiar with such Windows concepts as pointing, clicking, dragging, and selecting from menus and dialog boxed.
-
Page 3: Table Of Contents
Unpacking the Scanner Taking a Closer Look ... 4 Installation Installing the Scanner Software ... 5 Connecting the Scanner to Your Computer ... 6 Using the FireWire Cable ... 6 Using the SCSI Cable ... 8 Positioning Your Originals A. Positioning the Transparent Film ...10 Using the 35mm Slide Holder ... - Page 4 (1) This device may not cause harmful interference, and (2) this device must accept any interference received, including interference that may cause undesired operation. Responsible Party: Loi Han Microtek Lab, Inc. 16941 Keegan Avenue Carson, CA 90746 Phone: 310-687-5800...
-
Page 5: Introduction
Introduction The ArtixScan 120tf is a single-pass, dual interface (FireWire and SCSI), 42-bit, high- resolution scanner designed for scanning transparent media such as film, slides, and filmstrips. This manual will help you in the installation and operation of your scanner, with the information provided covering both Macintosh and PC environments. -
Page 6: Environmental Requirements
• Avoid positioning the scanner in the path of heavy traffic where it may get bumped. • Place the scanner within 3 feet of the computer. Use the FireWire cable or the SCSI cable that came with your scanner. Once the scanner has been placed in a suitable location and is ready to be connected to the host computer, it is time to proceed with installation of the necessary hardware and software components for the scanner. -
Page 7: Unpacking The Scanner
Refer to the enclosed packing list to ensure that you received all of the parts necessary for scanner setup. If there are any damaged or missing parts, contact Microtek's customer service department. 1. ArtixScan 120tf scanner 2-1. -
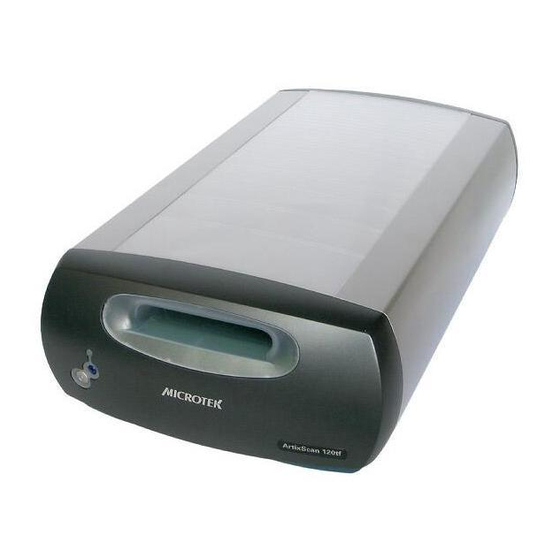
Page 8: Taking A Closer Look
Taking a Closer Look READY Indicator (orange) Eject button POWER button (yellow) Feed slot SCSI terminator FireWire ports (2) switch SCSI ID switch SCSI ports (2) Power connector ArtixScan 120tf Installation and Operation Manual... -
Page 9: Installation
2. Insert the Microtek CD-ROM into your CD-ROM drive. For Macintosh users: When the Microtek CD-ROM icon appears on your Macintosh desktop, double- click on this icon to open it. Double-click “For OS 9.x” or “For OS X”, depending on the OS you are using. When the software installer screen appears, click each software program on the screen to install all the software components. -
Page 10: Connecting The Scanner To Your Computer
Connecting the Scanner to Your Computer The ArtixScan 120tf comes with both FireWire and SCSI-2 built-in interfaces. You may choose either FireWire (IEEE-1394) or SCSI as the interface for connection between the scanner and computer. (Choose only one interface – either FireWire or SCSI, but not both.) - Page 11 For PC users 3. Press the power button on the front panel, and wait for the lights to stop blinking and stay on steady. The scanner will be detected by your system automatically. ArtixScan 120tf Installation and Operation Manual The latest Macintosh computers (i.e., G3,...
-
Page 12: Using The Scsi Cable
Using the SCSI Cable Before connecting the scanner, check to see if your computer system has a built-in SCSI interface or an installed SCSI card. If you need help on installing the SCSI card, please refer to the documentation that came with your SCSI card. - Page 13 SCSI TERM 5. Connect the power cord to the scanner. Plug the power cord into the back of the scanner, and plug the other end into a wall outlet or power source. 6. Turn on the scanner, and wait for the lights on the front panel to stop blinking and stay on steady.
-
Page 14: Positioning Your Originals
Positioning Your Originals When your scanner has been installed successfully, you can begin to scan slides and transparencies with the film holders. Included in the scanner package are three types of film holders — 35mm slide holder, 35mm filmstrip holder, and 6 x 9 cm filmstrip holder. -
Page 15: Using The 35Mm Filmstrip Holder
(indicated by an arrow mark) by force or touch the filmstrips. If you do so, this will bend the original and may result in out-of-focus scans. ArtixScan 120tf Installation and Operation Manual... -
Page 16: Using The 6 X 9 Cm Filmstrip Holder
2. Flip the 35mm filmstrip face down and place it into the holder and ensure that the filmstrip’s edge is against the side of the holder. 3. Close the holder lid and lock it by sliding it toward the side (indicated by an arrow mark). ArtixScan 120tf Installation and Operation Manual... -
Page 17: Inserting The Film Holder
B. Inserting the Film Holder When the slides or filmstrips are correctly loaded, push the holder into the scanner’s feed slot in the arrow direction, where the arrow mark appears on the holder’s top- end. The scanner then auto loads the holder. -
Page 18: Your First Scan
Scan Material menu. The Film Size window will automatically appear only if you are using the 6 x 9 cm filmstrip holder. Choose a film size, depending on your film type. Scan Material menu ArtixScan 120tf Installation and Operation Manual selected profile. - Page 19 For more details on various scanning scenarios, refer to the ScanWizard Pro TX User's Guide included in your scanner package. Job Panel window ArtixScan 120tf Installation and Operation Manual...
-
Page 20: Performing Color Calibration
Performing Color Calibration The Microtek Scanner ICC Profiler (MSP) is a scanner calibration and profiling utility program exclusively designed for Microtek scanners. Used together with the color calibration target, the ICC Profiler determines the color attributes of your scanner accurately, then generates an ICC profile tailored exclusively for the scanner you are using under ScanWizard Pro TX. -
Page 21: Positioning Your Target
Place the Kodak Q-60E 35mm target face up (as shown in the illustration below). Place the target on the first frame of the 35mm slide holder, then insert the holder into the scanner. Proper positioning of the target on the scanner is important for a successful calibration. Make sure the Kodak©... -
Page 22: Calibrating Your Target
2. Launch the Microtek Scanner ICC Profiler calibration program. In Macintosh, locate the Microtek ICC Profile folder and double-click the ICC Profile icon. In Windows, select the Start menu, Programs, Microtek ScanWizard Pro TX for Windows, then Microtek Scanner ICC Profiler. -
Page 23: Loading A Profile
For PC users: From the Preview window, click the Scan Material icon, and select “Positive Film” for slides and transparencies. 3. From the Settings window, click on the Scanner Profile list box and select the profile you have just created. -
Page 24: Specifications
Environment Additional Documentation in the CD-ROM Additional documentation is provided in the Microtek CD-ROM that contains ScanWizard Pro TX, Scanner ICC Profiler, troubleshooting, etc. If you experience problems with the hardware or software, you can open the file that you wish to view with Adobe Acrobat Reader or your browser, then read or print the information.
Need help?
Do you have a question about the ArtixScan 120tf and is the answer not in the manual?
Questions and answers