Table of Contents
Advertisement
Quick Links
Advertisement
Table of Contents

Related Manuals for Microtek ArtixScan DI 2125c


Summary of Contents for Microtek ArtixScan DI 2125c
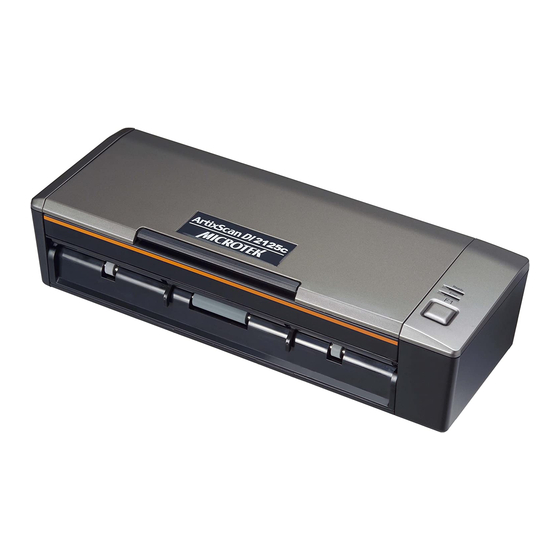
- Page 1 Document Imaging Scanner ArtixScanDI 2125c User's Manual www.microtek.com...
-
Page 2: Preface
The contents of this manual have been checked carefully for accuracy, and every effort has been made to ensure that there are no errors. However, Microtek makes no guarantee as to the accuracy of the contents of this document and reserves the right to make changes to the contents without prior warning. -
Page 3: Fcc Compliance Statement
This device complies with Part 15 of the FCC Rules. Operation is subject to the following two conditions: (1) This device may not cause harmful interference, and (2) this device must accept any interference received, including interference that may cause undesired operation. ArtixScan DI 2125c User's Manual... -
Page 4: Safety Precautions
When you need a repair service, unplug the scanner from the power outlet and consult qualified service personnel. • When replacement parts are required, use replacement parts that are specified by the manufacturer or have the same characteristics as the original parts. ArtixScan DI 2125c User's Manual... -
Page 5: Table Of Contents
Preface ....................2 FCC Compliance Statement ..............3 Safety Precautions ................4 Knowing about Your Scanner .............. 7 Features of the ArtixScan DI 2125c ........... 7 Installation Requirements ..............9 Taking a Closer Look ..............10 Front/Back View ..............10 Open View ................ - Page 6 Cleaning the Rollers ............... 36 Maintenance ..................37 Replacing the Separation Roller Assembly ......... 37 Replacing the Feed Roller Assembly ..........39 Appendix ..................41 Fixing Paper Jams ................. 41 Troubleshooting ................42 Specifications ................44 ArtixScan DI 2125c User's Manual...
-
Page 7: Knowing About Your Scanner
Portable, compact and convenient — With a perfect small size, the ArtixScan DI 2125c reforms your imagination about a sheet-fed scanner. From the office to the home, the coffee shop to the hotel, the ArtixScan DI 2125c easily affords users portable and mobile opportunities for document capture on the •... - Page 8 • New and Advanced Microtek ScanWizard DI software — All-in-one control panel offers a host of features and image adjustment controls. Supporting the TWAIN driver, ScanWizard DI also features full document scanning tools and on-screen proofing. Its multi-scanning area and preview option allow you to obtain quick scans in the preview window.
-
Page 9: Installation Requirements
Installation Requirements In order to use your ArtixScan DI 2125c, your computer must satisfy the following system requirements: • CD/DVD-ROM drive (for installing software) • Color display with 24-bit color output capability • 512 MB RAM or more • Pentium IV PC or higher with Hi-Speed USB (USB 2.0) port •... -
Page 10: Taking A Closer Look
Indicates the scanner is ready to scan. Power Connector Connects the scanner to the power adapter. Hi-Speed USB Port Connects the Hi-Seed USB (USB 2.0) cable to the computer. Feed Roller Assembly Used to feed documents into the feeder. ArtixScan DI 2125c User's Manual... -
Page 11: Open View
Pick Rollers Used to pick up documents into the feeder. Output Rollers Used to eject documents after scanning. Card Tray Holds the card to be fed into the feeder. ArtixScan DI 2125c User's Manual... -
Page 12: Initial Setup
After unpacking your scanner package, follow the steps in order for a quick and easy installation process. Step 1: Unpacking Package Contents After unpacking your scanner package, please check for the major components listed below. Scanner Power adapter Hi-Speed USB cable Software CDs/DVDs ArtixScan DI 2125c User's Manual... -
Page 13: Step 2: Installing The Software
After you finish the installation of software, if you found that the installed drivers and software cannot run your product or your computer system properly later, please go to the Microtek Download Service site at ww7.microtek.com.tw/service.php to download and install any updates you may require. -
Page 14: Step 3: Connecting The Scanner
Document Feed Tray 5. Open top cover (Document Feed Tray) to turn on the scanner. Once the scanner is detected by your system, the LED (green) will brighten, and the scanner is ready to scan. ArtixScan DI 2125c User's Manual... -
Page 15: Positioning Documents
3. Load and center the stack of documents onto the Document Feed Tray, with the side to be scanned facing down and the top edge facing toward the feeder. Then, slide the two Guide Arms toward the stacked papers if needed. ArtixScan DI 2125c User's Manual... -
Page 16: To Load Cards
Please refer to the section as below for the detail. • The scanner is not designed for scanning photos; doing so may damage your originals. Microtek accepts no responsibility for damage that may arise from misuse of equipment. •... -
Page 17: Scanning Documents
Scanning Documents Using ScanWizard DI ScanWizard DI is a scanning software designed by Microtek for document scanning in color, black and white, and grayscale in both duplex and simplex modes. Its user-friendly interface enables you to easily start the scanning process. - Page 18 If ScanWizard DI is launched as a stand-alone program, the scanned image can be saved after the scan to a file, opened in an image-editing program, or sent to a printer. ArtixScan DI 2125c User's Manual...
- Page 19 Scan frame (enclosed by dotted lines and labeled with the tag “Main”) Scanning Preview image (the settings enclosed frame bordered in red) Preview window Image type Image correction settings ArtixScan DI 2125c User's Manual...
-
Page 20: Scanning A Stack Of Documents
If ScanWizard DI is launched as a stand-alone program, the scanned image can be saved after the scan to a file, opened in an image-editing program, or sent to a printer. ArtixScan DI 2125c User's Manual... - Page 21 At this moment, the previewed page is delivered to the output tray from the Document Feed tray. Load the previewed page, along with the paper stack into Document Feed Tray. You are now ready to scan. ArtixScan DI 2125c User's Manual...
-
Page 22: Scanning Documents With Mixed Contents
Select Line Art in the Attribute drop-down menu as your image type for the selected scan frame. If necessary, adjust image quality by using the image correction tools. ArtixScan DI 2125c User's Manual... - Page 23 “Main”. When a new scan frame is generated, the enclosed scan frame is selected in red dotted lines. The newly added subframe is automatically labeled in series (with tag “1”, “2”, etc.). ArtixScan DI 2125c User's Manual...
-
Page 24: Scanning Documents With Barcodes
If the “Save Barcode as Directory” is checked, the program will recognize and use the barcode on the scanned document to generate a file directory, where the scanned document will appear with any predefined prefix and/or serial number. ArtixScan DI 2125c User's Manual... - Page 25 You can append any predefined prefix and/or serial number to the output filename in order to differentiate the documents containing same barcode. Barcode number is used as a file directory name Barcode number is used as a file name ArtixScan DI 2125c User's Manual...
- Page 26 Scan frame Scanning (enclosed by dotted settings lines and labeled with the tag “Main”) Image type Image correction settings Barcode Frame tool Barcode Separator Barcode frame (enclosed by dotted lines and labeled with the tag “BarCode”) ArtixScan DI 2125c User's Manual...
-
Page 27: Utilizing Scanned Documents
Check the “Every %image(s) into a file “ option, and then enter your desired number in the edit box directly or click the up/down arrow to increase/decrease the number. The range is from 2 to 100 images. ArtixScan DI 2125c User's Manual... - Page 28 Otherwise, if you do not do so, when you scan another document with the same barcode value as that on the old one and you forget to name it in different file prefix, the new scanned document will overwrite the old one immediately. ArtixScan DI 2125c User's Manual...
-
Page 29: Scanning For Ocr
“OCR Language” options. The available options are English, German, French, Italian, Spanish, and Chinese. Check the “Send document to application after saving” option, then choose your word processing application from the options. ArtixScan DI 2125c User's Manual... - Page 30 The originals are sequentially scanned until the stack of documents is depleted; when finished, all the scanned images are saved as a single file. The saved file can now be opened from your chosen application and is ready to be edited. ArtixScan DI 2125c User's Manual...
-
Page 31: Scanning For Pdf
Note: The scanner also allows you to scan a text document and convert it to an editable PDF file for editing with the Adobe Acrobat writer. Follow the procedures for “Scanning for OCR”, in step 4b, select the “Portable Document Format” as your file-saving format. ArtixScan DI 2125c User's Manual... -
Page 32: Scanning For Copying
“Scaling” setting is disabled. 5. Click the OK button. The originals are sequentially scanned until the stack of documents is depleted; when finished, all the scanned images are sent to the specified printer. ArtixScan DI 2125c User's Manual... -
Page 33: Customizing The Function Button
Customizing the Function Button The ArtixScan DI 2125c is equipped with one programmable function button (F1) that can be customized to automate a number of predefined operations, such as scanning to a file, sending an image to your printer, scanning for OCR, etc. - Page 34 OK button. The saved function button settings are restored to the ScanWizard DI control panel. You can then continue to use these settings until you need to specify new settings for the buttons. ArtixScan DI 2125c User's Manual...
-
Page 35: Care And Cleaning
Care and Cleaning To ensure optimal performance from the ArtixScan DI 2125c, it is important to clean several critical parts of the scanner on a regular basis. Cleaning the Scanner Glass Surfaces 1. To open the scanner cover, hold the two sides of the scanner cover and pull them up firmly. -
Page 36: Cleaning The Rollers
The inner side of Feed-Roller Assembly the scanner cover The bottom of the scanner Note: Do not attempt to spin or rotate the rollers while cleaning, for it may damage the drive train mechanism of the scanner. ArtixScan DI 2125c User's Manual... -
Page 37: Maintenance
2. Push down and then pull the cover lever to open the roller cover first. Hold both sides of the rollers to pull out the Separation Roller Assembly from its compartment. Separation Roller Assembly Roller cover ArtixScan DI 2125c User's Manual... - Page 38 4. Close the roller cover completely so that it clicks into place. Roller cover Note: • The recommended replacement point for the Separation Roller Assembly is approximately 20,000 sheets. • Please contact your local resellers for purchasing new Separation Roller Assembly. ArtixScan DI 2125c User's Manual...
-
Page 39: Replacing The Feed Roller Assembly
1. Open the scanner cover. Locate the Feed Roller Assembly at the bottom of the scanner. Scanner cover Feed Roller Assembly 2. Loosen the screws on the roller cover with a screwdriver. Then hold the roller cover and pull it out carefully. Roller cover ArtixScan DI 2125c User's Manual... - Page 40 Note: • The recommended replacement point for your Feed Roller Assembly is after scanning approximately 30,000 sheets through the feeder. • Please contact your local resellers for purchasing new Feed Roller Assembly. ArtixScan DI 2125c User's Manual...
-
Page 41: Appendix
Note: Do not take out a jammed paper by force from the scanner when the scanner cover closes. If doing so, it may damage the rollers and cause the scanner work improperly. ArtixScan DI 2125c User's Manual... -
Page 42: Troubleshooting
6. When trying to scan, an error message appears on your screen that reads, “ADF is not ready or no paper”. Make sure there are papers on the Document Feed Tray. Make sure the top edges of papers have been inserted into the feeder. ArtixScan DI 2125c User's Manual... - Page 43 “Fixing Paper Jams” section. • If the problem is occurring from situations other than a paper jam, follow the procedures laid out in the “Position Documents” section. Finally, close the scanner cover and restart scanning. ArtixScan DI 2125c User's Manual...
-
Page 44: Specifications
WA-18G12G (EU) 100V to 240V WA-18G12K (UK) 100V to 240V WA-18G12N (AU) 100V to 240V WA-18G12S (Korea) 100V to 240V WA-18H12 Environment Operating temperature: 50° to 95°F (10° to 35°C) Relative humidity: 10% to 80% ArtixScan DI 2125c User's Manual...
Need help?
Do you have a question about the ArtixScan DI 2125c and is the answer not in the manual?
Questions and answers