
Related Manuals for Microtek ArtixScanDI 4020 Plus


Summary of Contents for Microtek ArtixScanDI 4020 Plus
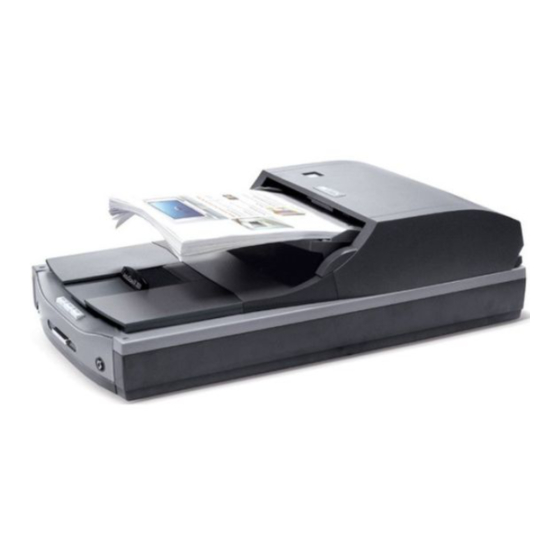
- Page 1 Document Imaging Scanner ArtixScanDI 4020 Plus ArtixScanDI 2020 Plus User's Manual www.microtek.com...
-
Page 2: Preface
The contents of this manual have been checked carefully for accuracy, and every effort has been made to ensure that there are no errors. However, Microtek makes no guarantee as to the accuracy of the contents of this document and reserves the right to make changes to the contents without prior warning. -
Page 3: Fcc Compliance Statement
FCC Compliance Statement This equipment (Model: MSS-1200T4ADF) has been tested and found to comply with the limits for a Class B digital device, pursuant to Part 15 of the FCC rules. These limits are designed to provide reasonable protection against harmful interference in a residential installation. -
Page 4: Safety Precautions
Safety Precautions Before using your scanner, read the following safety guides carefully, which detail the proper operation of the scanner and its accessories to prevent injuries or damage to users or equipment. Power Source and AC Power Cord: • Use a power source only with a power rating specified on the marking label. •... -
Page 5: Table Of Contents
Table of Contents Preface ....................2 FCC Compliance Statement ..............3 Safety Precautions ................4 Knowing about Your Scanner ............. 7 Features of the Scanner ..............7 Installation Requirements ..............9 Taking a Closer Look ..............10 Front/Top View ............... 10 Rear/Side View ................ - Page 6 Customizing the Function Buttons ..........37 Care and Cleaning ................39 Cleaning the Scanner Glass Surfaces ..........39 Cleaning the Mylar Cartridge ............39 Cleaning the Rollers ............... 40 To clean the rollers under the ADF cover ........41 To clean the rollers under the Document Feed Tray ...... 42 Cleaning the ADF Glass Surface ............
-
Page 7: Knowing About Your Scanner
480 Mbit/sec, providing the high data transfer rate via the included Hi- Speed USB cable. • New and Advanced Microtek ScanWizard DI software — All-in-one control panel offers a host of features and image adjustment controls. It comes out several distinguished advantages:... - Page 8 – Quick Scan — This feature enables the scanner to scan and save the images directly as a single PDF file, no more comprehensive settings required. – Auto Document Rotation — With this feature, the scanner automatically rotates every saved files in a readable direction based on a specific OCR language selected.
-
Page 9: Installation Requirements
Installation Requirements In order to use your ArtixScan DI 4020 Plus/2020 Plus, your computer must satisfy the following system requirements: • DVD-ROM drive (for installing software) • Color display with 24-bit color output capability • 512 MB RAM or above •... -
Page 10: Taking A Closer Look
Taking a Closer Look Front/Top View Names of Parts Functions of Parts Button Presses to open or closes the ADF cover. Document Feed Tray Holds the high-volume documents to be scanned. into the ADF. Feed Tray Extender Extends the Document Feed Tray when loading long documents. Document Output Tray Stores the stacked documents which have been scanned. -
Page 11: Rear/Side View
Rear/Side View Names of Parts Functions of Parts Automatic Document Feeder Hi-Speed USB Port Connects the Hi-Speed USB (USB 2.0) cable to the computer. Power Connector Connects the scanner to the power adapter. ArtixScan DI 4020 Plus/ArtixScan DI 2020 Plus User's Manual... -
Page 12: Initial Setup
Initial Setup Following the Four Easy Steps After unpacking your scanner package, you should see four yellow stickers, which are marked from Step 1 to Step 4 and are placed on your scanner contents. Follow the steps in order for a quick and easy installation process. Step 1: Unpacking Package Contents After unpacking your scanner package, please check for the major components listed below. -
Page 13: Step 2: Installing The Software
After you finish the installation of software, if you found that the installed drivers and software cannot run your product or your computer system properly later, please go to the Microtek Download Service site at ww7.microtek.com.tw/service.php to download and install any updates you may require. - Page 14 It is strongly recommended that you should duplicate a copy of calibration data for your scanner after installing the software in case if you loose the Microtek Software CD/DVD or a newer version of ScanWizard DI is required in the future. You can find the calibration data in either of these two locations: •...
-
Page 15: Step 3: Unlocking The Scanner
Step 3: Unlocking the Scanner 1. Remove the yellow “Step 3” sticker from your scanner. 2. With the scanner power off, tilt the scanner and locate the locking switch at the bottom left corner of the scanner. Do not turn the scanner upside down when attempting to unlock, as this may damage the scanner’s mechanism. -
Page 16: To The Hi-Speed Usb Cable
To the Hi-Speed USB Cable 4. Connect one end of the Hi-Speed USB cable to your computer. 5. Connect the other end of the Hi-Speed USB cable to the scanner’s USB port. 6. Press the Power button at the front panel of your scanner to turn on the scanner;... -
Page 17: Positioning Documents
Positioning Documents Into the ADF (Automatic Document Feeder) This section shows you how to position a single-sheet document, as well as a stack of documents, into the ADF (Automatic Document Feeder). 1. Pull out the Feed Tray Extender for better paper support if the length of the originals exceeds 10 inches. - Page 18 Please refer to the section as below for the detail. • The document feeder is not designed for scanning photos; doing so may damage your originals. Microtek accepts no responsibility for damage that may arise from misuse of equipment. •...
-
Page 19: On The Flatbed
On the Flatbed This section shows you how to position a single-sheet document, such as a single photograph or a page from a book, on the flatbed: 1. Raise the scanner lid, and place the document to be scanned face down on the scanner glass surface. -
Page 20: Scanning Documents
Scanning Documents Using ScanWizard DI ScanWizard DI is a scanning software designed by Microtek for document scanning in color, black and white, and grayscale in both duplex and simplex modes. Its user-friendly interface enables you to easily start the scanning process. - Page 21 Select your image output type in the Scan Type drop-down menu. – Select RGB Color (24 bits) to scan the image in color. – Select Grayscale (8 bits) to scan the image in grayscale. – Select Black & White (1 bit) to scan the image in black-and-white. Select a dimension in the Paper Size drop-down menu as your preview image size.
- Page 22 Scanning settings Scan frame (enclosed by dotted lines and labeled with the tag “Main”) Image type Image Preview correction image (the settings enclosed frame bordered in red) Preview window ArtixScan DI 4020 Plus/ArtixScan DI 2020 Plus User's Manual...
-
Page 23: Scanning A Stack Of Documents
Scanning a Stack of Documents 1. Place the stack of documents to be scanned on the ADF's Document Feed Tray. 2. Launch ScanWizard DI (either as a stand-alone by clicking the program icon, or by using the “File-Import” or “Scan” command from an application program). - Page 24 For preview purposes only Scanning settings Scan frame (enclosed by dotted lines and labeled with the tag “Main”) Image type Image correction Preview settings image (the enclosed frame bordered in red) Preview window ArtixScan DI 4020 Plus/ArtixScan DI 2020 Plus User's Manual...
-
Page 25: Scanning Documents With Mixed Contents
Scanning Documents with Mixed Contents Many documents contain mixed content with both text and pictures on the same page. You can use a function named “Multiple Scan Frames” to scan different types of documents at the same time. 1. Place the single-sheet color print to be scanned on either the scanner glass surface or on the ADF’s Document Feed Tray. - Page 26 Create Subframe tool* Scanning settings Scan frame (enclosed by dotted lines and labeled with the tag “Main”) Image type Image correction Preview image settings (the enclosed frame bordered in red) First subframe Second subframe *Create Subframe tool The Create Subframe tool lets you create a new scan frame within the enclosed scan frame that is labeled with the tag “Main”.
-
Page 27: Scanning Documents With Barcodes
Scanning Documents with Barcodes When there is a barcode on a document, you can use “Barcode Separator” function to batch scan documents without starting and stopping each time a new file begins. This scanning scenario is useful for the scanned documents to be filed with barcode numbers. - Page 28 Select Frame tool Scanning settings Scan frame (enclosed by dotted lines and labeled with the tag “Main”) Image type Barcode Image correction Frame tool settings Barcode Separator Barcode number is used as Barcode frame a file directory name (enclosed by dotted Barcode number is used as lines and labeled with a file name...
-
Page 29: Scanning Documents Directly To A Pdf
Scanning Documents Directly to a PDF This scanning scenario guides users to scan documents directly to a PDF file, which helps users to avoid complicated after-scan settings if they just want to transform stacks of valuable data and papers into a single PDF file. 1. -
Page 30: Utilizing Scanned Documents
Utilizing Scanned Documents Depending on your needs, you may save your scanned documents into the following purposes: Scanning for Archiving The archiving function allows the scanner to scan documents for recording purposes. For instance, an image “record” can be kept of multiple-page documents or of other important documents, such as birth certificates and tax records. - Page 31 5. Click the Save button to start the scanning. If the “Save multiple images as a single file” option is checked, when the scanning is finished, ScanWizard DI will prompt you a window to ask if you want to place the next page. Click the Continue button to scan or click the Done button to save multiple images as a single file.
-
Page 32: Scanning For Ocr
Scanning for OCR The OCR (Optical Character Recognition) function allows the scanner to convert a scanned document into text that can be edited from any word processing application. 1. Place the documents with text to be scanned on the ADF's Document Feed Tray. - Page 33 5. Click the Save button to start the scanning. If the “Save multiple images as a single file” option is checked, when the scanning is finished, ScanWizard DI will prompt you a window to ask if you want to place the next page. Click the Continue button to scan or click the Done button to save multiple images as a single file.
-
Page 34: Scanning For Pdf
Scanning for PDF The scanner can easily convert any paper document into an image and saves it as an Adobe Portable Document Format (PDF) file for viewing with the Adobe application software. It also offers variable compression levels for full controls over file sizes and image quality. -
Page 35: Scanning For E-Mail
Scanning for E-mail The e-mail function allows the scanner to save and send the scanned images to your preferred e-mail application program in one simple step. This lets you share your scanning results with others fast and easily. 1. Load the documents to be scanned on the scanner glass surface. 2. -
Page 36: Scanning For Copying
Scanning for Copying The copy function allows the scanner to work like a copier using your printer, with documents printed successively without interruption. This lets you transform your scanner and printer into a convenient copy station. 1. Place the documents to be scanned on the ADF's Document Feed Tray. 2. -
Page 37: Customizing The Function Buttons
Customizing the Function Buttons The ArtixScan DI 4020 Plus/2020 Plus is equipped with 3 programmable function buttons (F1, F2, and F3) that can be customized to automate a number of predefined operations, such as scanning to a file, sending an image to your printer, scanning for OCR, etc. - Page 38 4. In the dialog box, specify your requirements for the button that you wish to define (F1, F2, or F3). Select F1, F2, or F3 (e. g., F1) to be defined from the Button options. Key in your preferred string in the Label edit box for the selected function button.
-
Page 39: Care And Cleaning
Care and Cleaning To ensure optimal performance from the ArtixScan DI 4020 Plus/2020 Plus, it is important to clean several critical parts of the scanner on a regular basis. Cleaning the Scanner Glass Surface 1. Lift the ADF. 2. Then use a soft, non-abrasive and lint-free cloth to gently wipe the rear and front glass surface areas on the scanner flatbed. -
Page 40: Cleaning The Mylar Cartridge
Cleaning the Mylar Cartridge Use the same kind of cloth for cleaning the scanner glass surface to clean the black Mylar cartridge located at the bottom of the ADF. Cleaning the Rollers Prolonged used of the ADF may result in accumulation of ink and other residue on the feeder’s rollers, affecting their efficiency. -
Page 41: To Clean The Rollers Under The Adf Cover
To clean the rollers under the ADF cover: 1. Push the button at the top of the ADF to release and lift up the ADF cover. 2. Clean the rollers with a lint-free cloth or a swab moistened with alcohol or ECO cleaner, as shown in the graphic below. -
Page 42: To Clean The Rollers Under The Document Feed Tray
To clean the rollers under the Document Feed Tray: 1. Push the button at the top of the ADF, then lift the Document Feed Tray along with the ADF cover. 2. Clean the rollers with a lint-free cloth or a swab moistened with alcohol or ECO cleaner, as shown in the graphic below. -
Page 43: Cleaning The Adf Glass Surface
Cleaning the ADF Glass Surface 1. Push the button at the top of the ADF, then lift the Document Feed Tray along with the ADF cover. 2. Using a soft and non-abrasive, lint-free cloth, clean the inner glass surface of the ADF gently and carefully. -
Page 44: Maintenance
Maintenance The separation pad assembly and the feed-roller assembly in your Automatic Document Feeder (ADF) are designed to make document feeding smooth. After usage for a period of time, the separation pad assembly and feed-roller assembly may become worn, and a problem such as document double-feed may occur. In this case, check either the separation pad assembly or the feed-roller assembly, and replace them if needed. -
Page 45: Replacing The Feed-Roller Assembly
Replacing the Feed-Roller Assembly 1. Press the button at the top of the ADF, then move the cover of the feeder up to see the feed-roller assembly, as indicated in the graphic below. Feed-Roller Assembly 2. With the cover fully opened, loosen the screw on the cover with a screwdriver, and pull out the feed-roller assembly carefully. -
Page 46: Appendix
Appendix Fixing Paper Jams Open the ADF cover by pressing the button on the top of the ADF. Paper jams can occur in either of two places: Directly under the ADF cover, or under the Document Feed Tray. ADF Cover Document Feed Tray •... -
Page 47: Troubleshooting
Troubleshooting The LEDs on the button panel indicates the status of the scanner. On - Ready to scan Flashing Green - Scanning Off - Scanner is off LEDs First, make sure that you have followed Steps 1 to 4 as described in the “Initial Setup”... -
Page 48: Specifications
Specifications Type Flatbed with ADF scanner Scanning Modes Color, grayscale, and black-and-white in a single scanning pass Input: 48-bit color input (Approx. 281 trillion colors) 16-bit grayscale (Approx. 65,536 shades of gray) Output: 24-bit color (Approx. 16 million colors) 8-bit grayscale (Approx. 256 shades of gray) Resolution Flatbed: 1200 (H) x 1200 (V) dpi ADF: 600 (H) dpi x 600 (V) dpi...
Need help?
Do you have a question about the ArtixScanDI 4020 Plus and is the answer not in the manual?
Questions and answers