Advertisement
MAN#650245
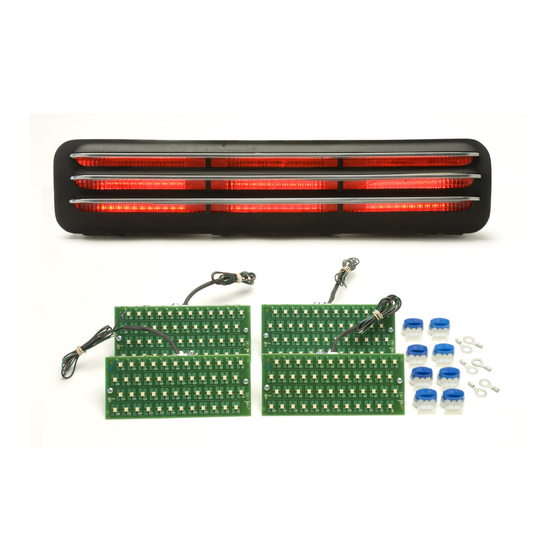
Kit Includes:
Installation:
1. Remove the original bulb connectors from the bottom side of the housing.
2. Remove the plastic housing from the vehicle.
3. Remove the tail light lens by gently prying the housing away from the lens tabs.
4. Now is a good time to clean the lens and housing. If lenses are in bad shape a new set is
recommended.
5. Remove the round mounting plate from the bottom of the LED assembly. It is attached with
two lock nuts. Make sure the wire harness is through the center large hole.
INSTALLATION INSTRUCTIONS
LAT-NR112
LED Tail Lights for 1966 GTO
MAN#650245
Advertisement
Table of Contents

Related Manuals for Dakota Digital Led Tail Lights LAT-NR112


Summary of Contents for Dakota Digital Led Tail Lights LAT-NR112
- Page 1 MAN#650245 Kit Includes: Installation: 1. Remove the original bulb connectors from the bottom side of the housing. 2. Remove the plastic housing from the vehicle. 3. Remove the tail light lens by gently prying the housing away from the lens tabs. 4.
- Page 2 6. Insert each new LED assembly through the hole where the original bulb and connector were located. Use caution when feeding the wires through the socket opening to avoid damaging the wire insulation. 7. Feed the wires through the large hole in the back plate and attach the back plate onto the back side of the housing.
-
Page 3: Service And Repair
This Warranty is in lieu of all other expressed warranties or liabilities. Any implied warranties, including any implied warranty of merchantability, shall be limited to the duration of this written warranty. No person or representative is authorized to assume, for Dakota Digital, any liability other than expressed herein in connection with the sale of this product.
Need help?
Do you have a question about the Led Tail Lights LAT-NR112 and is the answer not in the manual?
Questions and answers