Advertisement
MAN#650159c
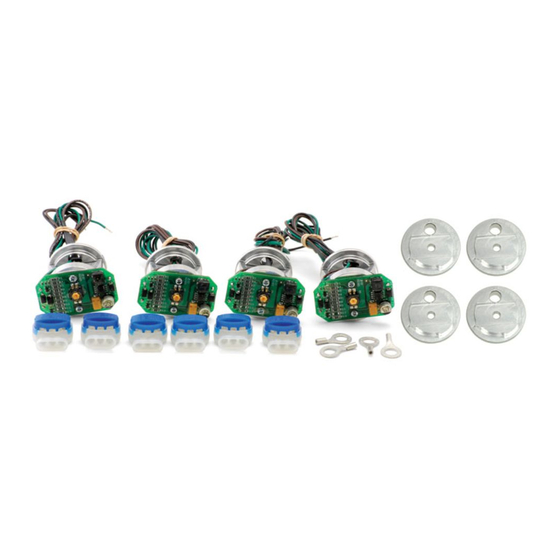
Kit Includes:
Installation:
1. Remove the original bulb connector from the back side of the housing.
2. Remove the light bulb.
3. Remove the tail light lens.
• On the 60-65 Impala, the screws are directly in the lens.
• On the 67 Impala, the nuts securing the tail light assembly must be removed first from
inside the trunk. Once the assembly is removed, the screws on the back of the housing
can be taken out.
• On the 75-76 Caprice, the nuts securing the tail light assembly must be removed first from
inside the trunk. Once the assembly is removed, the screws on the top and bottom sides of
the housing are removed and the metal trim taken off. Last the screws holding the lens are
removed so the lens can come off.
• On the 71-73 Mustang, the lens is snapped into place with tabs around the outside edge.
Carefully pry the lens off using a flat blade screwdriver.
INSTALLATION INSTRUCTIONS
LAT-NR161
LED Tail Lights for '60-'65 Impala/Bel Air/Biscayne, '67 Impala,
'75-'76 Caprice, and '71-'73 Mustang
MAN#650159c
Advertisement
Table of Contents

Related Manuals for Dakota Digital LED Tail Lights LAT-NR161


Summary of Contents for Dakota Digital LED Tail Lights LAT-NR161
- Page 1 MAN#650159c Kit Includes: Installation: 1. Remove the original bulb connector from the back side of the housing. 2. Remove the light bulb. 3. Remove the tail light lens. • On the 60-65 Impala, the screws are directly in the lens. •...
- Page 2 • 4. Now is a good time to clean the lens and housing. If lenses are in bad shape a new set is recommended. 5. Remove the screw and aluminum back plate from the new LED assembly. LED assembly (attached to the assembly) 6.
- Page 3 8. Secure the back plate with the supplied #6 screw and lock washer. 9. Place the original lens gasket into place and replace the tail light lens. Tighten the screws down carefully. Cut off the existing light socket as it will not be used. Do not strip the wires. Trim the wires from LED assembly to appropriate length once mounted, making sure wires are routed cleanly and securely.
-
Page 4: Service And Repair
This Warranty is in lieu of all other expressed warranties or liabilities. Any implied warranties, including any implied warranty of merchantability, shall be limited to the duration of this written warranty. No person or representative is authorized to assume, for Dakota Digital, any liability other than expressed herein in connection with the sale of this product.
Need help?
Do you have a question about the LED Tail Lights LAT-NR161 and is the answer not in the manual?
Questions and answers