Advertisement
Table of Contents
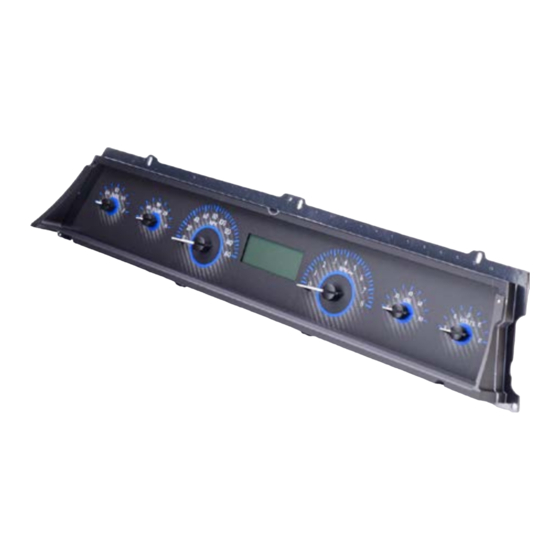
Your new VHX-66C-CVL kit includes:
Universal Sender
Pack
Switch Assembly
Installation
1. First, remove the stock gauge cluster from the dash. There are four mounting tabs on both the top and
on the bottom of the bezel that secure the assembly to the dash. Next, remove and retain the seven
screws holding the metal gauge housing to the bezel; locations are shown with arrows below.
These screws will be used to secure the new instrument panel.
VHX-66C-CVL
Dakota Digital VHX Instrument Installation
For 1966-'67 Chevelle, Malibu and El Camino
VHX Display
Installation Manuals
CAT5 Cable
Control Box
Manual # 650382A
Advertisement
Table of Contents

Related Manuals for Dakota Digital VHX-66C-CVL


Summary of Contents for Dakota Digital VHX-66C-CVL
- Page 1 VHX-66C-CVL Dakota Digital VHX Instrument Installation For 1966-‘67 Chevelle, Malibu and El Camino Your new VHX-66C-CVL kit includes: VHX Display Universal Sender Pack Installation Manuals Switch Assembly Control Box CAT5 Cable Installation 1. First, remove the stock gauge cluster from the dash. There are four mounting tabs on both the top and on the bottom of the bezel that secure the assembly to the dash.
- Page 2 2. Remove the protective tape from the clear lens and install the VHX system into the bezel. Watch carefully as you insert the system so you don’t scratch or damage the lens. The VHX system should align tightly, and the lens should sit flush with the bezel. Some reproduction bezels may require modification on the top side for the holes to line up properly.
- Page 3 4. Connect the CAT5 cable to the system. As the assembled cluster is installed into the dash, take care when routing this cable to the control box. 5. Re-install the cluster into the car and refer to the main manual for wiring instructions to complete the VHX installation.
Need help?
Do you have a question about the VHX-66C-CVL and is the answer not in the manual?
Questions and answers