Dacor Epicure ER30D Use And Care Manual
Dacor range use and care manual
Hide thumbs
Also See for Epicure ER30D:
- Technical manual (49 pages) ,
- Use and care manual (36 pages) ,
- Installation instructions manual (24 pages)
Table of Contents
Advertisement
Use and Care Manual
Epicure
Range
®
For Use With Models ER30D, ER30DSR, ER30D-C
T a b l e o f C o n t e n t s
Important Safety Instructions ............................................. 1-4
Getting To Know Your Range ............................................ 4-6
Setting Up Your Range ..................................................... 7-9
Operating the Cooktop ................................................ 10-11
Operating the Oven .................................................... 12-21
Cooking Tips ................................................................... 22
Cleaning and Maintenance .......................................... 23-28
Replacement Parts and Accessories ................................... 29
Before You Call for Service ........................................... 30-31
Warranty and Service ...................................................... 32
Warranty Card .................................................... Back Cover
Part No. 102188 Rev. C
Advertisement
Table of Contents

Subscribe to Our Youtube Channel
Related Manuals for Dacor Epicure ER30D


Summary of Contents for Dacor Epicure ER30D
-
Page 1: Table Of Contents
Use and Care Manual Epicure Range ® For Use With Models ER30D, ER30DSR, ER30D-C T a b l e o f C o n t e n t s Important Safety Instructions ... 1-4 Getting To Know Your Range ... 4-6 Setting Up Your Range ... -
Page 3: Model Identification
Serial Number ________________________________________ Date of Purchase______________________________________ For warranty and service information, see page 32. At Dacor, we continuously improve the quality and performance of all our products. We may need to make changes to this appliance without updating these instructions. - Page 4 IMPORTANT: Child entrapment and suffocation are not problems of the past. Junked or abandoned appliances are still dangerous – even if they sit out for “just a few days.” If you are getting rid of your old range, please follow the instructions below to help prevent accidents.
- Page 5 Do not allow pot holders to touch hot surfaces or gas burners. Do not wear loose or hanging apparel while using the range. Do not allow clothing to come into contact with the interior of the oven or the cooktop and surrounding areas during and immediately after use.
-
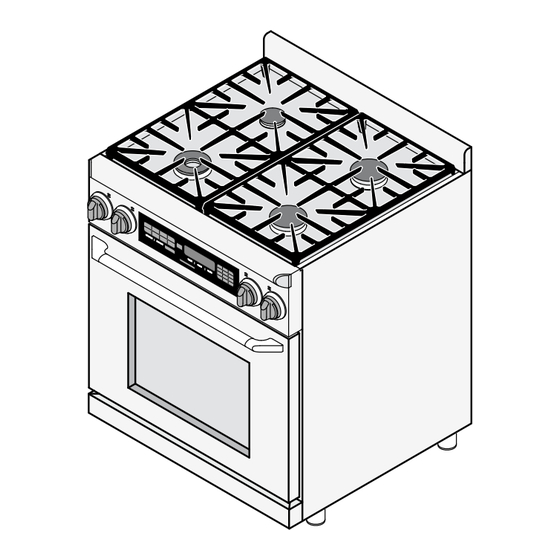
Page 6: Getting To Know Your Range
Do not allow acids (citrus juices, tomato sauces, etc.) to remain on the range’s surfaces. The porcelain finish may stain. Never use the cooktop surface as a cutting board. Do not try to remove heavy spills with a sharp object such as a knife or metal spatula. Sharp objects may scratch the range’s surfaces. - Page 7 Getting to Know Your Range Self-Clean Latch Meat Probe Connector Oven Light Rack Supports Bake Element Cooking Mode Keypad Keys CLOCK: Use this key to set the clock. TIMER: Use the TIMER 1 and TIMER 2 keys to time an event.
-
Page 8: Getting To Know Your Range
Smart-Flame extends grate life and protects the finish. SimmerSear™: The crown burner is equipped with Dacor’s exclusive precision burner control system. It allows you to cook with a wide range of heat settings, from simmer to sear. -
Page 9: Cooktop Assembly
WARNING To avoid the chance of fire, explosion or carbon monoxide poisoning, do not attempt to use your range without the burners completely and properly assembled. The burner rings spread the flame evenly around the burner cap. The burner rings must be properly seated for proper burner lighting and operation. -
Page 10: Installing The Burner Knobs
Gently set the grates on top of the spill tray. Put the legs of each grate into the corresponding dimples. Installing the Burner Knobs There are two different types of knobs for the range. The knobs for the right burners have the words “MAX GRIDDLE” on them. •... -
Page 11: Control Panel Settings
Clock Key Clock Key 24/12 Hour Clock (Military Time) The range is set to 12-hour (non-military) time at the factory. 24- hour time is also known as military time. 1:36 PM = 13:36 military time. If you want to switch the clock to 24 hour time or switch from military back to regular time: Press and hold the clock key for six seconds. -
Page 12: Selecting The Cookware
The flame should burn evenly around the perimeter of the burner, except underneath each grate support finger, where the flame height is reduced by Dacor ’s Smart Flame feature. A normal flame is steady and blue in color. Foreign material in the gas line, especially in new construction, may cause an orange flame during initial operation. -
Page 13: Using The Griddle
Operating the Cooktop Cooktop Tips: • Dacor’s SimmerSear feature allows you precision control of the flame. The larger the burner size, the wider the range of control. See page 6 for the heat ranges of the different burners. • Food cooks just as quickly at a gentle boil as it does at a vigorous, rolling boil. -
Page 14: Operating The Oven
To Insert Your GlideRack Oven Rack: Your oven comes with a Dacor GlideRack oven rack. You can pull the GlideRack oven rack out further than the standard racks and still support heavy pots and pans full of food. It is great for heavier foods and the optional Dacor baking stone. -
Page 15: Starting Your Oven
To turn the oven off, press the CANCEL/ SECURE key NOTE: After you turn off the oven, the cooling fans may continue to run until the range’s internal parts have cooled down. Changing the Temperature (after you press START) Press the key for the current cooking mode. The current cooking mode appears on the display (for example BAKE). -
Page 16: Lock-Out Feature
This feature does not apply to the cooktop. The range ships from the factory with the 12 hour timer enabled. To disable or enable the 12 hour timer feature: 350°F •... - Page 17 Understanding the Various Oven Modes The three basic styles of cooking in an oven are: BAKING - The gentle cooking of dry goods such as cookies, cakes, soufflés, etc. ROASTING - The cooking of meats or vegetables over a period of time. ...
-
Page 18: Convection Bake
After achieving acceptable results, follow the convection guidelines in the Dacor Cooking Guide. If the food is not cooked to your satisfaction during this first convection trial, adjust one recipe variable at a time (such as cooking time, rack position, or temperature) and repeat the convection test. -
Page 19: Convection Broil
Timers WARNING The timers on your range do not turn the oven on or off. They are only for timing purposes. When you want to turn the oven off automatically, use the Delay Timed Cooking Features (see page 18). -
Page 20: Hold Mode
Delay Timed Cooking Features If you want to set the oven to automatically turn itself on or off at a later time, you can use the delay timed features. Things to Know About Delay Timed Cooking: • The delay timed options work for all of the various cook modes, except broil and convection broil. -
Page 21: Using The Meat Probe
• Use of meat probes other than the one provided with your range may result in damage to the meat probe and/or the oven. To use the meat probe: Prepare the meat for cooking prior to setting the oven. Insert the meat probe skewer into the center of the meat. -
Page 22: Dehydrating Tips
When dehydrating, you may need to experiment with higher temperatures. Press START. FOOD TYPE FOOD TYPE Vegetables Vegetables Dacor recommends that you use one of the timers to time the process. Dehydrating Tips 160°F Equipment Recommended: 165°F •... -
Page 23: Operating The Oven
Operating the Oven Proofing You can use your range to proof yeasted doughs at a low and draft-free temperature using the bake mode. Press the BAKE key. Enter the temperature of 100°F on the keypad. -
Page 24: Cooking Tips
• When you are cooking a food item that is very heavy, use the Dacor GlideRack oven rack. You can pull it out further than a conventional rack, making it easier to check the food, stir, or add ingredients. -
Page 25: Cleaning And Maintenance
To prevent damage, do not use abrasive or corrosive cleaners or applicators such as steel wool or scouring pads, on any part of the range unless instructed to do so. Use only a sponge, soft cloth, fibrous or plastic brush, or nylon cleaning pad for cleaning the surfaces of your range. -
Page 26: Cleaning The Cooktop
The oven will still be hot. General Cleaning CAUTION Use only a sponge, soft cloth, fibrous or plastic brush, or nylon pad for cleaning the surfaces of your range. Avoid the use of abrasive cleaners such as steel wool. Knobs and Trim Rings CAUTION •... - Page 27 If erratic clicking is still present, make sure the igniter is completely dry. If the unit still exhibits problems after drying, call your local Dacor Authorized Service Agent. Burner...
-
Page 28: Stainless Steel Surfaces
Clean stainless steel surfaces with a mild solution of detergent and warm water. Rinse and dry with a soft, lint-free cloth. You may also use Dacor Stainless Steel Cleaner on the stainless steel surfaces. Use it according to the directions on the package. - Page 29 Cleaning and Maintenance Door Gasket (Seal) WARNING WARNING Take extreme caution when cleaning the door gasket. Rubbing Take extreme caution when cleaning the door gasket. Rubbing or displacing it may damage the tight door seal required for or displacing it may damage the tight door seal required for proper cooking and self-cleaning.
-
Page 30: Replacing The Light Bulbs
Pull the lens cover straight out. Using a glove, insert the new bulb into the socket. Replace the light bulbs only with Dacor Part No. 100429, available from any authorized Dacor parts dealer. IMPORTANT: Do not touch the replacement halogen light bulbs with your fingers. -
Page 31: Replacement Parts And Accessories
Toe Skirt Thread Ring Removal Tool (for crown burners) * The Dacor full sized cookie sheets maximize oven rack baking capabilities by utilizing the total usable rack space. To order parts and accessories, contact your Dacor dealer or visit www.everythingdacor.com. -
Page 32: Before You Call For Service
Oven door will not open. Oven is set to self-clean. MAY BE CAUSED BY Have electrician connect range to properly wired electrical connection. Turn power on at junction box. Check for tripped circuit breaker or blown fuse. -
Page 33: Before You Call For Service
Make sure burner is assembled according to the Setting Up Your Range section. Have qualified service technician check to make sure that the range is set up for the type of gas and the correct altitude. Have qualified service technician check the gas regulator. -
Page 34: Product Maintenance
Problem Solution Guide and the problem has not yet been remedied, please visit our web site or contact our Customer Service Team for a listing of Dacor authorized service agents. Prior to requesting service, it is helpful to be familiar with the warranty terms and conditions on this page. - Page 35 IN THE UNITED STATES BUSINESS REPLY MAIL FIRST-CLASS MAIL PERMIT NO. 4507 DIAMOND BAR CA POSTAGE WILL BE PAID BY ADDRESSEE DACOR INC. ATTN: WARRANTY PROCESSING DEPT 1440 BRIDGE GATE DR STE 200 PO BOX 6532 DIAMOND BAR CA 91765-9861...
-
Page 36: Warranty Information
Please rest assured that under no conditions will Dacor sell your name or any of the information on this form for mailing list purposes. We are very grateful that you have chosen Dacor products for your home and do not consider the sale of such information to be a proper way of expressing our gratitude! Owner’s Name:...
Need help?
Do you have a question about the Epicure ER30D and is the answer not in the manual?
Questions and answers