Advertisement
Quick Links
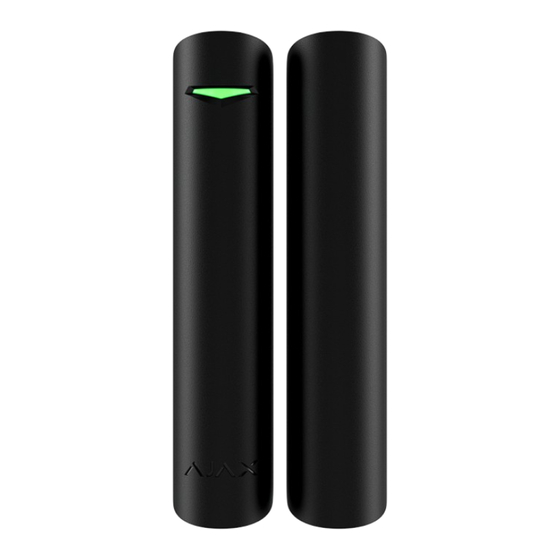
Bedienungsanleitung für DoorProtect S
DoorProtect S Jeweler ist ein kabelloser Tür- und Fensteröffnungsmelder für
den Innenbereich. Mit einer vorinstallierten Batterie kann es bis zu 7 Jahre
betrieben werden. DoorProtect S verfügt über eine Buchse zum Anschluss eines
externen Melders.
Das Funktionselement von DoorProtect S ist ein Reed-Relais mit versiegeltem Kontakt.
Es besteht aus ferromagnetischen Kontakten in einer Glühbirne, die unter der Wirkung
eines Dauermagneten einen kontinuierlichen Stromkreis bilden.
DoorProtect S kommuniziert über das sichere Funkprotokoll
Hub, um Alarme und Ereignisse zu übertragen.
ohne Hindernisse beträgt bis zu 1.200 Meter.
Diese Produktlinie wird für Projekte entwickelt. Nur akkreditierte Ajax Systems-Partner
können Superior-Produkte installieren und verwalten.
Jeweler
Aktualisiert30. Juni 2023
Die Kommunikationsreichweite
Jeweler mit einem
Advertisement

Related Manuals for AJAX DoorProtect S Jeweler


Summary of Contents for AJAX DoorProtect S Jeweler
- Page 1 Bedienungsanleitung für DoorProtect S Jeweler Aktualisiert30. Juni 2023 DoorProtect S Jeweler ist ein kabelloser Tür- und Fensteröffnungsmelder für den Innenbereich. Mit einer vorinstallierten Batterie kann es bis zu 7 Jahre betrieben werden. DoorProtect S verfügt über eine Buchse zum Anschluss eines externen Melders.
- Page 2 Melder von der Ober äche zu lösen, eine Sabotage auszulösen. Brechen Sie es nicht ab. 7. Steckverbinder zum Anschluss eines kabelgebundenen Detektors eines Drittanbieters mit Öffnerkontakt (NC). 8. QR-Code mit der Geräte-ID. Es wird verwendet, um den Detektor zum Ajax- System hinzuzufügen. 9. Geräteschalter. Manipulationsknopf .
- Page 3 11. Halteschraube. Kompatible Hubs und Range Extender Für den Betrieb des Detektors ist ein Ajax-Hub mit der Firmware OS Malevich 2.16 und höher erforderlich. Hubs Funksignal-Reichweitenverlängerer Hub Plus Hub 2 (2G) ReX 2 Hub 2 (4G) Hub 2 Plus Hub-Hybrid (2G)
- Page 4 6. One-time deactivation / activation of the detector. When an alarm is received, the security company monitoring station operator knows what happened and precisely where to send a fast response team. The addressability of Ajax devices allows sending events to the PRO Desktop or the...
-
Page 5: Adding To The System
The hub and the device operating at different radio frequencies are incompatible. The radio-frequency range of the device may vary by region. We recommend purchasing and using Ajax devices in the same region. You can check the range of operating radio frequencies with the... - Page 6 DoorProtect S works with one hub. When connected to a new hub, the detector stops sending events to the old one. When added to a new hub, the detector is not removed from the device list of the old hub. This must be done through the Ajax app. Malfunctions When a malfunction is detected, the Ajax app displays a malfunction counter on the device icon.
- Page 7 No connection with the hub or radio signal range extender via Jeweller. The device battery is low. Icons The icons display some detector states. To access them: 1. Sign in to the Ajax app 2. Select the hub. 3. Go to the Devices tab. Icon Meaning Jeweller signal strength.
- Page 8 Learn more States The states include information about the device and its operating parameters. The states of DoorProtect S can be found in the Ajax app: 1. Go to the Devices tab. 2. Select DoorProtect S from the list.
- Page 9 Battery level of the device. Displayed as a percentage. Battery Charge How battery charge is displayed in Ajax apps The status of the detector tamper that responds to detachment or opening of the device enclosure: Open — the detector was removed from the SmartBracket, or its integrity was compromised.
- Page 10 Closed — the detector is installed on the SmartBracket mounting panel. The integrity of the device enclosure and the mounting panel is not compromised. Normal state. Learn more Status of the detector’s opening sensor: Disabled — primary contact is disconnected. Primary Detector Open —...
- Page 11 (speci ed in the hub settings for Devices Auto Deactivation). The feature is con gured in the Ajax PRO app. Learn more Shows the status of the device one-time deactivation setting: No —...
- Page 12 Firmware Detector rmware version. Detector ID. Also available on the QR code on Device ID the detector enclosure and its package box. Device № Number of the device loop (zone). Settings To change the detector settings in the Ajax apps:...
- Page 13 1. Go to the Devices tab. 2. Select DoorProtect S from the list. 3. Go to Settings by clicking on the gear icon 4. Set the required parameters. 5. Click Back to save the new settings. Meaning Value Name of the detector. Displayed in the list of hub devices, text of SMS and noti cations in the events feed.
- Page 14 activated during an external detector alarm. Opens the settings of Chime. How to set up Chime Chime Settings What is Chime Alarm Reaction Specify how this device will react to alarms: Instant Alarm — the armed detector immediately reacts to a threat and raises the alarm.
- Page 15 Learn more Switches the detector to the signal attenuation test mode. Signal Attenuation Test Learn more Opens DoorProtect S user manual in the Ajax User Guide app. Permanent Deactivation Allows the user to disable the device without removing it from the system.
- Page 16 The system can also automatically deactivate devices when the preset number of alarms is exceeded or when the recovery timer expires. Learn more Allows the user to disable events of the device until the rst disarm. Three options are available: No —...
-
Page 17: Functionality Testing
Functionality testing The Ajax system offers several tests to help select the device installation place. Tests do not start immediately. However, the waiting time does not exceed the duration of one “hub—device” polling interval. The polling interval can be checked and con gured at hub settings (Hub →... -
Page 18: Detector Placement
1. Jeweller Signal Strength Test 2. Detection Zone Test 3. Signal Attenuation Test 6. Run the test. Detector placement The device is designed for indoor use only. When choosing where to place DoorProtect S, consider the parameters that affect its operation: Detection zone. -
Page 19: Signal Strength
The magnet can be attached to the right or to the left side of the detector. DoorProtect S works with one magnet on one side only. If magnets are attached on both sides, the detector cannot detect the opening correctly. Signal strength The Jeweller signal strength is determined by the number of undelivered or corrupted data packages over a certain period of time. -
Page 20: Installation
3. Place the detector on SmartBracket. The device LED indicator will ash. It is a signal indicating that the tamper on the detector is closed. If the LED indicator doesn’t light up during placing the detector on SmartBracket, check the tamper status in the Ajax app, the integrity of the fastening, and the... - Page 21 tightness of the detector xation on the panel. 4. Fix the magnet on the surface with double-sided tape. 5. Run the Jeweller signal strength test . The recommended signal strength is two or three bars. If the signal strength is low (a single bar), we do not guarantee stable operation of the device.
-
Page 22: Maintenance
If using screwdrivers, set the speed to the minimum so as not to damage the SmartBracket mounting panel during installation. When using other fasteners, ensure they do not damage or deform the panel. To make mounting the detector or magnet easier, you can pre-drill the screw holes while the mount is still secured with double- sided tape. -
Page 23: Technical Speci Cations
Warranty for the Limited Liability Company “Ajax Systems Manufacturing” products is valid for 2 years after the purchase. If the device does not function correctly, please contact the Ajax Technical Support rst. In most cases, technical di culties can be resolved remotely. - Page 24 Telegram Manufactured by “AS Manufacturing” LLC Subscribe to the newsletter about safe life. No spam Email Subscribe...
Need help?
Do you have a question about the DoorProtect S Jeweler and is the answer not in the manual?
Questions and answers