Subscribe to Our Youtube Channel
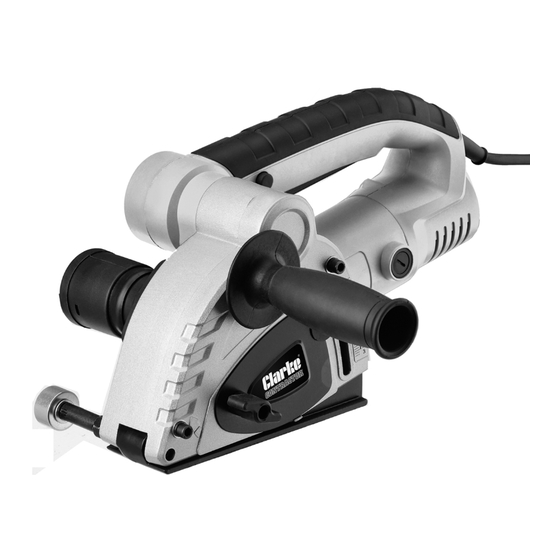
Summary of Contents for Clarke CONTRACTOR CON1500WC
- Page 1 WALL CHASER Model No: CON1500WC Part No: 6462167 OPERATION & MAINTENANCE INSTRUCTIONS ORIGINAL INSTRUCTIONS GC01/24...
-
Page 2: Specification
INTRODUCTION Thank you for purchasing this CLARKE Wall Chaser. Before attempting to use this product, please read this manual thoroughly and follow the instructions carefully. In doing so you will ensure the safety of yourself and that of others around you, and you can look forward to your purchase giving you long and satisfactory service. -
Page 3: General Power Tool Safety Warnings
GENERAL POWER TOOL SAFETY WARNINGS WARNING: READ ALL SAFETY WARNINGS AND ALL INSTRUCTIONS. FAILURE TO FOLLOW THE WARNINGS AND INSTRUCTIONS MAY RESULT IN ELECTRIC SHOCK, FIRE AND/OR SERIOUS INJURY. 1. Keep the work area tidy. • Clutter in the work area can lead to accidents. 2. -
Page 4: Additional Safety Rules For Wall Chasers
POWER TOOL USE AND CARE 1. DO NOT force the power tool. Use the correct power tool for your application. The correct power tool will do the job better and safer at the rate for which it was designed. 2. DO NOT use the power tool if the switch does not turn it on and off. Any power tool that cannot be controlled with the switch is dangerous and must be repaired. -
Page 5: Kickback And Related Warnings
4. Cutting discs must be used only for recommended applications. Side forces applied to these discs may cause them to shatter. 5. DO NOT use damaged cutting discs. Before each use, inspect the discs for chips and cracks. If the wall chaser or wheel is dropped, inspect for damage or install an undamaged disc. -
Page 6: Environmental Recycling Policy
5. When wheel is binding or when interrupting a cut for any reason, switch off the power tool and hold the power tool motionless until the wheel comes to a complete stop. NEVER attempt to remove the cut-off wheel from the cut while the wheel is in motion, otherwise kickback may occur. -
Page 7: Electrical Connections
ELECTRICAL CONNECTIONS WARNING! READ THESE ELECTRICAL SAFETY INSTRUCTIONS FULLY BEFORE CONNECTING THE MACHINE TO THE MAINS SUPPLY. This machine is provided with a standard 13 amp, 230 volt (50Hz), BS 1363 plug, for connection to a standard, domestic electrical supply. Should the plug need changing, make sure that a plug of identical specification is used. -
Page 8: Before Use
BEFORE USE INVENTORY Unpack your wall chaser and make sure that the following items are present. Should items be damaged or missing contact your CLARKE dealer immediately. Note that the spacing discs should be fitted to the machine. 1. Wall Chaser 2. - Page 9 4. Tighten with the pin spanner while locking the spindle with the spindle lock button. 5. Re-position and secure the cover plate. Replacement cutting discs are available as part number 6461036 from your Clarke dealer. Parts & Service: 020 8988 7400 / E-mail: Parts@clarkeinternational.com or Service@clarkeinternational.com...
-
Page 10: Fitting The Handle
SETTING THE CUTTING WIDTH The cutting width is determined by the number of spacer discs you put in between the discs. • The cutting width is equal to: The thickness of the 2 blades (2 x 2.5 mm) + the thickness of the spacers. -
Page 11: Operation
OPERATION ADJUSTING THE CUTTING DEPTH 1. Loosen the depth adjustment knobs. 2. Raise/lower the baseplate. 3. Use a ruler as shown to measure the depth of the blade. 4. Tighten the adjustment knob. 5. The depth of cut should be set 3mm deeper than the required slot depth. -
Page 12: Care And Maintenance
CARE AND MAINTENANCE AFTER USE 1. Clean away any accumulated dust. 2. Check the condition of the cutting disc for signs of cracking, and discard immediately if apparent. 3. Keep the cooling vents clear. 4. Clean the housing with a soft cloth. Any worn or damaged parts should be replaced by qualified personnel. -
Page 13: Declarations Of Conformity
DECLARATIONS OF CONFORMITY Parts & Service: 020 8988 7400 / E-mail: Parts@clarkeinternational.com or Service@clarkeinternational.com... -
Page 14: Component Parts
COMPONENT PARTS Parts & Service: 020 8988 7400 / E-mail: Parts@clarkeinternational.com or Service@clarkeinternational.com... -
Page 15: Component Parts List
COMPONENT PARTS LIST DESCRIPTION DESCRIPTION DESCRIPTION Scale plate 31 Washer Brush holder Active cover 32 Dust seal washer Carbon brush Flat washer 33 Dust tube Brand label Adjusting knob 34 Dust cover Air duct Cover 35 Screw M4 x 16 Screw Brand label 36 Front cover...


Need help?
Do you have a question about the CONTRACTOR CON1500WC and is the answer not in the manual?
Questions and answers