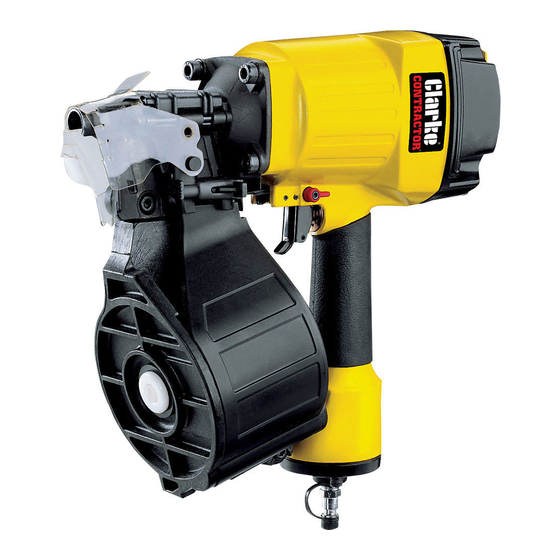
Summary of Contents for Clarke Contractor CON15
- Page 1 15 DEGREE COIL NAILER Model CON15 Part No: 3110295 OPERATING & MAINTENANCE INSTRUCTIONS GC0309...
-
Page 2: Environmental Protection
GUARANTEE This CLARKE product is guaranteed against faulty manufacture for a period of 12 months from the date of purchase. Please keep your receipt as proof of purchase. -
Page 3: Technical Specification
OVERVIEW The CON15 Coil Nailer is suitable for use on softwood, hardwood, plywood, hardboard, fibreboard or MDF, and will penetrate flexible plastics, leather, fabrics, PVC & rubber sheet materials. It is not suitable for piercing hard laminates, brittle plastics or metals (other than light foil). - Page 4 Nail Magazine Drive Pawl Protective Screen Safety Yoke (muzzle) Mode Switch (single/full contact sequential actuation) Trigger Pressure Adjuster Compressed Air Hose Connector Exhaust Deflector...
-
Page 5: General Safety Precautions
6. NEVER attempt any repairs yourself. If you have a problem with the machine contact your local Clarke dealer. 7. ALWAYS store power tools out of reach of children. 8. ALWAYS dress properly. Never wear loose clothing or jewellery which could be caught on moving parts. - Page 6 7. ALWAYS Store the tool out of reach of children. 8. NEVER allow persons unfamiliar with these instructions to operate this tool. SERVICING 1. ALWAYS have power tools serviced by your Clarke dealer, using only identical replacement parts. This will ensure the safety of the power tool is maintained.
-
Page 7: The Compressed Air Supply
THE COMPRESSED AIR SUPPLY WARNING: COMPRESSED AIR CAN BE DANGEROUS. ENSURE THAT YOU ARE THOROUGHLY FAMILIAR WITH SAFETY PROCEDURES RELATING TO THE USE OF COMPRESSORS AND COMPRESSED AIR SUPPLIES. A filtered, lubricated and regulated air supply will be required as shown in the layout below. - Page 8 LOADING THE COIL NAILER WARNING: ENSURE THE COMPRESSED AIR SUPPLY IS DISCONNECTED BEFORE ATTEMPTING TO LOAD THE COIL NAILER. DO NOT HOLD THE TRIGGER WHILE LOADING THE NAILER. The machine is loaded with nails as follows: 1. Press the latch (1) open and pull the magazine cover (2) back.
-
Page 9: Operation
OFF, connect the air line to the ¼” BSP connector. (A Whip Hose with quick-fit coupling is available from your Clarke dealer). 2. Turn ON the air supply. • Check for air leaks. If any are apparent, rectify before proceeding. -
Page 10: Clearing A Jam
4. Before starting work, test the nailer on a piece of scrap wood to check that the driving depth is correct. If the nails are being driven too far or not deep enough into the timber, adjust the air pressure adjuster located on the side of the nose section accordingly. -
Page 11: Maintenance
1. Check and clean, if necessary, the air inlet gauze filter located inside the air hose connection point. 2. A bottle of Clarke airline oil is supplied with the Coil Nailer. Unscrew the cap & withdraw the nozzle which is reversed within the neck of the bottle. -
Page 12: Accessories And Consumables
1800466 2.9 x 70mm Nails (250pcs) Clarke airline oil (1 litre) is available from your Clarke dealer; Part No 3050825 IMPORTANT: The use of parts other than genuine Clarke replacement parts may result in safety hazards, decreased tool performance and will invalidate... -
Page 13: Troubleshooting
. s r . s r t r i In the event that any of the above situations occurs, requiring the dismantling and overhaul of the tool, contact your Clarke International Service Department on 020-8988-7400. -
Page 14: Parts List
PARTS LIST t l o e l f n i l t l o t l o n i l t l o c t i l l o d i l n i l t l o t l o n i l... - Page 15 PARTS LIST t l o t l o l i v t l o l i a t l o t l o t l o l i a i t c t l o t e l...
-
Page 16: Parts Diagram
PARTS DIAGRAM... -
Page 17: Vibration Emissions
‘K’, which represents the uncertainty factor, i.e. a value in excess of ‘a’, to which the tool could vibrate under normal conditions. These values appear in the specification panel below. MODEL No: CON15 DESCRIPTION: COIL NAILER Declared vibration emission value in accordance with EN12096 Measured vibration emission value - a: 3.3m/s... - Page 18 You will note that a third value is given in the specification - the highest measured reading in a single plane. This is the maximum level of vibration measured during testing in one of the axes, and this should also be taken into account when making a risk assessment.
-
Page 19: Declaration Of Conformity
DECLARATION OF CONFORMITY...


Need help?
Do you have a question about the Contractor CON15 and is the answer not in the manual?
Questions and answers