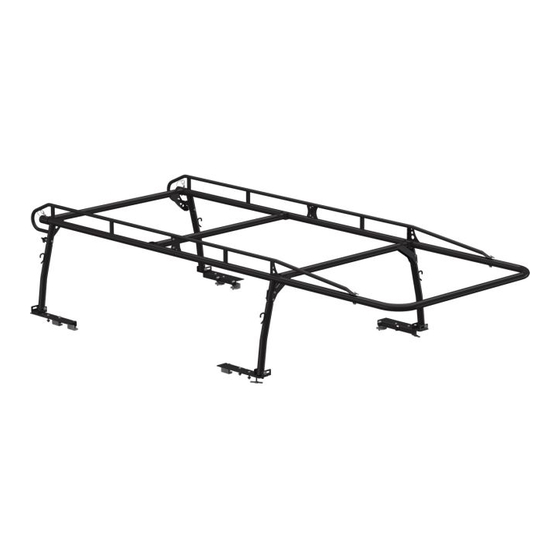
Summary of Contents for Holman Pro II
- Page 1 Installation Guide Pro II Truck Rack Holman Rancho Cordova, CA 95742 800-343-7486 InstallationSupport@Holman.com 20220222R5 DATE: __________________...
- Page 2 Installation Instructions – PRO II * PLEASE READ ALL INSTRUCTIONS AND WARNINGS PRIOR TO ASSEMBLING, INSTALLING, AND USING THIS PRODUCT. * Warning Always check for wires, fuel tanks and lines, brake lines and other important vehicle functionality items prior to drilling and installing all products.
-
Page 3: Table Of Contents
Installation Instructions – PRO II Table of Contents Tools Needed ..............................2 Parts List ................................3 Assembly Hardware Kit ............................. 4 Mounting Hardware Kit ............................ 6 Rear Stake Pocket Mounting Kit ........................7 Center Crossbar Shim............................7 Sealant Application ............................9 Step 1 –... -
Page 4: Parts List
Installation Instructions – PRO II Parts List For Technical Support Call: 800-343-7486, Monday-Friday, 7AM - 4 PM (PST) Page 3... -
Page 5: Assembly Hardware Kit
Installation Instructions – PRO II Assembly Hardware Kit For Technical Support Call: 800-343-7486, Monday-Friday, 7AM - 4 PM (PST) Page 4... - Page 6 Installation Instructions – PRO II Assembly Hardware Kit (Cont.) NOT TO SCALE. NOT TO SCALE. For Technical Support Call: 800-343-7486, Monday-Friday, 7AM - 4 PM (PST) Page 5...
-
Page 7: Mounting Hardware Kit
Installation Instructions – PRO II Mounting Hardware Kit For Technical Support Call: 800-343-7486, Monday-Friday, 7AM - 4 PM (PST) Page 6... -
Page 8: Rear Stake Pocket Mounting Kit
Installation Instructions – PRO II Rear Stake Pocket Mounting Kit Center Crossbar Shim For Technical Support Call: 800-343-7486, Monday-Friday, 7AM - 4 PM (PST) Page 7... - Page 9 Installation Instructions – PRO II PRO II TRUCK RACK EXPLODED VIEW For Technical Support Call: 800-343-7486, Monday-Friday, 7AM - 4 PM (PST) Page 8...
-
Page 10: Sealant Application
Installation Instructions – PRO II Sealant Application Proper sealant application is critical to preventing water penetration inside the rack. Apply a healthy bead of sealant entirely around every swaged joint as shown. Improper sealing can lead to water penetration and rust on inside surfaces. -
Page 11: Step 2 - Attach Front Tube
Installation Instructions – PRO II Step 2 – Attach Front Tube Apply sealant to front side-channel swaged joint. Insert front side-channel swaged joint into front tube until bolt holes in tube and side-channel align. Loosely fasten front tube to side channel using 1/2” x 3”... -
Page 12: Step 5 - Attach Rear Legs
Installation Instructions – PRO II Be sure to apply sealant between each washer and leg cup as you assemble. Fasten and seal leg to leg cup using two 3/8” x 3” hex head bolts, four 3/8” washers and two 3/8” lock nuts. Tighten nut to bolt to 35 ft-lb. -
Page 13: Step 6 - Attach Rear Crossbar
Installation Instructions – PRO II Step 6 – Attach Rear Crossbar Apply sealant to around black cap fastening flanges. Using a mallet or dead blow hammer, tap black cap into rear crossbar tubing on the side opposite the gusset welded to the rear crossbar. - Page 14 Installation Instructions – PRO II Set the corresponding front foot, on the bed rail, near the front of the bed, so that the distance between the slotted channels corresponds with the length for the model number being assembled. The table below lists the lengths for all model numbers.
-
Page 15: Step 7B - Foot Installation Using Rail Clamps
Installation Instructions – PRO II Step 7B – Foot Installation Using Rail Clamps There are two types of rail clamp included in the mounting hardware. For newer Ford, Chevy, and GMC models, the full-size rail clamp should provide a best fit. When installing the feet, it is best to verify the clamp that best fits at each location chosen for installation. -
Page 16: Step 7C - Foot Installation Using Permanent Mounting Locations
Installation Instructions – PRO II Step 7C – Foot Installation Using Permanent Mounting Locations The following table describes the recommended permanent foot mounting locations. Verify the permanent mount location is accessible from inside the bed, below the bed rail. Different vehicles have different possible mounting locations. -
Page 17: Step 8 - Rack Installation
Installation Instructions – PRO II Step 8 – Rack Installation Lift rack and set legs into slotted channel. Insert 1/2” x 3-3/4” hex head bolt and 1/2” flat washer through slotted channel and leg. Loosely install 1/2” washer and 1/2”... - Page 18 Installation Instructions – PRO II For Technical Support Call: 800-343-7486, Monday-Friday, 7AM - 4 PM (PST) Page 17...


Need help?
Do you have a question about the Pro II and is the answer not in the manual?
Questions and answers