
Subscribe to Our Youtube Channel
Related Manuals for Holman 4826L


Summary of Contents for Holman 4826L
- Page 1 Assembly Guide 4826L 4832L Holman Rancho Cordova, CA 95742 800-343-7486 InstallationSupport@Holman.com 20230621R2 DATE: ________________...
-
Page 2: Table Of Contents
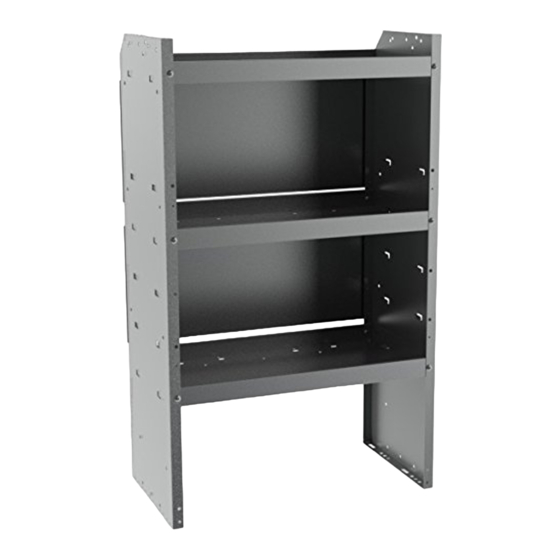
Read all instructions prior to assembling or installing any Holman product. These instructions cover both the 4826L Shelf Unit (26" W x 43" H x 14" D) and 4832L Shelf Unit (32" W x 43" H x 14" D). -
Page 3: Parts List
Instructions – 4826L-4832L Parts List Hardware For Technical Support Call: 800-343-7486, Monday-Friday, 7AM - 4 PM (PST) Page 2... -
Page 4: Step 1 - Determine Shelf Locations
Instructions – 4826L-4832L Step 1 – Determine Shelf Locations Shelves can be assembled with flanges pointing up to retain shelf contents, or flanges pointing down to allow the installation of drawer cabinets. Decide which option you want for each shelf before attaching it to the side panels. The beveled corner of each shelf side is in the back. -
Page 5: Step 2 - Attach Shelves To Side Panel
Instructions – 4826L-4832L Step 2 – Attach Shelves to Side Panel Place shelf side in orientation shown on floor or work bench. Press the shelf against the side shelf then push shelf firmly against the lances. Using two 1/4”x 3/8” pan head cap screws per shelf, attach the front and rear of the shelf to each side. -
Page 6: Step 3 - Attach Opposite Shelf Side
Instructions – 4826L-4832L Step 3 – Attach Opposite Shelf Side Place other shelf side onto shelf sides in orientation shown. Slide shelf until shelf tabs rests firmly against the lances on the shelf side. Using two 1/4”x 3/8” pan head cap screws per shelf, attach the front and rear of the shelf to each side. -
Page 7: Step 4 - Attach Back Panels
Instructions – 4826L-4832L Step 4 – Attach Back Panels Align and square shelf. At the backside of shelf assembly, place back panels as shown. Be sure to install back panel in the correct orientation, see next page. Using four 1/4”x 3/8” pan head cap screws per back panel, attach the back panels to the assembled shelves. - Page 8 Instructions – 4826L-4832L When installing the rear panels to the assembled shelves, be sure the lip flange is facing away from the shelf. If the rear panel is installed incorrectly, it may rattle. Be sure shelves are aligned and shelving unit is square.
Need help?
Do you have a question about the 4826L and is the answer not in the manual?
Questions and answers