
Related Manuals for Holman 40669TM


Summary of Contents for Holman 40669TM
- Page 1 Instruction Guide 40669TM Holman Rancho Cordova, CA 95742 800-343-7486 InstallationSupport@Holman.com 20231019R6 DATE: ________________...
-
Page 2: Table Of Contents
Step 10 – Install Wings to D-ring Holes ..................... 11 Before You Begin • Read all instructions prior to installing any Holman product. • Be sure to have a tall partition (40660, 40661, 40662, or 40665) assembled and ready to be installed. -
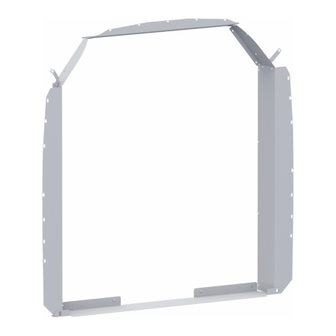
Page 3: Parts List
Instructions – 40669TM Parts List For Technical Support Call: 800-343-7486, Monday-Friday, 7AM - 4 PM (PST) Page 2... -
Page 4: Hardware
Instructions – 40669TM Hardware For Technical Support Call: 800-343-7486, Monday-Friday, 7AM - 4 PM (PST) Page 3... -
Page 5: Hardware (Continued)
Instructions – 40669TM Hardware (Continued) Step 1 – Attach Side Wings • Using four 5/16” x 5/8” flanged bolts and four 5/16” flanged lock nuts, bolt side wing to partition. • Snugly tighten. • Repeat this step on opposite side of the partition. -
Page 6: Step 2 - Attach Top Wing
Instructions – 40669TM Step 2 – Attach Top Wing • Using six 5/16” x 5/8” flanged bolts and six 5/16” flanged lock nuts, bolt top wing to partition. • TIGHTEN hardware. Step 3 – Attach Corner Panels • Using two 5/16” x 5/8” flanged bolts and two 5/16”... -
Page 7: Step 4 - Attach Corner Bracket
Instructions – 40669TM Step 4 – Attach Corner Bracket NOTE: The corner brackets are side specific. Verify the correct bracket position prior to installing. • Using a 5/16” x 5/8” flanged bolt and a 5/16” flanged lock nut, bolt each mid roof corner bracket into the holes closest to the partition on each corner of the partition as shown. -
Page 8: Step 6 - Remove Factory Installed D-Rings
Instructions – 40669TM Step 6 – Remove Factory Installed D-Rings • If D-rings are factory installed in the driver-side and passenger-side “B” pillars, remove D-rings. Step 7 – Install Driver’s Side Wing to “B” Pillar NOTE: On the driver side the wing kit can be installed using either U-nuts or the included plus nuts. -
Page 9: Plus Nuts
Instructions – 40669TM Plus Nuts • Press the assembled partition with wings firmly against the “B” pillar and the top wing across the roof support of the van. • Mark the holes shown. MARK NOTE: Ensure this is the location of where you want the partition to be installed. -
Page 10: Step 8 - Install Passenger Wing To "B" Pillar
Instructions – 40669TM • Using 1/4" x 1-1/4” hex heads, 1/4" lock washers, and 1/4" flat washers, bolt partition into plus nuts. • Snug tighten but allow for movement. Step 8 – Install Passenger Wing to “B” Pillar • Using M6 x 25mm hex heads, 1/4” lock washers, and 1/4" flat washers, bolt passenger side wing to the threaded embosses in the “B”... -
Page 11: Step 9 - Install Top Wing To "B" Pillar
Instructions – 40669TM Step 9 – Install Top Wing to “B” Pillar Always ensure, when installing hardware through any installation surface, the area behind the installation surface is clear of fuel tanks or lines, electrical wiring or vehicle safety features. -
Page 12: Step 10 - Install Wings To D-Ring Holes
Instructions – 40669TM Step 10 – Install Wings to D-ring Holes • If factory D-rings were factory installed and previously removed from “B” pillar, re-install D-rings through slots provided in both passenger-side and driver-side wings. • If factory D-rings were not provided by the vehicle manufacturer, install a 7/16” x 1-1/4” hex head bolt, 7/16”...
Need help?
Do you have a question about the 40669TM and is the answer not in the manual?
Questions and answers