
Subscribe to Our Youtube Channel
Related Manuals for Holman 40475TE


Summary of Contents for Holman 40475TE
- Page 1 Instruction Guide 40475TE - 40475TL - 40475TR Holman Rancho Cordova, CA 95742 800-343-7486 InstallationSupport@holman.com 20231018R2 DATE: ________________...
-
Page 2: Table Of Contents
• Always locate your installation locations prior to performing any work. • ENSURE SAFETY WHILE INSTALLING OR DRILLING INTO VEHICLE. • Any previously installed flooring must be removed prior to installing Holman flooring. For Technical Support Call: 800-343-7486, Monday-Friday, 7AM - 4 PM (PST) -
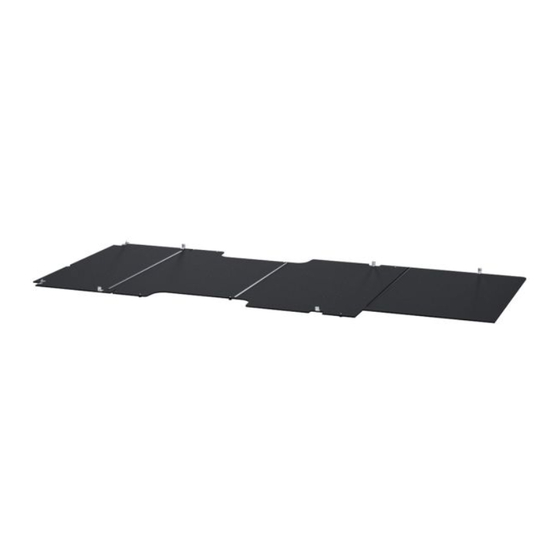
Page 3: 40475Tl, 40475Tr, And 40475Te Parts List
Instructions – 40475TE, 40475TL, 40475TR • Floor must be assembled in vehicle. • 40475HW hardware kit may be necessary to install some accessories to Holman flooring. (40475HW sold separately) • 40477T threshold kit must be installed when installing Holman flooring. (40477T sold separately) -
Page 4: 18-Km0251 Floor Hardware (All Floor Kits)
Instructions – 40475TE, 40475TL, 40475TR 18-KM0251 Floor Hardware (ALL FLOOR KITS) For Technical Support Call: 800-343-7486, Monday-Friday, 7AM - 4 PM (PST) Page 3... -
Page 5: 18-Km0251 Floor Hardware Continued (All Floor Kits)
Instructions – 40475TE, 40475TL, 40475TR 18-KM0251 Floor Hardware Continued (ALL FLOOR KITS) 18-KM0255 Floor Extension Hardware (40475TE ONLY) For Technical Support Call: 800-343-7486, Monday-Friday, 7AM - 4 PM (PST) Page 4... -
Page 6: 18-Km0255 Floor Extension Hardware Continued (40475Te Only)
Instructions – 40475TE, 40475TL, 40475TR 18-KM0255 Floor Extension Hardware Continued (40475TE ONLY) For Technical Support Call: 800-343-7486, Monday-Friday, 7AM - 4 PM (PST) Page 5... -
Page 7: Step 1 - Trim Factory Threshold
Instructions – 40475TE, 40475TL, 40475TR Step 1 – Trim Factory Threshold Some vehicles may be equipped with a plastic threshold by the sliding door. This needs to be either removed or trimmed before installing the floor. • Remove the four screws circled. -
Page 8: Step 3 - Insert T-Nut Inserts
Instructions – 40475TE, 40475TL, 40475TR Step 3 – Insert T-nut Inserts • Insert 1/4” tee nut insert into bottom of floor panel into holes highlighted below. • Tap in inserts with hammer. 1/4” Tee Nut Insert • For Transit 130” and 148” wheelbase insert three 1/4”... -
Page 9: Step 4 - Install Floor Spacers
Instructions – 40475TE, 40475TL, 40475TR Step 4 – Install Floor Phillips round Spacers head screw • Using six Phillips round head screws, fasten plastic spacers 1/4” x 1/2" to the bottom of the floor in the Plastic Spacer locations highlighted. - Page 10 Instructions – 40475TE, 40475TL, 40475TR • Using 7/16” x 1-1/4” hex head screws, 7/16” lock washers and 1/2” flat washers bolt floor brackets into D-ring embosses in rear pillar, side pillar, and B-pillar. Be sure to use the Front Mount on the side and B-pillar and Rear Mount for the rear pillars.
-
Page 11: Attaching Shelving To Floor
1-1/8” drill bit. • In the center of each hole, install a plus nut using the instructions below. • Use 1” x 3/8” plastic spacer (Holman p/n 40501) in each hole as needed to attach accessories to steel van floor. - Page 12 Instructions – 40475TE, 40475TL, 40475TR Install Plus Nuts DO NOT drill beyond depth of floor or upper installation surface. Always check for wires, fuel tanks and lines, brake lines and other important vehicle functionality items prior to drilling and installing all products.
Need help?
Do you have a question about the 40475TE and is the answer not in the manual?
Questions and answers