Subscribe to Our Youtube Channel
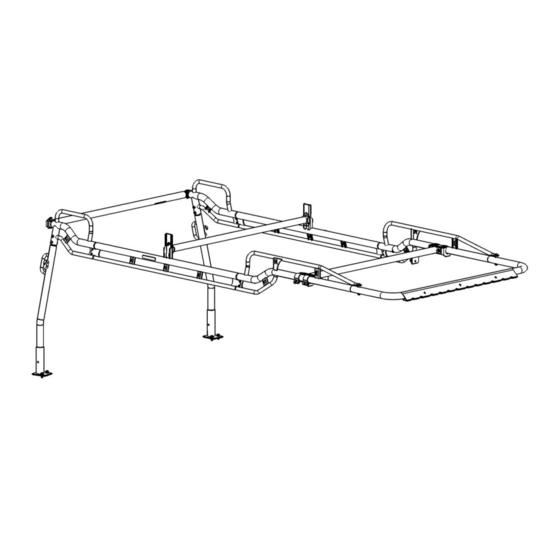
Summary of Contents for Holman The Pro Rack Platform Body Rack
- Page 1 Installation Guide The Pro Rack Platform Body Rack Holman Rancho Cordova, CA 95742 800-343-7486 InstallationSupport@Holman.com 20231201R1 DATE: __________________...
- Page 2 Instructions – The Pro Rack Platform Body For Technical Support Call: 800-343-7486, Monday-Friday, 7AM - 4 PM (PST) Page 2...
- Page 3 ALWAYS DISCONNECT BATTERY FROM VEHICLE PRIOR TO PERFORMING ANY WELDING TO FRAME OR BODY. Too much weight will greatly reduce the stability of your vehicle. Holman makes no representation or warranty as to the amount of weight your vehicle can safely carry.
-
Page 4: Table Of Contents
Instructions – The Pro Rack Platform Body Table of Contents Standard Side Channel Parts List ....................5 Wind Deflector Hardware......................... 5 Extra Crossbar Parts List ......................... 5 Extra Crossbar Hardware ........................ 6 Forklift Loadable Side Channel Parts List ..................6 Leg and Bar Kit Parts List ........................ -
Page 5: Standard Side Channel Parts List
Instructions – The Pro Rack Platform Body Standard Side Channel Parts List Wind Deflector Hardware Extra Crossbar Parts List For Technical Support Call: 800-343-7486, Monday-Friday, 7AM - 4 PM (PST) Page 5... -
Page 6: Extra Crossbar Hardware
Instructions – The Pro Rack Platform Body Extra Crossbar Hardware Forklift Loadable Side Channel Parts List For Technical Support Call: 800-343-7486, Monday-Friday, 7AM - 4 PM (PST) Page 6... -
Page 7: Leg And Bar Kit Parts List
Instructions – The Pro Rack Platform Body Leg and Bar Kit Parts List For Technical Support Call: 800-343-7486, Monday-Friday, 7AM - 4 PM (PST) Page 7... -
Page 8: Hardware Kit (18-12005)
Instructions – The Pro Rack Platform Body Hardware Kit (18-12005) For Technical Support Call: 800-343-7486, Monday-Friday, 7AM - 4 PM (PST) Page 8... -
Page 9: Sealant Application
Instructions – The Pro Rack Platform Body Hardware Kit (Continued) Sealant Application Proper sealant application is critical to preventing water penetration inside the rack. • Apply a healthy bead of sealant around every swaged joint as shown. Improper sealing can lead to water penetration and rust on inside surfaces. -
Page 10: Step 1 - Join Side Channels
Instructions – The Pro Rack Platform Body Step 1 – Join Side Channels • Lay flattened box on ground and use for scratch protection while building rack. • Be sure you have correct front and rear side channels paired. Decals and logo face outward. -
Page 11: Step 3 - Attach Center Crossbar
Instructions – The Pro Rack Platform Body Step 3 – Attach Center Crossbar Forklift Loadable Step 3A – Forklift Loadable Side Channels Side Channels • Using two 3/8” x 1” carriage bolts, 3/8” flat washers, and 3/8” thin lock nuts, LOOSELY attach the center crossbar to the crossbar support. -
Page 12: Step 5 - Temporarily Attach Rear Legs
Instructions – The Pro Rack Platform Body • On opposite side, insert 3/8” lock pin. Step 5 – Temporarily Attach Rear Legs Legs are attached at this point to determine proper leg height. Do not apply sealant. • Flip rack upside down. •... - Page 13 Instructions – The Pro Rack Platform Body • Mark the location of the front crossbar holes onto the mounting surface. • If mounting directly to top tube of headache rack, do the following. o Drill a 7/16" hole through at each of locations marked on the forward mounting surface or headache rack.
-
Page 14: Step 7 - Cut Legs To Size
Instructions – The Pro Rack Platform Body Step 7 – Cut Legs to Size Note: It may be helpful to place a towel on top of cab to avoid any scratches. • Set the rack on the flatbed with the legs inserted into the feet. •... -
Page 15: Step 8 - Attach Wind Deflector
Instructions – The Pro Rack Platform Body Step 8 – Attach Wind Deflector • Position wind deflector on front U-tube. • Insert wind deflector straps into slots on rear of wind deflector. • Using #10 x 3/4” screws and #10 washers, bolt through top into press-in nuts on wind deflector straps. -
Page 16: Step 11 - Attach Rack To Front Crossbar
Instructions – The Pro Rack Platform Body • Position crossbar strapping bracket on lower side channel 2” tubing, centered at approximate distance measured. • Hook two of the side channel clamps into the slots on the strapping bracket. • Using a 5/16”... -
Page 17: Step 13 - Attach Legs To Feet
Instructions – The Pro Rack Platform Body o Tap each hole to a 1/2"-13 thread. o Squeeze sealant into each hole. o Using 1/2” x 1-1/4” bolts, 1/2” lock washers, and 1/2” flat washers, bolt the feet to the frame. NOTE: Bolt through is acceptable, but hardware is not included. -
Page 18: Step 16 - Adjust Wind Deflector
Instructions – The Pro Rack Platform Body Step 16 - Adjust Wind Deflector The best angle for the wind deflector will depend on the vehicle the rack is installed on. Small angle adjustments can make a big difference. The image shown is approximately the best angle to start with.


Need help?
Do you have a question about the The Pro Rack Platform Body Rack and is the answer not in the manual?
Questions and answers