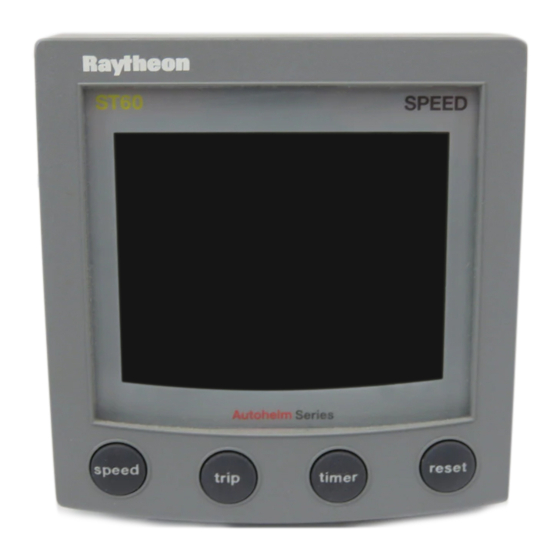
Raytheon ST60 Owner's Handbook Manual
Hide thumbs
Also See for ST60:
- Owner's handbook manual (60 pages) ,
- Service manual (36 pages) ,
- Owner's handbook manual (54 pages)

Subscribe to Our Youtube Channel
Related Manuals for Raytheon ST60


Summary of Contents for Raytheon ST60
- Page 1 ST60 Club House Wind Instrument Owner’s Handbook Document number: 81148_2 Date: 1st October 1999...
-
Page 3: Table Of Contents
Introduction Contents Introduction ................iii EMC conformance ............iii Mounting options ............. iv Parts supplied ..............iv Chapter 1: Operation & Maintenance ......... 1 1.1 Getting started ............. 1 Calibration requirements ..........1 1.2 Normal operation ............1 Pointer ................. 1 Digital display ............. - Page 4 ST60 Club House Wind Instrument Owner’s Handbook EMC guidelines ............9 Suppression ferrites ..........9 Connections to other equipment ....10 2.2 Installation procedure ..........10 Unpacking ..............10 Fitting the instruments..........10 Surface mounting ..........11 Flush Mounting ........... 12 Fitting the low-profile bezel ......
-
Page 5: Introduction
Note: The ST60 Club House Wind instrument is not suitable for use on boats. The ST60 Club House Wind instrument gives: •... -
Page 6: Mounting Options
ST60 Club House Wind Instrument Owner’s Handbook Mounting options If you do not want to surface mount your ST60 instrument, options are available for: • Flush mounting. If you have ordered the flush mounting option a low-profile bezel and four fixing screws are also provided. - Page 7 Introduction ST60 Club Worldwide House Wind Distributors Instrument Owner's Handbook Document Number: 44421_10 Date: September 1998 D4503-1...
- Page 8 ST60 Club House Wind Instrument Owner’s Handbook...
-
Page 9: Chapter 1: Operation & Maintenance
Raytheon ST60 Club House Wind instrument. This instrument shows the wind speed and direction. Calibration requirements Your ST60 instrument is calibrated to factory (default) settings when first installed and must therefore be calibrated before use, in accordance with the procedures in Chapter 3, Calibration. -
Page 10: Wind Speed Alarms
ST60 Club House Wind Instrument Owner’s Handbook Wind speed alarms An alarm condition occurs when the wind speed either exceeds the maximum wind speed alarm threshold or falls below the minimum wind speed alarm threshold. An alarm condition is indicated by a flashing alarm icon on the digital display and an audible alarm at the instrument. -
Page 11: Switching Alarms On And Off
Note: The digital display will return to normal operation 7 seconds after the last key press. 1.3 Maintenance Servicing and safety • Raytheon equipment should be serviced only by authorised Raytheon service engineers. There are no user-serviceable parts in any Raytheon product. -
Page 12: Instrument
Preliminary procedures Changes in the electronic environment may adversely affect the operation of your ST60 equipment. If a you appear to have a problem, first ensure that the EMC requirements (see Chapter 2, Installation & Calibration) are still being met before further investigating the... -
Page 13: Fixing Faults
• The power supply. • The security of cables and connectors • The fuse or circuit breaker If you are unable to rectify a problem, contact the Raytheon Product Support Department or your own National Distributor, for assistance. - Page 14 ST60 Club House Wind Instrument Owner’s Handbook...
-
Page 15: Chapter 2: Installation
Chapter 2: Installation Chapter 2: Installation This chapter describes how to install and calibrate the ST60 Club House Wind instrument, and associated Wind Vane transducer. The transducer is connected to the rear of the instrument. For advice, or further information regarding the installation of this equipment, please contact the Raytheon Product Support Department or your own National Distributor. -
Page 16: Instrument
ST60 Club House Wind Instrument Owner’s Handbook There must also be a viable route for the transducer cable to be routed to the instrument. Note: As you will need to manually rotate the Wine Vane as part of the linearisation procedure, do not actually fit it in position yet. -
Page 17: Emc Guidelines
• Genuine Raytheon cables should be used at all times. Cutting and rejoining these cables can compromise EMC performance and so should be avoided unless doing so is detailed in the installation manual. -
Page 18: Connections To Other Equipment
Fitting the instruments The ST60 Club House Wind instrument can be installed using one of a number of different mounting options: • Surface mounting. Gives a profile of approximately 24 mm. -
Page 19: Surface Mounting
Chapter 2: Installation ST60 instruments can also be mounted behind a suitably prepared panel, so that just the instrument dial and keys are visible. Surface mounting To surface mount your ST60 instrument (see the Surface mounting illustration): 1. Ensure that: •... -
Page 20: Flush Mounting
6 mm above the panel fascia. Fitting the low-profile bezel In order to flush-mount your ST60 instrument, you must first replace the standard bezel with the low-profile bezel as follows: 1. Hold the instrument in both hands with the display towards you. -
Page 21: Flush Mounting Procedure
Flush mounting procedure Flush mount your instrument ( see the Flush mounting illustration) as follows: 1. Assemble the ST60 instrument and low-profile bezel as described under Fitting the low-profile bezel. 2. Ensure that: • The panel on which you intend to mount the instrument is between 3 mm and 20 mm thickness. -
Page 22: Bracket Mounting Kit
To bracket mount your ST60 instrument, do so in accordance with the Control Unit Mounting Bracket Instruction Sheet. -
Page 23: Power Supply Connections
D4511-1 Power supply connections The ST60 Club House Wind instrument requires a 12 V dc power supply capable of providing at least 2 A and protected by a 0.5 A fuse. Power cables are available in 2 m and 9 m lengths. -
Page 24: Linearisation
Vane, carry out this procedure, before fitting the Wind Vane in its operational location. To carry out the linearisation and alignment procedure: 1. Referring to the Connections to ST60 Club House Wind instrument illustration, temporarily connect the Wind Vane to the instrument. -
Page 25: Running Transducer Cable
Running transducer cable The Wind Vane is supplied with sufficient cable already connected, to run from the mounted position to the ST60 Club House Wind instrument. The manner in which you run the cable will depend on the locations of the transducer and instrument. The following guidelines are provided: •... - Page 26 ST60 Club House Wind Instrument Owner’s Handbook Mast Junction box Typical Wind Vane cable run D4512-1 Referring to the Connections to ST60 Club House Wind instrument illustration, connect the Wind Vane cable to the instrument.
-
Page 27: Chapter 3: Calibration
Chapter 3: Calibration Chapter 3: Calibration 3.1 Introduction The ST60 Club House Wind instrument is set up with factory- programmed default settings, so in order to optimise performance at a particular installation, the procedures in this Chapter must be carried out immediately after the completion of installation. -
Page 28: Leaving User Calibration
ST60 Club House Wind Instrument Owner’s Handbook Hold down for approximately 2 seconds Entry screen Press either Wind angle (decrease) (increase) to set the current wind angle Press either Wind speed units to set the required wind speed units (KTS or M/S) -
Page 29: Dealer Calibration
Chapter 3: Calibration 3.4 Dealer calibration The Dealer calibration procedures enable the following parameters to be set: • Wind angle and speed response. • Wind speed calibration. • Boat show mode on/off. Dealer calibration also gives access to the Factory defaults screen. This enables you to re-apply the factory settings if you want to reset the instrument to a known operating condition. - Page 30 ST60 Club House Wind Instrument Owner’s Handbook Press Dealer calibration - sheet 1 D4516-1...
-
Page 31: Boat Show Mode (Bso)
Chapter 3: Calibration Boat show mode (bSO) ) ) ) ) CAUTION: Do NOT enable this mode. It must only be used for demonstration purposes. Ensure that the Boatshow Mode is set to bS0 (disabled). If necessary, press the < < < < < or > > > > > key to achieve this. Factory reset (FO) You can use this screen to reset the operating parameters to the factory default values. -
Page 32: Leaving Dealer Calibration
ST60 Club House Wind Instrument Owner’s Handbook Leaving Dealer calibration and set keys for 2 seconds to save your changes, Hold down the exit Dealer calibration and resume normal operation. 81148_2... - Page 33 Drill 5mm (3/16in) diameter ST60 Surface Mount Template Machine hole 90mm (3.54in) diameter Shaded areas to be removed Drill 5mm (3/16in) diameter D4436-1...
- Page 35 ST60 Flush Mount Template 4 holes 6 mm diameter Shaded area to be removed 109 mm D4437-1...
- Page 37 During this period, except for certain products, travel costs (auto mileage and tolls) up to 100 round trip highway miles and travel time of 2 hours, will be assumed by Raytheon Marine Company only on products where proof of installation or commission by authorised service agents, can be shown.
- Page 38 United States of America Raytheon Marine Company 603-647-7530 Recreational Products 603-634-4756 676 Island Pond Road Manchester, NH 03109-5420 U.S.A. UK, Europe, Middle East, Far East Raytheon Marine Company (44) 1705 693611 Recreational Products (44) 1705 694642 Anchorage Park, Portsmouth Customer support (44) 1705 661228...
Need help?
Do you have a question about the ST60 and is the answer not in the manual?
Questions and answers