Raytheon ST60 Owner's Handbook Manual
Hide thumbs
Also See for ST60:
- Owner's handbook manual (60 pages) ,
- Service manual (36 pages) ,
- Owner's handbook manual (38 pages)

Related Manuals for Raytheon ST60


Summary of Contents for Raytheon ST60
- Page 1 ST60 Multi Instrument Owner’s Handbook Document number: 81039_2 Date: 1st September 1999...
-
Page 3: Table Of Contents
Introduction Contents Introduction ................v EMC conformance ............v Data inputs ..............vi Remote control ..............vi Options ................vi Auxiliary Alarm ............ vi Mounting options ..........vi Parts supplied ..............vii Chapter 1: Operation ............. 1 1.1 Introduction ..............1 Calibration requirement .......... - Page 4 ST60 Multi Instrument Owner’s Handbook 1.7 Display settings ............9 Illumination ..............9 Contrast ............... 9 1.8 Pop-up Pilot .............. 10 1.9 Remote control ............10 Chapter 2: Maintenance and Fault Finding ...... 11 2.1 Maintenance .............. 11 Servicing and safety ..........11 Instrument ..............
- Page 5 Introduction Connecting the instrument ........21 Introduction ............21 Connection options ........21 Signal connections ..........21 Power supply connections ........23 Chapter 4: Calibration ............25 4.1 Introduction .............. 25 EMC conformance ............ 25 4.2 User calibration ............25 Procedure ..............
- Page 6 ST60 Multi Instrument Owner’s Handbook...
-
Page 7: Introduction
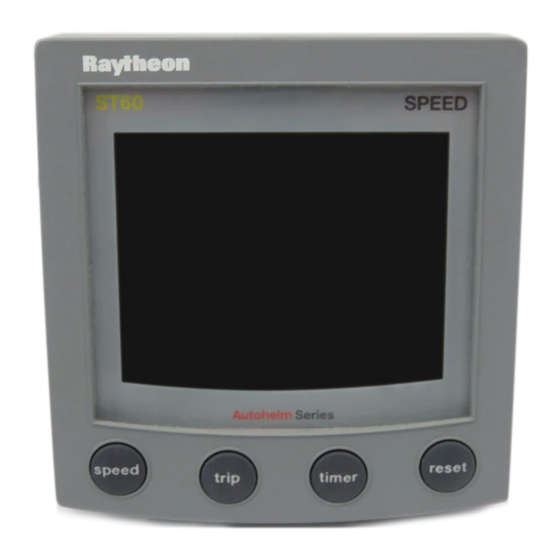
Introduction Introduction Thank you for purchasing a Raytheon product. We are sure your ST60 instrument will give you many years of trouble-free operation. This handbook describes how to install and use the Raytheon ST60 Multi instrument. This instrument provides a wide range of accurate navigational information, on a high quality Liquid Crystal Display (LCD). -
Page 8: Data Inputs
Mounting options If you do not want to surface mount your ST60 instrument, options are available for: • Flush mounting. If you have ordered the flush mounting option a low-profile bezel and four fixing screws are also provided. -
Page 9: Parts Supplied
Introduction Parts supplied Unpack your ST60 instrument and check that the following items are present: • Item 1, ST60 Multi instrument fitted with standard bezel for surface mounting. • Item 2, Fixing studs (2). • Item 3, Thumb nuts (2). - Page 10 ST60 Multi Instrument Owner’s Handbook MULTI Operation ST60 Multi Worldwide Instrument Distributors Owner's Handbook Key: Document Number: 44421_10 Date: September 1998 Chapter selection and content D4440-1...
-
Page 11: Chapter 1: Operation
Chapter 4, Calibration). This handbook assumes all pages are enabled. Finding the information you want The disposition of the ST60 Multi chapters and pages, is shown in the following Chapter selection and content illustration. This illustration assumes a system where all information sources are available. - Page 12 ST60 Multi Instrument Owner’s Handbook Depth Current depth Minimum depth Maximum depth Speed Autopilot Speed Pilot status Maximum speed Rudder angle Average speed Speed over ground VMG to windward Key: Trip Timer Chapter name Pages within chapter Listed in sequence.
- Page 13 Chapter 1: Operation To display a particular page: 1. Refer to the Chapter selection and content diagram to determine the location of the information you need (i.e. which chapter it is in), then press the key the necessary number of times, to cycle to the required chapter.
-
Page 14: Chapters And
ST60 Multi Instrument Owner’s Handbook 1.3 Chapters and pages This section lists all the available pages along with titles and salient points. Depth chapter pages Function Title Remarks Current depth Displayed in either FEET, METRES or FATHOMS. An up arrow is displayed if the sea- bed is rising, and a down arrow is displayed for sea-bed falling. -
Page 15: Wind Chapter Pages
Chapter 1: Operation Wind chapter pages Function Title Remarks Apparent wind Either knots (KTS) or metres per second (M/S). speed Apparent wind Shown in degrees. Shows a PORT indicator when the boat is on a starboard tack angle and a STBD indicator when the boat is on a port tack. True wind speed TRUE Either knots (KTS) or metres per second (M/S). -
Page 16: Navigate Chapter Pages
ST60 Multi Instrument Owner’s Handbook Navigate chapter pages Function Title Remarks Bearing to Displayed in degrees. Either TRU(e) or MAG(netic) depending on the value set during User calibration (see Chapter 4, Calibration ). waypoint Distance to In kilometres (KM), statue miles (SM), or nautical miles (NM). -
Page 17: Using The Track Key
To cancel an alarm, press any one of the ST60 Multi front panel keys. -
Page 18: Auxiliary Alarm Option
Note: An Auxiliary Alarm cannot be fitted if the NMEA output port is being used. 1.6 Operating with NMEA The ST60 Multi instrument can provide data communication between SeaTalk and NMEA when the appropriate connections are made, and supports NMEA 0183 compatible products. -
Page 19: Nmea To Seatalk
Chapter 1: Operation NMEA to SeaTalk The ST60 Multi instrument decodes certain data from NMEA when available, and if the respective data is not already present on SeaTalk, transmits the decoded data to SeaTalk. The data types and NMEA headers are:... -
Page 20: Pop-Up Pilot
This facility can be enabled or disabled during User calibration (see Chapter 4, Calibration). 1.9 Remote control When it is connected to SeaTalk, the ST60 Multi instrument can be controlled remotely with a SeaTalk Remote Keypad Unit. Remote control of an instrument is indicated by a REMOTE legend on the display, to indicate that the keypad has control. -
Page 21: Chapter 2: Maintenance And Fault Finding
This will not harm the instrument and can be cleared by increasing the illumination to the brightest setting. Periodically clean your ST60 instrument with a soft damp cloth. Do NOT use chemical and abrasive materials to clean the instrument. -
Page 22: Fixing Faults
Fixing faults Some data types may not be supported by your system and therefore will not be displayed on your ST60 Multi instrument. If you think that some data is missing, ensure that your system supports this data before assuming that a fault exists. -
Page 23: Chapter 3: Installation
Chapter 3: Installation Chapter 3: Installation This chapter describes how to install the ST60 Multi instrument, and where supplied, the Auxiliary Alarm. For advice, or further information regarding the installation of these products, please contact the Raytheon Product Support Department or your own National Distributor. -
Page 24: Emc Guidelines
ST60 instruments can be fitted either above or below deck, provided the rear of the instrument is sited where it is protected from contact with water. -
Page 25: Suppression Ferrites
If your Raytheon equipment is going to be connected to other equipment using a cable not supplied by Raytheon, a suppression ferrite MUST always be fitted to the cable close to the Raytheon unit. 3.2 Procedures As it is not possible to describe procedures for all possible installation scenarios, the procedures given here describe the broad requirements for installing the ST60 Multi instrument. -
Page 26: Fitting The Instrument
Fitting the instrument The ST60 Multi instrument can be installed using one of a number of different mounting options: • Surface mounting. Gives a profile of approximately 24 mm. -
Page 27: Flush Mounting
6 mm above the panel fascia. Fitting the low-profile bezel In order to flush-mount your ST60 instrument, you must first replace the standard bezel with the low-profile bezel as follows: 1. Hold the instrument in both hands with the display towards you. -
Page 28: Flush Mounting Procedure
Flush mounting procedure Flush mount your instrument (see the Flush mounting illustration) as follows: 1. Assemble the ST60 instrument and low-profile bezel as described under Fitting the low-profile bezel. 2. Ensure that: • The panel on which you intend to mount the instrument is... - Page 29 Chapter 3: Installation • The selected location is clean, smooth and flat. • There is sufficient space behind the selected location to accommodate the rear of the instrument and connectors. 3. Apply the flush mount template (supplied at the rear of this handbook) to the selected location and mark out the aperture into which the assembled instrument and bezel will sit.
-
Page 30: Bracket Mounting
To bracket mount your ST60 instrument, do so in accordance with the Control Unit Mounting Bracket Instruction Sheet. -
Page 31: Connecting The Instrument
(supplied). 5. Connect a 2-core cable to the connector block and run the other end of the cable to the rear of the ST60 Multi instrument. The manner in which you run the cable will depend on the locations... - Page 32 ST60 Multi Instrument Owner’s Handbook SeaTalk cable SeaTalk cable Blue Blue Either NMEA out Auxiliary Alarm Buzzer Note: If connections are made to the NMEA OUT terminals, the instrument must be set up for either NMEA or Anciliary Alarm Buzzer operation, in accordance with the instructions in Chapter 4, Calibration.
-
Page 33: Power Supply Connections
Chapter 3: Installation Power supply connections CAUTION When instruments are connected to SeaTalk, ensure that the power supply for the SeaTalk 12 V line is protected by a 5 A fuse. Systems with a large number of instruments on the SeaTalk bus may require connections to the power supply from each end of the system (‘ring-main’... - Page 34 ST60 Multi Instrument Owner’s Handbook...
-
Page 35: Chapter 4: Calibration
Chapter 4: Calibration Chapter 4: Calibration 4.1 Introduction The ST60 Multi instrument is set up with factory-programmed default settings, so in order to optimise the performance of the instrument on board a particular vessel, the procedures in this Chapter must be carried out immediately after the completion of installation, and before the equipment is used for navigational purposes. -
Page 36: Procedure
Battery alarm threshold The recommended setting is 10.5 VOLTS. Alarms on/off Determines whether or not the ST60 Multi instrument will give alarm indications. The following alarms will occur irrespective of the setting here: • Pop up pilot alarms. • External alarms, provided this option is fitted and enabled (see Select NMEA or Auxiliary Alarm). - Page 37 Chapter 4: Calibration Hold down chap for approximately 2 seconds Entry screen either track reset to set the required values on each screen Chapter Heading type titles from sheet 2 Battery alarm threshold Alarms on/off Time display Date format to sheet 2 User calibration - sheet 1 D4406_1...
-
Page 38: Time Offset
ST60 Multi Instrument Owner’s Handbook Time offset You can apply an offset from -12 hours to +12 hours, in 1-hour increments, so that your system time is your local time. The time with the offset applied is shown at the top right of the screen. -
Page 39: Temperature Units
Determines whether waypoints are identified by name (WP NAME) or by number (WP NO). Select NMEA or Auxiliary Alarm If the ST60 Multi is connected to NMEA, select ON. If the Auxiliary Alarm option is fitted select OFF, to enable the Auxiliary Alarm. Auxiliary Alarm enable If the Auxiliary Alarm option is fitted, use this screen to determine which alarms you want to sound at the Auxiliary Alarm. -
Page 40: Pop-Up Pilot
ST60 Multi Instrument Owner’s Handbook Title Alarm function DRV STOP Drive stopped NO XTE No NMEA HIGH XTE Large cross track error NMEA ERR NMEA data error NO CU No control unit RADAR Guard, MARPA, radar failure Pop-up pilot Switches the pop-up pilot function on and off. - Page 41 Chapter 4: Calibration Title Page Chapter SPD SOG Speed SPD VMG VMG to Windward Speed SPD LOG Speed SPD TRIP Trip Speed SPD TIMR Timer Speed WND ASPD Apparent Wind Speed Wind WND AANG Apparent Wind Angle Wind WND TSPD True Wind Speed Wind WND TANG...
-
Page 42: Leaving User Calibration
ST60 Multi Instrument Owner’s Handbook Title Page Chapter NAV SOG Navigate NAV SATS Stats Navigate ENV TEMP Sea Temperature Environment ENV VOLT Battery Voltage Environment NAV TIME Time Environment NAV DATE Date Environment PLT STAT Status Pilot PLT RUDD Rudder Angle... -
Page 43: Dealer Calibration
Chapter 4: Calibration 4.4 Dealer calibration The Dealer calibration procedures enable the following parameters to be set: • User calibration on/off. • Response settings for speed, depth heading wind angle, wind speed, VMG, course over ground and speed over ground. Dealer calibration also gives access to the Factory defaults screen. - Page 44 ST60 Multi Instrument Owner’s Handbook Title Response function WIND ANG Wind angle WIND SPD Wind speed Velocity made good COG/SOG Course over ground and speed over ground Hold down for approximately 12 seconds Entry screen reset track Calibration on/off track...
-
Page 45: Factory Defaults
Chapter 4: Calibration Factory defaults You can use this screen to reset the operating parameters to the factory default values. If you want to apply the factory defaults, ensure the display shows YES, but if you want to retain the current values, ensure that the display shows NO. - Page 46 ST60 Multi Instrument Owner’s Handbook 81039-2...
- Page 47 Drill 5mm (3/16in) diameter ST60 Surface Mount Template Machine hole 90mm (3.54in) diameter Shaded areas to be removed Drill 5mm (3/16in) diameter D4436-1...
- Page 49 ST60 Flush Mount Template 4 holes 6 mm diameter Shaded area to be removed 109 mm D4437-1...
- Page 51 During this period, except for certain products, travel costs (auto mileage and tolls) up to 100 round trip highway miles and travel time of 2 hours, will be assumed by Raytheon Marine Company only on products where proof of installation or commission by authorised service agents, can be shown.
- Page 52 United States of America Raytheon Marine Company 603-647-7530 Recreational Products 603-634-4756 676 Island Pond Road Manchester, NH 03109-5420 U.S.A. UK, Europe, Middle East, Far East Raytheon Marine Company (44) 1705 693611 Recreational Products (44) 1705 694642 Anchorage Park, Portsmouth Customer support (44) 1705 661228...
Need help?
Do you have a question about the ST60 and is the answer not in the manual?
Questions and answers