
Related Manuals for Advantech POD-6552


Summary of Contents for Advantech POD-6552
- Page 1 POD-6552 5.25” Intel® Celeron® M SBC, with CPU/ VGA/LCD, and Ether- net Interface User’s Manual Download from Www.Somanuals.com. All Manuals Search And Download.
- Page 2 UMC is a trademark of United Microelectronics Corporation. SMI is a trademark of Silicon Motion, Inc. All other product names or trademarks are properties of their respective owners. For more information on this and other Advantech products, please visit our websites at: http://www.advantech.com http://www.advantech.com/eplatform For technical support and service, please visit our support website at: http://www.advantech.com.tw/support...
- Page 3 Packing List Before you begin installing your card, please make sure that the following materials have been shipped: • 1 POD-6552 all-in one single board computer • Mini Jumper(yellow) p/n: 1653300100 • Mini Jumper(black) p/n: 1653302122 Optional • 1 startup manual •...
- Page 4 Same as POD-6552L-M0A1,but with SKT479 Additional Information and Assistance Visit the Advantech web site at www.advantech.com where you can find the latest information about the product. Step 1. Contact your distributor, sales representative, or Advantech's cus- tomer service center for technical support if you need additional assistance.
- Page 5 This device complies with the requirements in part 15 of the FCC rules: Operation is subject to the following two conditions: 1.This device may not cause harmful interfer- ence, and 2. This device must accept any interference received, including interference that may cause undesired operation This equipment has been tested and found to comply with the limits for a Class A digital device,...
- Page 6 POD-6552 User’s Manual Download from Www.Somanuals.com. All Manuals Search And Download.
-
Page 7: Table Of Contents
Contents Chapter 1 General Information ........2 Introduction ............... 2 Features ................2 Specifications ..............3 1.3.1 Standard SBC Functions..........3 1.3.2 Display Interface............. 3 1.3.3 Solid State disk ............... 4 1.3.4 TV-Out................4 1.3.5 Ethernet interface............4 1.3.6 Mechanical and Environmental ........4 Board layout: dimensions.......... - Page 8 Advanced Chipset Features setup ......... 32 Figure 4.4:Advanced Chipset Features setup ....32 4.2.5 Integrated Peripherals ........... 33 Figure 4.5:Integrated Peripherals........33 4.2.6 Power Management Setup ..........34 POD-6552 User’s Manual viii Download from Www.Somanuals.com. All Manuals Search And Download.
- Page 9 Figure 4.6:Power Management Setup......34 4.2.7 PnP/PCI Configurations..........35 Figure 4.7:PnP/PCI Configurations ......35 4.2.8 Frequency/Voltage Control........... 36 Figure 4.8:Frequency/Voltage Control ......36 4.2.9 Load Optimized Defaults..........37 Figure 4.9:Load BIOS defaults screen......37 4.2.10 Set Password ..............38 Figure 4.10:Set password..........39 4.2.11 Save &...
- Page 10 System I/O Ports.............. 72 Table B.1:System I/O ports .......... 72 1st MB memory map............73 Table B.2:1st MB memory map ........73 DMA channel assignments..........73 Table B.3:DMA channel assignments ......73 POD-6552 User’s Manual Download from Www.Somanuals.com. All Manuals Search And Download.
- Page 11 Interrupt assignments ............74 Table B.4:Interrupt assignments ........74 Appendix C Programming the Watchdog Timer .....76 Supported Input Timing Modes ........76 Download from Www.Somanuals.com. All Manuals Search And Download.
- Page 12 POD-6552 User’s Manual Download from Www.Somanuals.com. All Manuals Search And Download.
- Page 13 General Information This chapter gives background information on the POD-6552. Sections include: • Introduction • Features • Specifications • Board layout and dimensions Chapter 1 General Information Download from Www.Somanuals.com. All Manuals Search And Download.
-
Page 14: Chapter 1 General Information
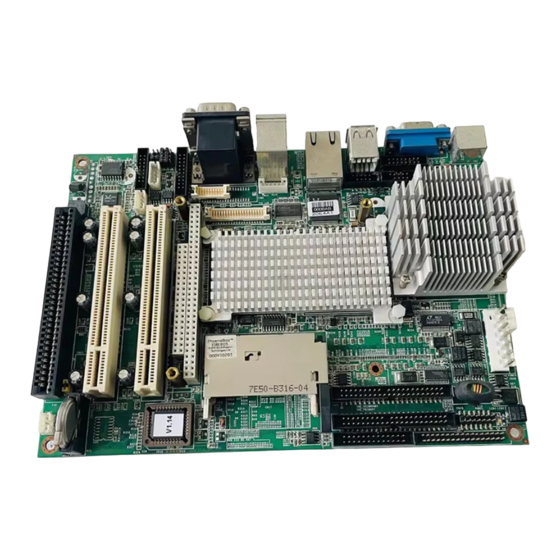
Chapter 1 General Information 1.1 Introduction The POD-6552 is a new Intel® Celeron® M 600 MHz(0L2) 5.25" Bis- cuit PC with enhanced graphics function. The POD-6552 comes with an embedded high-performance Celeron® M 600 MHz processor on-board, and one socket479 optional for Celeron-M CPU. For maximum perfor- mance, the POD-6552 supports one 200pin DDR SODIMM socket that can accept up to 512 MB memory. -
Page 15: Specifications
1.3 Specifications 1.3.1 Standard SBC Functions • CPU: Intel® Celeron® M 600 MHz w/o L2 cache. Socket479(Optional for Celeron® M and Pentium® M CPU) • System chipsets: Intel® 852GM/ICH4 • BIOS: Award 4Mbit Flash memory • System memory:One DDR SODIMM socket, support up to 512MB DRAM •... -
Page 16: Solid State Disk
1.9 A @ +5V(w/Celeron M 600 MHzMHz, 128MB DDR333) 0.10 A @ +12V(w/Celeron M 600 MHzMHz, 128MB DDR333) • Operating temperature: 0 ~ 60°C (32 ~ 140°F),operation • Operating humidity: 0% ~ 90% Relative Humidity, Non condensing POD-6552 User’s Manual Download from Www.Somanuals.com. All Manuals Search And Download. -
Page 17: Board Layout: Dimensions
1.4 Board layout: dimensions Figure 1.1: Board layout: dimensions (component side) Chapter 1 General Information Download from Www.Somanuals.com. All Manuals Search And Download. - Page 18 Figure 1.2: Board layout: dimensions (solder side) POD-6552 User’s Manual Download from Www.Somanuals.com. All Manuals Search And Download.
- Page 19 Installation This chapter explains the setup procedures of POD-6552 hardware, including instruc- tions on setting jumpers and connecting peripherals, switches and indicators. Be sure to read all safety precautions before you begin the installation procedure. Chapter 2 Installation Download from Www.Somanuals.com. All Manuals Search And Download.
-
Page 20: Chapter 2 Installation
Chapter 2 Installation 2.1 Jumpers The POD-6552 has a number of jumpers that allow you to configure your system to suit your application. The table below lists the functions of the various jumpers. Table 2.1: Jumpers Label Function J1/J2/J3/J4 Setting COM2 RS232/422/485... -
Page 21: Connectors
2.2 Connectors On-board connectors link the POD-6552 to external devices such as hard disk drives, a keyboard, or floppy drives. The table below lists the func- tion of each of the board’s connectors. Table 2.2: Connectors Label Function VGA D-SUB... -
Page 22: Locating Connectors(Component Side)
Table 2.2: Connectors CN26 Front Panel connector CN27 Floppy connector CN28 Print connector FAN 1,2 FAN connector PCI 1,2 PCI slot 2.3 Locating Connectors(component side) Figure 2.1: Jumper&Connector Locations POD-6552 User’s Manual Download from Www.Somanuals.com. All Manuals Search And Download. -
Page 23: Locating Connectors(Solder Side)
2.4 Locating Connectors(solder side) Figure 2.2: Connectors (solder side) Chapter 2 Installation Download from Www.Somanuals.com. All Manuals Search And Download. -
Page 24: Setting Jumpers
If you have any doubts about the best hardware configuration for your application, contact your local distributor or sales representative before you make any changes. Generally, you simply need a standard cable to make most connections. POD-6552 User’s Manual Download from Www.Somanuals.com. All Manuals Search And Download. -
Page 25: Clear Cmos (J8)
2.6 Clear CMOS (J8) Warning! To avoid damaging the computer, always turn off the power supply before setting “Clear CMOS.” Before turning on the power supply, set the jumper back to “3.0 V Battery On.” This jumper is used to erase CMOS data and reset system BIOS informa- tion. -
Page 26: Com2 232/422/485 Select(J1/J2/J3/J4)
RS422 RS485 1-2(Default) Table 2.5: COM2 232/422/485 Select(J2/J3/J4) RS232 RS422/RS485 J2(1)-J3(1) J3(1)-J4(1) J2(2)-J3(2) J3(2)-J4(2) J2(3)-J3(3) J3(3)-J4(3) J2(4)-J3(4) J3(4)-J4(4) 2.8 Setting LCD Voltage(J5) Table 2.6: Setting LCD Voltage(J5) Function +3.3V(Default) POD-6552 User’s Manual Download from Www.Somanuals.com. All Manuals Search And Download. -
Page 27: Sm Bus Connector(J6)
2.9 SM BUS Connector(J6) Table 2.7: SM BUS Connector(J6) Function SM_CLOCK SM_DATA 2.10 PCI VIO(J7) Table 2.8: PCI VIO(J7) Function +3.3V 2.11 Installing DDR SODIMMs Notes The modules can only fit into a socket one way. The gold pins must point down into the DDR SODIMM socket. -
Page 28: Printer Port Connector (Cn28)
BIOS settings. 2.14 Floppy drive connector (CN27) You can attach up to two floppy drives to the POD-6552’s on-board con- troller. You can use any combination of 5.25” (360 KB and 1.2 MB) and/ or 3.5” (720 KB, 1.44 MB, and 2.88 MB) drives. -
Page 29: Connecting The Floppy Drive
Appendix A. 2.15 IDE connector(CN25, CN24) The POD-6552 provides two IDE channels to which you can attach up to four Enhanced Integrated Device Electronics hard disk drives or CDROM to the POD-6552’s internal controller. The POD-6552's IDE controller uses a PCI interface. -
Page 30: Vga/Lvds Interface Connections
Users can drive a standard progressive scan analog monitor with pixel resolution up to 1600 MHz x 1200 at 85 Hz. The POD-6552 also provides a box header CN7 which connects CRT dis- play via a cable. Pin assignments for CRT display connector are detailed in Appendix A. -
Page 31: Ttl Lcd/Dstn Connector(Cn17)
The POD-6552 supports 10/100Base-T Ethernet connections with onboard RJ-45 connectors(CN6). 2.18.1 LAN connector (CN6) 10/100 or 1000 Base-T connects to the POD-6552 via a cable to a stan- dard RJ-45 connector. 2.18.2 Network boot The Network Boot feature can be utilized by incorporating the Boot ROM image files for the appropriate network operating system. -
Page 32: Ps/2 Mouse/Keyboard Connector (Cn5)
CN13 is a 6pin connector for PS/2. 2.21 Front Panel Connector (CN26) Next is to install external switches to monitor and control the POD-6552. These features are optional: install them only if necessary. CN26 is an 2x7 pin header, 180 degree, male.It provides connections for reset and power &... -
Page 33: Lan Active Led(Pin 7 & Pin 8)
You can select ECP/EPP DMA channel via BIOS setup. 2.24 TV-out interface(CN3) The POD-6552 board provides optional TV-out via CN3. This module output supports S-video connectors. TV-out generators use both NTSC and PAL formats with 640 x 480 or 800 x 600 MHz resolution. -
Page 34: Ir Connector(Cn10)(Optional)
2.26 Power connectors (CN20, CN21,CN23) 2.26.1 EBX power connector, +5 V, +/-12 V (CN20) Supplies main power to the POD-6552 (+5 V), and to devices that require +12 V. The POD-6552 supports AT power via CN20. 2.26.2 Power supply connector, -5V, -12V (CN21) Supplies secondary power to devices that require -5 V and -12 V. - Page 35 Software Configuration This chapter details the software con- figuration information. It shows you how to configure the card to match your application requirements. Award System BIOS will be covered in Chapter 4. Sections include: • Introduction • VGA display software configuration Download from Www.Somanuals.com.
-
Page 36: Chapter 3 Software Configuration
Ensure that the AWD- FLASH.EXE and *.BIN files are located in the working drive. NOTE: Ensure that you do not run AWDFLASH.EXE while your system is operating in EMM386 mode. POD-6552 User’s Manual Download from Www.Somanuals.com. All Manuals Search And Download. -
Page 37: Connectors To Standard Lcds
AWDFLASH.EXE program and change the settings. 3.3 Connectors to Standard LCDs The following table illustrate typical LCD connection pinouts for the POD-6552. Chapter 3 Download from Www.Somanuals.com. All Manuals Search And Download. -
Page 38: Au M170Eg01(1280 X1024 Lvds Lcd)
OCK- RxOCLKIN+ OCK+ RxOIN3- OD3- RxOIN3+ OD3+ RxEIN0- ED0- RxEIN0+ ED0+ RxEIN1- ED1- RxEIN1+ ED1+ RxEIN2- ED2- RxEIN2+ ED2+ RxECLKIN- ECK- RxECLKIN+ ECK+ RxEIN3- ED3- RxEIN3+ ED3+ VCC_LCD VCC_LCD POD-6552 User’s Manual Download from Www.Somanuals.com. All Manuals Search And Download. - Page 39 Chapter 4 Ducks that Need Love! Award BIOS Setup This chapter describes how to set BIOS configuration data. Download from Www.Somanuals.com. All Manuals Search And Download.
-
Page 40: Chapter 4 Award Bios Setup
The CMOS memory has lost power and the configuration informa- tion has been erased. The POD-6552 Series' CMOS memory has an integral lithium battery backup. The battery backup should at least three years in normal service, but when it finally runs down, you will need to replace the complete unit. -
Page 41: Award Bios Setup
4.2 Award BIOS setup Award’s BIOS ROM has a built-in Setup program that allows users to modify the basic system configuration. This type of information is stored in battery-backed CMOS RAM so that it retains the Setup information when the power is turned off. 4.2.1 Entering setup Power on the computer and press <Del>... -
Page 42: Standard Cmos Features Setup
Once a field is high- lighted, on-line help information is displayed in the right top of the Menu screen. Figure 4.2: Standard CMOS Features setup POD-6552 User’s Manual Download from Www.Somanuals.com. All Manuals Search And Download. -
Page 43: Advanced Bios Features Setup
By choosing the Advanced BIOS Features Setup option from the Initial Setup Screen menu, the screen below is displayed. This sample screen contains the manufacturer’s default values for the POD-6552 Series. Figure 4.3: Advanced BIOS Features setup Download from Www.Somanuals.com. All Manuals Search And Download. -
Page 44: Advanced Chipset Features Setup
4.2.4 Advanced Chipset Features setup By choosing the Advanced Chipset Features option from the Initial Setup Screen menu, the screen below is displayed. This sample screen contains the manufacturer’s default values for the POD-6552 Series. Figure 4.4: Advanced Chipset Features setup POD-6552 User’s Manual... -
Page 45: Integrated Peripherals
4.2.5 Integrated Peripherals Choosing the Integrated Peripherals option from the Initial Setup Screen menu should produce the screen below. Here we see the manufacturer’s default values for the POD-6552 Series. Figure 4.5: Integrated Peripherals Download from Www.Somanuals.com. All Manuals Search And Download. -
Page 46: Power Management Setup
4.2.6 Power Management Setup By choosing the Power Management Setup option from the Initial Setup Screen menu, the screen below is displayed. This sample screen contains the manufacturer’s default values for the POD-6552 Series. Figure 4.6: Power Management Setup POD-6552 User’s Manual... -
Page 47: Pnp/Pci Configurations
By choosing the PnP/PCI Configurations option from the Initial Setup Screen menu, the screen below is displayed. This sample screen contains the manufacturer’s default values for the POD-6552 Series. Figure 4.7: PnP/PCI Configurations Download from Www.Somanuals.com. All Manuals Search And Download. -
Page 48: Frequency/Voltage Control
4.2.8 Frequency/Voltage Control By choosing the Frequency/Voltage Control option from the Initial Setup Screen menu, the screen below is displayed. This sample screen contains the manufacturer’s default values for the POD-6552 Figure 4.8: Frequency/Voltage Control Caution Incorrect settings in Frequency/Voltage Control may damage the system CPU, video adapter, or other hardware. -
Page 49: Load Optimized Defaults
ROM. If the stored record created by the Setup program should ever become corrupted (and therefore unusable), these defaults will load auto- matically when you turn the POD-6552 Series system on. Figure 4.9: Load BIOS defaults screen Download from Www.Somanuals.com. All Manuals Search And Download. -
Page 50: Set Password
When you see “Enter Password,” enter the desired password and press <Enter>. At the “Confirm Password” prompt, retype the desired password, then press <Enter>. Select Save to CMOS and EXIT, type <Y>, then <Enter>. POD-6552 User’s Manual Download from Www.Somanuals.com. All Manuals Search And Download. - Page 51 Figure 4.10: Set password To Change Password Choose the Set Password option from the CMOS Setup Utility main menu and press <Enter>. When you see “Enter Password,” enter the existing password and press <Enter>. You will see “Confirm Password.” Type it again, and press <Enter>.
-
Page 52: Save & Exit Setup
At the “Confirm Password” prompt, again don’t type in anything; just press <Enter>. Select Save to CMOS and EXIT, type <Y>, then <Enter>. 4.2.11 Save & Exit Setup Figure 4.11: Save & Exit Setup POD-6552 User’s Manual Download from Www.Somanuals.com. All Manuals Search And Download. -
Page 53: Exit Without Saving
If you select this option and press <Y> then <Enter>, the values entered in the setup utilities will be recorded in the chipset’s CMOS memory. The microprocessor will check this every time you turn your system on and use the settings to configure the system. This record is required for the system to operate. - Page 54 POD-6552 User’s Manual Download from Www.Somanuals.com. All Manuals Search And Download.
- Page 55 PCI SVGA Setup Introduction Installation of SVGA drivers -for Windows XP Further information Download from Www.Somanuals.com. All Manuals Search And Download.
-
Page 56: Chapter 5 Pci Svga Setup
The board has an onboard interface. The specifications and features are described as follows: 5.1.1 Chipset The POD-6552 uses a Intel 852GM + ICH4 chipset for its graphic con- troller. It supports LVDS LCD displays, conventional CRT monitors. 5.1.2 Display memory... -
Page 57: Installation Of The Svga Driver
To install SVGA driver for Window 2000/XP, please run the setup wizard "Intel Extreme Graphic 2" in CD-ROM. Example of installation is shown as bellow: Select the path: G:\POD-6552\2_VGA, then double click "win2k_xp169" to run "Install Shield Wizard". Chapter 5... - Page 58 Press the "Next" button. Press the "Next" button. POD-6552 User’s Manual Download from Www.Somanuals.com. All Manuals Search And Download.
- Page 59 In order to continue setup, you must accept the agreement, press the "Yes" button and wait a minute. Choose the option "Yes, I want to restart my computer now." and press the "Finish" button. Chapter 5 Download from Www.Somanuals.com. All Manuals Search And Download.
-
Page 60: Further Information
For further information about the AGP/VGA installation in your POD- 6552, including driver updates, troubleshooting guides and FAQ lists, visit the following web resources: Intel website: www.intel.com. Advantech websites: www.advantech.com www.advantech.com.tw POD-6552 User’s Manual Download from Www.Somanuals.com. All Manuals Search And Download. - Page 61 Audio Setup • Introduction • Installation of audio driver for Win- dows XP Chapter 6 Download from Www.Somanuals.com. All Manuals Search And Download.
-
Page 62: Chapter 6 Audio Setup
6.2.1 Before you begin Please read the instructions in this chapter carefully before you attempt installation. The audio drivers for the POD-6552 board are located on the audio driver CD. Run the supplied SETUP program to install the drivers; don't copy the files manually. - Page 63 2. Press the "Next" button and wait for a moment. 3. Choose the option "Continue Anyway”. Chapter 6 Download from Www.Somanuals.com. All Manuals Search And Download.
- Page 64 4. Choose the option "Yes, I want to restart my computer now", then click "Finish" button to reboot your computer. POD-6552 User’s Manual Download from Www.Somanuals.com. All Manuals Search And Download.
- Page 65 Pin Assignments This appendix contains information of a detailed or specialized nature. It includes: • Floppy Drive Connector • Primary IDE Connector • LPT Connector • Secondary IDE(Slave) Connector • ATX Power Connector • COM3/COM4 output • USB0, 1 Connector •...
-
Page 66: Appendix A Pin Assignments
Appendix A Pin Assignments A.1 ATX power connector (CN23) Table A.1: ATX power connector(CN23) Signal 5VSB PS_ON POD-6552 User’s Manual Download from Www.Somanuals.com. All Manuals Search And Download. -
Page 67: Floppy Connector (Cn27)
A.2 Floppy connector (CN27) Table A.2: Floppy Connector (CN27) Signal Signal RWC# Index# MOA# DSB# DSA# MOB# DIR# STEP# Track0# RDATA# HEAD# DSKCHG# *low active Appx. A Download from Www.Somanuals.com. All Manuals Search And Download. -
Page 68: Primary Ide Connector (Cn25)
A.3 Primary IDE Connector (CN25) Table A.3: Primary IDE connector (CN25) Signal Signal IDE RESET READY Cable Select DACK IRQ14 ATA check CS1# CS3# Active POD-6552 User’s Manual Download from Www.Somanuals.com. All Manuals Search And Download. -
Page 69: Secondary Ide Connector (Cn24)
A.4 Secondary IDE Connector (CN24) Table A.4: Secondary IDE connector (CN24) Signal Signal IDE RESET READY Cable Select DACK IRQ14 ATA check CS1# CS3# Active Appx. A Download from Www.Somanuals.com. All Manuals Search And Download. -
Page 70: Compactflash Socket(Cn22)
A.5 CompactFlash socket(CN22) Table A.5: CompactFlash socket (CN22) Signal Signal #CD1 #CE2 #VS14 #IORD #IOWR #IRQ #CSEL #VS2 RESET #WAIT #INPACK #REG BVD2 BVD1 IOCS16 #CD2 POD-6552 User’s Manual Download from Www.Somanuals.com. All Manuals Search And Download. -
Page 71: Lan,Rj45 Connector(Cn6)
A.6 LAN,RJ45 connector(CN6) Table A.6: LAN,RJ45 connector(CN6) 10/100M Signal Signal A.7 USB port 0, 1(CN4) Table A.7: USB 0, 1 connector(CN4) Signal Signal USB0- USB1- USB0+ USB1+ USB GND USB GND A.8 USB port 2, 3(CN12) Table A.8: USB 2, 3 connector(CN12) Signal Signal USB0-... -
Page 72: Usb Port 4, 5(Cn11)
A.9 USB port 4, 5(CN11) Table A.9: USB 4, 5 connector(CN11) Signal Signal USB0- USB1- USB0+ USB1+ USB GND USB GND POD-6552 User’s Manual Download from Www.Somanuals.com. All Manuals Search And Download. -
Page 73: Lvds Connector(Cn14)
A.10 LVDS connector(CN14) Table A.10: LVDS connector (CN14) Signal Signal VCC_LCD VCC_LCD LVDS0_N0 LVDS0_P0 LVDS0_N1 LVDS0_P1 LVDS0_N2 LVDS0_P2 LVDS0_CLK0N LVDS0_CLK0P LVDS0_N3 LVDS1_N2 LVDS0_P3 LVDS1_P2 LVDS1_N0 LVDS1_CLK0N LVDS1_P0 LVDS1_CLK0P LVDS_CLK LVDS_DATA LVDS1_N1 LVDS1_N3 LVDS1_P1 LVDS1_P3 VCON Appx. A Download from Www.Somanuals.com. All Manuals Search And Download. -
Page 74: Print Port Connector(Cn28)
A.12 COM port 1, 2 Connector (CN2) Table A.12: COM port 1, 2 Connector(CN2) Com1 Com2 Rs232 Rs232 Rs422 Rs485 TXD- DATA- SINA SINA TXD+ DATA+ SOUT SOUT RXD- RXD+ POD-6552 User’s Manual Download from Www.Somanuals.com. All Manuals Search And Download. -
Page 75: Com Port 3, 4 Connector (Cn9)
A.13 COM port 3, 4 Connector (CN9) Table A.13: COM port 3,4 Connector(CN9) Signal Signal DCD3 DSR3 SIN3 RTS3 SOUT3 CTS3 DTR3 DCD4 DSR4 SIN4 RTS4 SOUT4 CTS4 DTR4 Appx. A Download from Www.Somanuals.com. All Manuals Search And Download. -
Page 76: Audio Connector(Cn8)
Left line out Ground Ground Right line in Left line in Ground Ground MIC IN Ground A.15 D-SUB VGA connector(CN1) Table A.15: D-SUB VGA connector(CN1) Signal Signal S-DATA HSYNC VSYNC S-CLK POD-6552 User’s Manual Download from Www.Somanuals.com. All Manuals Search And Download. -
Page 77: Vga Connector(Cn7)
A.16 VGA connector(CN7) 14 16 13 15 Table A.16: VGA connector(CN7) Signal Signal D2_DATA D2_ CLOCK A.17 IrDA connector(CN10) Table A.17: IrDA connector(CN10) Signal Signal IRRX IRTX A.18 LCD Backlight connector(CN15) Table A.18: LCD Backlight connector(CN15) Signal Signal +12V BACKLIGHT ENABLE Appx. -
Page 78: Ps/2 Connector(Cn13)
A.20 CD-In connector(CN16) Table A.20: CD-In connector(CN16) Signal Signal CD in left CD in right A.21 PS/2 Mouse/Keyboard connector(CN5) Table A.21: PS/2 Mouse/Keyboard connector(CN5) Signal Signal KDATA MDATA KCLOCK MCLOCK POD-6552 User’s Manual Download from Www.Somanuals.com. All Manuals Search And Download. -
Page 79: Ttl Lcd Or Dstn Connector(Cn17)
A.22 TTL LCD or DSTN connector(CN17) Table A.22: TTL LCD or DSTN connector (CN17) Signal Signal VCC_LCD VCC_LCD VCC_LCD VCC_LCD PD10 PD11 PD12 PD13 PD14 PD15 PD16 PD17 PD18 PD19 PD20 PD21 PD22 PD23 SFCLK ENABL Appx. A Download from Www.Somanuals.com. All Manuals Search And Download. -
Page 80: Isa Slot(Cn19)
DRQ2 -12V ENDFXR +12V IOCHRDY SMEMW SA19 SMEMR SA18 SA17 SA16 DACK3 SA15 DRQ3 SA14 DACK1 SA13 DRQ1 SA12 REFRESH SA11 SYSCLK SA10 IRQ7 IRQ6 IRQ5 IRQ4 IRQ3 DACK2 POD-6552 User’s Manual Download from Www.Somanuals.com. All Manuals Search And Download. -
Page 81: Ebx Power Connector(Cn20)
A.24 EBX Power connector(CN20) Table A.24: EBX connector(CN20) Signal Signal +12V -12V A.25 -5V and -12V connector(CN21) Table A.25: -5V and -12V connector(CN21) Signal Signal -12V Appx. A Download from Www.Somanuals.com. All Manuals Search And Download. -
Page 82: Front Panel Connector(Cn26)
A.26 Front Panel connector(CN26) Table A.26: Front Panel connector(CN26) Signal Signal HDD_LED SUSLED 3.3V LAN_ACT 3.3V LAN_LINK POWER BUTTON RESET POD-6552 User’s Manual Download from Www.Somanuals.com. All Manuals Search And Download. - Page 83 System Assignments This appendix contains information of a detailed nature. It includes: • System I/O ports • 1st MB memory map • DMA channel assignments • Interrupt assignments Appx. B Download from Www.Somanuals.com. All Manuals Search And Download.
-
Page 84: Appendix B System Assignments
200-20F Game Port 2E8-2EF COM4 2F8-2FF COM2 378-37F Parallel Port(Standard & AFF) 3C0-3CF 3D0-3DF 3E8-3EF COM3 3F0-3F7 Floppy Controller 3F8-3FF COM1 778-77A Parallel Port(ECP Extensions)(Port 378+400) 870-871 Hardware Monitor POD-6552 User’s Manual Download from Www.Somanuals.com. All Manuals Search And Download. -
Page 85: 1St Mb Memory Map
Table B.1: System I/O ports Addr. range (Hex) Device CF8-CFB PCI Configuration Address CFC-CFF PCI Configuration Data D00-FFFF -available for system use- B.2 1st MB memory map Table B.2: 1st MB memory map Addr. range (Hex) Device F0000h - FFFFFh System ROM *D0000h - EFFFFh Unused (reserved for Ethernet ROM) - Page 86 Reserved (audio) IRQ 10 COM3 IRQ 11 Reserved for watchdog timer IRQ 12 PS/2 mouse IRQ 13 INT from co-processor IRQ 14 Primary IDE IRQ 15 Secondary IDE for CFC POD-6552 User’s Manual Download from Www.Somanuals.com. All Manuals Search And Download.
- Page 87 Programming the Watchdog Timer The board is equipped with a watchdog timer that resets the CPU or generates an interrupt if processing comes to a standstill for any reason. This feature ensures system reliability in industrial standalone or unmanned environments. Download from Www.Somanuals.com.
- Page 88 After data entry, your program must refresh the watchdog timer by rewriting the I/O port 866 (hex) while simultaneously setting it. When you want to disable the watchdog timer, your program should write I/O port 866 (hex) to 00. Pod-6552 User’s Manual Download from Www.Somanuals.com. All Manuals Search And Download.
- Page 89 The following example shows how you might program the watchdog timer in ASSEMBLY: ;Watchdog timer example program MOV DX, 865H ; set the time unit as second MOV AL, 80H OUT DX, AL MOV DX,866H MOV AL, data ; data=1~255 Second OUT DX, AL Appendix C Download from Www.Somanuals.com.
- Page 90 Pod-6552 User’s Manual Download from Www.Somanuals.com. All Manuals Search And Download.
- Page 91 Free Manuals Download Website h p://myh66.com h p://usermanuals.us h p://www.somanuals.com h p://www.4manuals.cc h p://www.manual-lib.com h p://www.404manual.com h p://www.luxmanual.com h p://aubethermostatmanual.com Golf course search by state h p://golfingnear.com Email search by domain h p://emailbydomain.com Auto manuals search h p://auto.somanuals.com TV manuals search h p://tv.somanuals.com...
Need help?
Do you have a question about the POD-6552 and is the answer not in the manual?
Questions and answers