BodyCraft EXP Series Assembly Manual
Hide thumbs
Also See for EXP Series:
- Owner's manual (50 pages) ,
- Assembly manual (32 pages) ,
- Operation manual (26 pages)
Table of Contents
Advertisement
Quick Links
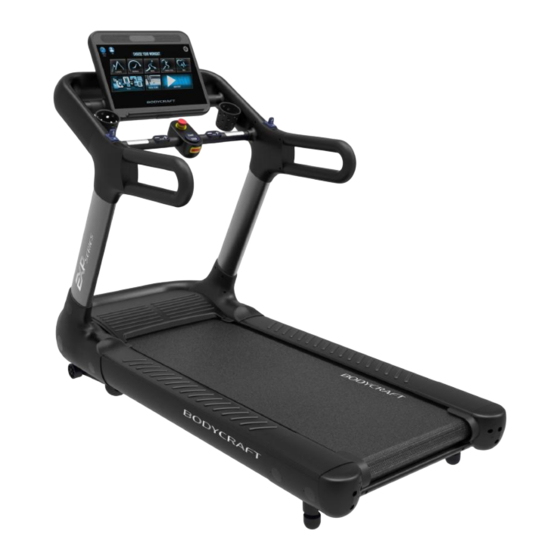
T1200
Treadmill
For the Owner's Manual,
Assembly STEPS in
FULL COLOR
& additional information,
Open your Camera
App and point it at
scan this QR code.
the QR Code
Base Serial Number: T120 __________________
Console Serial Number: ____________________
Purchased Date: ___ / ___ / ______
Dealer's Name:__________________________
Please register your products at:
https://www.bodycraft.com/product-registration/
Base Serial Number
Assembly Manual
T1200 (T120) AM v1.2
1
Advertisement
Table of Contents

Related Manuals for BodyCraft EXP Series


Summary of Contents for BodyCraft EXP Series
- Page 1 QR code. the QR Code Base Serial Number: T120 __________________ Console Serial Number: ____________________ Purchased Date: ___ / ___ / ______ Dealer’s Name:__________________________ Please register your products at: https://www.bodycraft.com/product-registration/ Base Serial Number Assembly Manual T1200 (T120) AM v1.2...
- Page 2 Your BODYCRAFT machine has all the quality and design elements to make your workout extremely efficient and comfortable. Your new unit is a serious cardio machine that will keep you motivated, challenged and within reach of your fitness goals.
-
Page 3: Table Of Contents
Table of Contents Page Product Safety Information Product Safety …………………………………………………………….……….. 4 - 5 Power & Grounding Requirements Grounding Instructions …...........….……..………….. Power Requirements ……………………………..…………………………….. Product Overview Product Overview & Tools for Assembly .……………………………..……. Shipping Boxes and Pre-Assembly TIP ……………………………..…………. Assembly Parts & Hardware ………………………………………………. 9 - 10 How Assemble the Treadmill Product Assembly Instructions ..........…………..………... - Page 4 Read, study and understand the Assembly Instructions and all the warning labels on this product. Furthermore, it is recommended to familiarize yourself and others with the proper operation and workout recommendations for this BODYCRAFT product prior to use. ● Keep children under the age of 13 and pets away from the equipment at all times. Do not allow children and pets to use or play on the equipment.
- Page 5 Read, understand, and test the emergency stop procedures before use. ● To ensure proper function of your treadmill, do not install attachments or accessories not provided or recommended by BODYCRAFT. ● This T1200 Treadmill is intended for home use and commercial, rental, or institutional setting.
-
Page 6: Grounding Instructions
Safety and Warning for a Treadmill - Electrical & Grounding Instructions This product must be grounded. If the treadmill’s electrical system should malfunction or breakdown, grounding provides a path of least resistance for electric current, reducing the risk of electric shock. This product is equipped with a cord having an equipment-grounding plug. -
Page 7: Product Overview
Product Overview and Tools for Assembly - T1200 (T120) Energy Saving function: These treadmill consoles are equipped with a power saving function. This means after 10 minutes of inactivity, the treadmill will automatically power off. Press any key on the dashboard to wake up the console from power save mode. -
Page 8: Shipping Boxes And Pre-Assembly Tip
Remove all packing materials from your area and place them back into the box. Do not dispose of the packing materials until assembly is completed. Read each step carefully before beginning. BODYCRAFT reserves the right to make improvements at any time which may affect color, parts, materials, size, weight, or any other aspect. -
Page 9: Assembly Parts & Hardware
Assembly Parts - T1200 (T120) NOTE: For a complete service parts list, please refer to the detailed parts list & exploded view …………………………………….at the rear of this manual. Large Box #1 Medium Box #2 Assembly Manual Hardware & Tool Kit Small Box #3 Console Operation Manual... - Page 10 Assembly Hardware - T1200 (T120) NOTE: For a complete service parts list, please refer to the detailed parts list & exploded view …………………………………….at the rear of this manual. NOTE: Parts are not to scale...
- Page 11 Product Assembly DECISION POINT If you are simultaneously assembling a If you are assembling a T1200 without a T1200 & the Connect-22, o directly to Connect-22, Go to STEP 1 below the Connect-22-T1200 Owner’s Manual – TEP 1 & 2 Install Upright Connecting Tubes (Rt &...
-
Page 12: Product Assembly Instructions
Product Assembly – TEP 3 Connect Cables on Right Upright Post Part # Description T120:073 Upright Post, Right Side ( T ) NOTE: Confirm connections have no bent pins (Fig. 2) and are securely locked (Fig. 3) with a gentle pull after connected. - Page 13 Product Assembly – TEP 4 & 5 Install Upright Posts (Rt & Lt) Please Hand Tighten All Bolts Until STEP 10b Part # Description T120:072 Upright Post, Left Side ( T ) T120:073 Upright Post, Right Side ( T ) Bolt, Flat Allen Head, M8 x 1.25P x T120:142 15mm L - BLK...
- Page 14 Product Assembly Product Assembly – TEP 6 Install Dashboard Assembly NOTE: Confirm connections have no bent pins (above) and are securely locked (below) with a gentle pull after connected.
- Page 15 Product Assembly – TEP 7 & 8 Install Dashboard Assembly to the Upright Posts (Rt & Lt) Please Hand Tighten All Bolts Until STEP 10b Part # Description T120:142 Bolt, Flat Allen Head, M8 x 1.25P x 15mm L - BLK T120:154-ASM Frame, Dashboard - Assembly T120:175...
- Page 16 Product Assembly Product Assembly DECISION POINT If you are simultaneously assembling a If you are assembling a T1200 with the T1200 & the Extended Handrails, normal short handrails, Go to STEP 9 below directly to the T1200-EH Owner’s Manual Open your Camera App and point it at the QR Code –...
- Page 17 Product Assembly Product Assembly STEP 10b – “Torque Time” Tighten all Allen Head Bolts to the Recommended Tools: Recommended Torque Specs. These are from STEP 3 to STEP 10. NOTE: If no Torque Wrench is available use Fig. 4 as an example for average male hand appling 11 - 13 ft-lbs.
- Page 18 Product Assembly Product Assembly – TEP 11 & 12 Install Upright Posts Inner & Outer Covers (Rt & Lt) Recommended Tool: PHILLIPS SCREWDRIVER #2 w/ Magnetic TIP Part # Description T120:138 Upright Cover, Outer Bottom, Right T120:139 Upright Cover, Inner Bottom, Right T120:140 Upright Cover, Outer Bottom, Left T120:141...
- Page 19 Product Assembly Product Assembly – TEP 13 & 14 Install Handlebar Inner & Outer Covers (Rt & Lt) Recommended Tool: PHILLIPS SCREWDRIVER #2 w/ Magnetic TIP (The Longer Screws) Part # Description T120:155 Handlebar Cover, Outer Left T120:156 Handlebar Cover, Outer Right T120:157 Handlebar Cover, Inner Left T120:158...
- Page 20 Product Assembly Product Assembly – TEP 15 Install Console Mounting Plate & Tighten to Recommended Torque Specs Recommended Tool: ALLEN WRENCH Part # Description T120:171 Mounting Plate, Console T120:172 Bolt, Allen Head, M8 x 1.25P x 35mm L - BLK –...
- Page 21 Product Assembly Product Assembly – TEP 17 Install Console & Tighten to Recommended Torque Specs Part # Description T120:170 Console T120:173 Bolt, Allen Head, M8 x 1.25P x 20mm L - BLK T120:174 Washer, Spring, M8 - BLK T120:175 Washer, Flat, M8 x Ø16 x T1.0 - BLK Recommended Tool: ALLEN WRENCH 8 ft-lbs...
-
Page 22: Spacing Requirements
Product Setup - Spacing Requirements BODYCRAFT recommendation is to leave a minimum of a 79 inches (2m) safety zone at the rear of the treadmill, 24 inches (0.6m) on each side of the treadmill and 12 inches (0.3m) in front of treadmill. -
Page 23: Running Belt Tension & Alignment
Follow these steps after the assembly STEPS to ensure proper function of your treadmill! ● If you are not comfortable performing these STEPS, please contact your local BODYCRAFT dealer or our customer support department to arrange a qualified technician to come to your home or commercial location. -
Page 25: Cleaning Your Treadmill
Cleaning your Treadmill CAUTION: Do not use any acidic cleaners. Doing so will discolor the plastics, painted surfaces and powder coatings. Never pour water or spray liquids on any part of the item. 1. Turn off and unplug the treadmill power cord from the wall before using any cleaning product. 2. -
Page 26: Detailed Parts Lists
Part Lists - Detailed - T1200 (T120) 1 of 4 Part # Description Detailed Assembly Parts T120:A01-ASM Frame, Incline w/ Hardware & Transportation / Incline Wheels #66 - Assembly T120:A02-ASM Side Foot Rail, w/ Rubber Inserts, Left - Assembly T120:A03-ASM Side Foot Rail, w/ Rubber Inserts, Right - Assembly T120:A04-ASM Handle Bar Cover, w/ Handgrip Heart-Rate &... - Page 27 Part Lists - Detailed - T1200 (T120) 2 of 4 Part # Description Part # Description Detailed Single Parts Detailed Single Parts T120:047 Bolt, hex head, M10 x 1.5P x 45mm L - BLK T120:111 Wire, Black 550mm L + 270mm L Grommet, Rubber w/ Quick Release for Motor Top T120:112 Wire, Black 150mm L...
- Page 28 Part Lists - Detailed - T1200 (T120) 3 of 4 Part # Description Part # Description Detailed Single Parts Detailed Single Parts T120:142 Bolt, Flat Allen Head, M8 x 1.25P x 15mm L - BLK T120:189 Motor Lock Plate, Inner Right T120:143 Bolt, Allen Head, M8 x 1.25P x 15mm L - BLK T120:190...
-
Page 29: Detailed Parts Exploded Views
T120:249 Label, Indicate for T19" Touch screen T120:241 Screwdriver, Phillips # 2 T120:242 Sticker, EXP Series for dashboard frame cover T120:250 Label, Power Cable for Connect-22 T120:251 Label, Warning for end of Right Rear Cover Product Parts Exploded View - Dashboard Assembly - T1200 (T120) - Page 30 Product Parts Exploded View - Upright Posts, Handlebars & Console- T1200 (T120) NOTE: Parts are not to scale...
- Page 31 Product Parts Exploded View - Base Assembly - T1200 (T120) NOTE: Parts are not to scale...
-
Page 32: Circuit Diagram
Circuit Diagram - T1200 (T120) NOTE: Parts are not to scale... -
Page 33: Warranty & Contact Us Product Warranty Registration
Warranty Registration - Cardio, T1200 Treadmill Thank you for purchasing a BODYCRAFT product. To validate the product warranty the fast and easy way, please go on-line now to https://www.bodycraft.com/product-registration.html and register your product. The information you provide will never be distributed to any other individuals or agencies for any purpose. If you prefer to mail your warranty card, have the owner of the product complete the information below and return it to BODYCRAFT within 30 days from the date of equipment installation. -
Page 34: Required Info Before Initiating A Service Case
Required Information BEFORE Initiating a Service Case The following information is needed to help expedite troubleshooting and to ensure the correct part(s) are sent if needed for a repair: What product / model # do you have? Unit serial number? Installed by a dealer or direct sale? Date of installation? Date of service issue?
Need help?
Do you have a question about the EXP Series and is the answer not in the manual?
Questions and answers