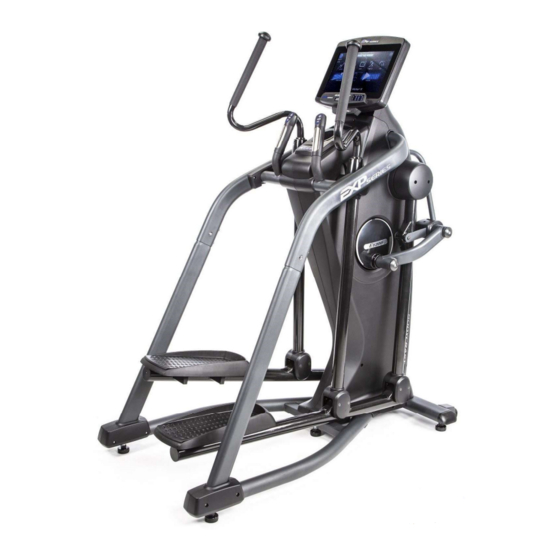
Treadmills with 9" lcd console, engineering modes (4 pages)
Summary of Contents for BodyCraft EXP Series
Page 1
& additional information, the QR Code scan this QR code. Base Serial Number: E ____________________ Console Serial Number:____________________ Purchased Date: ___ / ___ / ______ Dealer’s Name:__________________________ Please register your products at: Base Serial Number https://www.bodycraft.com/product-registration/ Owner’s Manual (E1K1-V4) ver. 1.5...
Page 2
Your BODYCRAFT machine has all the quality and design elements to make your workout extremely efficient and comfortable. Your new unit is a serious cardio machine that will keep you motivated, challenged and within reach of your fitness goals.
Table of Contents Page Maintenance & Repairs Information Needed Prior to Contacting Customer Support ……………… 34 Circuit Diagram ………………………………………………………………... 35 38 - 39 Parts Lists ………..………….………………………………………….…. 36 - 37 40 - 41 Parts Exploded Views………………………………….…………….……38 - 39 Warranty Product Warranty ............….……..….……... 40 Product Warranty Registration ..........….…..………...
Page 5
Read, study and understand the Assembly Instructions and all the warning labels on this product. Furthermore, it is recommended to familiarize yourself and others with the proper operation and workout recommendations for this BODYCRAFT product prior to use. ● We recommend that two people be available for moving and assembly of this product.
Page 6
Safety and Warnings - Elliptical ● Keep both feet firmly and securely on the Foot Pedals while exercising. ● This Elliptical should not be used by persons weighing over 400 pounds /181 kgs. ● The Elliptical should be used by only one person at a time. ●...
Product Overview Components and Tools for Assembly THE FOLLOWING TOOLS ARE INCLUDED FOR ASSEMBLY: THE FOLLOWING TOOLS ARE RECOMMENDED FOR EASIER ASSEMBLY: SOCKET SET ⅜ drive w/ 3“ & 6” OPEN & CLOSED WRENCHES ALLEN WRENCHES SET PHILLIPS SCREWDRIVERS EXTENSION for 13mm & 17mm for 13mm &...
Hardware Identification Chart Unpack the box in a clear area. Use the List of Hardware below to check the contents of the hardware kit. This chart is provided to help identify the hardware used in the assembly process. Place the washers, the end of bolts, or screws on the circles to check for the correct diameter.
Assembly Parts Unpack the box in a clear area. Follow the List of Assembly Parts below to check and make sure all assembly parts are present and in good condition. Do not dispose of the packing material until the assembly process is completed. Assembly tools and hardware kit have included for you to use when assembling the product (5 each) Adaptor (107) &...
Remove all packing materials from your area and place them back into the box. Do not dispose of the packing materials until assembly is completed. Read each step carefully before beginning. BODYCRAFT reserves the right to make improvements at any time which may affect color, parts, materials, size, weight, or any other aspect.
Product Assembly - Pre Assembly Tips PRE ASSEMBLY TIP #1 – UnPacking “The Monster” (E1200 & E1000). Once you have taken all the parts and main frame out of the shipping box, place the main frame forward on packaging foam. ONLY REST ON METAL FRAME NOT PLASTIC. Not stable and can easily fall Very stable and safe to start the Assembly STEPS.
Product Assembly Many Images shown are GENERIC for both the E1200 and E1000 Ellipticals on most assembly STEPS STEP 1 – Remove Packing Tube Follow the left drawing to remove the Packing Tube (167) by unscrewing 4pcs Washers (122) and 2pcs Nuts (129). NOTE: DO NOT REUSE THIS HARDWARE &...
Page 13
Product Assembly – TEP 3 Leveler (11) & Base Frame (48) Assembly Follow the drawing on the right to attach 3pcs Levelers (11) under the Base Frame (48). Screw levelers down to frame with no threads showing. NOTE: Flip upside down and install the levelers. Then flip over with levelers (11) touching the ground for next STEP.
Page 14
Product Assembly – TEP 4 Install Base Frame Assembly to Main Frame Assembly Part # Description E1K1-001 Main Frame Assembly E1K1-048 Base Frame Assembly E1K1-115 Lock Washer (M8) E1K1-121 Washer (M8 × 30 × 2.0t) E1K1-123 Washer (M10 × 23 × 2.0t) E1K1-135 Thinner Nylon Nut (M10 ×...
Page 15
Product Assembly – TEP 5 Adjust the Handlebar & Remove Upper Cover (30) a. First Rotate the Fixed Handlebar (85) upward as shown. Recommended Tool: PHILLIPS SCREWDRIVERS #2 w/ Magnetic TIP b. Then remove the Upper Cover (30) by first removing Screws (147).
Page 16
Product Assembly – TEP 6 Assembly Hardware Pack & 13mm Wrench (supplied) TIP a. Fully unpackage the Assembly b. If using the supplied Hardware Pack and label the hardware 13mm Wrench, find number on cardboard in front of each the soft packaging type, for an easy assembly process from material that is in the STEP 7 till STEP 16.
Page 17
Product Assembly TEP 7 – (Continued) Install Rotator Cuffs (plastic covers) d-e: Image show below for Rt Side, repeat for Lt Side. Part # Description E1K1-063 Front Rotator Cuff E1K1-064 Back Rotator Cuff Recommended Tool: Screw (M5 × p0.8 × E1K1-147 15mm) PHILLIPS SCREWDRIVERS #2...
Page 18
Product Assembly Please Hand Tighten All Bolts Until STEP 9 – ( TEP 8 Continued) a thru c. Remove all PREASSEMBLED hardware from Rear Support Tubes. NOTE: Save them for STEP 8c. Part # Description E1K1-151 Bolt (M8 × p1.25 × 15mm) Recommended Tool: Allen Wrench 5mm b-c: Attach the Stationary Handrails Lt &...
Page 19
Product Assembly Please Hand Tighten All Bolts Until STEP 9 – ( TEP 8 Continued) d thru e. d. Remove all PREASSEMBLED hardware from Stationary Handrails both Rt & Lt Sides and save for STEP 11. Part # Description E1K1-074 Left Stationary Handrail E1K1-075 Right Stationary Handrail...
Page 20
Product Assembly Please Hand Tighten All Bolts Until STEP 9 – ( TEP 8 Continued) Assembly of Stationary Handrail, f thru g. f-g:. Attach the Stationary Handrails on both Rt & Lt Sides to the Main Frame Assembly. Part # Description E1K1-074 Left Stationary Handrail...
Page 21
Product Assembly Please Hand Tighten All Bolts Until STEP 9 – TEP 8 (Continued) h thru i. h-i: Install both Rt & Lt Handrails to the Rt & Lt Sides of the Base Frame Assembly. Part # Description E1K1-074 Left Stationary Handrail E1K1-075 Right Stationary Handrail E1K1-102...
Page 22
Product Assembly – TEP 10 Side Handrail Cover Assembly a. Remove all PREASSEMBLED hardware from the Fixed Handlebar both Rt & Lt Sides. b. Reinstall hardware with both Rt & Lt Side Handrail Covers Recommended Tools: PHILLIPS SCREWDRIVERS #2 w/ Magnetic TIP Part # Description E1K1-076...
Page 23
Product Assembly – TEP 11 Install Rear EndCap Covers on both Rt & Lt Sides Part # Description E1K1-050 Left Rear EndCap Cover - Outer E1K1-051 Left Rear EndCap Cover - Inner E1K1-052 Right Rear EndCap Cover - Inner E1K1-053 Right Rear EndCap Cover - Outer E1K1-072 Screw Cap...
Page 24
Product Assembly – TEP 13 Pedal Arm, Pedal Arm Cover Assembly a. Remove all PREASSEMBLED Recommended Tool: hardware from the Front & Back Swing Arms on both Rt & Lt PHILLIPS SCREWDRIVERS #2 Sides. w/ Magnetic TIP Part # Description E1K1-071 Back Swing Arm E1K1-077...
Page 25
Product Assembly – TEP 13 (Continued) Install Pedal Arms & Pedal Arm Cover on both Rt & Lt Sides. Part # Description E1K1-072 Screw Cap E1K1-073 Pedal Arm Cover E1K1-147 Screw (M5 × p0.8 × 15mm) NOTE: Press in the Screw Caps after screws are tightened.
Page 26
Product Assembly STEP 14 – (Continued) Install the Rt & Lt Pedals & Non-Slip Pads on the Pedal Arms Part # Description E1K1-054 Non-Slip Pad E1K1-055 Pedal E1K1-149 Bolt (M8 × p1.25 × 15mm) E1K1-169 Washer (M8 × 19 × 2.0t) NOTE: Confirm all four inserts are fully depressed flat into pedal holes.
Page 27
Product Assembly STEP 15 – Install the Console Bracket, Console and Front Cover a. Remove all PREASSEMBLED hardware from the Console Bracket. Part # Description E1K1-094 Console Bracket E1K1-115 Lock Washer (M8) E1K1-119 Washer (M8 × 16 × 2.0t) E1K1-162 Bolt (M8 ×...
Page 28
Product Assembly STEP 15 – (Continued) Console Bracket, Console and Front Cover Assembly. d. Connect the Console Connection Wire (92a) to …. the First Connection Wire (106). e. Connect the Console Pulse Sensor Wire (92b) to .the First Pulse Sensor Wire (110). f.
Page 29
Product Assembly – TEP 17 “The Last STEP” Leveler & Stabilizer Assembly Be sure to tighten the Levelers (19) securely against the Main Frame and Base Frame (48, 1) until screw lines are eliminated as shown with drawing #1. Adjusted up to frame Adjusted down away from frame Stabilizer Stabilizer...
Page 30
Operational Instruction Plugging in the E1000 (E1K1) Elliptical - Adaptor Usage: ONLY use for the 16” & 10” Touch Screen Consoles or charging the battery, if needed, for the 9” LCD console. Connect the Adaptor (12DC / 3A) (107) & Power Cord (108) to the connector located on the front of the Main Frame (1).
Page 31
Operational Instruction OW TO MOVE THE E1000 ELLIPTICAL SAFELY Hold the Base Frame (48) up with two hands and move the item to the desired location then carefully bring to floor. NOTE: Make sure to relevel if unstable after moved to new location, see STEP 17. THE STRIDE LENGTH For a great stretching exercise, the E1000 Elliptical has a locked extended...
Cleaning your Elliptical CAUTION: Do not use any acidic cleaners. Doing so will discolor the plastics, painted surfaces and powder coatings. Never pour water or spray liquids on any part of the item. 1. Unplug Elliptical before using any cleaning product. 2.
Page 33
High Intensive Exercise while on a machine. Built in Wireless Heart Rate Receiver Note: Chest strap transmitter does not come with this unit; contact BODYCRAFT, or your dealer for purchase. This product is equipped with a built-in receiver for your heart rate monitoring. Any heart rate telemetry strap that transmits at 5 KHz or Bluetooth is compatible.
Page 34
Heart Rate Monitoring Device & Exercise Tips Erratic Heart Rate Readings: Erratic readings on the receiver can be caused by electromagnetic disturbances. If the heart rate readings appear to be abnormal, check that your product is not within range of other strong electromagnetic signals. Common sources are televisions, computers, cars, cell phones, TV antennas and high voltage power lines (both above and below ground).
Page 36
Service Request Required Information BEFORE Initiating a Service Case The following information is needed to help expedite troubleshooting and to ensure the correct part(s) are sent if needed for a repair: What product / model # do you have? Unit serial number? Installed by a dealer or direct sale? Date of installation? Date of service issue?
Page 38
Part Lists (E1K1-V4) 1 of 2 Part # Description Part # Description E1K1-001 Main Frame E1K1-049 Bearing (6005) E1K1-002 Crank E1K1-050 Left Rear EndCap Cover - Outer E1K1-003 Bearing (6004) E1K1-051 Left Rear EndCap Cover - Inner E1K1-004 Spacer (25.1 x 32 x 40mm) E1K1-052 Right Rear EndCap Cover - Inner E1K1-005...
Page 39
Part Lists (E1K1-V4) 2 of 2 Part # Description Part # Description E1K1-102 Left Rear Support Tube E1K1-152 Bolt (M10 × p1.5 × 70mm) E1K1-103 Right Rear Support Tube E1K1-153 Bolt (M8 × p1.25 × 25mm) E1K1-104 Handheld Dome Plug E1K1-154 Bolt (M10 ×...
Page 40
Product Parts Exploded View - Inside Main Frame (E1K1-V4)
Page 41
Product Parts Exploded View - Attached to Main Frame (E1K1-V4)
Page 42
If the item exhibits such a defect, BODYCRAFT will, at its option, repair or replace it without cost for parts. Shipping and handling charges may apply. (BODYCRAFT may require return of the part(s) or photographic evidence of the damaged part(s) prior to replacement.) Serial number is required.
Page 43
Warranty Registration Thank you for purchasing a BODYCRAFT product. To validate the product warranty the fast and easy way, please go on-line now to https://www.bodycraft.com/product-registration.html and register your product. The information you provide will never be distributed to any other individuals or agencies for any purpose. If you prefer to mail your warranty card, have the owner of the product complete the information below and return it to BODYCRAFT within 30 days from the date of equipment installation.
Need help?
Do you have a question about the EXP Series and is the answer not in the manual?
Questions and answers