Table of Contents
Advertisement
Quick Links
Advertisement
Table of Contents

Related Manuals for PR Lighting PR-6000 FRAMING


Summary of Contents for PR Lighting PR-6000 FRAMING
- Page 1 PR-6000 FRAMING (1400W) PR-2937 The user manual contains important information about the safe installation and use of a projector. Please read and follow these instructions carefully and keep the manual in a safe place for future reference. PR LIGHTING LTD.
-
Page 2: Table Of Contents
INDEX 1. SAFETYAND WARNINGS ………………………………………………………………………………………… 2. INSTRUCTIONS …………………………………………………………………………………………………… 3. APPEARANCE ………………………………………………………………………………………………… … 4. INSTALLATION …………………………………………………………………………………………………… 5. SETUPAND CONFIGURATION …………………………………………………………………………………… 6. OPERATIONMENU ………………………………………………………………………………………………… 7. DMX PROTOCOL ………………………………………………………………………………………………… 8. SIGNS ON THE TOUCH SCREEN ………………………………………………………………………………… 9. ERROR MESSAGE……………………………………………………………………………………………… 10. TECHNICAL DATA ……………………………………………………………………………………………… 11. -
Page 3: Safetyand Warnings
Note: For the products made by Guangzhou PR lighting Ltd, the warranty for the whole product is one year starting from the delivery date but the light source is not within the warranty 1. SAFETYAND WARNINGS NOTE Before a projector’s installation, power-on, operation and maintenance, please carefully read the safety information hereinafter! The following safety signs are used in the user manual. -
Page 4: Instructions
Any electrical connection must be carried out by a qualified person . ● Before installation, please confirm the voltage supplied matches what is required for the projector ● Each projector must be properly earthed and installed as per related electrical standards. ●... -
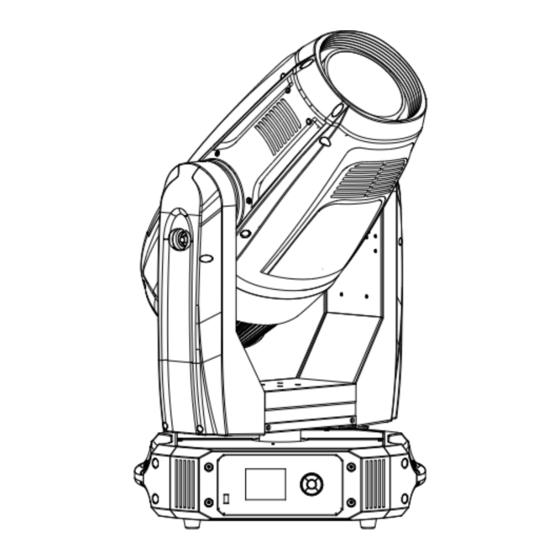
Page 5: Appearance
To avoid internal damage, sun light or other light mustn’t penetrate into the projector via front lens whether ● it runs or not Do not use alcohol or other organic solvent to clean the housing to avoid damage. ● Do not use any solvent with chemical elements to clean color filters or hot mirror. ●... - Page 6 Note: 1. the distance between the foot of the base and the front lens cover(the head facing downward) distance between mounting truss and the front lens cover( the head facing downward) 3. The maximum diameter of the rotating head ( minimum spacing between fixtures) WARNING Clamp...
- Page 7 ● POWER CONNECTION Connect the power cord as follows: L (live) =brown E (earth) =yellow/green N (neutral) =blue Before power connection, please ensure the power supplied must match what the nameplate says. It is recommended that each projector be connected with power separately so that they may be individually switched on and off. The earth wire(yellow/green) must be connected to the ground.
- Page 8 DMX TERMINATOR CONNECTION Connect a 120 (OHM) resistor across pins 2 and 3 in an XLR plug and insert into the DMX out socket on the last unit in the chain. PIN 2 PIN 3 ● ALIGNMENT/INSTALLATION/REPLACEMENT OFALAMP Before installation/replacement/alignment of a lamp, disconnect the unit from the power and let it cool first. Lock Tilt in the figure below and open the lamp cover after its 4 screws are loosened.
-
Page 9: Setupand Configuration
Framing module Colour wheel Rotate Gobo wheel Lock the tilt and loosen the 4 fast-fit screws on the upper cover ,After removing the cover, you will see the structures as the figure below. Before replacing a gobo on the fixed gobo wheel, use your finger to remove the spring tightening it and take the old one out with due care.At last put the new into the wheel. - Page 10 ◄ means ESCAPE, key ► won’t function, key OK means ENTER. Push key OK to At 2 and 4 level menus, key save any changes o enter into submenus. Push key ▲or ▼ to change numbers(plus or minus) or tap any item required for changes.
-
Page 11: Operationmenu
Master Slave Slave Terminator Controler 6. OPERATION MENU 1st LEVEL 2nd LEVEL 3rd LEVEL 4th LEVEL 5th LEVEL 1-478(Short Mode) 1-472(Standard Mode) DMX Address 1-459(Extended Mode) Default IPAddress 2.X.X.X /10.X.X.X IP Address Custom IPAddress X.X.X.X Address X.X.X.X SubNet Mask ArtNet Universe 0-255 sACN Universe 1-63999... - Page 12 Invert OFF Display Invert Invert ON InvertAuto English Language Setting Chinese Input Password123 Touch Calibration Celsius Degree Temperature Unit Fahrenheit Degree Un-Link Wireless Really Un-Link? Factory Defaults Restore Defaults? Pan DMX Invert OFF/ ON Tilt DMX Invert OFF/ ON Pan/Tilt Settings Pan Tilt Swap OFF/ ON XYFeedback...
-
Page 13: Dmx Protocol
System= XXX Fan Board Boot =XXX Electronic SN= Electronic SN ************ RDM Device Label RDM Device Label ANSI E1.20 RDM Version X.X Fan Status XYEncoder Lamp Fan Error Strobe XXX Manual Effect Control Service DimmerXXX … Factory Test Change Operation Mode? DMX Mode Preset Memory Change Operation Mode? - Page 14 Color macro1 Color macro2 Color macro3 Color macro4 Color macro5 Color macro6 Color macro7 Color macro8 Color macro9 Color macro10 Color macro11 Color macro12 Color macro13 Color macro14 Color macro15 Color macro16 Color macro17 Color macro18 Color macro19 Color macro20 Color macro21 Color macro22 Color macro23...
- Page 15 Color macro45 Color macro46 Color macro47 Color macro48 Color macro49 Color macro50 Color macro51 Color macro52 Color macro53 Color macro54 Color macro55 Color macro56 Color macro57 Color macro58 Color macro59 Color macro60 Color macro61 Color macro62 Color macro63 Color macro64 Color macro65 Color macro66 Color macro67...
- Page 16 Color macro89 Color macro90 Color macro91 Color macro92 Color macro93 Color macro94 Color macro95 Color macro96 CMY color mixing fade from slow toast Cyan Cyan (Linear 0-100%) Cyan in 16 bit Cyan 16 bit adjustment Yellow Yellow (Linear 0-100%) Yellow in 16 bit Yellow 16bit adjustment Magenta Magenta (Linear 0-100%)
- Page 17 Clockwise rainbow effect from slow to fast Anti-clockwise rainbow effect from slow to fast Color wheel in 16bit Color wheel continuous positioning ,16bit adjustment Iris Linear iris from big to small Iris in 16bit Iris 16 bit adjustment Iris macros Disable iris macro Iris macro1:Iris from big to small(speed from slow to fast)...
- Page 18 Gobo5shakes from slow to fast Gobo6shakes from slow to fast Gobo rotation Indexing 0-360° Stop Clockwise rotation from slow to fast Stop Anti-clockwise rotation from slow to fast Gobo rotation in 16bit Gobo rotation 16bit adjustment Framing blade 1left Linear Framing Blade1 Left Change 0%-100% Framing Blade 1 Left change in 16 bit Framing Blade 1 Left change in 16 bit precision Framing Blade 1 right...
- Page 19 Framing Blade 3 right change in 16 bit Framing Blade 3right change in 16 bit precision Framing Blade 4 Left Linear Framing Blade4Left Change 0%-100% Framing Blade 4 Left change in 16 bit Framing Blade 4Left change in 16 bit precision Framing Blade 4 Right Linear Framing Blade4Right Change 0%-100% Framing Blade 4 right change in 16 bit...
- Page 20 Linear focus Focus in 16 bit Focus 16 bit adjustment Zoom Linear Zoom Zoom in 16 bit Zoom 16 bit adjustment Pan movement Pan in 16 bit Pan movement in 16 bit Tilt Tilt movement Tilt in 16 bit Tilt movement in 16 bit Pan &...
-
Page 21: Signs On The Touch Screen
Reserved Lamp off Reserved Remark: 1. The projector can’t be turned on within 5 minutes after the lamp-off. 2. Fan error can cause lamp-off. 3. "Speed Mode" means Pan and Tilt will move from Point A to Point B at their respective maximum speeds."Time Mode" means both Pan and Tilt will arrive at designated point at the same time. -
Page 22: Technical Data
Timeout Check if wiring, positioning parts and motors are normal Prism Rotation Timeout Check if wiring, positioning parts and motors are normal Focus Timeout Check if wiring, positioning parts and motors are normal Zoom Lamp T Fan Error Check if fan and its wiring are normal Check if fan and its wiring are normal Lamp R Fan Error... - Page 23 Stepping/linear color changing Orange Yellow Pink Blue Green 0-100% linear CTO GOBO/FRAMING 1 Rotating Gobo Wheel: 6 replaceable gobos+ open, Glass or Metal Gobo Bi-directional Rotation with variable speeds With Indexing Function Gobo Shake Effect with Variable Speeds Bi-directional Scrolling with Variable Speeds Rotating Gobo Wheel : 1#.120150426 2#.090072356...
- Page 24 1 Framing Module: 4 Framing Blades Framing Module continual rotation with many graphics of different sizes and shapes 4 Framing blades to make full curtain effect PRISM 1pc of 3 facet prism , Bi-directional rotation with variable speeds and indexing function FROST 1pc frost filter, linear frost effect FOCUS...
- Page 25 IRIS 5-100% linear adjustment with macros STROBE Double shutter blades, 0.3~25 F.P.S HEAD MOVEMENT Pan 540º, Tilt 270º with auto position correction BEAMANGLE linear zoom 6°~ 55°with 16 bit function CONTROL DMX512 5 pin interfaces RDM andArt-Net controls with options for RJ45 interfaces, wireless DMX control and SACN protocol 35channels in short mode, 41channels in standard mode and 54channels in extended mode Self-test mode NOISE...
- Page 26 Input signal isolation Modular Structure for easy maintenance DMX channel monitoring Magnet sensor positioning with signal feedback, absolute position memeroy,Auto-positioning after DMX signal disruption or power off Firmware upgrade via DMX DMX512 wireless reciever DMX512 Transmitter ( Optional) ArtNet and sACN ( Optional) HOUSING High temperatureABS, IP20 NET WEIGHT...
-
Page 27: Circuit Diagram
11. CIRCUIT DIAGRAMAND PCB CONNECTIONS... -
Page 29: Component Order Codes
12. COMPONENT ORDER CODES NAME CODE NUMBER REMARKS POWER SWITCH 230020689 POWER FILTER 230061131 THERMAL SWITCH 190010206 ELECTRONIC BALLAST (1400W) 040070144A LAMP (OSRAM 1400W) 100070047 Lok-it!1400W/PS OSRAM IGNITER(1400W) 040090066A LAMP FAN1 030060117 LAMP FAN2 030060119 HEAD FAN 030060120 STROBE FAN 030060117 CMY FAN 030060119... - Page 30 Appendix: 1.Fan positions Front:Head Fan1 Opposite: Head Fan 2 Side Fan 2 Side Fan1 Front: CMY Fan1 Front: Lamp R Fan 1 Opposite: CMY Fan 2 Front: Lamp T Fan 1 Opposite: Lamp R Fan Opposite: Lamp T Fan 2 Base Fan Ballast Fan...
- Page 31 2.SOME ITEMS REQUIRING ATTENTION AS FOR THE USE OF DISCHARGE LAMP For the effective extension of the lifespan of discharge lamp, some factors impacting its lifespan are specially listed below, based on manufacturing technology and working mechanism of discharge lamps., physical attributions of the lamps including lamp striking theory( ignited by focused high voltage---highly pressurized air broken down and burning---lamp on at high temperature with thermal protection--- stable running) and lamp off theory( lamp off power ---lamp off at high temperature and thermal protection-highly pressurized air vaporizing evenly----completion...
- Page 32 1582 XingyeAvenue, Nancun Panyu Guangzhou, 511442 China TEL: +86-20-3995 2888 PR lighting will try its best to offer accurate and overall information about a product’s technical data. Any changes won’t be notified if necessary. Patented Products. CounterfeitingWill be Prosecuted! P/N:320021242A...
Need help?
Do you have a question about the PR-6000 FRAMING and is the answer not in the manual?
Questions and answers