Table of Contents
Advertisement
Quick Links
Advertisement
Table of Contents

Related Manuals for PR Lighting PR-6000 FRAMING


Summary of Contents for PR Lighting PR-6000 FRAMING
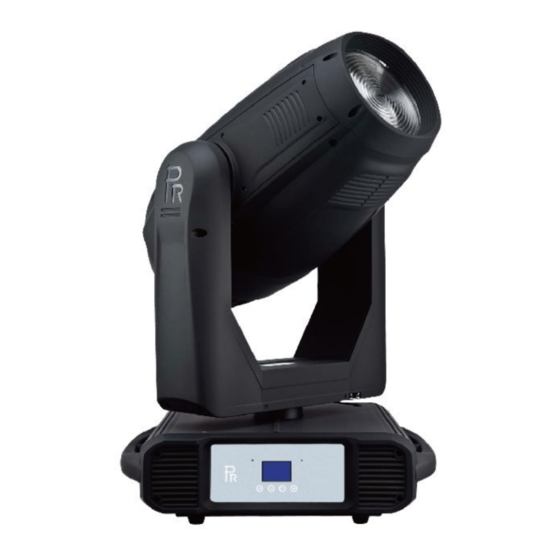
- Page 1 PR-6000 FRAMING (1400W) PR-2927 The user manual contains important information about the safe installation and use of a projector. Please read and follow these instructions carefully and keep the manual in a safe place for future reference. PR LIGHTING LTD.
-
Page 2: Table Of Contents
Any future technical change in the user manual won’t be with any notice. Note: For the products made by Guangzhou PR lighting Ltd, the warranty for the whole product is one year starting from the delivery date but the light source is not within the warranty... -
Page 3: Safety And Warnings
1. SAFETY AND WARNINGS NOTE Before a projector’s installation, power-on, operation and maintenance, please carefully read the safety information hereinafter! The following safety signs are used in the user manual. User Electrical Protective High Warning Flames Goggles Manual shock Gloves Temperature When unpacking , check if there is transportation damage before using the projector. -
Page 4: Instructions
There are safety cord holes at the bottom of the base of a projector. In view of safety, please run the safety ● cord supplied through the safety cord holes for safety support. Before any installation, maintenance and cleaning work, please ensure the projector is disconnected from ●... -
Page 5: Troubleshooting
●TROUBLESHOOTING PROBLEM ACTION Check the fuse on the power socket. The projector doesn’t switch on Check the lamp. The lamp is on but the projector doesn’t respond Make sure that the fixture’s start address is right to the controller Replace or repair the XLR signal cable. -
Page 6: Power Connections
Take 2 clamps and the safety cord out from the package and mount 2 clamps on the underside of fixture with 2 retainers attached to each clamp. Hang the fixture on the structure and fasten the screws attached to each clamp. (See the WARNING on the underside of the base as shown above) To pass the SAFETY CORD through the HOLES for safety! Always ensure that the projector is firmly anchored to avoid vibration and slipping whilst functioning. -
Page 7: Dmx Terminator
Terminator Controler ●DMX TERMINATOR In the Controller mode, at the last fixture in the chain, the DMX output has to be connected with a DMX terminator. This prevents electrical noise from disturbing and corrupting the DMX control signals. The DMX terminator is simply an XLR connector with a 120 (ohm) resistor connected across pins 2 and 3, which is then plugged into the output socket on the last projector in the chain. -
Page 8: Gobo/Color Filter Replacement
Don’t touch the internal surface of the reflector and the burner of the lamp with bare hands so as not to ● impair the beam output. While lamp’s installation, do not damage the metal wire around the burner. Please read "Instructions " enclosed with the lamp ●... -
Page 9: Dmx Start Address
The projector configuration can be set conveniently via push buttons and color touch screen. To browse through or change the projector ’s settings, touch the white area of the touch screen or press OK button for more than ► key to enter the projector ’s function 3s(Only powered by the battery, pressing the OK button) to unlock the screen , then press menus. -
Page 10: Stand-Alone Mode
●STAND-ALONE MODE Operate the projector without connecting with a controller, enable the master mode through the operation panel, the projector will run in Stand-Alone mode automatically. DMX address can be set at any number within 512. ●MASTER/SLAVE MODE Many projectors can run synchronously in the Master/Slave mode by linking them with each other. First, connect the first fixture’s DMX output to the second fixture’s DMX input using XLR-XLR control cable and then connect the second fixture’s DMX output to the third fixture’s DMX input, and so on until all projector are connected in this way. - Page 11 XLR Only XLR First Wireless Only Wireless First Wireless In/XLR Out ARTNET Only ARTNET/XLR Out Normal time out Loss of DMX Hold Last Value Off After Delay Display Mode On Always Invert OFF Display Config Display Invert Invert ON Invert Auto English Language Setting Chinese...
-
Page 12: Dmx Protocol
System= XXX Driver Board 1 Boot =XXX Driver Board 2 System= XXX Boot =XXX System= XXX Driver Board 3 Boot =XXX System= XXX Framing Board Boot =XXX Electronic SN= Electronic SN ************ RDM Device Label RDM Device Label ANSI E1.20 RDM Version X.X Fan Status XY Encoder... - Page 13 Dimmer Close Linear dimmer (0-100%) Dimmer in 16 bit Dimmer in 16 bit adjustment CYM macros The following functions will disable CMY,CTO,color wheel1 and color wheel2 No function Color macro1 Color macro2 Color macro3 Color macro4 Color macro5 Color macro6 Color macro7 Color macro8 Color macro9...
- Page 14 Color macro36 Color macro37 Color macro38 Color macro39 Color macro40 Color macro41 Color macro42 Color macro43 Color macro44 Color macro45 Color macro46 Color macro47 Color macro48 Color macro49 Color macro50 Color macro51 Color macro52 Color macro53 Color macro54 Color macro55 Color macro56 Color macro57 Color macro58...
- Page 15 Color macro80 Color macro81 Color macro82 Color macro83 Color macro84 Color macro85 Color macro86 Color macro87 Color macro88 Color macro89 Color macro90 Color macro91 Color macro92 Color macro93 Color macro94 Color macro95 Color macro96 CMY color mixing fade from slow toast Cyan Cyan (Linear 0-100%) Cyan in 16 bit...
- Page 16 Color3(Blue)/Color4(Green) Color4(Green) Color4(Green)/Color5(Pink) Color5(Pink) Color5(Pink)/Color6(Orange) Color6(Orange) Color6(Orange)/ Color7(UV) Color7(UV) Color7(UV)/White Clockwise rainbow effect from slow to fast Anti-clockwise rainbow effect from slow to fast Color wheel1 in 16bit Color wheel continuous positioning ,16bit adjustment Iris Linear iris from big to small Iris in 16bit Iris 16 bit adjustment Iris macros...
- Page 17 Rotating gobo wheel White Gobo1 Gobo2 Gobo3 Gobo4 Gobo5 Gobo6 Clockwise rotation from slow to fast Anti-clockwise rotation from slow to fast Gobo1 shakes from slow to fast Gobo2 shakes from slow to fast Gobo3 shakes from slow to fast Gobo4shakes from slow to fast Gobo5shakes from slow to fast Gobo6shakes from slow to fast...
- Page 18 Linear Framing Blade2 Right Change 0%-100% Framing Blade 2 right change in 16 bit Framing Blade 2 right change in 16 bit precision Framing Blade 3 Left Linear Framing Blade3 Left Change 0%-100% Framing Blade 3 Left change in 16 bit Framing Blade 3Left change in 16 bit precision Framing Blade 3 Right Linear Framing Blade3 Right Change 0%-100%...
- Page 19 Prism indexing Stop Clockwise rotation from slow to fast Stop Anti-clockwise rotation from slow to fast Frost Linear frost 0% - 100% Focus Linear focus Focus in 16 bit Focus 16 bit adjustment Zoom Linear Zoom Zoom in 16 bit Zoom 16 bit adjustment Pan movement Pan in 16 bit...
-
Page 20: Signs On The Touch Screen
Lamp on Pan and tilt reset Color system reset Gobo wheel reset Dimmer/ strobe reset Zoom/Focus/Frost/Prism reset Other(Iris /Framing module)reset Total reset Reserved Lamp off Reserved Remark: 1. The projector can’t be turned on within 5 minutes after the lamp-off. 2. -
Page 21: Technical Data
Timeout Check if wiring, positioning parts and motors are normal Magenta Timeout Check if wiring, positioning parts and motors are normal Timeout Check if wiring, positioning parts and motors are normal Color Wheel Fixed gobo wheel Timeout Check if wiring, positioning parts and motors are normal Rot. - Page 22 COLORS CMY linear mixing system with macros 1 color wheel: 7colors+ White, Half Color effect, rainbow effect with bi-directional and variable speeds, Stepping/linear color changing Orange Yellow Pink Blue Green 0-100% linear CTO GOBO/FRAMING 1 Rotating Gobo Wheel: 6 replaceable gobos+ White, Glass or Metal Gobo Bi-directional Rotation with variable speeds With Indexing Function Gobo Shake Effect with Variable Speeds...
- Page 23 1 Framing Module: 4 Framing Blades Framing Module continual rotation with many graphics of different sizes and shapes 4 Framing blades to make full curtain effect PRISM 1pc of 3 facet prism , Bi-directional rotation with variable speeds and indexing function FROST 1pc frost filter, linear frost effect FOCUS...
- Page 24 Pan 540º , Tilt 270º with auto position correction BEAM ANGLE linear zoom 6°~ 55°with 16 bit function CONTROL DMX512 5 pin interfaces RDM control protocol 33channels in short mode, 36channels in standard mode and 52channels in extended mode Self-test mode OTHER FUNCTIONS Adjustable Pan &...
-
Page 25: Circuit Diagram
LIGHT OUTPUT: 55°(lux) 2064 6°(lux) 127684 31921 14187 7980 5107 3547 55° 6° DISTANCE (m) 0m 6° DIAMETER (m) 1.06 1.59 2.12 2.65 3.18 0.53 55° DIAMETER (m) 0 4.85 9.70 14.55 19.40 24.25 29.10 11. CIRCUIT DIAGRAM... -
Page 27: Component Order Codes
12. COMPONENT ORDER CODES NAME CODE NUMBER REMARKS POWER SWITCH 192010136 POWER FILTER 193020014 THERMAL SWITCH 190010206 ELECTRONIC BALLAST (1400W) 040070140 LAMP (OSRAM 1400W) 100070047 LOK-IT!1400W/PS OSRAM IGNITER(1400W) 040090066 TILT BELT 290151205 PAN BELT 290151207 LAMP FAN 030060117 LAMP CERAMIC STAND FAN 030060119 HEAD CHAMBER FAN 030060119... - Page 28 1582 Xingye Avenue, Nancun Panyu Guangzhou, 511442 China TEL: +86-20-3995 2888 PR lighting will try its best to offer accurate and overall information about a product’s technical data. Any changes won’t be notified if necessary. Patented Products. Counterfeiting Will be Prosecuted! P/N: 320020801B...
Need help?
Do you have a question about the PR-6000 FRAMING and is the answer not in the manual?
Questions and answers