SilverCrest SLE 320 A1, 96805 - DEHUMIDIFIER Manual
- Operating instructions manual (52 pages) ,
- Operating instructions manual (146 pages)
Advertisement
Introduction
Intended use
The appliance is exclusively intended to dehumidify living spaces, basements or storage areas with an ambient temperature of 5°C to 35°C. The appliance may only be used indoors. The appliance is intended solely for personal use and not for commercial deployment. Usage other than as described above is impermissible and may result in injury and/or damage to the appliance.
The manufacturer shall assume no liability for damage attributable to misuse.
The risk shall be borne solely by the user.
Warnings used
The following warnings are used in these operating instructions:

A warning at this risk level indicates an imminently hazardous situation.
If the hazardous situation is not avoided, it could result in death or serious physical injury.
- Follow the instructions in this warning to prevent a fatality or serious personal injury.

A warning at this risk level indicates a potentially hazardous situation.
Failure to avoid this hazardous situation could result in physical injury.
- Follow the instructions in this warning to prevent physical injury.

A warning at this risk level indicates potential material damage.
Failure to avoid this situation could result in material damage.
- Follow the instructions in this warning to prevent material damage.
NOTE
- A note indicates additional information that eases appliance handling.
Initial operation
Consignment scope and carriage inspection
The appliance is supplied with the following components as standard:
- Dehumidifier
- Tube
- These operating instructions
NOTE
- Check the consignment for completeness and for signs of visible damage.
- If the consignment is incomplete or damaged due to defective packaging or carriage, contact the Service hotline (see the chapter Service)
- Remove all packaging materials and all carriage braces from the appliance.
- Remove the film from the control panel.
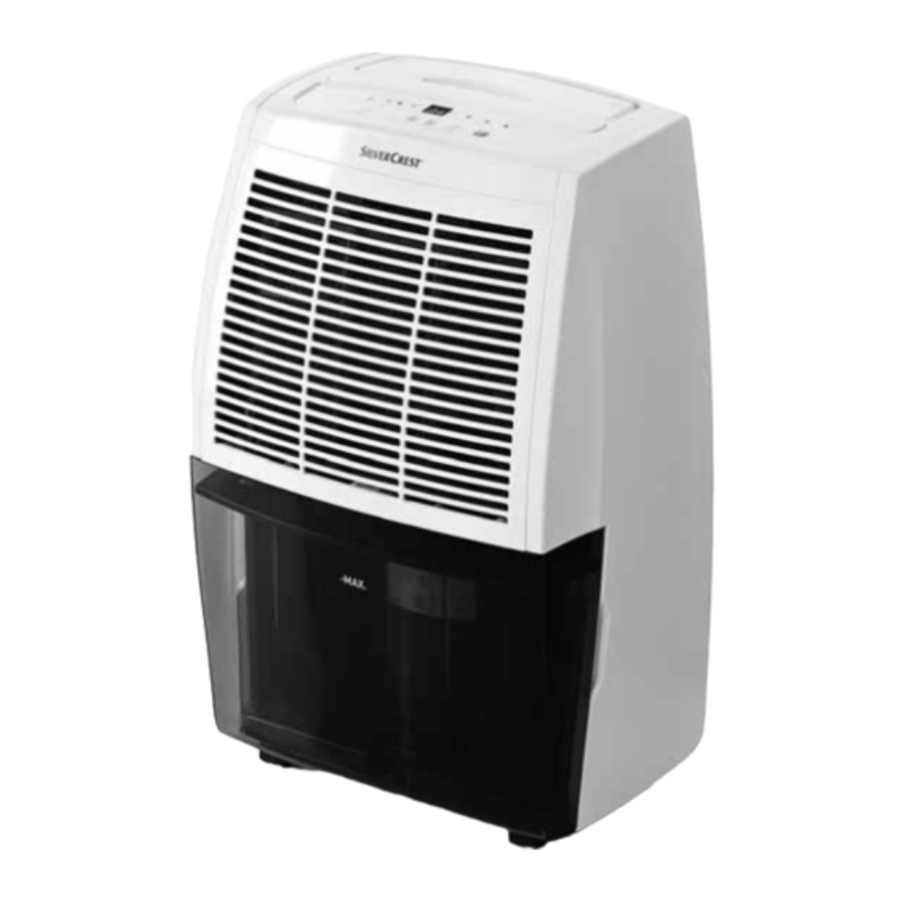
Appliance description

- Air outlet valve
- Carrying handle
- Control panel
- Grip recess for the water tank
- Water tank
- Rollers
- Water level monitoring markers
- Air inlet grille (removable)
- Plastic filter
- Carbon filter
- Cable spool
- Power cord
- Drainage closure
- Plugs
- Securing brace
- LED programmes
- Display
- TIMER LED
- TANK FULL LED
- OPERATION LED
- STANDBY button
- TIMER button
- UP/DOWN arrow keys
- MODE button
- Tube
Before initial use
- Place the appliance on a flat, dry and solid surface.
- Allow the appliance to remain in the deployment position for approx. 30 minutes so that the coolant can pool.
- Check that the float, located on the right-hand side of the water tank
![]() , is able to move freely.
, is able to move freely. - Check whether the water tank
![]() has been correctly inserted.
has been correctly inserted. - Connect the mains plug into a mains power socket.
 ,
, Electrical connection
- Before connecting the appliance, compare the specifications for the required input voltage on the rating plate with the voltage source designated for operation. These data must be congruent so that no damage is sustained by the appliance.
- The power cable must always be easily accessible, so that the appliance can be swiftly removed from the mains in the event of an emergency.
- Ascertain that the power cable is undamaged and that it is not routed over hot surfaces and/or sharp edges, otherwise it will become damaged.
- Ensure that the power cable is not taut or kinked.
Guidelines for operation
- Should the air in your living spaces consistently evince excess relative humidity, the cause should be identified and addressed. (Sustained - year-round - venting is generally inappropriate.)
- The optimal ambient temperature for dehumidifying the air is 5°C to 35°C. Using a dehumidifier at temperatures below 5°C is redundant, as there is little humidity in the air.
- During operation, room temperature can increase by between 1°C and 4°C, depending on the size of the room. This is normal.
Automatic defrosting
To ensure that the appliance does not ice up during sustained operation, it defrosts automatically. This involves activation of dehumidification, with the motor running at the highest setting. The ranges involved vary.
Handling and operation
In this section, you will receive important information pertaining to appliance handling and operation.
Switching the appliance on/off
- Press the STANDBY button
![]() to switch the appliance on. The OPERATION LED
to switch the appliance on. The OPERATION LED ![]() lights up.
lights up. - Press the STANDBY button
![]() to switch the appliance off. The OPERATION LED
to switch the appliance off. The OPERATION LED ![]() goes out.
goes out.
 to switch the appliance on. The OPERATION LED
  lights up.
NOTE
- The appliance starts in the mode last selected.
- After a power failure, if the appliance is disconnected from the mains, or after switching off owing to the overheating guard, the appliance starts in the mode last selected.
- If a timer has been programmed, the appliance switches off definitively upon lapse of the time specified (1-24 hour/s)
- If the relative humidity value has been defined in the TARGET HUMIDITY programme, the appliance switches off once the value has been attained. If the value is exceeded, the appliance switches on again.
- The appliance switches off if the water tank
![]() is full or has been removed. If wrongly positioned, or if the water tank
is full or has been removed. If wrongly positioned, or if the water tank ![]() has been removed, the TANK FULL LED
has been removed, the TANK FULL LED ![]() lights up when the appliance is switched on and an audible signal is emitted.
lights up when the appliance is switched on and an audible signal is emitted.
 is full or has been removed.
  lights up when the appliance is switched on and an audible
 NOTE
- The water tank
![]() must be fully inserted in the appliance; otherwise, the condensate cannot be collected properly.
must be fully inserted in the appliance; otherwise, the condensate cannot be collected properly.
Air outlet valve
Always open the air outlet valve, regardless of the appliance's respective programme. If the valve is not opened, the overheating guard switches the appliance off after some time for approx. 3 minutes.
Operating status displays
The various operating statuses are indicated by means of LEDs (  ) and the display
  .
.
LED indicators
| LED glows | Meaning |
TANK FULL  | The water tank is full or is not inserted. |
TIMER  | A switch-off time has been activated. |
AIR CLEAN  DRY CLOTHES TARGET HUMIDITY AUTOMATIC | Selected programme |
OPERATION  | The appliance is switched on. |
Display indicators
| Indicator | Meaning |
 | This indicator is consistently visible during operation. It indicates the room's humidity range: LOW: below 65% MEDIUM: 65% to 75% HIGH: over 75% |
Selecting programmes
NOTE
- The values defined for relative humidity (rh) are recognised, allowing for a deviation of approx. ±3%. This is necessary so that the appliance does not constantly switch itself on and off.
- The appliance has 4 distinct programmes.
- You switch between the programmes by pressing the MODE button
![]() .
. - The LED programme
![]() before the active programme glows.
before the active programme glows.
 .
. before the active programme glows.
AUTOMATIC MODE
The relative humidity (rh) to be attained is permanently set to 55%. The compressor effects dehumidification until this value has been attained, and then switches off. If relative humidity again increases, the compressor switches on again.
In this programme, the appliance works at 3 distinct levels of intensity:
- rh above 70%: The appliance dehumidifies at the highest level.
- rh between 55% and 70%: The appliance dehumidifies at standard intensity.
- rh below 55%: No dehumidification; only the fan continues to run.
NOTE
- The rh values specific to AUTOMATIC mode are not identical to the values HIGH/MEDIUM/LOW on the display
![]() .
.
 .
.Select this programme for sustained dehumidification at a comfortable relative humidity of 55%.
TARGET HUMIDITY
In the TARGET HUMIDITY programme, you can select relative humidity in 5% increments between 30% and 80% by pressing the arrow keys  . The appliance dehumidifies at a low level of intensity until the defined value has been attained, and then switches off. If relative humidity again increases, the compressor switches on again.
- 30% – 80%: setting for the room's desired relative humidity
- CO: The appliance dehumidifies on a sustained basis.
Select this programme for sustained dehumidification or for dehumidification specific to the value you have defined.
| Indicator | Meaning |
| 30 – 80, or CO flashes for 5 seconds | Adjust relative humidity during sustained operation. Values between 30 and 80, or CO flashes for 5 seconds upon switching on the appliance. CO: The appliance dehumidifies on a sustained basis. |
DRYING LAUNDRY
- You use this programme to dry damp laundry or shoes faster. The appliance dehumidifies at the highest level of intensity. Manipulate the air outlet valve
![]() such that the air current is directed towards the articles of clothing to be dried.
such that the air current is directed towards the articles of clothing to be dried.
 such that the air current is directed towards the articles of clothing to be dried.
AIR PURIFICATION
No dehumidification takes place in this programme. The air in the room is drawn in via the filter in front of the air inlet aperture, where it is purified.
Timer
- The timer can be combined with all 4 programmes.
- One of 24 switch-off times, ranging from 1 to 24 hours, can be selected.
- Once the time defined has elapsed, the appliance switches off definitively and the timer is deactivated.
- Press the TIMER button
![]() during operation.
during operation. - Die TIMER LED
![]() flashes.
flashes. - Use the arrow keys
![]() to select a switch-off time of 1 to 24 hours. The selected time flashes on the display
to select a switch-off time of 1 to 24 hours. The selected time flashes on the display ![]() for 3 seconds and is then stored.
for 3 seconds and is then stored. - In order to end timer activation prematurely, press TIMER
![]() twice or switch the appliance off by pressing STANDBY
twice or switch the appliance off by pressing STANDBY ![]() .
.
- Press the TIMER button
 during operation.
 flashes.
 to select a switch-off time of 1 to 24 hours. The selected time flashes on the display
  for 3 seconds and is then stored.
 twice or switch the appliance off by pressing STANDBY
  .
.| Indicator | Meaning |
| 1 - 24 flashes / 3 seconds | Timer for all programmes: These values (1 - 24 hours) flash for 5 seconds if you define a switch-off time using the arrow keys. |
Water tank
- The water tank
![]() has a storage capacity of 7 litres.
has a storage capacity of 7 litres. - The water level is indicated on the front of the water tank
![]() .
. - The appliance may only be operated once the water tank
![]() is inserted.
is inserted. - If the water tank
![]() is full, the TANK FULL LED
is full, the TANK FULL LED ![]() starts to flash.
starts to flash.
The appliance switches off after a few seconds. An alarm sounds for approx. 20 seconds. The TANK FULL LED![]() flashes until the tank has been emptied.
flashes until the tank has been emptied. - To empty the water tank
![]() , pull it out a little to the left and the right and then hold it by the carrying handle.
, pull it out a little to the left and the right and then hold it by the carrying handle.
![]()
- Pour out the water and replace the water tank
![]() .
.
![]()
- To empty the water tank
 has a storage capacity of 7 litres.
 starts to flash.

Tube drainage
In very damp rooms, it is often more appropriate for the water not to collect in the water tank, but for it to be drained directly by means of a tube.
![]()
When draining via the tube, sustained operation of the appliance is mandated. This means that the condensate must be able to drain securely so that no pooling forms on the floor.

- Using a screwdriver, prise open the closure
![]() on the reverse of the appliance and remove the plug
on the reverse of the appliance and remove the plug ![]() .
. - Position the tube
![]() , supplied with the appliance, over the outlet aperture for the drainage tube.
, supplied with the appliance, over the outlet aperture for the drainage tube. - Then insert the plug
![]() into the outlet aperture for the water tank.
into the outlet aperture for the water tank. - Set up the appliance such that the end of the tube is positioned over a drain. Thus, the open end of the tube must be positioned beneath the appliance's outlet (i.e. the tube must slope downwards).
- Switch on the appliance as usual and select a programme.
- If you wish to drain the water tank
![]() again, switch off the appliance, with- draw the tube
again, switch off the appliance, with- draw the tube ![]() and remove the plug
and remove the plug ![]() from the outlet aperture for the water tank and insert it again into the outlet aperture for the drainage tube.
from the outlet aperture for the water tank and insert it again into the outlet aperture for the drainage tube.
 on the reverse of the appli

Cleaning
Potential appliance damage!
- Protect the appliance from moisture and from the ingress of fluids.
- To avoid irreparable damage to the appliance, never immerse it in water.
- Always remove the mains plug from the mains power socket before cleaning the appliance.
- Do not use aggressive or abrasive cleaning agents, as these may corrode the surface of the casing.
- Do not clean the water tan k
![]() in a dishwasher. Otherwise, it will be damaged.
in a dishwasher. Otherwise, it will be damaged.
 in a dishwasher. Otherwise, it will be
 - If required, wipe the casing with a slightly damp cloth.
- Remove the water tank
![]() and pour away the water; then dry the water tank
and pour away the water; then dry the water tank ![]() thoroughly, both inside and out, before replacing it.
thoroughly, both inside and out, before replacing it. - In order to clean the inside of the water tank
![]() , you must remove the black lid. To do this, release the carrying handle from the retainer while pressing it out sideways. When doing so, ensure that the handle plug coincides with the opening in the water container.
, you must remove the black lid. To do this, release the carrying handle from the retainer while pressing it out sideways. When doing so, ensure that the handle plug coincides with the opening in the water container.

- Now, remove the black lid from the water tank
![]() .
. - To insert, follow the reverse sequence.
- It is recommended that the water tank
![]() be cleaned regularly every two weeks to prevent the build-up of mould and bacteria. To do this, fill the water tank
be cleaned regularly every two weeks to prevent the build-up of mould and bacteria. To do this, fill the water tank ![]() with lukewarm water, adding a standard detergent. Rinse repeatedly with lukewarm water. In addition, disinfection is recommended following cleaning. To do this, use a standard, alcohol-based disinfecting agent or high-proof alcohol. Both substances are completely harmless if followed by repeated rinsing with lukewarm water.
with lukewarm water, adding a standard detergent. Rinse repeatedly with lukewarm water. In addition, disinfection is recommended following cleaning. To do this, use a standard, alcohol-based disinfecting agent or high-proof alcohol. Both substances are completely harmless if followed by repeated rinsing with lukewarm water.

Cleaning and changing the filter
The performance of the appliance also depends upon how clean the filter is.
- The plastic filter
![]() should be washed every 2 weeks.
should be washed every 2 weeks. - The carbon filter
![]() should be cleaned every 2 weeks and changed every 6 months.
should be cleaned every 2 weeks and changed every 6 months.
 should be washed every 2 weeks.
 should be cleaned every 2 weeks and changed every 6 months.
NOTE
- You can purchase new carbon filters in almost all shops selling household goods. The carbon filter mats just need to be cut to size.

- Switch the appliance off and remove the mains plug.
- Remove the water tank
![]() from the appliance.
from the appliance. - To remove the air inlet grille
![]() , three plastic lugs located at the base of the air inlet grille
, three plastic lugs located at the base of the air inlet grille ![]() must be pressed upwards slightly to allow release.
must be pressed upwards slightly to allow release. - Remove the air inlet grille
![]() in a downwards motion.
in a downwards motion. - To remove the plastic filter
![]() , two plastic lugs located at the base of the plastic filter
, two plastic lugs located at the base of the plastic filter ![]() must be pressed downwards slightly to allow release.
must be pressed downwards slightly to allow release. - Now, remove the plastic filter
![]() including the plastic frames from the appliance by pulling it downwards.
including the plastic frames from the appliance by pulling it downwards. - The carbon filter
![]() is also located behind the plastic filter
is also located behind the plastic filter ![]() .
. - First remove the plastic filter
![]() from the plastic frames.
from the plastic frames. - Now remove the carbon filter
![]() .
. - Wash down both filters with lukewarm water.
- Allow both filters to dry completely before re-inserting the filter in the appliance.
- To insert, follow the reverse sequence.
 from the appliance.
 , three plastic lugs located at the base of the air inlet grille
  , two plastic lugs located at the base of the plastic filter
  is also located behind the plastic filter
 Protection against overheating
The appliance has an overheating guard.
- The overheating guard switches the appliance off automatically if there is a risk of overheating.
- For approx. 3 minutes thereafter, the appliance cannot be re-started.
- After approx 3 minutes, the appliance re-starts automatically.
- Check whether external factors may have triggered the overheating guard.
(e.g. temperatures above 35°C or a closed valve![]() obstructing the air outlet).
obstructing the air outlet).
 obstructing the air outlet).
Storage
- Remove the mains plug from the mains power socket.
- Coil the power cord
![]() around the cable spool
around the cable spool ![]() and secure the mains plug to the power cord
and secure the mains plug to the power cord ![]() using the securing brace
using the securing brace ![]() provided with the cable.
provided with the cable. - Empty the water tank
![]() if not using the appliance for a prolonged period.
if not using the appliance for a prolonged period. - Always store the appliance in an upright position and in a dry and dust-free environment.
 around the cable spool
  and secure the mains plug to the power cord
  provided with the cable.
Troubleshooting
This section contains important information on fault identification and rectification.
Causes of malfunction and fault rectification
The following Table will help to identify and rectify minor faults:
| Fault | Possible cause | Rectification | ||
The appliance will not switch on | The mains plug is not plugged in. | Insert the mains plug into the mains power socket. | ||
| The mains power socket is not supplying power. | Check the house's mains fuse. | |||
Safety stop due to the water tank  being missing or having been inserted incorrectly. being missing or having been inserted incorrectly. | Insert the water tank correctly. | |||
| The water tank is full. | Empty the water tank and re-insert it. | |||
The appliance is producing no or limited condensate | The air inlet or air outlet aperture is soiled or obstructed. | Ensure that the air inlet and air outlet apertures are clean and free of obstructions. | ||
| The room's windows and doors are open. | Close the windows and doors. | |||
| Is the appliance running in the AIR CLEAN programme? Dehumidification is not taking place. | Select a different programme, such as AUTOMATIC MODE. | |||
Water is pooling on the floor | The appliance was overly agitated during positioning. There is residual water in the appliance. | This is a normal feature of the appliance. When re-positioning the appliance, ensure that it is not overly agitated. | ||
The air ejected is warm | Heat exchange process | This is a normal feature of the appliance. | ||
The error code E1 is flashing on the display | Coil temperature error | Contact the Customer Service department. | ||
The error code E2 is flashing on the display | The humidity sensor is defective. | Contact the Customer Service department. | ||
NOTE
- If you are unable to resolve the problem applying any of the aforementioned methods, please contact the Customer Service department (see the chapter Service).
Technical data
| Input voltage | 220 - 240 V ~ 50 Hz |
| Input power | 320 W |
| Nominal current: | 1.6 A |
| Maximum output power | 380 W |
| Maximum nominal current | 1.8 A |
| Air flow rate | 160 m³/h |
| Water tank | 7.0 l |
| Intake pressure | 1.0 MPa |
| Ejected pressure | 2.5 MPa |
| Dehumidification performance / 24 h* | 20 l (at 30°C / 80% rh) 12 l (at 27°C / 60% rh) |
| Recommended room size | approx. 20 m2 or approx 46 m3 (at a ceiling height of 2.3 m) |
| Operating temperature | +10°C to +35°C |
| Dimensions | approx. 60.0 x 38.0 x 29.5 cm |
| Weight | approx. 13.2 kg |
*The lower the ambient temperature is and the colder the temperature outside becomes, the less moisture accumulates in the air and flows from outside into the room to be dehumidified. For this reason, dehumidification performance steadily decreases when temperatures drop and can come to a standstill. This does not mean that the appliance is defective.
Safety
In this section, you will receive important safety advice relating to appliance handling. Improper use may result in personal injury and material damage.

Risk of fatal injury from electrocution!
Contact with live cables or components can result in fatal injury!
Please observe the following safety guidelines to prevent electrical hazards.
- Do not use the appliance if the power cable or the connecting plug is damaged.
- There is a risk of electrocution if live connections are touched and the electrical and mechanical structure is changed
Risk of electrocution due to moisture
- Do not place the appliance in water, nor in water pooling areas or in puddles.
- The appliance may never be operated near a bath tub, a shower, a filled wash basin or similar structures.
- The appliance, the connection cabling and the mains plug may not be immersed in water or other fluids.
- Protect the appliance against drops or splashes of water.
- In the event that fluid should enter the appliance (apart from in the water tank), immediately disconnect the mains plug. Arrange to have the appliance checked before putting it into operation again after a period of remission.
- Do not handle the appliance with damp hands.
- Should the appliance have fallen into water, disconnect the mains plug immediately. Remove the appliance only thereafter.
Risk of explosion
Do not use the appliance in a potentially explosive environment containing combustible liquids, gases or dusts. Electrical appliances generate sparks that can ignite the dust or fumes.
Risk of disease
- The stored water is not suitable for drinking or watering. There are potential health hazards.
WARNING OF MATERIAL DAMAGE
- Do not use the appliance in swimming pools, wash rooms or similar facilities.
- The appliance is not suitable for drying lagging. If, after a pipe has burst, insulation or lagging materials become damp, consult an expert under all circumstances.
- Never expose the appliance to temperatures of 0°C or lower. Residual water in the pipes could freeze and damage the system.
- Do not use the appliance in a dusty or chlorinated environment.
Basic safety guidelines
To ensure safe handling of the appliance, follow the safety guidelines set out below
- Prior to use, check the appliance for visible, external damage. Do not operate an appliance that has been damaged or dropped.
- Should the connecting cable or the connections be damaged, have them exchanged by authorised specialist staff or by the Customer Service department in order to prevent hazards.
- Do not operate the appliance outdoors.
- During operation, always keep windows and doors closed so that the appliance can work effectively.
- Do not operate the appliance in the proximity of highly inflammable gases or materials, near naked flames or in areas prone to oil and water splashing.
- This appliance may be used by children aged 8 years and above and by persons with limited physical, sensory or mental capabilities or lack of experience and knowledge, provided that they are under supervision or have been told how to use the appliance safely and are aware of the potential risks. Children must not use the appliance as a plaything. Cleaning and user maintenance tasks may not be carried out by children unless they are supervised.
- All repairs must be carried out by authorised specialist companies or by the Customer Service department. Improper repairs can pose significant risks to the user. Warranty entitlement shall also lapse.
- This appliance should not be exposed to rain. Protect the appliance against moisture and the ingress of fluids and objects into the casing. Never immerse the appliance in water and do not place objects containing fluids (such as vases) on the appliance. The appliance may be irreparably damaged.
- Heavy objects are not to be placed on the appliance.
- The appliance is not to be covered (e.g. with newspapers, cushions or blankets).
- No objects are to be inserted into the ventilation grille.
- Avoid direct sunlight.
- Naked flames, such as burning candles, may not be placed upon or directly alongside the appliance.
- In the event that malfunctions occur, and in bad weather, disconnect the plug from the mains power socket.
- Always ensure that the air inlet and air outlet apertures remain free of soiling during operation. Never cover the appliance!
- Always place the appliance on a solid, flat surface so that it cannot tip over.
- Do not mount the appliance. Position the appliance's side panels so as to allow a clearance of at least 20 cm from walls or other objects, and ensure a clearance of at least 50 cm from the front, rear and top panels of the appliance in order to ensure good air circulation.
- The appliance may only be operated in rooms with an ambient temperature of 5°C to 35°C.
- Use the appliance only in areas measuring a total of 20 m².
- Clean the air filters before they become heavily soiled.
- While draining the tube, ensure that it does not become blocked and that the open end of the tube is positioned at a lower level than the outlet aperture. The end of the tube must be positioned above a drain
- Operate the appliance only with the integrated water tank or with the tube installed.
- Connect the earthing pin plug only to a properly installed, easily accessible plug socket with protected contacts, the voltage of which corresponds to the specifications on the rating plate. The plug socket must remain easily accessible even following connection.
- Before cleaning, always disconnect the mains plug from the mains power socket.

Documents / ResourcesDownload manual
Here you can download full pdf version of manual, it may contain additional safety instructions, warranty information, FCC rules, etc.
Download SilverCrest SLE 320 A1, 96805 - DEHUMIDIFIER Manual
Advertisement


Need help?
Do you have a question about the SLE 320 A1 and is the answer not in the manual?
Questions and answers