Table of Contents
Advertisement
Available languages
Available languages
Quick Links
Advertisement
Chapters
Table of Contents

Related Manuals for AEG Protect C 1000 LCD+


Summary of Contents for AEG Protect C 1000 LCD+
- Page 1 PROTECT C LCD+ Protect C 1000 LCD+ Protect C 2000 LCD+ Protect C 2000S LCD+ Protect C 3000 LCD+ Benutzerhandbuch / Protect C 3000S LCD+ User Manual Protect C 1050 BP+ (36V) Protect C 2030 BP+ (72V)
- Page 3 Vielen Dank für den Kauf des AEG PS UPS Protect C von AEG Power Solutions. Die nachfolgenden Sicherheitshinweise sind wichtiger Bestandteil der Betriebsanleitung und werden Sie vor Problemen durch Fehlbedienung oder vor möglichen Gefahren schützen. Lesen Sie deshalb diese Anleitung vor der ersten Inbetriebnahme sorgfältig...
-
Page 4: Table Of Contents
INHALT Inhalt ....................4 HINWEISE ZU DIESER BETRIEBSANLEITUNG ....6 1.1 Sicherheitshinweise ............6 1.2 Zertifizierungsstandards ...........6 1.3 Besondere Symbole ............6 1.4 Entsorgung und Recycling ..........7 1.5 Sicherheit von Personen...........8 1.6 Besondere Vorsichtsmaßnahmen ........10 EINFÜHRUNG ................11 2.1 Schutz elektronischer Geräte .........11 2.2 Schutz der Umwelt ............12 2.3 Gewicht und Abmessungen ..........13 2.4 Rückseite ................14 2.5 Zubehör ................16... - Page 5 6.5 Recyceln .................35 FEHLERSUCHE ..............36 SPEZIFIKATIONEN ...............40 8.1 USV Blockdiagramm ............40 8.2 USV-Spezifikationen ............41 8.3 Produkt- und Zubehörcodes ...........44...
-
Page 6: Hinweise Zu Dieser Betriebsanleitung
1. HINWEISE ZU DIESER BETRIEBSANLEITUNG 1.1 Sicherheitshinweise Diese Betriebsanleitung hilft Ihnen bei der Installation und Bedienung des BEWAHREN SIE DIESE ANLEITUNG AUF. Dieses Handbuch enthält wichtige Anweisungen, die bei der Installation und Wartung der USV und der Batterien befolgt werden sollten. Die USV-Tower-Modelle sind für den Einsatz in einer Umgebungstemperatur von 0 bis 40 °... -
Page 7: Entsorgung Und Recycling
1.4 Entsorgung und Recycling Ende der Produktlebensdauer AEG Power Solutions wird die Produkte am Ende ihrer Lebensdauer in Übereinstimmung mit den örtlichen Vorschriften entsorgen. AEG Power Solutions arbeitet mit Unternehmen zusammen, die für die Sammlung und Beseitigung unserer Produkte am Ende ihrer Nutzungsdauer zuständig sind. -
Page 8: Sicherheit Von Personen
eine korrekte Entsorgung entfernt werden. Weitere Informationen erhalten Sie bei Ihrem örtlichen Recycling-/Wiederverwertungs- oder Sondermüllzentrum. Entsorgen Sie verbrauchte Batterien oder Batteriematerial niemals mit dem Müll. Achten Sie auf die Einhaltung der örtlichen Gesetze und Vorschriften, die für den Hinweis gelten: Das Zeichen "Pb"... - Page 9 Öffnen oder verstümmeln Sie die Batterien nicht. Der − freigesetzte Elektrolyt ist schädlich für Haut und Augen. Es kann giftig sein. VORSICHT - Bei einer Batterie besteht die Gefahr eines − Stromschlags und eines hohen Kurzschlussstroms. Die folgenden Vorsichtsmaßnahmen sollten bei Arbeiten an Batterien beachtet werden: Legen Sie Uhren, Ringe oder andere Metallgegenstände ab.
-
Page 10: Besondere Vorsichtsmaßnahmen
Installieren Sie das System niemals in der Nähe von • Flüssigkeiten oder in einer übermäßig feuchten Umgebung. Lassen Sie niemals einen Fremdkörper in das System • eindringen. Blockieren Sie niemals die Lüftungsgitter der Anlage. • Setzen Sie das System niemals direktem Sonnenlicht •... -
Page 11: Einführung
2. EINFÜHRUNG Vielen Dank, dass Sie sich für AEG USV zum Schutz Ihrer elektrischen Geräte entschieden haben. Wir empfehlen Ihnen, sich die Zeit zu nehmen, dieses Handbuch zu lesen, um die vielen Funktionen der USV (Unterbrechungsfreie Stromversorgung) voll nutzen zu können. -
Page 12: Schutz Der Umwelt
2.2 Schutz der Umwelt Die Produkte werden nach einem Ökodesign-Ansatz entwickelt. Stoffe Dieses Produkt enthält keine FCKWs, HFCKWs oder Asbest. Verpacken Um die Abfallbehandlung zu verbessern und das Recycling zu erleichtern, sollten Sie die verschiedenen Verpackungsbestandteile trennen. Produkt Das Produkt besteht hauptsächlich aus wiederverwertbaren Materialien. -
Page 13: Gewicht Und Abmessungen
2.3 Gewicht und Abmessungen Das Gewicht in dieser Tabelle ist nur ein Anhaltspunkt, bitte sehen Sie die Etiketten auf dem Karton für Details. TEIL Nº BESCHREIBUNG GEWICHT ABMESSUNGEN: (KG) T X B X H (MM) PROTECT C 1000 30004615 12.8 404 X 145 X 220 LCD+ PROTECT C 2000... -
Page 14: Rückseite
2.4 Rückseite PROTECT C 1000 LCD+ PROTECT C 2000 LCD+/ PROTECT C 2000 LCD+ Version "S"... - Page 15 PROTECT C 3000 LCD+ PROTECT C 3000 LCD+ Version "S"...
-
Page 16: Zubehör
PROTECT 1050 BP+ (36V) PROTECT 2030 BP+ (72V) LAN (HDMI) Slotkarten-Box EBP-Anschluss Eingangsunterbrecher Ethernet (RJ45) (optional) RPO/DRY IN/DRY Eingangsbuchse/ Eingangsklemme Automatische Ausgangsbuchse/Klemme EBP-Erkennung Ausgangssicherung RS232 (optional) 2.5 Zubehör BESCHREIBUNG TEILENR. Protect C 1000 BP+ 30004618 Protect C 2030 BP+ 30004619 WEB / SNMP-Managementkarte 30919556 WEB / SNMP PRO... -
Page 17: Einrichtung
3. EINRICHTUNG Inspektion der Ausrüstung Wenn ein Gerät während des Transports beschädigt wurde, bewahren Sie die Versandkartons und das Verpackungsmaterial für den Spediteur oder den Ort, an dem Sie das Gerät gekauft haben, auf und reklamieren Sie einen Transportschaden. Wenn Sie nach der Annahme des Geräts einen Schaden entdecken, reklamieren Sie einen verdeckten Schaden. - Page 18 Installieren Sie das Gerät Halten Sie hinter der USV-Rückwand immer einen Freiraum von 200 mm ein. Überprüfen Sie, ob die Angaben auf dem Typenschild auf der oberen Abdeckung der USV mit der AC-Stromquelle und dem tatsächlichen Stromverbrauch der Gesamtlast übereinstimmen. 1-Schließen Sie die USV- Eingangsbuchse mit...
- Page 19 Empfohlener vorgelagerter Schutz VORGESCHALTETER USV-MODELL LEISTUNGSSCHALTER Protect C3000 C-Kurve-20A LCD+ Anschluss der Eingangs- und Ausgangsklemmen: PROTECT C MIN. MAX. 3000LCD+ QUERSCHNITT QUERSCHNITT ERFORDERLICH/ DREHMOMENT KLEMMENBLOCKS Eingabe L, N, G Leiter 2,5 mm²/(0,3N.m) 4 mm² Querschnitt Ausgang L, N, G Leiter 4 mm²/(0,8N.m) 10 mm²...
- Page 20 Anschluss von externen Akkupacks Beim Anschluss eines EBP an die USV kann es zu einer geringen Lichtbogenbildung kommen. Dies ist normal und stellt keine Gefahr für das Personal dar. Es können bis zu 6 EBPs an die USV angeschlossen werden. Protect C 1000 LCD+ Protect C 2000 LCD+ und Protect C 3000 LCD+...
-
Page 21: Betrieb
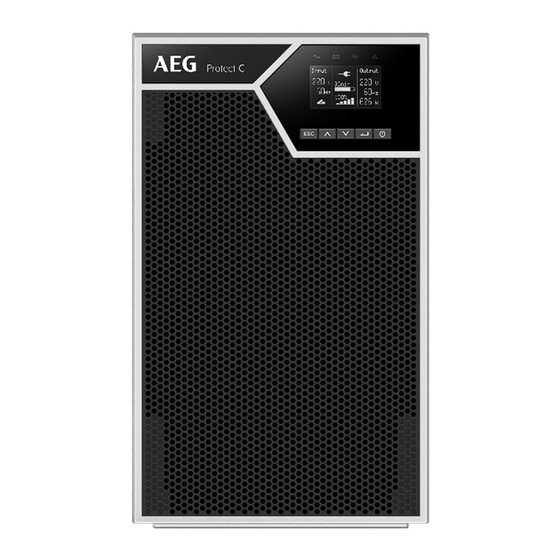
4. BETRIEB 4.1 LCD-Panel Die USV liefert nützliche Informationen über die USV selbst, den Laststatus, Ereignisse, Messungen und Einstellungen. Die folgende Tabelle zeigt den Status und die Beschreibung des Indikators: Indikator Status Beschreibung Die USV arbeitet normalerweise im Online- oder im Hocheffizienzmodus. Grün Die USV befindet sich im Batteriebetrieb. - Page 22 In der folgenden Tabelle sind die Schaltflächen und ihre Beschreibung aufgeführt: Schaltflä Funktion Abbildung Durch Drücken der Taste für >100ms & < 1s kann die USV ohne Stromzufuhr Einschalten eingeschaltet werden, wenn die Batterie angeschlossen ist. Wenn die Unity eingeschaltet ist, kann die USV Einschalten durch Drücken der Taste für >1s eingeschaltet werden.
-
Page 23: Lcd-Beschreibung
4.2 LCD-Beschreibung Die LCD-Hintergrundbeleuchtung wird nach 10 Minuten Inaktivität automatisch gedimmt. Drücken Sie eine beliebige Taste, um den Bildschirm wieder einzuschalten. Betriebszustand Ursache Beschreibung Die USV ist ohne Ausgang Standby-Modus ausgeschaltet. Die USV arbeitet normal und Online-Modus schützt die Geräte. Ein Stromausfall ist aufgetreten, und die USV versorgt die Geräte mit... - Page 24 Bei einem Netzausfall oder einer Netzstörung schaltet die Modus "Hoher USV in den Netz- oder Batteriebetrieb um und die Wirkungsgrad Last wird kontinuierlich versorgt. Die USV würde mit einer festen Ausgangsfrequenz (50Hz oder 60Hz) laufen. Konverter- Modus Die Last sollte im Umrichterbetrieb auf 60 % herabgesetzt werden.
-
Page 25: Funktionen Anzeigen
4.3 Funktionen anzeigen Beim Starten der USV befindet sich die Anzeige im Standardbildschirm für die USV-Statusübersicht. Anzeige von Informationen Hauptmenü Untermenü oder Menüfunktion USV-Modus, Datum/Uhrzeit, USV-Status Batteriestatus und aktuelle Alarme Zeigt die gespeicherten Ereignisse Ereignisprotokoll und Störungen an [Last] [Eingang/Ausgang] V Hz, Messungen [Batterie] EBP,... -
Page 26: Benutzereinstellungen
Einstellungen Siehe Benutzereinstellungen [Produktname], [Seriennummer], Identifizierung [Firmware-Version], [IP/MAC- Adresse] 4.4 Benutzereinstellungen Untermenü Verfügbare Einstellungen Standardeinstel lungen Passwort Kann vom Benutzer geändert werden 4732 Englisch, Italiano, Français, Deutsch, Sprache ändern Englisch Español, Русский, Polski, 简 体 中 文 Benutzer-Passwort [aktiviert, ****], [deaktiviert] aktiviert Akustische Alarme [aktiviert], [deaktiviert]... - Page 27 Untermenü Verfügbare Einstellungen Standardeinstel lungen [Automatische Erkennung], Automatische Externe Batterie [Manuelles EBP: 0~6], Erkennung Strom [2A], [4A], [6A], [8A] für langes Backup- Ladegeräts Modell [Deaktiviert], [Ferngesteuert ein], Dry In Signal [Ferngesteuert aus], [Erzwungener deaktiviert Bypass] [lastbetrieben], [batteriebtrieben], Dry Out Signal [Batterieschwach], [Batterie getrennt], Umgehung [Bypass], [USV ok]...
- Page 28 Untermenü Verfügbare Einstellungen Standardeinstel lungen Bat % zum Neustart [0%], [10%], [20%], ..., [100%] Handelt es sich bei der Last um einen Transformator, wird empfohlen, die Funktion "Start vom Bypass" zu aktivieren.
-
Page 29: Starten Der Usv Mit Netzstrom
4.5 Starten der USV mit Netzstrom 4.6 Starten der USV im Batteriebetrieb Bevor Sie diese Funktion nutzen können, muss die USV mindestens einmal mit aktivierter Ausgangsleistung mit Netzstrom versorgt worden sein. Batteriestart kann deaktiviert werden. Siehe Kapitel Benutzereinstellung... -
Page 30: Usv-Abschaltung
4.7 USV-Abschaltung... -
Page 31: Kommunikation
5. KOMMUNIKATION 5.1 RS232 und USB Kommunikationskabel an den seriellen oder USB-Anschluss des Computers. Schließen Sie das andere Ende des Kommunikationskabels an den RS232- oder USB-Kommunikationsanschluss der USV 5.2 USV- Fernsteuerungsfunktione Fernabschaltung (RPO) Wenn RPO aktiviert ist, schaltet die USV den Ausgang sofort ab und gibt weiterhin Alarm. -
Page 32: Modbus Tcp
DRY IN KOMMENTARE Steckertyp 16 AWG Maximaler Leitungsquerschnitt Spezifikation externen 60 V DC/30 V AC 20 mA max. Leistungsschalters Austrocknen Dry out ist der Relaisausgang, die Dry out-Funktion kann konfiguriert werden (siehe Einstellungen > Dry out). DRY OUT KOMMENTARE Steckertyp 16 AWG Maximaler Leitungsquerschnitt Spezifikation des 24Vdc/1A... -
Page 33: Usv Instandhaltung
6. USV INSTANDHALTUNG 6.1 Pflege der Ausrüstung Für eine optimale vorbeugende Wartung halten Sie den Bereich um das Gerät sauber und staubfrei. Wenn die Atmosphäre sehr staubig ist, reinigen Sie die Außenseite des Systems mit einem Staubsauger. Um die Lebensdauer des Akkus zu verlängern, sollte das Gerät bei einer Umgebungstemperatur von 25°... -
Page 34: Auswechseln Der Batterien
6.4 Auswechseln der Batterien Trennen Sie die Batterien NICHT, während sich die USV im Batteriemodus befindet. Beachten Sie alle Warnungen, Vorsichtshinweise und Anmerkungen, bevor Sie die Batterien austauschen. Die Wartung sollte von qualifiziertem Servicepersonal durchgeführt werden, das sich mit Batterien und den erforderlichen Vorsichtsmaßnahmen auskennt. -
Page 35: Recyceln
6.5 Recyceln Wenden Sie sich an Ihr örtliches Recycling- oder Sondermüllzentrum, um Informationen zur ordnungsgemäßen Entsorgung der gebrauchten Geräte zu erhalten. Werfen Sie die Batterien nicht ins Feuer. Dies kann zur Explosion der Batterien führen. Die Batterien müssen gemäß den örtlichen Vorschriften ordnungsgemäß... -
Page 36: Fehlersuche
7. FEHLERSUCHE Typische Alarme und Störungen: Zur Überprüfung des USV-Status und des Ereignisprotokolls: Drücken Sie eine beliebige Taste auf dem Frontblende- • Display, um die Menüoptionen zu aktivieren. Drücken Sie die Taste , um Ereignisprotokoll zu wählen. • Blättern Sie durch die aufgelisteten Ereignisse und •... - Page 37 Fehler Mögliche Ursache Aktion Batteriestörung Der Batterietest ist Überprüfen Sie, ob alle aufgrund schlechter oder Batterien richtig nicht angeschlossener angeschlossen sind. Starten Batterien fehlgeschlagen, Sie einen neuen Batterietest: LED leuchtet. oder die Wenn das Problem weiterhin Dauerhafter Mindestspannung der besteht, wenden Sie sich an Piepton.
- Page 38 Fehler Mögliche Ursache Aktion Übertemperatu Die interne Temperatur Machen Sie die rwarnung der USV ist zu hoch. Auf Lüftungsöffnungen frei und der Warnstufe erzeugt entfernen Sie alle die USV den Alarm, Wärmequellen. Stellen Sie bleibt aber im aktuellen sicher, dass der Luftstrom um LED leuchtet.
- Page 39 Fehler Mögliche Ursache Aktion Kurzschluss Ausgangskurzschluss Überprüfen Sie den Ausgang am Ausgang aufgetreten. der USV und der Verbraucher und stellen Sie sicher, dass der Kurzschluss beseitigt ist, bevor Sie das Gerät wieder einschalten.
-
Page 40: Spezifikationen
8. SPEZIFIKATIONEN 8.1 USV Blockdiagramm... -
Page 41: Usv-Spezifikationen
8.2 USV-Spezifikationen Name des Modells PROTECT C LCD+ Bewertung 1 KVA 2 KVA 2 KVA "S" 3KVA 3 KVA "S" 1000VA/ 2000VA/ 3000VA/ Nennleistung VA/Watt 1000W 2000W 3000W Zeilenmodus Wirkungsgrad ECO-Modus Spannungsber 160-300V 100% Last, 110-160V Derating auf 50% Last linear eich Nennfrequenz 50Hz/60Hz... - Page 42 Name des Modells PROTECT C LCD+ Bewertung 1 KVA 2 KVA 2 KVA "S" 3KVA 3 KVA "S" Steckdose 8 x IEC C13 8 x IEC C13 4 x IEC C13 8 x IEC C13 1x Klemme (Turm IEC) 1x IEC C19 Bypass-Modus 550A/2,8ms 699A/7ms 699A/7ms...
- Page 43 Name des Modells PROTECT C LCD+ Bewertung 1 KVA 2 KVA 2 KVA "S" 3KVA 3 KVA "S" Modbus-Karte Optional, SNMP oder SNMP PRO Optional, Relaiskarte oder programmierbare Relaiskarte Trockenschütz Optional karte RJ45 Software Winpower überwachen 145*404* Abmessungen 192*428*318 (B*T*H) mm Physische IP20 Schutzniveau...
-
Page 44: Produkt- Und Zubehörcodes
8.3 Produkt- und Zubehörcodes Für den Kauf eines Protect C LCD+ Produktes folgen Sie bitte der folgenden Code-Tabelle: PRODUKTBESCHREIBUNG CODE Protect C 1000 LCD+ 30004615 Protect C 2000 LCD+ 30004616 Protect C 2000S LCD+ 30004626 Protect C 3000 LCD+ 30004617 Protect C 3000S LCD+ 30004627 Protect C 1000 BP+... - Page 45 Verfügbares Zubehör: Protect C 1000 BP+ Zusätzliches Batteriepaket kompatibel mit Protect 1000 LCD+, maximal 6 externe Batteriepakete können pro USV installiert werden. Protect C 2030 BP+ Zusätzliches Batteriepaket kompatibel mit Protect 2000 LCD+, 2000S LCD+, 3000 LCD+ und 3000S LCD+, maximal 6 externe Batteriepakete können pro USV installiert werden.
- Page 46 Thank you for purchasing the AEG PS UPS Protect B from AEG Power Solutions. Safety information and operating instructions are included in this manual. To ensure correct use of the UPS, please read this manual thoroughly before operating it. Use this manual properly.
-
Page 47: Contents
CONTENTS Contents ..................47 NOTES ON THESE OPERATING INSTRUCTIONS ....49 1.1 Safety Instructions ............49 1.2 Certification standards ............49 1.3 Special symbols..............49 1.4 Disposal and recycling ............50 1.5 Safety of Persons ............51 1.6 Special precautions ............53 INTRODUCTION ..............54 2.1 Electronic equipment protection........54 2.2 Environmental protection ..........55 2.3 Weight and dimensions ..........56 2.4 Rear panels ..............57... - Page 48 6.5 Recycle................77 TROUBLESHOOTING ............78 SPECIFICATIONS ..............81 8.1 UPS Block diagram ............81 8.2 UPS Specifications ............82 8.3 Product & accessory codes ..........85...
-
Page 49: Notes On These Operating Instructions
1. NOTES ON THESE OPERATING INSTRUCTIONS 1.1 Safety Instructions These operating instructions will help you to install and operate the SAVE THESE INSTRUCTIONS. This manual contains important instructions that should be followed during installation and maintenance of the UPS and batteries. UPS Tower models are considered acceptable for use in the ambient of 0 ~ 40°... -
Page 50: Disposal And Recycling
Refer to the user manual. 1.4 Disposal and recycling End of life AEG Power Solutions will process products at the end of their service life in compliance with local regulations. AEG Power Solutions works with companies in charge of collecting and eliminating our products at the end of their service life. -
Page 51: Safety Of Persons
correct disposal. For more information, contact your local recycling/reuse or hazardous waste centre. Never dispose used batteries or battery material with refuse. Ensure compliance with local legislation and regulations governing the Notice: The sign "Pb" below the symbol for batteries indicates that this battery contains lead. Electrical and electronics waste must only be disposed of in compliance with local legislation and regulations. - Page 52 Remove watches, rings, or other metal objects. − Use tools with insulated handles. − Wear rubber gloves and boots. − Do not lay tools or metal parts on top of batteries. − Disconnect charging source prior to connecting or disconnecting −...
-
Page 53: Special Precautions
1.6 Special precautions The unit is heavy: wear safety shoes and use vacuum • lifter preferentially for handling operations. All handling operations will require at least two people • (unpacking, lifting, installation in rack system). Before and after the installation, if the UPS remains de- •... -
Page 54: Introduction
2. INTRODUCTION Thank you for selecting AEG UPS to protect your electrical equipment. We recommend that you take the time to read this manual to take full advantage of the many features of the UPS (Uninterruptible Power System). Before installing the UPS, please read the booklet presenting the safety instructions. -
Page 55: Environmental Protection
2.2 Environmental protection Products are developed according to an eco-design approach. Substances This product does not contain CFCs, HCFCs or asbestos. Packing To improve waste treatment and facilitate recycling, separate the various packing components. Product The product is mainly made up of recyclable materials. Dismantling and disassembly must take place in compliance with all local regulations concerning waste. -
Page 56: Weight And Dimensions
2.3 Weight and dimensions The weight in this table is reference only, please see the labels on the carton for details. PART Nº DESCRIPTION WEIGHT DIMENSIONS: (KG) D X W X H (MM) 30004615 Protect C 1000 12.8 404 X 145 X 220 LCD+ 30004616 Protect C 2000... -
Page 57: Rear Panels
2.4 Rear panels Protect C 1000 LCD+ Protect C 2000 LCD+/ Protect C 2000 LCD+ “S” Version... - Page 58 Protect C 3000 LCD+ Protect C 3000 LCD+ “S” Version...
-
Page 59: Accessories
Protect C 1050 BP+ (36V) Protect C 2030 BP+ (72V) LAN (HDMI) Slot Card Box EBP Connector Ethernet (RJ45) Input Breaker(optional) RPO/Dry in/Dry Input Socket/ Input Terminal EBP auto Output Socket/Terminal detection RS232 Output Fuse (optional) 2.5 Accessories DESCRIPTION PART Nº Protect C 1000 BP+ 30004618 Protect C 2030 BP+... -
Page 60: Installation
3. INSTALLATION Inspection of the equipment If any equipment has been damaged during shipment, keep the shipping cartons and packing materials for the carrier or place of purchase and file a claim for shipping damage. If you discover damage after acceptance, file a claim for concealed damage. To file a claim for shipping damage or concealed damage refer immediately to your sales representative. - Page 61 Install the unit Always keep 200 mm of free space behind the UPS rear panel. Check that the indications on the name plate located on the top cover of the UPS meets to the AC-power source and the true electrical consumption of the total load. 1-Connect the UPS input socket to the AC-power source...
- Page 62 Recommended upstream protection. UPS MODEL UPSTREAM CIRCUIT BREAKER Protect C3000 C curve-20A LCD+ Input terminal and output terminal connection: PROTECT C MINIMUM OF TERMINAL- 3000LCD+ SECTION BLOCK REQUIRED/ CAPACITY TORQUE Input L, N, G conductor 2.5 mm²/(0.3N.m) 4 mm² cross section Output L, N, G conductor 4 mm²/(0.8N.m)
- Page 63 Connecting external battery packs A small amount of arcing may occur when connecting an EBP to the UPS. This is normal and will not harm personnel Up to 6 EBPs can be connected to the UPS. Protect C 1000 LCD+ Protect C 2000 LCD+ &...
-
Page 64: Operation
4. OPERATION 4.1 LCD panel The UPS provides useful information about the UPS itself, load status, events, measurements and settings. The following table shows the indicator status and description: Indicator Status Description The UPS is operating normally on Online or on High Efficiency mode. - Page 65 Button Function Illustration Press the Button for >100ms & < 1s can Power on power on the UPS without utility input at the condition of battery connected When the Unity is powered on, press the button Turn on for >1s can turn on the UPS Turn off Press the button >...
-
Page 66: Lcd Description
4.2 LCD description The LCD backlight automatically dims after 10 minutes of inactivity. Press any button to restore the screen. Operation Cause Description status Standby The UPS is Off without output. mode The UPS is operating normally and Online mode protecting the equipment. - Page 67 Once the mains are loss or High abnormal, the UPS would transfer to Efficiency Line mode or Battery mode and the mode load is supplied continuously. The UPS would free run with fixed output frequency (50Hz or 60Hz). Converter mode The load should be derating to 60% in converter mode.
-
Page 68: Display Functions
4.3 Display functions When starting the UPS, the display is in the default UPS status summary screen. Display information or Menu Main menu Submenu function UPS mode, date/time, battery status UPS status and current alarms Event log Displays the events and faults stored [Load] W VA A P%, [Input/Output] V Hz, [Battery] % min V EBP, [DC Bus] V, Measurements... -
Page 69: User Settings
4.4 User settings Submenu Available settings Default settings Password Can be changed by user 4732 English, Italiano, Français, Deutsch, Change language English Español, Русский, Polski, 简 体 中 文 User password [enabled, ****], [disabled] enabled Audible alarms [enabled], [disabled] enabled Output voltage [200V], [208V], [220V], [230V], [240V] [230V]... - Page 70 Submenu Available settings Default settings Ambient temperature [enabled], [disabled] enabled alarm Battery remaining [enabled], [disabled] enabled time Date and time dd/mm/yyyy hh:mm 01/01/2020 00:00 LCD contrast [-5 ~ +5] Modbus TCP [enabled], [disabled] disabled Control commands [enabled], [disabled] enabled Battery saving mode [disabled], [10%], [20%], …, [100%] disabled REPO input polarity...
-
Page 71: Starting The Ups With Utility
4.5 Starting the UPS with utility 4.6 Starting the UPS on Battery Before using this feature, the UPS must have been powered by utility power with output enabled at least once. Battery start can be disabled. Refer to the Chapter User setting... -
Page 72: Ups Shutdown
4.7 UPS Shutdown... -
Page 73: Communication
5. COMMUNICATION 5.1 RS232 and USB Communication cable to the serial or USB port on the computer. Connect the other end of the communication cable to the RS232 or USB communication port on the UPS. 5.2 UPS remote control functions Remote Power Off (RPO) When RPO is activated, UPS will cut off output immediately, and continues to alarm. -
Page 74: Modbus Tcp
Dry out is the relay out, dry out function can be configured (see Settings > Dry out). Dry out Comments Connector type 16 AWG Maximum wires Inner Relay specification 24Vdc/1A 5.3 Modbus TCP Built-in ethernet port offers Modbus TCP feature to facilitate remote monitoring of the UPS into your own software. -
Page 75: Ups Mainteinance
6. UPS MAINTEINANCE 6.1 Equipment care For the best preventive maintenance, keep the area around the equipment clean and dust free. If the atmosphere is very dusty, clean the outside of the system with a vacuum cleaner. For full battery life, keep the equipment at an ambient temperature of 25°... -
Page 76: Replacing Batteries
6.4 Replacing batteries DO NOT DISCONNECT the batteries while the UPS is in Battery mode. Consider all warnings, cautions, and notes before replacing batteries. Servicing should be performed by qualified service personnel with knowledgeable of batteries and required precautions. Keep unauthorized personnel away from batteries Verify that the replacement batteries have the same rating and brand as the batteries being replaced. -
Page 77: Recycle
6.5 Recycle Contact your local recycling or hazardous waste center for information on proper disposal of the used equipment. Do not dispose of the batteries in the fire. Which may cause battery explosion. The batteries must be rightly disposed according to local regulation Do not open or destroy the batteries. -
Page 78: Troubleshooting
7. TROUBLESHOOTING Typical alarms and faults: To check the UPS status and Event log: Press any button on the front panel display to activate the • menu options. Press the button to select Event log. • Scroll through the listed events and faults. •... - Page 79 Conditions Possible cause Action The UPS Apply utility power for 48 hours to does not The batteries need charge the batteries. If the provide the charging or service. condition persists, contact your expected service representative. backup time. Bypass mode An overload or a fault Equipment is powered but not has occurred, or a protected by the UPS.
- Page 80 Conditions Possible cause Action connector is missing. Emergency RPO is active 1.Check the RPO connector status power off 2.Reset the RPO fault through LCD. Main menu – Control - Reset fault state. Fan fault Fan abnormal Check if the fan is running normally Site fault Phase and neutral Site Fault detection disabled by...
-
Page 81: Specifications
8. SPECIFICATIONS 8.1 UPS Block diagram... -
Page 82: Ups Specifications
8.2 UPS Specifications Model name PROTECT C LCD+ Rating 1 KVA 2 KVA 2 KVA “S” 3KVA 3 KVA “S” 1000VA/ 2000VA/ 3000VA/ Power rating VA/Watt 1000W 2000W 3000W Line mode Efficiency ECO mode Voltage range 160-300V 100% load, 110-160V derating to 50% load linearly Rated 50Hz/60Hz frequency... - Page 83 Model name PROTECT C LCD+ Rating 1 KVA 2 KVA 2 KVA “S” 3KVA 3 KVA “S” Socket 8 x IEC C13 8 x IEC C13 4 x IEC C13 8 x IEC C13 1x Terminal (Tower IEC) 1x IEC C19 Bypass mode 550A/2.8ms 699A/7ms 699A/7ms...
- Page 84 Model name PROTECT C LCD+ Rating 1 KVA 2 KVA 2 KVA “S” 3KVA 3 KVA “S” card Optional RJ45 Monitor Winpower software 145*404* Dimension 192*428*318 (W*D*H) mm IP protection Physical IP20 level performance Plug solid Wheel Operating 0-45⁰C, 40-45⁰C derating to 80% temperature Relative 0-95%...
-
Page 85: Product & Accessory Codes
8.3 Product & accessory codes For purchasing any Protect C LCD+ product please follow following code table: PRODUCT DESCRIPITON CODE Protect C 1000 LCD+ 30004615 Protect C 2000 LCD+ 30004616 Protect C 2000S LCD+ 30004626 Protect C 3000 LCD+ 30004617 Protect C 3000S LCD+ 30004627 Protect C 1000 BP+... - Page 86 Available accessories: Protect C 1000 BP+ Additional battery pack compatible with Protect 1000 LCD+, maximum 6 External battery packs can be installed per UPS. Protect C 2030 BP+ Additional battery pack compatible with Protect 2000 LCD+, 2000S LCD+, 3000 LCD+ and 3000S LCD+, maximum 6 External battery packs can be installed per UPS.
- Page 87 NOTES...
- Page 88 AEG PS – Technical data in this document does not contain any binding guarantees or warranties. Content only serves for information purposes and can be modified at any time. We will make binding commitments only upon receipt of concrete enquiries and customer notification of the relevant conditions. Due to the non-binding nature of these terms, we assume liability neither for the accuracy nor completeness of the data provided here.
Need help?
Do you have a question about the Protect C 1000 LCD+ and is the answer not in the manual?
Questions and answers