
Related Manuals for AEG Protect D Series


Summary of Contents for AEG Protect D Series
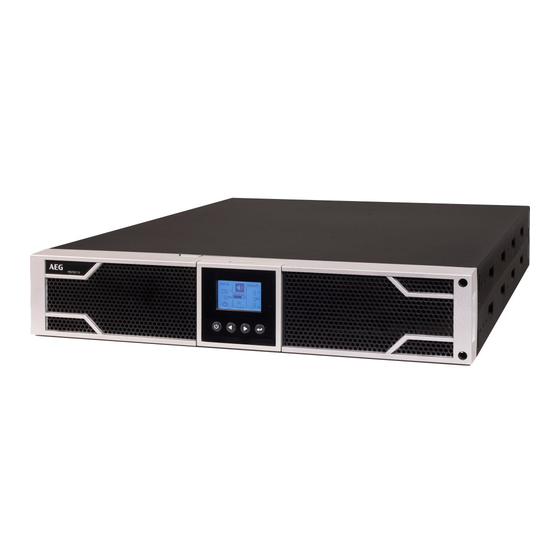
- Page 1 PROTECT D Protect D 1000(S) LCD Protect D 1500(S) LCD Protect D 2000(S) LCD Protect D 3000(S) LCD User Manual Protect D 1000BP LCD Protect D 1520BP LCD Protect D 3000BP LCD...
- Page 2 REVISION Status Change Date Name Created 29.01.2019 Smrekar...
- Page 3 Thank you for purchasing the AEG PS UPS Protect D from AEG Power Solutions. Safety information and operating instructions are included in this manual. To ensure correct use of the UPS, please read this manual thoroughly before operating it. Use this manual properly.
-
Page 4: Table Of Contents
CONTENTS NOTES ON THESE OPERATING INSTRUCTIONS ......... 6 Duty to provide information ............6 Operating instructions ............... 6 Validity ..................6 Warranty and liability ..............6 Handling ..................7 Copyright ................... 7 GENERAL INFORMATION ..............8 Description of commonly used symbols ........8 Technology ................. - Page 5 Messages and alarms ............... 29 Event log .................. 30 6.2.1 Accessing the event log ..........30 6.2.2 Measurements ............31 6.2.3 Control ................ 31 6.2.4 Configuring Load Segments ........32 6.2.5 Identification............... 33 6.2.6 Settings ............... 33 INTERFACES AND COMMUNICATIONS .......... 40 RS-232 and USB communication ports ........
-
Page 6: Notes On These Operating Instructions
AEG and its representatives without prior notification in the event of maintenance and repair work being carried out with anything other than original AEG spare parts or spare parts purchased by AEG. -
Page 7: Handling
This document must not be reproduced, either in whole or in part, without the express permission of AEG Power Solutions GmBH. AEG is a registered trademark used under license from AB Electrolux. This product complies with the safety and environmental regulations in If the time arises to throw away your product, please recycle all the components possible. -
Page 8: General Information
2. GENERAL INFORMATION 2.1 Description of commonly used symbols Some or all of the following symbols may be used in this manual. It is advisable to familiarize yourself with them and understand their meaning. The crossed-out wheeled bin symbol indicates that waste electrical and electronic equipment should not be discarded together with unseparated household waste but must be collected separately. -
Page 9: Technology
2.2 Technology This On-Line-Series is an uninterruptible power supply incorporating double-converter technology. It provides perfect protection specifically for Novell, Windows NT and UNIX servers. The double-converter principle eliminates all mains power disturbances. A rectifier converts the alternating current from the socket outlet to direct current. - Page 10 BATTERIES Protect D Protect D Protect D Protect D Model 1000 LCD 1500 LCD 2000 LCD 3000 LCD Qty and type 3 × 12V 9Ah 4 × 12V 9Ah 4 × 12V 9Ah 6 × 12V 9Ah TYPICAL BACKUP TIME (TYPICAL VALUES AT 25°C IN MINUTES) Protect D Protect D Protect D...
- Page 11 OPERATING ENVIRONMENT Ambient Temperature 0°C to 40°C Operating humidity < 95% Altitude < 1000m Storage temperature 0°C to 45°C ENVIRONMENTAL / SAFETY Safety IEC/EN 62040-1 Conducted emission IEC/EN 62040-2, Category C1 Radiated emission IEC/EN 62040-2, Category C1 Harmonic current IEC/EN 61000-3-2 Voltage fluctuations and flicker IEC/EN 61000-3-3 IEC/EN 61000-4-2, Level 3...
-
Page 12: Installation
3. INSTALLATION Please read carefully the following user manual and the safety instructions before installing the unit or using the unit! See installation instructions before connecting to the supply. Condensation may occur if the UPS is moved directly from a cold to a warm environment. -
Page 13: Inspection Of Unit
3.1 Inspection of Unit Inspect the UPS upon receiving. If the UPS is apparently damaged during the shipment, please keep the box and packing material in original form for the carrier and notify the carrier and dealer immediately. 3.2 Unpacking the Cabinet To unpack the system: ... -
Page 14: External Battery Pack Installation
3.3.1 External battery pack installation Using the same method as assembling UPS in a rack form, assemble external battery pack into the rack-mounting on the top or bottom of the UPS. Connect the earth line from UPS (port A) to external battery pack (port B) Take off the LCD box and unscrew the internal screws. -
Page 15: Connecting The Multiple External Battery Packs
After installing the UPS into rack, the load can then be connected to UPS. Please make sure the load equipment is turned off before plugging all loads into the output receptacle 3.3.2 Connecting the multiple external battery packs Protect D UPS include external battery port that allows users to connect multiple external battery packs in order to provide additional backup time. - Page 16 And then connect the battery terminal (D) from the first external battery pack to the battery terminal (E) from the second external battery pack. Users need to remove the small gate(C) on side of the front panel to allow the outlet wire of the external battery pack to pass through the gate and then reassemble front panel.
-
Page 17: Operation
The battery connection procedure is very important. Any incompliance may result in the risk of electric shock. Therefore, the following steps must be strictly complied with. Make sure the mains input is cut off, if there is a battery breaker then turn it off first. - Page 18 The UPS features its own, internal current source (batteries). You may receive an electric shock when you touch the UPS output sockets or output terminal block even if the UPS is not connected to the building wiring socket. In order to fully disconnect the UPS, first press the OFF button to turn off the UPS, then disconnect the mains lead.
-
Page 19: Connection S, Operating / Display Elements
4. CONNECTION S, OPERATING / DISPLAY ELEMENTS 4.1 Front display panel The main feature of the operating panel is its graphical, two-color LCD display. The standard setting is white lettering on a black background; for alarm messages, the background changes to amber. There are 4 keys at the bottom for menu navigation and another 3 different-colored LEDs at the top. -
Page 20: Display (Main Menu)
“ ” key: Press this key to return to the previous menu level without altering any settings. If you press this key in the status display, you will access the “UPS On or Off” menu item If no keys are pressed, the display will automatically return to the standard display after 5 minutes. -
Page 21: Rear Panel
UPS status Autonomy time Battery capacity UPS load Part 1 of the UPS status display 4.5 Rear panel The UPS rear panel description table and pictures are shown as below. Protect D 1000(S) / 1500(S) / 2000 LCD model rear panel Protect D 2000S LCD model rear panel... - Page 22 Protect D 3000 LCD model rear panel Protect D 3000S LCD model rear panel AC Output EPO / Dry in Communication Port USB Port AC Input Dry out SNMP slot RS232 Earth Line Port The external battery pack rear panel description table and picture is shown as below.
- Page 23 Protect D BP LCD models’ rear panel Earth Line Port...
-
Page 24: Electrical Connection
5. ELECTRICAL CONNECTION 5.1 UPS input connection The system may be installed and wired only by qualified electricians in accordance with applicable safety regulations! When installing the electrical wiring, please note the nominal amperage of your incoming feeder. Inspect the packaging carton and its contents for damage. Please inform the transport agency immediately should you find signs of damage. -
Page 25: Ups Output Connection
5.2 UPS Output Connection The output of the UPS is made up of IEC socket-types. Simply plug the load power cord to the output sockets to complete connection. Use one cord for every 5A load. Model Output Socket (pcs) Protect D 1000(S) LCD 8 x IEC320 C13 Protect D 1500(S) LCD Protect D 2000(S) LCD... -
Page 26: Battery Charge
User can select the polarity of EPO, EPO is NC (Normally Close) as default setting. NO (Normally Open) Normally the EPO connector is open on the rear panel. Once the connector is closed with a wire, the UPS would stop the output until the EPO status is disabled. -
Page 27: Ups Turn On
The UPS will be immediately supplied with power from the public power network. It will start up with an initialization phase, indicated by the AEG logo, which appears on the screen for 5 seconds. After that, you will see the following message: Now confirm the highlighted “UPS On”... -
Page 28: Operating Modes
6. OPERATING MODES The LCD display indicates the current UPS status in the top middle section. Here is a list of the symbols used and what they mean: Display Status UPS is in normal / continuous double- conversion mode. Power supply is available and within the acceptable tolerance range (Mode: “High performance”). -
Page 29: Messages And Alarms
Display for 10 seconds after a successful battery test. UPS reports a defective or disconnected battery system. UPS is overloaded. UPS indicates a critical error and has switched off the UPS output. General UPS alarm. Details can be found in the Alarm messages and entries in the event log. -
Page 30: Event Log
Battery status display Description Battery charge Batteries are currently charging with constant current. Battery float charge Batteries are currently being supplied with constant voltage. Battery resting Batteries on standby, but in “sleep” mode (part of the battery standby cycle mode). Battery discharge Batteries are currently discharging, e.g. -
Page 31: Measurements
6.2.2 Measurements Select this menu item to find the following measurements in this order: Power Usage Efficiency Output power [W] & [VA] (active and apparent power) Output power (current and power factor) Output [V] & [Hz] (voltage and frequency) Input [V] &... -
Page 32: Configuring Load Segments
used and should not be displayed as a control option. Battery Test Schedule Battery Test: yes Cancel Battery test: no Starts a manual battery test. Reset Error State Reset Alarms: yes | no Manually clears any latched alarms, such as bad battery detected or DC Bus over voltage/ under voltage. -
Page 33: Identification
6.2.5 Identification Activate this menu item to view the following sub-menu items: “Type / Model”, “Part number”, “Serial number” and finally the current “UPS firmware” version one after the other. 6.2.6 Settings The following table provides you with a detailed description of the possible user settings using the UPS operating panel: Description Adjustable parameters... - Page 34 Set Date and 03/15/2019 Set Month,Day,Year, Hours and Time Minutes; Date layout: mm/dd/yyyy Time layout: hh:mm NOTE: The date format depends on the language selection. NOTE: Time is a 24-hour clock. Relay UPS ok [UPS ok], [on bypass], configuration [on Economical mode (ECO)], [on High efficiency mode (ECO+)], [on battery], [battery low], [battery fault], [battery missing],...
- Page 35 [High efficiency mode (ECO+)], [converter] Setting only available in UPS stand-by mode. Automatic Load Segment [Off], [On] = <hh>H <mm>M <ss>S Start Delay <1> 1s, Adjustment: Hours, Minutes, Load Segment Seconds <2> 2s <00>H <00>M <00>S to <12>H <59>M <59>S If Off, automatic restart is disabled on the selected load segment and turns on only when...
- Page 36 Set the other load segment if applicable. Load segment On/Off commands issued through the Control menu overrules the settings for load segments. Description Adjustable parameters Presetting Start w/o enabled [enabled], [disabled] mains cold Start Battery Saving disabled [disabled], [10%], [20%], ...[100%] Mode On battery operation the UPS output is turned off as soon as the...
- Page 37 Automatic battery tests run according to “periodic battery test”, unless disabled. During the test, the UPS transfers to Battery mode and discharges the batteries for 10 seconds under the existing load. The “UPS on Battery” notice and the “Battery Low” alarm do not activate during a battery test.
- Page 38 hours, UPS will make bat low alarm and then shutdown itself 30 minutes later even battery voltage still above the shutdown value. Disabled means “No time limitation” for battery mode Auto reboot enabled [enabled], [disabled] Enabled means UPS will auto restart to normal mode while utility recover after the UPS has been shut down for battery low.
- Page 39 Restore [no], [yes] Factory Setting only available in UPS Settings stand-by mode. Restoring the factory settings: - Returns all user-configurable EEPROM settings to default factory settings - Resets all pending on/off commands - Clears the Event Log and resets all time stamps - Resets the battery test status - Initiates the Self Diagnostics test The “Restore Factory Settings“...
-
Page 40: Interfaces And Communications
7. INTERFACES AND COMMUNICATIONS 7.1 RS-232 and USB communication ports To establish communication between the UPS and a computer, connect a computer to one of the UPS communication ports by using an applicable communication cable. NOTE: Only one of the communication ports can be active at one time. The USB port has priority over the RS-232 port. -
Page 41: Dry Contact Port
To install the Network Management Card, complete the following steps: Locate the UPS communication bay. Remove the two screws that secure the communication bay cover to the UPS and save the screws. Insert the Serial Network Management Card into the slot on the UPS. - Page 42 Dry out contact schematic Dry in contact schematic...
- Page 43 The following table shows the options for the dry out/in contacts. Dry out signal Description Summary Alarm Activated when any warning happens On Battery Activated when the UPS operates on battery Battery Low Activated with the “bLOW” alarm UPS ok Activated when the UPS has no alarms and no fault.
-
Page 44: Ups Management Software
7.5 UPS management software For the UPS settings, management and shutdown scheduling AEG can propose two different solutions: Advanced software package CompuWatch Lite software package WinPower For more details, please visit www.aegps.com under Products / Monitoring Solutions. There you can download software package and documentation. -
Page 45: Troubleshooting
8. TROUBLESHOOTING If the UPS system does not operate correctly, please attempt to solve the problem using the table below. Problem Possible cause Remedy No indication, no No input voltage Check building wiring warning tone even socket outlet and though system is input cable. - Page 46 Inverter temperature Inside temperature Check the ventilation high of the UPS is too high of the UPS, check the ambient temperature. Ambient The ambient Check the temperature high temperature is too environment high ventilation. Battery open Battery pack is not Check the battery connected correctly bank is connected to...
- Page 47 Inverter short Output short circuit Remove all the loads. Turn off the UPS. Check whether the output of UPS and loads is short circuit. Make sure the short circuit is removed, and the UPS has no internal faults before turning on again. Bus short UPS internal fault Notify dealer...
-
Page 48: Maintenance
9. MAINTENANCE 9.1 Operation The UPS system contains no user-serviceable parts. If the battery service life (3~5 years at 25°C ambient temperature) has been exceeded, the batteries must be replaced. In this case please contact your dealer. For the best preventive maintenance, keep the area around the UPS clean and dust-free. - Page 49 If it needs to replace the batteries while the UPS is running, make sure the UPS would not shut down during the replacement. If there is a battery breaker then turn it off first. Disconnect the battery cable carefully and make sure no any exposed wires can be touched.
-
Page 50: Testing New Batteries
Screw up the battery bracket and reconnect the battery cable A and B Re-install the front panel back to UPS. 9.4 Testing New Batteries For a battery test, please check: The batteries must be fully charged. The UPS must be in Normal mode with no active alarms. ... -
Page 51: Recycling The Used Equipment
9.5 Recycling the used equipment Contact your local recycling or hazardous waste center for information on proper disposal of the used equipment. Do not dispose of the batteries in the fire. Which may cause battery explosion. The batteries must be rightly disposed according to local regulation. -
Page 52: Disposal
9.6 Disposal This section tells you how to dispose of the individual components of the equipment. • Packaging: Dispose of the stretch plastic film and the moulded parts made from polyethylene foam with normal industrial waste. They are chemically inactive and can be disposed of or recycled. •... - Page 53 AEG PS – Technical data in this document does not contain any binding guarantees or warranties. Content only serves for information purposes and can be modified at any time. We will make binding commitments only upon receipt of concrete enquiries and customer notification of the relevant conditions. Due to the non-binding nature of these terms, we assume liability neither for the accuracy nor completeness of the data provided here.
Need help?
Do you have a question about the Protect D Series and is the answer not in the manual?
Questions and answers