Advertisement
Advertisement
Table of Contents

Related Manuals for LifeSpan CEM-10 CS


Summary of Contents for LifeSpan CEM-10 CS
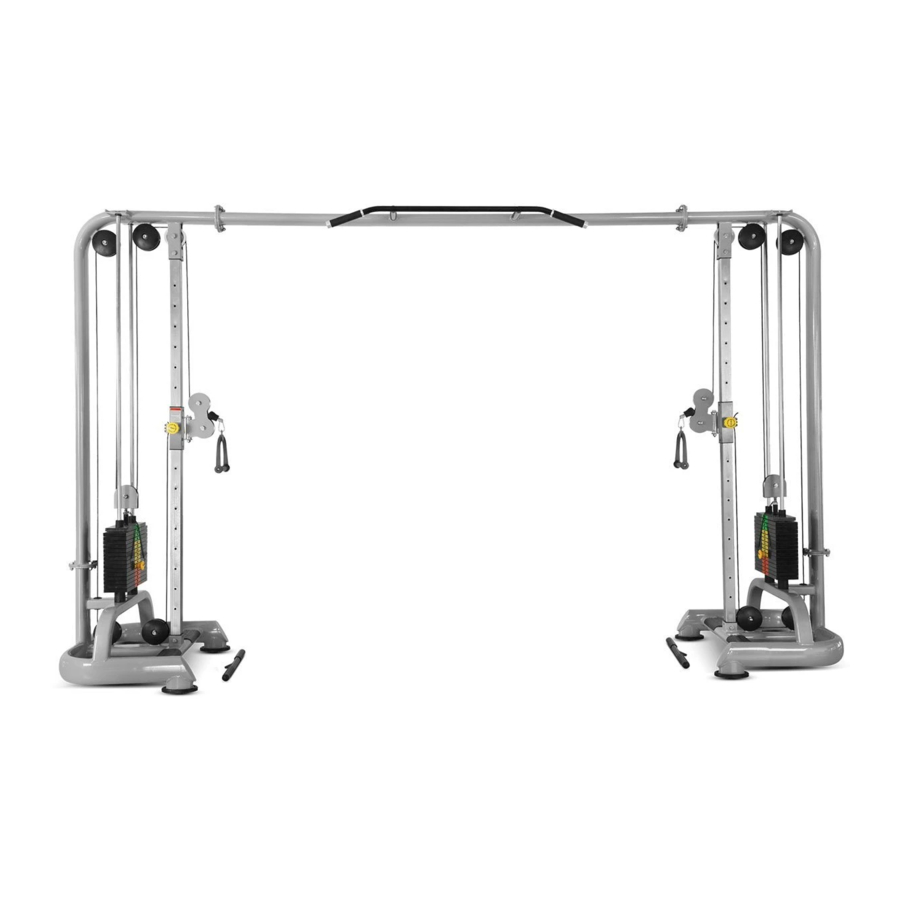
- Page 1 CEM-10 CS Cable Machine (COVER, NORMAL GRIP) Owner’s Manual IMPORTANT ! Please read all instructions carefully before using this product. Retain this manual for future reference. The specifications of this product may vary slightly from the illustrations and are subject to change...
-
Page 2: Safety Information
SAFETY INFORMATION Note the following precaution before assembling and operating the machine. UNDERSTANDING EACH AND EVERY WARNING TO THE FULLEST IS IMPORTANT. Keep children away from strength equipment. Parent or others supervising children must provide close supervision of children if the equipment is used in the presence of children. It is recommended that all users of this exercise equipment be informed of the following information prior to use. -
Page 3: Exploded Diagram
EXPLODED DIAGRAM - 2 -... - Page 4 Parts list DESCRIPTION DESCRIPTION Bottom tube Sleeve Junction tube Hex boltM10*132 Upper frame Hex boltM12*48 4L/R Adjusting tube joint Grip Guide plate joint Inner hexagon bolt M8*16 U-shape support joint Hex nut M16*1.5 Long handle joint Pop-pin knob Short straight handle joint Nylon sleeve Short V-handle joint E-shape washerΦ15...
-
Page 5: Assembly Instruction
ASSEMBLY INSTRUCTION STEP 1 A: Insert the Adjusting tube joint (4L/R) to the Slide tube (12) and fasten with pop-pin knob (38), then insert the slide tube (12) to the stabilizer (1) & Junction tube (2), secure with Hex bolt (16), flat washer (17) & nylon nut (18) B: Fix the Junction tube (2) to the stabilizer (1) with Hexagon bolt (27), flat washer (17) &... - Page 6 STEP 2 Insert the Slide pole joint (11) to the Stablizer (1) (Note: You can pull it to the bottom for easy assembling), and then insert the cushion(26),weight plate (29) & the pull rod joint (10) to the slide pole joint (11), finally fix the slide pole joint (11) to the junction tube (2) with E-shape washer (40);...
- Page 7 STEP 3 A: Fix the upper frame (3) to the junction tube (2) with hexagon bolt (27), flat washer (17) & nylon nut (18), then fix the Long handle joint (7) to the Upper frame (3) with inner hexagon bolt (50) & end caps (51) B: Connect the Steel cable (48) to the Handlebar (45) as pic shown (attention the direction), then pull the steel cable (48) and fix it to the adjusting tube joint (4L/R) with inner hexagon bolt (36)
- Page 8 STEP 4 1. Fix the support board (58) to the bottom tube (1) with the inner hexagon bolt (43), spring washer (59) and flat washer (60). 2. Fix the front cover (57a) to the support board (58) with the inner hexagon bolt (43), and flat washer (60).
-
Page 9: Warm-Up And Cool-Down
WARM-UP and COOL-DOWN A successful exercise program consists of a warm-up, aerobic exercise, and a cool-down. Do the entire program at least two and preferably three times a week, resting for a day between workouts. After several months, you can increase your workouts to four or five times per week. WARM-UP The purpose of warming up is to prepare your body for exercise and to minimize injuries.
Need help?
Do you have a question about the CEM-10 CS and is the answer not in the manual?
Questions and answers