Table of Contents
Advertisement
Quick Links
MotionCam (PhOD) Fibra User manual
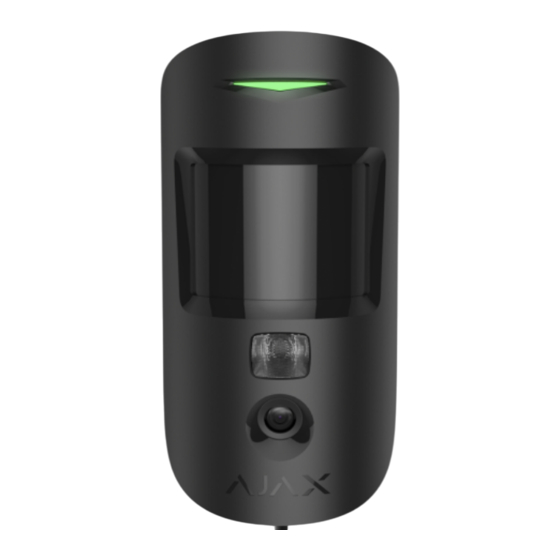
MotionCam (PhOD) Fibra is a wired motion detector featuring photo veri cation
of alarms, Photo on Demand, and Photo by Scenario. The device is designed for
indoor use only. Detects movement at a distance of up to 12 meters. Ignores
pets when installed and con gured correctly.
An Ajax hub is required for the detector to operate. MotionCam (PhOD) Fibra is
compatible with
Connection to other
not provided.
MotionCam (PhOD) Fibra is part of an Ajax system and exchanges data with the
hub using the secure Fibra wired communication protocol. Wired
communication can be up to 2,000 meters long when connected using the
U/UTP cat.5 twisted pair cable.
MotionCam (PhOD) Fibra relates to the Fibra product line of wired devices. Only
accredited Ajax Systems partners can buy, install, and administer Fibra
Updated July 12, 2023
Hub Hybrid (2G)
and
Hub Hybrid (4G)
hubs radio signal range extenders ocBridge Plus
,
on
OS Malevich 2.15.2
,
, and
uartBridge
or higher.
is
Advertisement
Table of Contents

Subscribe to Our Youtube Channel
Related Manuals for AJAX MotionCam Fibra


Summary of Contents for AJAX MotionCam Fibra
- Page 1 Detects movement at a distance of up to 12 meters. Ignores pets when installed and con gured correctly. An Ajax hub is required for the detector to operate. MotionCam (PhOD) Fibra is compatible with Hub Hybrid (2G) Hub Hybrid (4G) OS Malevich 2.15.2...
-
Page 2: Functional Elements
products. Buy MotionCam (PhOD) Fibra Functional elements 1. LED indicator. 2. Motion detector lens. 3. Infrared (IR) backlight. Used to take photos in dark and low-light conditions. 4. Camera. 5. SmartBracket mounting panel. To remove the panel, slide it down. 6. -
Page 3: Operating Principle
10. Terminal strip connection socket. 11. QR code with the device ID. It is used to pair the device with an Ajax hub. 12. Terminal strip for the detector connection. - Page 4 IR backlight, and transmits an alarm. This reduces the current consumption on the line to which the detector is connected and increases the autonomy of the detector and the system. How Ajax noti es of alerts More about Ajax motion detectors What is the tamper Fibra data transfer protocol The detector uses Fibra technology to transmit alarms and events.
- Page 5 How to con gure Photo on Demand When Photo by Scenario is enabled, MotionCam (PhOD) takes pictures in case of alarm from other Ajax devices. By default, the Photo by Scenario feature is disabled for all detectors. More about the Photo by Scenario feature...
- Page 6 Photos are played back in the application as a photo or animated series (if more than 1 photo is taken). The number of pictures is con gured in Ajax apps . To view the received photos, click on the MotionCam (PhOD) Fibra noti cation in the event feed.
- Page 7 You can save photo veri cation as video or images by clicking the download icon. Photo delivery time The photo delivery time to Ajax apps depends on the image resolution, Fibra signal strength, and Internet connection speed. The alarm messages are delivered immediately, regardless of the settings.
-
Page 8: Temperature Compensation
The table shows the delivery time for one photo when the signal strength between the hub and MotionCam (PhOD) is 2–3 bars, and the hub is connected via Ethernet or 4G (LTE). Photo resolution Delivery time 160 × 120 pixels up to 7 seconds 320 ×... -
Page 9: Selecting The Installation Site
6. Permanent Deactivation / activation of the detector. 7. Alarm due to loss of the main power. Restoration of the main power. The Ajax devices are addressable, meaning that PRO Desktop app and CMS receive events, device type, assigned name, and location (room, group). The list of transmitted parameters may differ depending on the type of CMS and the selected communication protocol. - Page 10 The camera’s viewing angle and the presence of obstacles in front of it. Follow these recommendations when designing the Ajax system project for an object. The security system should be designed and installed by professionals. The list of authorized Ajax partners is...
- Page 11 Fibra signal strength is determined by the ratio of the number of undelivered or corrupted data packages to those expected over a speci c time. The icon the Devices tab in Ajax apps indicates the signal strength: Three bars — excellent signal strength. Two bars — good signal strength.
- Page 12 Horizontal viewing angle of the detector Vertical viewing angle of the detector When installing the detector, perform the Detection Zone Test . This allows you to check the operation of the device and accurately determine the sector in which the detector registers motion. If possible, take a couple of photos at the installation site to ensure that the camera captures the desired area and that no obstructions are blocking its view.
- Page 13 If you are connecting multiple devices to a single Fibra line, make sure that they are connected one after the other, as shown in the diagram. Ajax systems also support Beam and Ring topologies. Ring connection will be available in the next OS Malevich updates.
-
Page 14: Preparing For Installation
To ensure that the project is designed correctly and that the system will work in practice, we have developed a Fibra power supply calculator . The calculator helps check the communication quality and cable length for wired Fibra devices when designing the system project for the selected con guration. You can connect up to 100 devices to Hub Hybrid (with default settings). - Page 15 Connecting MotionCam (PhOD) Fibra to the hub 1. Turn off the power of lines in the Ajax PRO app . The function is available in the Lines menu: Hub → Settings →...
- Page 16 If it is necessary to output cable from the bottom or the side, make holes carefully in the places indicated in the gure using a drill at low speed. 4. If the detector is not the last device in the connection line, prepare a second cable in advance.
- Page 17 The installation height is 2.4 metres. 9. Place the detector on the SmartBracket mounting panel. 10. Turn on line power in the Ajax PRO app (Hub → Settings → Lines → Lines Power Supply). When the device is turned on, the green LED will light...
- Page 18 The tamper reacts if someone tries to break or open the lid of the enclosure — the noti cation about this is sent to Ajax apps. To x SmartBracket on the corner, screw the bundled fasteners to the side recesses.
-
Page 19: Adding To The System
2. Add the hub compatible with MotionCam (PhOD) Fibra to your app. Adjust the settings and create at least one virtual room 3. Make sure that the hub is on and has Internet access via Ethernet and/or mobile network. You can do this in the Ajax app. - Page 20 Group mode is enabled). 6. Press Add. To automatically add a device: 1. Open the Ajax PRO app. Select the hub to which you want to add the detector. 2. Go to the Devices tab and click Add Device. 3. Select Add All Fibra Devices. The hub will scan the Fibra lines. After...
-
Page 21: Functionality Testing
Ajax app. Functionality testing The Ajax system offers several types of tests to help select the correct installation place for the devices. Tests do not start immediately. However, the waiting time does not exceed the duration of one “hub—device” polling interval. - Page 22 Icons The icons show some statuses of MotionCam (PhOD). You can check them in the Ajax apps: 1. Select the hub in the Ajax app. 2. Go to the Devices tab. 3. Find MotionCam (PhOD) Fibra in the list.
- Page 23 Learn more States The states display information about the device and its operating parameters. You can check the MotionCam (PhOD) states in the Ajax apps: 1. Go to the Devices tab. 2. Select MotionCam (PhOD) Fibra from the list of devices.
- Page 24 The acceptable error between the value in the app and the temperature at the installation site: 2°C. The value is updated as soon as the detector detects a temperature change of at least 1°C. You can create a scenario by temperature to control automation devices.
- Page 25 By number of alarms — the device is automatically excluded from the system when the number of alarms is exceeded. The number of alarms is speci ed in the Devices Auto Deactivation settings in Ajax PRO-app. Learn more...
- Page 26 Alarm Reaction Shows how the detector reacts to alarms: Instant Alarm — the armed detector immediately reacts to a threat and raises the alarm. Entry/Exit — when a delay is set, the armed device starts the countdown and doesn’t Operating Mode raise the alarm even if triggered until the countdown ends.
- Page 27 The Fibra line number of the hub to which Line No. MotionCam (PhOD) is connected. Settings To change detector settings in an Ajax app: 1. Go to the Devices tab. 2. Select MotionCam (PhOD) Fibra from the list. 3. Go to Settings by clicking on the icon.
- Page 28 MotionCam (PhOD) has three levels of sensitivity. The choice depends on the type of the object, the presence of probable sources of false alarms, and the speci cs of the secured area: Low — it does not respond to animals up to 50 cm tall.
- Page 29 Series of 5 (only available with 320 × 240 or 160 × 120 resolutions). Applies to MotionCam (PhOD) photos by alarm and by scenario. Selecting the number of alarms accompanied by photos. You can choose if the photo will be transmitted each time the device is triggered or specify the exact number of alarms: 1 to 10.
- Page 30 MotionCam (PhOD) detector. The menu allows you to create a scenario, according to which the detector will take Scenarios pictures when other Ajax devices are triggered. Learn more Alarm Reaction Specify how this device will react to alarms: Instant Alarm —...
- Page 31 to Night Mode. Learn more Delay time when entering in Night Mode. Delay when entering (alarm activation delay) is the time the user has to disable Night Mode Night Mode Delay When Entering, sec after entering the premises. Learn more Delay time when leaving in Night Mode.
- Page 32 Setting the Photo on Demand feature A user with the right to manage privacy settings can enable and con gure the Photo on Demand feature. The way to con gurations in the Ajax app: Devices → Hub → Settings...
- Page 33 Setting the Photo by Scenario feature A user with the right to manage privacy settings can enable the Photo by Scenario feature. The way to enable the Photo by Scenario feature in the Ajax app: Devices → Hub → Settings →...
- Page 34 Detector batteries need to be replaced. and goes out. Flashes green The detector is not connected to the hub. frequently. The device needs to be Lights up red and Ajax repaired, contact ashes after the rst Hardware error. switching on. Technical Support...
-
Page 35: Maintenance
When the detector detects a malfunction (for example, there is no communication via the Fibra protocol), a malfunction counter is displayed in the Ajax app in the upper left corner of the device icon. All malfunctions can be seen in the detector states. Fields with malfunctions will be highlighted in red. -
Page 36: Technical Speci Cations
Warranty for the Limited Liability Company “Ajax Systems Manufacturing” products is valid for 2 years after the purchase. If the device does not function correctly, please contact Ajax Technical Support rst. In most cases, technical issues can be resolved remotely. - Page 37 Subscribe to the newsletter about safe life. No spam Email Subscribe...
Need help?
Do you have a question about the MotionCam Fibra and is the answer not in the manual?
Questions and answers