AJAX MotionProtect Outdoor User Manual
Hide thumbs
Also See for MotionProtect Outdoor:
- User manual (23 pages) ,
- Quick start manual (6 pages) ,
- Quick start manual (2 pages)
Table of Contents
Advertisement
Quick Links
MotionProtect Outdoor User Manual
MotionProtect Outdoor is a wireless outdoor motion detector for the Ajax
security system. The detector communicates with the hub via protected
Jeweller
radio protocol at a distance up to 1,700 meters in the line of sight.
MotionProtect Outdoor features protection against blocking the detector view
(anti-masking system) and triggering by pets (pet immunity). The motion
detection distance is adjustable: from 3 up to 15 meters.
MotionProtect Outdoor can operate both on pre-installed batteries or use an
external power supply. Depending on the detector settings, the batteries' life is
up to 5 years.
MotionProtect Outdoor does not support connection via the
uartBridge
integration modules.
The user can con gure the detector via the
and Windows. The security system noti es users of all events through push
noti cations, SMS, and calls (if activated).
Updated June 24, 2020
Ajax app
ocBridge Plus
and
for iOS, Android, macOS,
Advertisement
Table of Contents

Related Manuals for AJAX MotionProtect Outdoor


Summary of Contents for AJAX MotionProtect Outdoor
- Page 1 MotionProtect Outdoor User Manual Updated June 24, 2020 MotionProtect Outdoor is a wireless outdoor motion detector for the Ajax security system. The detector communicates with the hub via protected Jeweller radio protocol at a distance up to 1,700 meters in the line of sight.
-
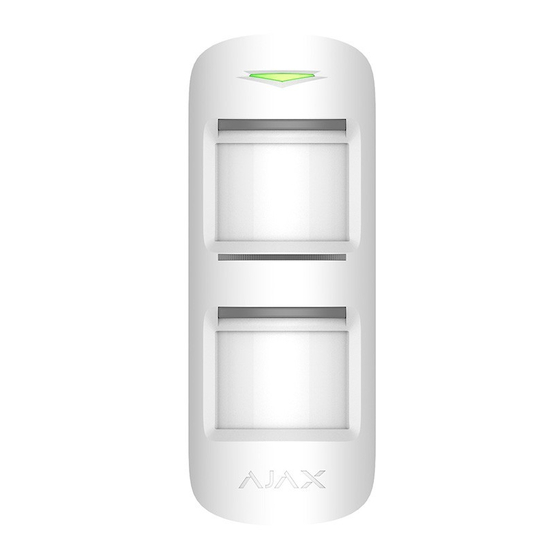
Page 2: Functional Elements
The Ajax security system can be connected to a central monitoring station of a security company. Buy outdoor motion detector MotionProtect Outdoor Functional Elements 1. Main light indicator 2. Upper light indicator and masking sensor 3. Upper motion sensor lens 4. -
Page 3: Operating Principle
PIR sensors. If both sensors detect identical motion, MotionProtect Outdoor instantly transmits an alarm signal to the hub and blinks with a green LED. MotionProtect Outdoor ignores animals, birds, insects, as well as swaying plants and trees. By a motion alarm, the security system also can activate sirens and notify a security company if connected. - Page 4 If one or more types of masking are detected, the detector generates a masking alarm and lights up a green LED for 1 second. MotionProtect Outdoor detects masking regardless of the security state: armed or disarmed. Response time to masking...
- Page 5 Only users with administrator rights can add the device to the hub How to connect the device to the hub: 1. Select the Add Device option in the Ajax application. 2. Name the device, scan/write manually the QR Code (located on the body...
- Page 6 Request for connection to the hub is transmitted for a short time at the time of switching on the device. MotionProtect Outdoor turns off automatically after 6 seconds, if it failed to connect to the hub. To retry the connection, you do not need to switch off the device.
- Page 7 The update of the detector statuses in the list depends on the device ping interval set in the hub settings (the default value is 36 seconds). To avoid masking alarms, switch off anti-masking in the device settings before the installation! States 1. Devices 2. MotionProtect Outdoor...
- Page 8 Parameter Value Temperature of the Detector. Measured on the Temperature processor and changes gradually Signal strength between the hub and the Jeweller Signal Strength detector Connection status between the hub and the Connection detector Battery level of the detector, displayed in Battery Charge increments of 25% The tamper mode of the detector, which reacts...
- Page 9 Device ID Device identi er Settings 1. Devices 2. MotionProtect Outdoor 3. Settings...
- Page 10 Setting Value First eld Detector name, can be edited Selecting the virtual room to which the device is Room assigned Delay when entering, sec Selecting delay time when entering Delay when leaving, sec Delay period after the security system is armed When enabled, the detector will experience a Delays in night mode delay in the night mode...
- Page 11 Opens the detector User Guide Disconnects the detector from the hub and Unpair Device deletes its settings Indication MotionProtect Outdoor light indicator may light up red or green depending on the device status. Indication When Pressing the “On” button Event Indication...
-
Page 12: Functionality Testing
Choosing an installation place Before installing the detector, conduct the Jeweller signal strength test. Install MotionProtect Outdoor at the height of 0.8 – 1.3 m, ensuring the upper lens axis to be parallel to the ground, and the supposed intrusion path is perpendicular to the lens axis. - Page 13 MotionProtect Outdoor under a covering. To protect masking sensors in the open area, use Hood for MotionProtect Outdoor cover MotionProtect Outdoor sends an alarm to the hub only if both PIR sensors detect identical motion. The difference in time of motion detection should not exceed 1.5 seconds.
- Page 14 Closer than 1 meter from the hub. Note that MotionProtect Outdoor does not detect movement behind the glass. Therefore, do not install the detector in locations where glass objects can obstruct the detector’s view. For example, in places where a glass door can obstruct the view of the device.
- Page 15 2. Select the motion detection distance (3 to 15 m) using the adjustment scroll bar.
- Page 16 The lower PIR sensor beam direction with the speci ed minimum (1) and maximum (2) detection range 3. Put MotionProtect Outdoor on the SmartBracket attachment panel. Leave the detection area (horizontal detection angle — 90°) and make sure that there are no moving objects within the detection area to calibrate anti- masking sensors properly.
-
Page 17: Connecting External Power Supply
Connecting External Power Supply MotionProtect Outdoor can use external power supply 5-28 V DC, 200 mA. If the external power supply is connected, there is no need to remove the pre-installed batteries. Batteries provide the detector with the backup power source. - Page 18 1. A cap for putting out the power supply wire behind the SmartBracket attachment panel 2. A cap for putting out the power supply wire below the SmartBracket attachment panel 3. Run the external power supply dead wire through the attachment panel and cap.
-
Page 19: Maintenance
Buy Hood for MotionProtect Outdoor Hood for MotionProtect Outdoor can be mounted even on a detector that is already installed. You don’t need to detach the device from the surface for installing the hood. To install Hood for MotionProtect Outdoor: 1. -
Page 20: Tech Specs
4. Put the hood back so that both parts of the tape stuck, xing the hood on the detector. Tech Specs Sensing element PIR sensor, 2 pcs Detection angle, horizontal 90° Adjustable, 3–15 m when the detector is Motion detection distance installed at 1 m height Protection against masking Yes, height up to 80 cm when the detector is... -
Page 21: Complete Set
4. Installation kit 5. Quick Start Guide Warranty Warranty for the “AJAX SYSTEMS MANUFACTURING” LIMITED LIABILITY COMPANY products is valid for 2 years after the purchase and does not apply to the pre-installed battery. If the device does not work correctly, you should rst contact the support service—in half of the cases, technical issues can be solved remotely! -
Page 22: Need Help
Need help? In this section you’ll nd detailed manuals and educational videos about all features of Ajax. And in case you need help of a technical specialist, we’re available 24/7. Send request...
Need help?
Do you have a question about the MotionProtect Outdoor and is the answer not in the manual?
Questions and answers