Advertisement
Quick Links
Updated September 19, 2022
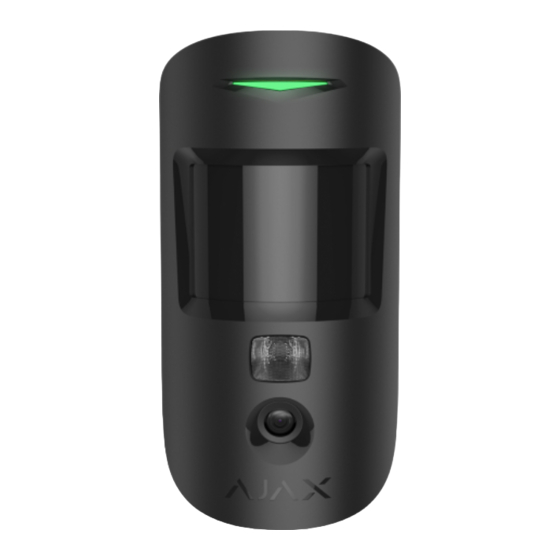
MotionCam (PhOD) Jeweller is a wireless motion detector supporting photo
verification of alarms, Photo on Demand, and Photo by Scenario features.
Intended for indoor installation. It can recognise movement at a distance of up
to 12 meters. Ignores pets when installed and set up correctly.
A hub is required for the detector to operate.
MotionCam (PhOD) Jeweller works as part of the Ajax security system,
communicating with the hub over two secure radio protocols: the detector uses
Jeweller to transmit alarms and events and Wings to transmit photos. The hub
communication range is up to 1,700 meters in an open space.
A
without the support of Photo on Demand and Photo by
Advertisement

Related Manuals for AJAX MotionCam PhOD Jeweller


Summary of Contents for AJAX MotionCam PhOD Jeweller
- Page 1 12 meters. Ignores pets when installed and set up correctly. A hub is required for the detector to operate. MotionCam (PhOD) Jeweller works as part of the Ajax security system, communicating with the hub over two secure radio protocols: the detector uses Jeweller to transmit alarms and events and Wings to transmit photos.
- Page 2 8. Power button of the detector. 9. Detector QR code. Used to connect to the Ajax security system. MotionCam (PhOD) Jeweller requires a hub to operate. The list of compatible...
- Page 3 , and notifies users and the security company. All MotionCam (PhOD) Jeweller alarms and events are recorded in the notification feed of the Ajax app. Users know exactly where motion is detected. The notifications contain the hub name (name of the secured facility), name of the device, and...
- Page 4 If the Photo by Alarm option is configured in the MotionCam (PhOD) Jeweller settings, the detector alarms in the Ajax apps are accompanied by photos or an animated series, depending on the selected viewing mode. The detector takes a...
- Page 5 photo only when armed. The detector does not switch to the armed mode instantly. The switching time depends on two factors: the exit delay (specified in the detector settings) and the hub–detector ping interval (hub settings, Jeweller section). In the first case, the delay is set by an administrator or a PRO user with system configuration rights.
- Page 6 You can save photo verification as video or images by clicking the download icon. Photo on Demand feature allows users to take pictures with the built-in cameras of detectors with photo verification. With this feature, you can check the...
- Page 7 situation at the facility: find out what the children are doing, check if your pet is OK, or simply monitor the situation at home. Depending on the settings, photos can be taken at any time or when MotionCam (PhOD) Jeweller is armed. By default, the Photo on Demand feature is disabled for all users.
- Page 8 The Photo by Scenario feature allows you to create a scenario for motion detectors with photo verification, according to which they will take pictures in case of alarm from other Ajax devices. By default, the Photo by Scenario feature is disabled for all detectors. A user with access to privacy settings can enable this feature.
- Page 9 Both protocols support encryption and authentication to prevent forgery. Connection with devices is monitored via a system of hub–detector polls. Their statuses are displayed in real-time in the Ajax apps. The polling frequency is set by a user or a PRO with system configuration rights.
- Page 10 The Ajax security system can transmit alarms to the Ajax PRO Desktop monitoring app as well as the central monitoring station (CMS) in the formats of...
- Page 11 The addressability of each Ajax device allows you to send not only events to PRO Desktop or CMS but also the type of the device, its name, and the virtual room to which the detector is assigned.
- Page 12 3. Make sure that the hub is switched on and has Internet access via Ethernet and/or mobile network. You can check the connection in the Ajax app or by looking at the LED on the hub enclosure. It should light up white or green.
- Page 13 The hub and the device operating at different radio frequencies are incompatible. The radio-frequency range of the device may vary by region. We recommend purchasing and using Ajax devices in the same region. You can check the range of operating radio frequencies with the MotionCam (PhOD) Jeweller only works with one hub.
- Page 14 No connection with the hub or radio signal range extender via Wings. The detector battery is low. The icons display some of MotionCam (PhOD) Jeweller states. You can view them in the Ajax app in the Devices tab. Icon Meaning Jeweller signal strength.
- Page 15 The detector has a malfunction. The list of malfunctions is available in the detector states. Displayed when the detector is operating via a The detector operates in the Always Active mode. Entry and/or exit delay is enabled. MotionCam (PhOD) Jeweller will be armed when Night Mode is enabled. MotionCam (PhOD) Jeweller has detected motion.
- Page 16 The states include information about the device and its operating parameters. The states of MotionCam (PhOD) Jeweller can be found in the Ajax app: 1. Go to the Devices tab. 2. Select MotionCam (PhOD) Jeweller from the list. Parameter Value...
- Page 17 Offline — the detector is not connected to the hub or the range extender. The battery charge level of the device: Battery low When the batteries are low, the Ajax apps and the security company will receive appropriate Battery Charge notifications.
- Page 18 Delay when entering (alarm activation delay) is the time the user has to disarm the security Delay When Entering, sec system after entering the secured area. Delay time when leaving: from 5 to 120 seconds. Delay when leaving (arming delay) is the time the user has to leave the secured area after the Delay When Leaving, sec security system arming.
- Page 19 Detector ID. Also available on the QR code on the detector enclosure and its package box. Device № Number of the device loop (zone). To change MotionCam (PhOD) Jeweller settings in the Ajax app: 1. Go to the Devices tab. 2. Select MotionCam (PhOD) Jeweller from the list.
- Page 20 4. Set the required parameters. 5. Click Back to save the new settings. Settings Value Detector name. Displayed in the list of hub devices, SMS text, and notifications in the event feed. To change the detector name, click on the pencil Name icon The name can contain up to 12 Cyrillic...
- Page 21 Delay time when entering in the Night Mode: from 5 to 120 seconds. Delay when entering (alarm activation delay) is the time the user has to disarm the security Night Mode Delay When Entering, sec system after entering the premises. Delay time when leaving in the Night Mode: from 5 to 120 seconds.
- Page 22 The higher the resolution, the more detailed the image is, but it takes longer to transfer the photos. The setting extends to visual alarm verification, photo by scenarios, and photo on demand. Selecting the number of photos in case of an alarm: No photo 1 photo...
- Page 23 Opens the menu for creating and setting scenarios for the MotionCam (PhOD) Jeweller detector. The menu allows you to create a scenario, according to which the detector will take pictures when other Ajax devices are Scenarios triggered. Switches the detector to the Jeweller signal strength test mode.
- Page 24 Opens the MotionCam (PhOD) Jeweller User User Guide Manual in the Ajax app. Allows the user to disable the device without removing it from the system. Two options are available: Entirely — the device does not execute...
- Page 25 A user with the right to manage privacy settings can enable and configure the Photos on Demand feature. To do this, in the Ajax app: 1. Select the facility if you have several of them.
- Page 26 A user with access to privacy settings can enable the Photo by Scenario feature. To do this, in the Ajax app: 1. Select the facility if you have several of them. 2. Go to the Devices tab and select a hub.
- Page 27 Any user or PRO with system configuration rights can create and configure a scenario. To do this: 1. In the Ajax app, select the facility if you have several of them or if you are using a PRO app. 2. Go to the Devices tab and select a detector with photo verification.
- Page 28 8. Click Save. The scenario will appear in the list of device scenarios. The scenario will not be executed if the Allow Photos by Scenario option is disabled in the privacy settings (hub settings, Privacy menu. To delete or edit a scenario, click on it in the list. You can also disable the scenario with a toggle next to the scenario name: its settings will be saved but not executed after the alarm from other devices.
- Page 29 The Ajax security system provides several types of tests to make sure that installation place is chosen correctly. MotionCam (PhOD) Jeweller tests do not start straight away but not later than over a single hub–detector ping interval (36 seconds by default).
- Page 30 1. Select the required hub. 2. Go to the Devices tab. 3. Select MotionCam (PhOD) Jeweller from the list. 4. Go to Settings 5. Select a test: 6. Run the test. The device is designed for indoor use only. When choosing where to place MotionCam (PhOD), consider the parameters that affect its operation: Motion detection zone.
- Page 31 The Jeweller and Wings signal strength is determined by the number of undelivered or corrupted data packages over a certain period of time. The icon on the Devices tab indicates the signal strength: Three bars — excellent signal strength. Two bars — good signal strength. One bar —...
- Page 32 Vertical viewing angle of the detector When installing the detector, perform the . This allows you to check the operation of the device and accurately determine the sector in which the detector registers motion. Take several photos with MotionCam (PhOD) camera at the installation site to ensure that the detector captures the required area.
- Page 33 Before installing MotionCam (PhOD) Jeweller, ensure that you have selected the optimal location that complies with the requirements of this manual. To mount a detector: 1. Remove the SmartBracket mounting panel from the detector by sliding it down. 2. Fix the SmartBracket panel using double-sided tape or other temporary fasteners.
- Page 34 detector. The maximum range of motion detection is 12 meters. If the detector did not respond to movement during the test in 5 out of 5 cases, relocate the device. 5. Take some test photos to make sure that the camera is capturing the required area and no obstacles are blocking its view.
- Page 35 Warranty for the Limited Liability Company “Ajax Systems Manufacturing” products is valid for 2 years after the purchase. If the device does not function correctly, please contact the Ajax Technical Support first. In most cases, technical issues can be resolved remotely.
Need help?
Do you have a question about the MotionCam PhOD Jeweller and is the answer not in the manual?
Questions and answers