Craftex CX Series User Manual
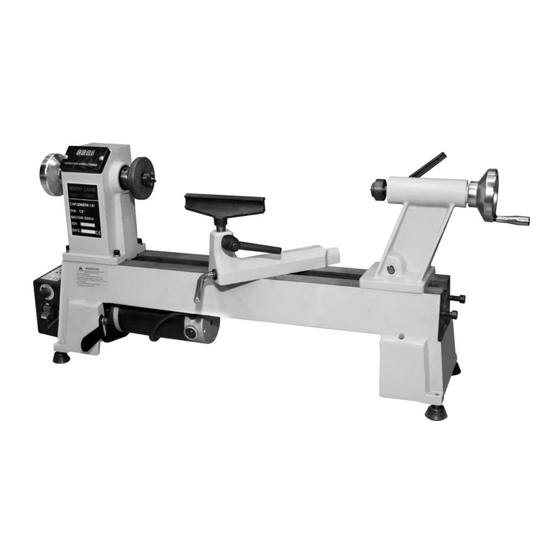
12" x 18" mini wood lathe with variable speed & digital readout
Hide thumbs
Also See for CX Series:
- User manual (49 pages) ,
- Manual (42 pages) ,
- Owner's manual (35 pages)

Subscribe to Our Youtube Channel
Related Manuals for Craftex CX Series


Summary of Contents for Craftex CX Series
- Page 1 CX813 12" x 18" MINI WOOD LATHE WITH VARIABLE SPEED & DIGITAL READOUT USER MANUAL Version 2.0 2023...
-
Page 2: Table Of Contents
TABLE OF CONTENT General Safety Instructions ............... 3 Specific Safety Instructions ..............4 Heavy Duty Bench Top Lathe Features............. 5 Physical Features ..................6 Un-packing ....................7 Setup ......................7 Bench Mounting ..................7 Assembly ....................8 Installing/Removing Headstock Center............8 Installing/Removing Tailstock Center ............ -
Page 3: General Safety Instructions
GENERAL SAFETY INSTRUCTIONS Do not attempt to operate the machine until you have read thoroughly and have understood completely all instructions, rules and conditions contained in this manual. Failure to comply can result in accidents involving fire, electric shock, or serious personal injury. Know your machine. -
Page 4: Specific Safety Instructions
CX813 HEAVY DUTY BENCHTOP LATHE SPECIFIC SAFETY INSTRUCTIONS Like all power tools and machinery, proper safety and attention must be adhered to. There is danger associated with using any tool or machine so pay careful attention each and every time you use your tool. If you are not familiar with the operations of a lathe, you should obtain the advice and/or instructions from a qualified professional. -
Page 5: Heavy Duty Bench Top Lathe Features
MODEL CX813 - 12" x 18" MINI WOOD LATHE WITH VARIABLE SPEED As part of the growing line of Craftex woodworking equipment, we are proud to offer CX813 a Heavy Duty Bench Top Lathe. By following the instructions and procedures laid out in this owner’s manual, you will receive years of excellent service and satisfaction. -
Page 6: Physical Features
PHYSICAL FEATURES... -
Page 7: Unpacking
UNPACKING SETUP The machine is properly packaged in a Before starting setting up the machine carton for safe transportation. When you need to read and understand this unpacking, carefully inspect the crate and user manual completely. ensure that nothing has been damaged protection of your eyes you need to have during transit. -
Page 8: Assembly
"Direct Mount" is to simply secure the ASSEMBLY lathe to the workbench using lag screws. Attach the electrical box to the lathe and See figure-3. secure it using the two pre installed Philips head screws and two flat washers as shown in figure-4. Figure-3 Direct mount Figure-4 Installing the electrical box Place the lathe on the workbench and use... -
Page 9: Installing/Removing Tailstock Center
REMOVING THE CENTER INSTALLING / REMOVING Removing the drive center is done by FACEPLATE simply knocking it out, using the supplied knock-out bar. When knocking out the Make sure the switch is in OFF position center, hold it by hand to prevent it and the cord is disconnected from the dropping down. -
Page 10: Test Run
During the test run the machine should TEST RUN run smoothly and create very little noise Once you have assembled your machine or vibration. If there is an unusual noise completely, it is time for a test run to make coming from the machine or the machine sure that the machine works properly and vibrates excessively, turn the machine... -
Page 11: Operation
OPERATION STOCK INSPECTION The first thing to do is to inspect the Before cutting any wood, make sure to workpiece and make sure it is suitable for inspect the workpiece for nails, staples, turning. The workpiece should not have small pieces of stone or metal and any any extreme bows, knots, or cracks. -
Page 12: Changing Spindle Speed
Loosen the belt tension screw so that the CHANGING SPINDLE belt tension lever moves freely. See SPEED figure-11. The CX813 12" x 18" Mini Wood Lathe is Remove the rear access door. See figure variable speed lathe and feature speed ranges: 300-1200RPM and 1000- 3700RPM Figure-11 Belt tension lever and screw... -
Page 13: Adjusting Tailstock
ADJUSTING TAILSTOCK tailstock features cam-action clamping system to secure it to the lathe bed. TO ADJUST TAILSTOCK POSITION: Disengage the lock lever and move the tailstock to the desired position on the bed. See figure-12. Figure-13 Adjusting the tool rest base ADJUSTING THE ANGLE OR HEIGHT Loosen the base lock lever and the tool rest lock lever. -
Page 14: Alignment Between Centers
ALIGNMENT BETWEEN MAINTENANCE CENTERS During the life of your machine, you will need practice some regular The center alignment has been adjusted maintenance to keep your lathe in peak properly at the factory before the machine performance condition, is shipped to you. However, after lengthy operation, the centers may be out of WARNING! alignment. -
Page 15: Belt Replacement
Install the headstock spindle hand wheel BELT REPLACEMENT and tighten the set screws. The drive belt stretches and gets old as the lathe is used. When the belt shows Tension the belt by lowering the belt signs of excessive wear and damage you tension lever and tighten the belt tension will need to replace it with a new one. -
Page 16: Troubleshooting
TROUBLESHOOTING PROBLEMS CAUSES CORRECTION CUTTING TOOL 1. Work-piece is not clamped 1. Clamp it firmly. VIBRATION firmly. 1. Work-piece is clamped 1. Check balance. incorrectly. 2. Adjust center POOR 2. Tailstock center and Alignment. MACHINE ACCURACY headstock center is out of alignment. -
Page 17: Cx813 Parts Breakdown
CX813 PARTS BREAKDOWN... -
Page 18: Cx813 Pars List
CX813 PARTS LIST... -
Page 20: Warranty
Proof of purchase is necessary. All warranty claims are subject to inspection of such products or part thereof and Craftex reserves the right to inspect any returned item before a refund or replacement may be issued.
Need help?
Do you have a question about the CX Series and is the answer not in the manual?
Questions and answers
on my CX 813 lathe the speed control is not working, can I order the part needed from my local Busy Bee store ?