Table of Contents
Advertisement
Quick Links
Advertisement
Table of Contents

Subscribe to Our Youtube Channel
Related Manuals for Neuation iFUGE UC02R


Summary of Contents for Neuation iFUGE UC02R
- Page 1 NEUATION iFUGE UC02R PRODUCT USER MANUAL...
-
Page 2: Table Of Contents
CONTENTS 1 NTRODUCTION INTENOEO USE SYMBOL SALIENT FEATURES STANDARD ACCESSORIES TECHNICAL SPEOFICATIONS SAFETY PRECAUTIONS INSTAUATION USER INTER FACE AND DISPLAY 10· . ROTOR INSTALLATION OPERATING THE CENTRIFUGE MAINTENANCE AND CLEANING TROUBLESHOOTlNG WARRANlY STATEMENT PRODUCT DISPOSAL TRANSPORTATION & STORAGE... -
Page 3: Ntroduction
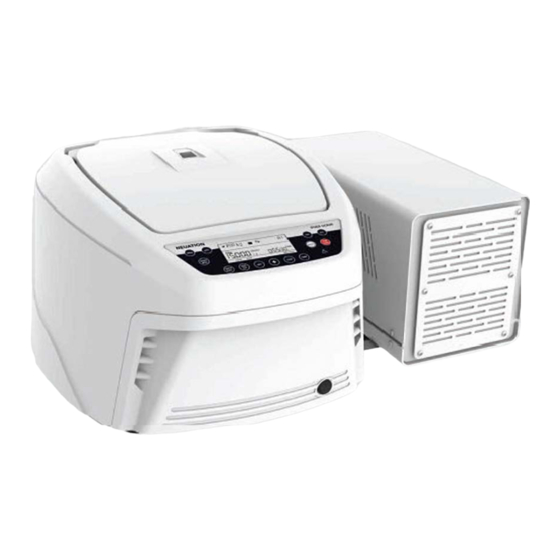
■ 1. INTROOUCTION This universal centrifuge is equipped with a maintenance free drive, a !arge display & simple interface for efficient Operation for dally lab usage. The programmable centrifuge can deliver up to 15000 RPM and can accommodates different types of rotors. -
Page 4: Technical Speofications
S. STANDARD ACCESSORIES Usermanual • Warranty card 6. TECEINICAL SPECIFICATIONS Motor Type Brushless DC Motor Max capacity 400 ml (4x 100 ml) Speed Setting Variable 500-15000 RPM Speed Steps ± 100RPM Speed Accuracy ± 100RPM Run Time 30 sec to 999 mins 59 second & infinite mode Min. - Page 5 7. SAFETY PRECAUTIONS sign of damage. • The rotor must always be securely fastened. II the centrifuge makes unusual noise during operation, the rotor frtment needs to be checked. Switch OFF the device immediately by pressing STOP, check fitment & fasten it weil. Never move the centrifuge du ring its operation.
-
Page 6: Instauation
8, INSTALLATION The Laboratory centrifuge is supplied in packaging box. Open the box, remove the packaging and gently place the centrifuge out of the box. Before 1" time usage, open the centrifuge & ensure to remove all packaging from the rotor chamber. Please keep all packaging in safe storage for at least 2 years forwarranty purpose. - Page 7 9. USER INTERFACE & DISPLAY Single press, Speed display will be blink to set. long press, RPM/RCF RPM/RCF will toggle between RPM to RCF. RPM, RCF mode is also indicated on LCD display. Single press, Minute can be set, another single press then Time seeond car1 lie set.
- Page 8 9. USER INTERFACE & DISPLAY Symbol Description ltem lndicates lid Status. Left image = lid close & Right image = lid open. lndicates centrifuge status. e n centrifuge is running the symbol rotates and when centrifuge is not running the symbol is stable. □□...
-
Page 9: Rotor Installation
10. ROTOR INSTALLATION REPLACI NG THE ROTOR Centrifuge Lid Rotor Lid Rotor Motor Shaft 1. To replace or install the rotor, take the rotor and load vertically onto the motor shaft. 2. Place the rotor nut in the center hole of the rotor onto the motor shaft. 3. -
Page 10: Operating The Centrifuge
10. ROTOR INSTALLATION 1. Always balance the rotor before centrifugation. Above are examples of properly balanced rotors. 2. The samples in thetubesshould be ofequalvolume. 3. lf the tubes are not loaded correctly • vibration or imbalance can occur which can cause serious damage to the centr fuge. - Page 11 11. OPERATING THE CENTRIFUGE be set in minutes & seconds. 11.4 TEMPERATURE SETTING •c. ° Press "Temperature• button lor setting the temperature from •l0 C to 40 parameters can be set when the Temperature value blinks by pressing "+" button (for increaslng the temperature) &...
- Page 12 11. OPERATING THE CENTRIFUGE 11.8 ROTOR SELECTION This centrifuge is equipped with auto selection rotor technology. Fix the rotor on the shaft & follow the operation guidellne. Swing Out Rotors Rotor No. Max. RCF Rotor Max. Volume Max.RPM UC-139 4500 3305 16x 15 ml 3305...
- Page 13 · u . OPERATING THE CENTRIFUGE NOTE: lt is mandatory to open the Jid once ofter completion of operotion for 2"' operation. Centrifuge will not stort if Ud is not opened andclosed oft er c.ompleti o nof o operotion. 11.10 PROGRAM MODE Long press "PROG"...
- Page 14 · u . OPERATING THE CENTRIFUGE The circle � left to "POl L3" will have a ticl< mark indicating that any one line of the speciffc program is filled. lf any line leading to selected lin is set, then the arrow below the line numberwill appear.
-
Page 15: Maintenance And Cleaning
11. OPERATING THE CENTRIFUGE 11.12 OPENING CENTRIFUGE LID IN POWER FAILURE Disconnect the centrifuge from the main power supply. Wait until the rotor has come to a standstill (this may take longer time). Once the rotor has stopped, then pull the lld release thread located at the bottom left (to your right) of the machine This will open the centrifuge lid. -
Page 16: Troubleshootlng
12. MAINTENANCE AND CLEANING • Regularly cleaning of the rotor is important. • lf the rotor chamber needs cleaning, clean with cloth or sponge moistened with a neutral detergent solution. • Do not place the rotor into the cleaning solution. •... - Page 17 13. TROUBLESHOOTING latch motor damaged, latch jammed or any Contact service representative Err 1 Limit switch of latch got damaged Turn OFF the centrifuge, Check Motor Stuck or incorrect rotor frtment or apply correct Err 52 operatlng voltage 230VAC ± lOVAC Operating voltage Remove cable and connect Power tripping...
-
Page 18: Warranly Statement
13. TROUBLESHOOTING • lf motor gets hot due to whlch there will be fluctuation in speed value then allow centrifuge to get cool for at least 30 minutes. Do not do any operation for 30 minutes. 14. WARRANTY STATEMENT This product is warranted to be free from defects in material and workmanship for a period of two (2) years from date of purchase. -
Page 19: Product Disposal
14. WARRANTY STATEMENT For you reference, make a note of serial number, date of purchase and supplier here. Serial No.: Purchase Date: Supplier: PRODUCT DISPOSAL Information on the disposal of electrical and electronic devlces in the European Community The disposal of electrical devices is regulated within the European Community by national regulations based on EU Directive 2012/19/EU on waste electrical and elec.;lronic;... - Page 20 Accumax Lab Devices Private limited Plot No. ts. 16 & 32 GJDC Eltttrorw; P.t SEZ. s«tor 21., �ndhlnag,r, Guja�t ln; h f � 382026. w-itr. WWW,nt\Abon..aJm...
Need help?
Do you have a question about the iFUGE UC02R and is the answer not in the manual?
Questions and answers