Table of Contents
Advertisement
Quick Links
Dalbeo Presence
Dalbeo Presence
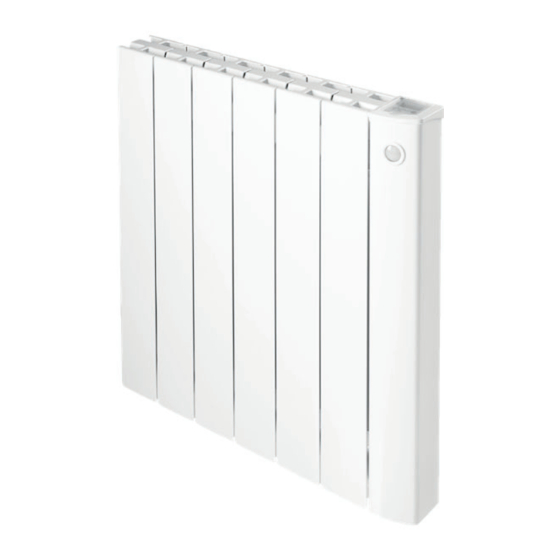
Electric radiator with mineral oil with 7 day programme, open window
detection, gauge and energy consumption indication and PIN code
lock
Smart features:
Occupancy detection - Automatic programming with self-
learning process and dual optimisation feature
INSTALLATION AND
OPERATING INSTRUCTIONS
FR9011450-60-70B-0322
Advertisement
Table of Contents

Related Manuals for Supra Dalbeo Presence 1022


Summary of Contents for Supra Dalbeo Presence 1022
- Page 1 Dalbeo Presence Dalbeo Presence Electric radiator with mineral oil with 7 day programme, open window detection, gauge and energy consumption indication and PIN code lock Smart features: Occupancy detection - Automatic programming with self- learning process and dual optimisation feature INSTALLATION AND OPERATING INSTRUCTIONS FR9011450-60-70B-0322...
-
Page 2: Table Of Contents
Table of contents Table of contents • Installing the heating device ..........................3 • Warnings and precautions ............................................3 • Connecting, wall-mounting procedure .......................................5 • Overview ................................7 • Benefits ....................................................7 • Operating ................................8 • Overview ..................................................8 • Power on/Standby mode ............................................8 •... -
Page 3: Installing The Heating Device
Installing the heating device Installing the heating device ARNINGS AND PRECAUTIONS Warnings All damage resulting from non-compliance with sensory or mental capabilities or lack of experience this advice gives rise to non-application of the and knowledge, if they have been given supervi- terms of the manufacturer’s warranty. - Page 4 Suggestion, positioning, location Before connecting up the radiator to the mains shower cabinet (in accordance with I.E.E. Wiring Reg- power supply, switch off mains power at the main ulations (BS 7671:2008)). circuit breaker. The radiator must not be located immediately below This electric radiator is a class II double insulated IP24 a socket-outlet.
-
Page 5: Connecting Wall Mounting Procedure
Fix the bracket according to the dimensions specified in the enclosed 357mm table template, use the drilling template supplied. Power outputs Products Width fixing holes (mm) Dalbeo Presence 1022 1000 244mm 244mm Dalbeo Presence 1522 1500 Dalbeo Presence 2022 2000... - Page 6 Setting up of the radiator on the wall-mounting brackets 1- Take the radiator by the sides and lift it slightly by 2- Place the radiator on the wall-mounting brackets. presenting it parallel to the wall. Top view Side view Top view Side view At the back of the product, make sure that each wall-mounting brackets are inserted between the intermedi- ate fins without altering them.
-
Page 7: Overview
Our range of electric radiators with thermal fluid with innovative style was designed and developed to bring you the comfort of heating without maintenance and significant energy savings thanks to the new smart features: your SUPRA radiator incorporates innovative technologies designed for your comfort and to increase your energy saving, control performance PID (stability), occupancy detection, open window detection, 7 day and daily programme, optimisation feature. -
Page 8: Operating
Operating Operating VERVIEW Frost protection mode Eco mode Power on/Standby mode Comfort Mode Setting the time and date mode Auto Mode Programming mode Set temperature Indicator pilot wire is active or programming Keypad locked Heating indicator Gauge consumption Days of the week (1=Monday … 7= Sunday) Modes selection and Power on/Standby mode... - Page 9 From the Standby mode, press Mode for 5 seconds to enter into the programming mode. Setting time Setting day Programmes choice Auto mode: In Automatic Mode, the device will automatically change from Comfort mode to Eco mode according to the established programme.
-
Page 10: Setting The Comfort Mode Temperature
AUGE CONSUMPTION France’s Agency for Environment and Energy Management (ADEME) recommends a Comfort setting temperature lowerr or equal to 19°C. In the radiators display, a selector indicates the energy comsumption level by positioning it in front of the colour: red, orange or green. So, depending on the set temperature, you can choose your level of energy usage. -
Page 11: Child Anti-Tamper, Keypad Lock/Unlock
Resetting the energy meter To reset the energy meter, select the Standby mode, as indicated page 8, then proceed as follows: 5 sec. Press Plus. Press simultaneously Minus and Plus for more than 5 seconds. To exit resetting the energy meter, press Mode, the device is automatically in Standby mode. -
Page 12: Day And Daily Programme
It therefore defines a programme built up of periods of Comfort and Eco, independently for each day of the week. During this learning week, the radiator will provisionally function in permanent “Comfort” mode. Important: To ensure the auto-programming is optimised, please ensure the presence detection sensor is not interrupted by an external source, see important information concerning the presence detection system on page 17. - Page 13 The two minute figures will flash. Select using Minus or Plus. Save by pressing Mode. The cursor above the number 1 (which represents the Monday) will flash. Select the date using Minus or Plus. Save by pressing Mode. To exit the setting the time and day mode, press Mode. Choices programmes Schematic sequence of programmes: Auto...
- Page 14 With Minus or Plus, select P1. P1 will flash. Press Mode for 5 seconds to make changes. 5 sec. The P1 start time (which by default is 06:00) will flash. Using Minus or Plus, you can change this time, by increments of 30 minutes. Save by pressing Mode.
- Page 15 Choices and allocation programmes Correspondence days/numbers Monday Prior information: Tuesday display area Thursday Friday Saturday Sunday If you just set the time and day, the cursor moves automatically under PROG and the days of the week appear on the display. The default program Auto (Auto Program, page 11) is displayed on the display.
-
Page 16: Open Window Detection
Manual and temporary program override from a running programme This function allows you to change the Eco mode temperature temporarily until the next scheduled change in temperature or the transition to 0:00. Example: The device is in Auto mode, the running programme is Eco 15,5°C. By pressing Minus or Plus, you can change temporarily the desired temperature up to 18°C for example. -
Page 17: Occupancy Detection
Automatic activation (factory settings): To disable this mode, see page The radiator detects a temperature fall. An opened window, a door to the outside, can cause this temperature fall. Note : the difference between the air from the inside and the outside must cause a significant temperature fall to be detected by the device. This temperature drop detection triggers the change to Frost protection mode. -
Page 18: Information About Remote Control By Pilot Wire
Operating Divisions of the detection zone Detection zone, for a temperature of 19°C. Setting temperature Top view 19°C 18°C 17.5°C 17°C The detection zone is divided into active and inactive areas. A person that crosses the area will be detected by the Active area 7°C infrared sensor. -
Page 19: Information About Priorities Between The Different Modes
Exemption to an order coming from a power manager by the pilot wire This feature allows you to modify temporarily the set temperature until the next order sent by the central control unit or the transition to 00:00. Example: By pressing Minus or Plus, you can mod- This modification will be automatically The device is in Auto mode. -
Page 20: Advanced Settings
Advanced settings Advanced settings ODIFICATIONS RESTRICTIONS OF THE TEMPERATURE SETTINGS Comfort setpoint temperature limit You can limit the set temperature range by introducing a maximum and/or minimum setting, preventing unintentional changes in temperature. The limit setting of the temperature setpoint is accessible from Comfort mode only. Select the Comfort mode with the Mode button. -
Page 21: Dual Optimisation Feature
Setting the Eco mode temperature self lowering The drop in temperature is set at -3.5°C compared to the set temperature of the Comfort mode. You can adjust the lowered level from -1°C to -8°C, by intervals of 0.5°C. Important: whatever the lowering level set, the Eco set temperature will never exceed 19°C. By pressing the Mode button, several times, position the arrow beside the Eco mode. -
Page 22: Configuration Of Detection Modes
Optimisation choice The OPTI COMFORT mode is activated by default. Starting from Standby mode, press Mode for 5 seconds. When the cursor moves above the setting time symbol , press Mode shortly. Press Mode and Plus buttons simultaneously for 8 seconds to enter in the setting mode. -
Page 23: Pin Code Lock
5 sec. Press Minus for 5 seconds to enter Press Minus or Plus. To save and exit the setting press the occupancy detection mode. Mode. = occupancy detection enabled. = occupancy detection disabled. Open window detection, activation/deactivation of the Auto mode From Auto, Comfort or Eco Modes: 5 sec. - Page 24 3 important steps are needed for the first use of the pin code lock: 1- PIN code initialisation, enter the preset PIN code (0000) to access to the feature. 2- Activation of the PIN Code to lock settings which will be protected by the PIN code. 3- Customizing the PIN code, replace 0000 by the custmized code.
-
Page 25: Backlight Setting
Customising the PIN code If you have just activated the PIN code, follow the stages described below. Alternatively, you must copy the steps 1, 2, 3 and 4 of the initialisation process as well as the steps 1 and 2 of the activation process before personalising the PIN code. -
Page 26: Restoring Factory Settings
Press Mode to save and exit. ESTORING FACTORY SETTINGS In order to a coming back to factory settings, you must hold simutaneously for 8 seconds on Mode, Minus and Plus. If the PIN code protection is enabled, the following factory values will be effective: Settings Factory settings Comfort set temperature... -
Page 27: Experts Settings (Reserved To The Installer)
Experts settings Experts settings reserved to the installer reserved to the installer MBIENT TEMPERATURE SENSOR ADJUSTMENT Overview Important: This operation is reserved for professional installers only; any wrong changes would result in control anomalies. In which case if the temperature measured (measured by a reliable thermometer) is different by at least 1°C or 2°C compared to the set temperature of the radiator. -
Page 28: Load Shedding And Power Cut
“standby” and then returns to the initial mize your subscription with your energy provider. operating mode. SUPRA heating devices are designed to operate with load shedding sys- tems with pilot wire only. THER REMOTELY MANAGEMENT BY POWER SHUTDOWN Important : The power supply of the device should be cut This type of deterioration would not be covered by the manufacturer’s... -
Page 29: Troubleshooting
Troubleshooting Troubleshooting IAGNOSIS SUPPORT Heating body The device automatically enters in Eco or Frost protection mode in your The device doesn’t heat: presence and closed windows: - Check the position of the circuit breaker/power supply protection fuse in - If the pilot wire is connected to a central programming via pilot wire, your fuse board. -
Page 30: Technical Information
Item code Products Power outputs Height (mm) wall mounting wall mounting Widths (mm) elements (Kg) bracket (mm) bracket (mm) FR9011450B Dalbeo Presence 1022 1000 W FR9011460B Dalbeo Presence 1522 1500 W FR9011470B Dalbeo Presence 2022 2000 W 1045 Hauteur Height... -
Page 31: Information Requirements For Electric Local Space Heaters
Room temperature control, with open window detection With distance control option With adaptive start control With working time limitation With black bulb sensor Contact details SUPRA S.A - 28, rue du Général Leclerc BP 22 - F 67216 OBERNAI Cedex FR9011450-60-70B-0322... - Page 32 FR9011450-60-70B-0322...
Need help?
Do you have a question about the Dalbeo Presence 1022 and is the answer not in the manual?
Questions and answers