
Subscribe to Our Youtube Channel
Related Manuals for Pfeiffer Vacuum ATH 3200 MT


Summary of Contents for Pfeiffer Vacuum ATH 3200 MT
- Page 1 OPERATING INSTRUCTIONS Translation of the Original ATH 2800 M/MT - ATH 3200 M/MT Magnetically levitated turbopump...
- Page 2 These operating instructions describe all models and variants of your product. Note that your product may not be equipped with all features described in this document. Pfeiffer Vacuum constantly adapts its products to the latest state of the art without prior notice. Please take into account that online operating instructions can deviate from the printed operating instructions supplied with your product.
-
Page 3: Table Of Contents
Table of contents Table of contents About this manual Validity 1.1.1 Applicable documents 1.1.2 Products concerned Conventions 1.2.1 Pictographs 1.2.2 Target group 1.2.3 Instructions in the text 1.2.4 Labels 1.2.5 Abbreviations Safety General safety information Safety instructions Safety instructions relating to flammable/pyrophoric materials Precautions Intended use Misuse... - Page 4 7.4.1 Disconnecting the pump from the installation 7.4.2 Draining the water circuit 7.4.3 Preparing the pump for shipping Decommissioning Shutting down for longer periods Recommissioning Disposal Service solutions by Pfeiffer Vacuum Accessories Spare parts Technical data and dimensions 12.1 General 12.2 Technical characteristics 12.3 Environmental characteristics 12.4 Cooling water characteristics...
- Page 5 List of tables List of tables Tbl. 1: Loads exerted on the equipment Tbl. 2: Securing the high vacuum flange (inlet flange) Tbl. 3: Conversion table: Pressure units Tbl. 4: Conversion table: Units for gas throughput Tbl. 5: Environmental characteristics Tbl.
- Page 6 ATH 2800 M dimensions Fig. 10: ATH 2800 MT dimensions Fig. 11: ATH 3200 M dimensions Fig. 12: ATH 3200 MT dimensions Fig. 13: Dimensions of Purge solenoid valve Fig. 14: Dimensions of Air inlet solenoid valve Fig. 15: Dimensions of water valve...
-
Page 7: About This Manual
Keep the manual for future consultation. 1.1 Validity These operating instructions are a customer document of Pfeiffer Vacuum. The operating instructions describe the functions of the named product and provide the most important information for the safe use of the device. The description is written in accordance with the valid directives. The information in these operating instructions refers to the product's current development status. -
Page 8: Labels
About this manual Individual action step A horizontal, solid triangle indicates the only step in an action. ► This is an individual action step. Sequence of multi-part action steps The numerical list indicates an action with multiple necessary steps. 1. Step 1 2. -
Page 9: Abbreviations
About this manual This label warns users that they risk being injured if their hands come into contact with a hot surface: protective gloves must be worn at all times when working on the pump. This label warns users about pumped process gases that can be dangerous or toxic and lead to severe injury or death. -
Page 10: Safety
Safety 2 Safety 2.1 General safety information The following 4 risk levels and 1 information level are taken into account in this document. DANGER Immediately pending danger Indicates an immediately pending danger that will result in death or serious injury if not observed. ►... - Page 11 ► Strictly comply with the installation instructions described in this manual. Pfeiffer Vacuum will be released from any warranty and liability for non-compliance with installation instructions. ► Only use approved original parts from Pfeiffer Vacuum for connection to the equipment (see ac- cessories).
-
Page 12: Safety Instructions Relating To Flammable/Pyrophoric Materials
Safety WARNING Risk of injury in case of contact with pressurized water The product uses pressurized water as a cooling fluid. Non-compliant installations or installations not done to professional standards may endanger the user’s life. ► Install a manual valve on the circuit at a distance of 3 m from the product, so that the water sup- ply can be locked out. -
Page 13: Precautions
Safety The risk assessment must take into account the pumped gases, by-products, and all components mak- ing up the installation. The following situations are hazardous and must be avoided at all cost: ● Flammable or pyrophoric gas concentrations in the flammable range. ●... -
Page 14: Intended Use
Safety 2.5 Intended use ● The vacuum pump should only be used to generate a vacuum while pumping gases. ● The turbomolecular pump must be combined with an appropriate backing pump. ● The vacuum pump must be integrated into industrial equipment. ●... -
Page 15: Transportation And Storage
Transportation and Storage 3 Transportation and Storage 3.1 Receipt of the product Condition of the delivery ● Check that the product has not been damaged during transport. ● If the product is damaged, take the necessary measures with the carrier and notify the manufacturer. -
Page 16: Storage
Transportation and Storage 1. Strap 2. Lifting ring Handling the pump using a hoist When handling the pump, a lifting device appropriate for the weight of the product must be used. The weight and center of gravity vary depending on the model (see chapter “Dimensions”). 1. -
Page 17: Product Description
Product description 4 Product description 4.1 Product identification To correctly identify the product when communicating with our service center, always have the informa- tion from the product rating plate available (see chapter "Labels"). 4.1.1 Scope of delivery ● 1 magnetically levitated turbomolecular pump ●... -
Page 18: Human/Machine Interface
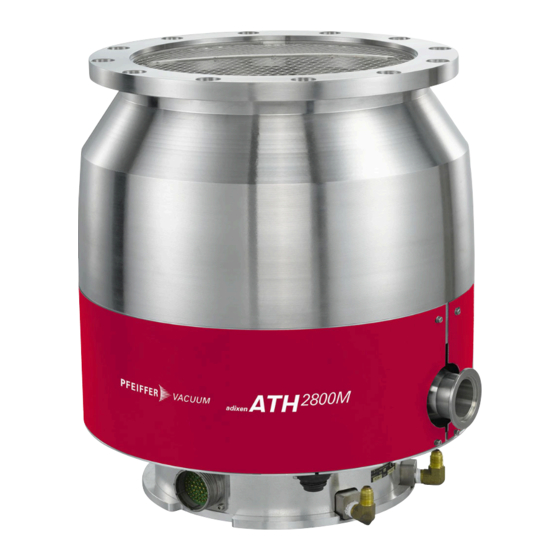
Product description 4.2 Human/Machine Interface Fig. 1: Description of an ATH 2800 MT pump 1 Splinter shield WATER IN connection 2 Inlet flange (high vacuum) Exhaust flange (PUMP EXHAUST) 3 Neutral gas purge Heater band connector Fig. 2: Description of an ATH 3200 M pump 1 Splinter shield WATER IN connection 2 Inlet flange (high vacuum) -
Page 19: Installation
► Strictly comply with the installation instructions described in this manual. Pfeiffer Vacuum will be released from any warranty and liability for non-compliance with installation instructions. ► Only use approved original parts from Pfeiffer Vacuum for connection to the equipment (see ac- cessories). - Page 20 Installation Description of a sudden blocking scenario The kinetic energy of the rotor has to be absorbed by the installation if the pump blocks suddenly. The maximum resulting loads have been measured on a test bench by simulating the worst-case turbo pump blockage with a rotor split in two with the pump rotating at nominal speed.
-
Page 21: Securing The Equipment And The Frame
Installation Characteristics Unit ATH 2800 M/MT ATH 3200 M/MT Max. kN Axial force (A) Duration ms Delay ms 1) Maximum axial force occurs when pump inlet is blocked by the rigid parts. There is no load on the equipment in case of limited stiffness, e.g. with a valve. Tbl. - Page 22 Installation The manufacturer guarantees proper operation of the pump if it is used in a uniform magnetic field up to 0.5 mT. From 0.5 to 5 mT, proper operation depends on cooling and gas loads. A magnetic field ex- ceeding 5 mT can cause excessive rotor heating. In this case, suitable shielding must be provided. The standalone pump can withstand radiation levels of up to 10 The turbomolecular pump cannot evacuate at atmospheric pressure;...
-
Page 23: Connecting To The Pumping Line
Installation 5. Hoist up the pump and move it to its location on the frame. 6. Keep the pump hanged all the installation time until the high vacuum flange is secured. Fig. 6: Installing the pump inlet facing up 1 Lifting table (example) Installing the pump inlet facing up When handling the pump, a lifting device appropriate for the weight of the product must be used. -
Page 24: Pump Inlet Connection
Installation General instructions for installing the pump in the pumping line in accordance with industry best practice The inlet and exhaust connections must not put undue strain on the pumping line that could cause leak- age. 1. Wear gloves to connect and remove the pump from the equipment. 2. -
Page 25: Connecting The Water Circuit
Installation ► Connect the turbopump with an approved backing pump (see chapter "Technical data"). ► Install an isolation valve (NC) between the turbomolecular pump and the backing pump. 5.4 Connecting the water circuit To limit corrosion and clogging of the water circuit, we recommend using softened or non-aggres- sive water with the required characteristics (see chapter "Water characteristics"). -
Page 26: Connecting The Pump To The Water Circuit
Installation Procedure for the assembly of single ferrule connectors Connectors used to connect flexible pipes between the pump and electronic drive unit (for example). 1. Insert the pipe until it is affixed tightly to the connector. 2. Manually place the nut into contact. 3. - Page 27 Installation In this manual, the inert gas will be called 'nitrogen', as it is the most commonly used gas. For more information on the type of purge gas, contact our service center. DANGER Danger of death by explosion when pumping gases containing pyrophoric/flammable materi- There is a risk of explosion if pyrophoric materials above the LEL are sent to the pump.
-
Page 28: Connection Of The Air Inlet Solenoid Valve
Installation 1 Flow reduction - 50 sccm Purge device 50 sccm The operation of this purge is continuous. The flow reducer guarantees a 50 ؘsccm flow for a pressure of 1.1 · 10 hPa. When the inert gas line is equipped with a mass flowmeter, do not install the flow reduc- tion device. -
Page 29: Check That The Installation Is Leak Tight
Installation 1 Air inlet solenoid valve Dust filter 1. Connect the solenoid valve to the PUMP EXHAUST port of the pump (use connecting accesso- ries of product catalog). 2. Connect the solenoid valve to the connector of the electronic drive unit (see electronic drive unit operating instructions). -
Page 30: Customer Electrical Installation Protection
Installation WARNING Danger of electrocution by contact during maintenance or overhaul There is an electric shock hazard in case of contact with a product powered on and not electrically isolated. ► Before carrying out any work, set the main switch to O. ►... - Page 31 Installation Grounding When necessary, the installer must provide dual protection in addition to the existing one. It consists of an uninsulated braid or a separate green/yellow conductor with a minimum section 3 mm (9AWG). The impedance between the pump body and the ground connection point must be < 0.1 Ohm at 25 A. ►...
-
Page 32: Operation
Operation 6 Operation 6.1 Preliminary precautions for use WARNING Risk of poisoning when process gases are present in the atmosphere The manufacturer has no control over the types of gases used with the pump. Process gases are of- ten toxic, flammable, corrosive, explosive and/or otherwise reactive. There is a risk of serious or fatal injury if these gases are allowed to escape freely into the atmosphere. -
Page 33: Pumping Start-Up
Operation 6.2.2 Pumping start-up The following steps describe the use of the pump regardless of the control interface: ● Use via HHR. ● Use via REMOTE control. ● Use via RS-232/RS-485 Serial link. ● Use via FIELDBUS. Pumping installation diagram Exh. Turbo Fore-vacuum isolation valve Inert gas purge inlet... -
Page 34: Shutting Down The Pump
Operation 6.3 Shutting down the pump 6.3.1 Pumping shutdown NOTICE Risk of damaging the pump by generating an electric arc The pump and its electronic drive unit must not be disconnected from the electrical network before the rotor completely stops rotating and the unit is isolated from the electrical network: an electric arc is created when the circuit is interrupted, which damages internal components. -
Page 35: Powering Off
Operation Otherwise, if the minimum speed is reached before the power supply has been restored: ● the pump lands on its landing bearings, ● the electronic drive unit is powered off; no indicator light is on, ● the landing bearings’ counter decreases. Start up the pump according to the standard start-up procedure when the mains supply has been re- stored. -
Page 36: Maintenance
Maintenance 7 Maintenance 7.1 Maintenance safety instructions DANGER Risk to health posed by residual traces of process gases inside the pump Process gases are toxic and hazardous to health. They can cause poisoning and be fatal. Before dis- connecting the pump, any remaining traces of process gases must be eliminated. ►... -
Page 37: Maintenance Frequency
The initial percentage is set at 100%. When this value reaches the warning threshold, a warning is triggered: the landing bearings must be replaced. If other landings occur, the counter contin- ues to decrease to 0%. Theses landing bearings must be replaced by a Pfeiffer Vacuum service center. -
Page 38: On-Site Maintenance
Maintenance 7.3 On-site maintenance The pump does not require any maintenance on the customer’s premises other than the day-to-day servicing described in this manual. All other maintenance operations must be carried out by our service center. ► Clean the outer surfaces of the product using a clean, lint-free cloth and a product that will not damage the screen-printed surfaces or adhesive labels. -
Page 39: Draining The Water Circuit
Maintenance Disconnection procedure 1. Stop the pump by sending a Stop order (see chapter “Pumping shutdown”). 2. Switch off the pump by setting the mains switch of the electronic drive unit to O. 3. Switch off the circuit breaker of the customer's installation. 4. - Page 40 Maintenance Complete flushing 1. Install the blanking plate equipped with the injector on the connec- tor Purge. 2. Connect the nitrogen to the gas connector provided for this pur- pose. 3. Flush with nitrogen by injecting a relative pressure of 120 to 30’...
-
Page 41: Decommissioning
All process pumps are designed for continuous operation in process gas pumping applications and should not be stopped. Pfeiffer Vacuum declines any liability for process pumps that have been stop- ped for a prolonged period of time leading to by-product condensation, powder build-up or corrosion inside the pump, nor does its warranty cover such items. -
Page 42: Service Solutions By Pfeiffer Vacuum
We are always focused on perfecting our core competence – servicing of vacuum components. Once you have purchased a product from Pfeiffer Vacuum, our service is far from over. This is often exactly where service begins. Obviously, in proven Pfeiffer Vacuum quality. - Page 43 Service solutions by Pfeiffer Vacuum 5. Prepare the product for transport in accordance with the provisions in the contamination declaration. a) Neutralize the product with nitrogen or dry air. b) Seal all openings with blind flanges, so that they are airtight.
-
Page 44: Accessories
Accessories 10 Accessories Accessory Function Description Dimension Isolation valve This isolation valve is used to main- Manual valve see manufacturer's catalog tain vacuum in the pump by isolating it in the pumping line. Splinter shield This splinter shield protects the pump Stainless steel bent screen DN 250 ISO-F 121472... -
Page 45: Spare Parts
Spare parts 11 Spare parts Description Comments 24 V DC coil 038066 for purge valve and air inlet valve 24 V DC coil 108667 on water valve Dust filter 106229 for purge valve and air inlet valve 45/56... -
Page 46: Technical Data And Dimensions
Technical data and dimensions 12 Technical data and dimensions 12.1 General Basic principles for the Technical Data of Pfeiffer Vacuum turbomolecular pumps: ► Recommendations from PNEUROP committee PN5. ► ISO 21360; 2007: “Vacuum technology - Standard methods for measuring vacuum-pump perform- ance - General description”... -
Page 47: Environmental Characteristics
Technical data and dimensions Technical data ATH 2800 M ATH 2800 MT ATH 3200 M ATH 3200 MT Maximum flow 5000 sccm 1000 sccm 5000 sccm 1000 sccm with water flow 2200 sccm 700 sccm 2200 sccm 700 sccm 60 l/h >... -
Page 48: Cooling Water Characteristics
Technical data and dimensions Characteristics ATH 2800 M ATH 2800 MT ATH 3200 M ATH 3200 MT Indice de protection de la pompe IP 42 15 – 40 °C 15 – 25 °C 15 – 40 °C 15 – 25 °C... -
Page 49: Electrical Characteristics
Technical data and dimensions 12.6 Electrical characteristics Characteristics of the three-phase motor ATH 2800 M/MT ATH 3200 M/MT Voltage between phases 35 Vrms 35 Vrms Power frequency 834 Hz 834 Hz Phase current 17.5 A 17.5 A Tbl. 8: Electrical characteristics of the pump Main circuit breaker short circuit cut-off capacity 10 kA Main circuit breaker rating... - Page 50 Fig. 11: ATH 3200 M dimensions Exh. DN40 ISO - KF Fig. 12: ATH 3200 MT dimensions Center of gravity Tapped holes M16 Ø 215mm Equidistant holes Ø d2 on Ø d1 Heating belt connector ATH 3200 M/MT - dimensions (mm)
- Page 51 Technical data and dimensions ATH 3200 M ATH 3200 MT Weight (kg) Weight (kg) 83.8 Fig. 13: Dimensions of Purge solenoid valve 1 Connection to pump Possible rotation Fig. 14: Dimensions of Air inlet solenoid valve 1 1/8" NPT female connector...
- Page 52 Technical data and dimensions 38,7 1/8 NPT 47,7 Fig. 15: Dimensions of water valve 1 Water valve cable 52/56...
-
Page 53: Declaration Of Conformity
EN 61000-3-3/A1 : 2019 EN IEC 61000-6-4 : 2019 The manufacturer's authorized representative in the United Kingdom and the authorized agent for compiling the technical documentation is Pfeiffer Vacuum Ltd, 16 Plover Close, In- terchange Park, MK169PS Newport Pagnell. Signature:... -
Page 54: Ec Declaration Of Conformity
Magnetically levitated turbomolecular pumps and integrated electronic drive unit ATH 2800 M ATH 2800 MT ATH 3200 M ATH 3200 MT We hereby declare that the listed product satisfies all relevant provisions of the following European Directives. Machinery 2006/42/EC (Annex II, no. 1 A) - Page 55 55/56...
Need help?
Do you have a question about the ATH 3200 MT and is the answer not in the manual?
Questions and answers