
Related Manuals for Pfeiffer Vacuum Adixen A3H Series


Summary of Contents for Pfeiffer Vacuum Adixen A3H Series
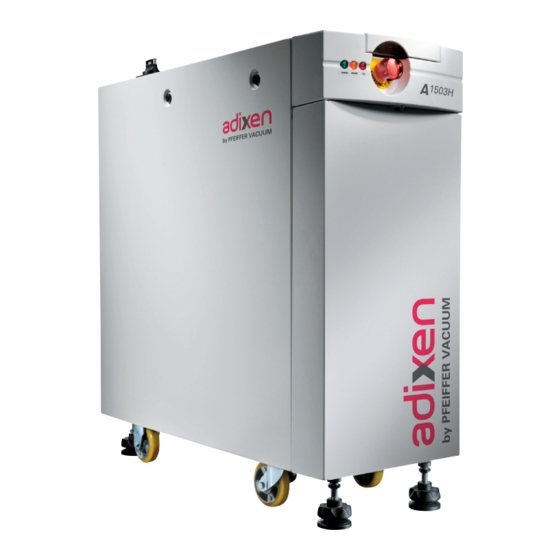
- Page 1 A3H Series Multistage Roots dry pump Operating instructions Operating instructions...
- Page 2 Multistage Roots dry pump Dear Customer, you have just purchased an adixen dry pump. We thank you and are proud to include you in our customers. This product has benefited from adixen Vacuum Product’s many years of experience in “semi-conductor” processes and dry pumping.
- Page 3 Multistage Roots dry pump This product complies with the requirements of European Directives, listed in the Declaration of Conformity available in section G 100. Copyright/Intellectual property: The use of adixen products are subject to copyright and intellectual property rights in force in any jurisdiction. All rights reserved, including copying this document in whole or any part without prior written authorization from adixen Vacuum Products.
- Page 4 : 114515 Contents ANUAL REFERENCE : 06 - A 2012 DITION UGUST English original version Operating instructions – A3H Series Chapter A INTRODUCTION A 010 - Dry pump operational principle A 020 - A3H Series dry pump range A 030 - M4 monitoring system A 040 - Technical characteristics A 050 - Accessories Chapter B...
-
Page 5: Table Of Contents
: 114515 Contents ANUAL REFERENCE : 06 - 2012 DITION AUGUST English original version Operating instructions – A3H Series Chapter E MAINTENANCE INSTRUCTIONS E 010 - Exchange standard repair E 011 - Safety instructions for pump relocation E 012 - Draining of the water cooling circuit E 013 - Saving and loading of the pump configuration E 014 - Disconnecting the pump from the installation E 015 - Conditioning the pump for shipping... - Page 6 Labelling Operating instructions – A3H Series Indicates a potentially hazardous situation which, if not avoided, could result in property damage. Indicates a potentially hazardous situation which, if not avoided, could result in moderate or minor injury. It may also be used to alert against unsafe practices.
- Page 7 Labelling Operating instructions – A3H Series Symbols Symbols / Marking Description Caution: possible risk, read the operator instructions Warning: electrical shock hazard Compulsory: wear gloves Compulsory: used a breathing mask Compulsory: wear protective glasses Earth connection Power White indicator light: pump is powered Running Green indicator light: pump is running Warning...
- Page 8 Labelling Operating instructions – A3H Series Pump labels Located on the covers of the pump, this label warns the user against WARNING possible risk of injury due to any hand contact with hot surfaces. HOT SURFACE Contact with pump bodies may cause burn. It states that protective gloves should be used before performing any Switch off and wait until pumps cooled intervention.
- Page 9 Labelling Operating instructions – A3H Series Pump labels location WARNING HAZARDOUS VOLTAGE Switch off the pump and disconnect the main power cable before opening the power box cover. WARNING Leakage current may be greater than 3.5 mA Earth connection is essential before connecting supply.
- Page 10 Introduction Operating instructions – A3H Series A 010 Dry pump operational principle A 020 A3H Series dry pump range A 030 M4 monitoring system A 040 Technical characteristics A 050 Accessories adixen Vacuum Products - A3H Series Operating instructions...
- Page 11 A 10 Dry pump operational principle Designed to The equipment is designed to minimize potential residue deposits: by limiting the internal volumes that contain gas, minimize potentiel by injecting N2 purge on each pump stage to dilute the process residues gas, by regulating the pump temperature and adjusting it to each process in order to limit gas condensation.
- Page 12 A 10 Dry pump operational principle Tightness with environment Tightness at low The pump is fitted with ball bearings lubricated with fluorinated pressure side grease. An overpressure zone is created around the bearing by injecting a neutral gas. The pressurization and the seals prevent pumped gases from migrating towards the bearings.
- Page 13 A 20 A3H Series dry pump range Model’s description A3H series is a range of dry pumps dedicated to the harshest applications of the semi-conductor industry. The range includes 4 compact pumping systems, integrated into covered frame including FB203 roughing pump, roots blower (except for A203H model) and monitoring : A203H A803H...
- Page 14 A 20 A3H Series dry pump range Large volume version : two models are available*. - A203H large volume model - A1803H large volume model. These versions are used for specific applications requiring the pumping of a chamber volume of 1m to 50m Available on A203H and A1803H models, this version features additional frequency converter on the dry pump.
- Page 15 A 20 A3H Series dry pump range Interfaces Hand-held remote control Emergency stop button Front Panel Inlet Mains switch Mains power supply Electrical interface panel Remote control connector Configuration switch Exhaust Coding wheel Facilities Hand-held remote (water + gas) control connector RS 232/485 connector Rear panel RS 485 connector...
- Page 16 A 20 A3H Series dry pump range Internal equipment The dry pumps include a cooling circuit and an inert gas purge of the pumps circuit. Inlet Cooling circuits A203H Principle schematic Water valve FB203 Water outlet Water flowmeter Water inlet Anti-suckback valve Exhaust Silencer...
- Page 17 A 20 A3H Series dry pump range Inlet Cooling circuits (con’t) Roots 1803 A1503H - A1803H Principle schematic Water valve FB203 Water outlet Water inlet Water flowmeter Anti-suckback valve Exhaust Silencer : Temperature sensor of pump (alert, alarm and setpoint) Tc : Temperature sensor of motor (alarm) - - - - - : for ELT version only.
- Page 18 A 30 M4 monitoring system Principle Each A3H Series pump includes an intelligent monitoring system. Description Electrical cabinet Hand-held remote It is located at the rear of the It ensures Man-Machine machine. interface. It is linked with main power It can be used either from the supply, Dry pump/Roots motors front or the rear of the pump and electronic cabinet.
- Page 19 A 30 M4 monitoring system Microprocessor controlled. M4 monitoring Parameters and messages are displayed on the hand-held remote characteristics control. Memorization of the last ten warnings and hazards. RS 232 - RS 485 - Network links. Alternative connection Mains Roots motor Electrical cabinet FB203 motor...
- Page 20 A 40 Technical characteristics A203H A1803H Characteristics Units A203H A803H A1503H A1803H Large Volume Large 130 / 160 - / 160 600 / 700 1100 / 1200 1650 / 1700 - / 1200 Peak pumping speed (50/60 Hz) 75 / 95 - / 95 350 / 412 647 / 706...
- Page 21 A 40 Technical characteristics Characteristics Units A203H A803H A1503H A1803H Environmental conditions: Use of the product indoor use Altitude up to 2000 m Ambient oparating temperature 5 to 40 °C (41 to 104 °F) 80 % for temp. up to 31 °C (87 °F) Maximum relative humidity decreasing linearly to 50 % at 40 °C (104 °F) category II...
- Page 22 A 40 Technical characteristics A203H dimensions (mm) 752 (A) Inlet DN 50 78 (B) Outlet DN40 - - - - Large Volume option A = 1055 (41.5) B = 221 (8.7) adixen Vacuum Products - A3H Series Operating instructions...
- Page 23 A 40 Technical characteristics A803H dimensions (mm) Minimum space for connection Inlet DN 100 Outlet DN 40 adixen Vacuum Products - A3H Series Operating instructions...
- Page 24 A 40 Technical characteristics A1503H / A1803H dimensions (mm) Minimum space for connection Inlet DN 100 or DN 160 56,5 Outlet DN 40 adixen Vacuum Products - A3H Series Operating instructions...
- Page 25 A 40 Technical characteristics Isometric views and location of the antiseismic protection devices A203H / A803H / A1503H / A1803H models GLOBAL CENTER OF GRAVITY METAL FEET SCREWED CLAMP THICKNESS 8 MM MATERIAL : SOFT STEEL 4 SCREWS : H M12-45 WEIGHT DISTRIBUTION SECTION Antiseismic protection...
- Page 26 A 50 Accessories This valve avoids a reverse flow of Isolation valve Manual valve gas to the chamber and increases at pump inlet Stainless steel tightness when the pump is DN 100 ISO-F 30503M switched off. DN 160 ISO-F 30606M It also isolates the running pump from the process.
- Page 27 A 50 Accessories Seismic bracket This accessory allows to attach the pump specifically in Set of two seismic earthquake area. A328947 brackets DN 40 O-ring This accessory resists against corrosion resistant corrosive and aggressive gases DN 40 O-ring 108785 (chloride and fluoride gases). (with PTFE protection) corrosion resistant A PTFE barrier and an internal...
- Page 28 Start-up Operating instructions – A3H Series B 000 Safety instructions B 001 Hook-up requirements B 010 Unpacking / Handling / Storage B 020 Positioning the pump in the pumping installation B 025 Filling the machine oil housings B 030 Connection to the cooling circuit B 040 Inert gas purge connection (N2 connection) B 050...
- Page 29 B 00 Safety instructions Overview Study the labelling described at the beginning of this manual. We took care to provide you with a clean product. To keep it in this condition, unpack it only in its final place of use. Make sure the equipment shows no sign of transport damage.
- Page 30 B 00 Safety instructions Ensure that the product is connected to an electrical installation: – in compliance with the local and national safety requirements, – equipped with electrical protection (fuses, circuit breaker, …) which has a suitable earth (ground) point, properly connected.-- Electric shock hazard on touching.
- Page 31 B 00 Safety instructions If loss of cooling water creates a significant risk, then the water flow must be monitored externally by the process equipment. Lock out/tag out (LO/TO) water and N supplies. The end user needs to provide a dedicated source of water and Nitrogen equipped with a manual valves that can be locked out within 10 feet of the tool.
- Page 32 B 00 Safety instructions Safety interlock The pump motors are protected against overload through circuit breakers which may include solid state components, refer to page G 110 for electrical schematic. These interlocks must never be overridden during installation, use or maintenance.
- Page 33 B 01 A3H Series – Hook-up requirements Packaging dimensions A1803H A203H A803H A1503H A1803H Large Volume (B 10) L x W x H 1200x900x1070 mm 1200x900x1190 mm A1803H Weight (B 10) A203H A803H A1503H A1803H Large Volume 360 kg 465 kg 635 kg Packaging weight 793 lbs...
- Page 34 B 01 A3H Series – Hook-up requirements A1803H Large Electricity (B 50) A203H A803H A1503H A1803H Volume Power consumption at 3.5 kW 4.5 kW 5.5 kW 6.5 kW 7 kW maximum inlet flow Short Circuit Current Rating 5 kAIC of main electrical cabinet Power supply voltage Low voltage 200-230 V 50/60 Hz...
- Page 35 B 10 Unpacking / Handling / Storage Make sure the equipment shows no sign of transport damage. If it has been damaged, take the necessary steps to record this with the carrier and inform the manufacturer. In all cases, we recommend keeping the packaging (reusable materials) for further transport of the equipment or for prolonged storage.
- Page 36 B 10 Unpacking / Handling / Storage Unpacking These packages contain*: (continued) Quantity provided with the pump A1503H Equipment A203H A803H A1803H Operating instructions Oil filling of the pump (0,4 liter) Hoisting ring Funnel EMO plug Remote control plug Water quick coupling Nitrogen quick coupling Refer to (F10) for part numbers.
- Page 37 B 10 Unpacking / Handling / Storage Handling WARNING Regarding its weight, handling the pump can cause muscle strain or back HEAVY OBJET injury. For all equipment handling, use the appropriate handling devices. Can cause muscle strain or back injury. Use lifting aids and proper lifting techniques when removing or replacing.
- Page 38 B 20 Positioning the pump in the pumping installation Risk of tilting Although the appliance meets EEC safety regulations (topple angle ± 10°), it is advisable to guard against the risk of tilting during handling, installation, and use. Refer to A40 of the user’s manual for location of the center of gravity. Don’t place the product on a tilted surfaces, it can drag the operator along due to its heavy weight: –...
- Page 39 B 20 Positioning the pump in the pumping installation Remove the flanging Remove the two assembling screws from the flanging plate, components and the claw clamps (A803H model) Unscrew the screws maintaining the plate on the clamping bar. Remove the hoisting rings and disassemble the clamping bar.
- Page 40 B 25 Filling the machine oil housings Risk of oil ingestion. The pumps are delivered without an oil charge: the oil is delivered in separate containers. Wear gloves, protective glasses and mask to fill in the oil in the pumps. The pumps are tested using synthetic fluid A113.
- Page 41 B 25 Filling the machine oil housings 1 - Roots motor side housing fill plug 2 - Roots motor side housing sight glass Roots 3 - Roots motor side housing drain plug 4 - FB203 fill plug 5 - FB203 sight glass 6 - FB203 drain plug 7 - Roots gears side housing fill plug FB203...
- Page 42 B 25 Filling the machine oil housings Filling of FB203 Remove the fill plug (4). Position the flexible tube in the oil fill neck. Fill the pump with oil according to the recommended quantities. dry pump The oil level should be in the middle of the sight glass (5). Do not exceed the indicated quantities.
- Page 43 B 30 Connection to the cooling circuit Water characteritics In order to limit corrosion and motor cooling circuit clogging, it is recommended to use cooling water with the following characteristics: Treated soft water or non-corrosive industrial water pH between 7.5 and 11 Hardness <...
- Page 44 B 30 Connection to the cooling circuit Water flowrate adjustment Water flowrate Needle tap Flowmeter panel Remove the front cover. The water flow will be adjusted according to the pump model (see A 40) with the needle tap located on the flowmeter panel. Note for A1503H and A1803H: the flowmeter adjusts the water flow in the roots flanges blower only.
- Page 45 B 40 Inert gas purge connection connection) Nitrogen For maximum performances, a filtered dry nitrogen supply with characteristics the following characteristics is required: O concentration < 10 ppb concentration < 5 ppb Dust < 1μm Oil < 0.1 ppm Pressure between 2 - 6 ·...
- Page 46 B 50 Electrical connection Make sure that main switch is off during electrical connection. Study the preliminary precautions (see B 00). Electric shock hazard. The voltages and currents in use can induce electric shock. Isolate and lock out power line by switching off the main isolator before maintaining the product /or removing the cover.
- Page 47 B 50 Electrical connection Customer electrical Differential circuit breaker installation protection In case of insulation defect, for personnel protection you must install (con’t) on the main power supply a type B differential circuit breaker GFI (or RCD) of 300 mA. This equipment protection device is compatible with type T.T electrical network.
- Page 48 B 51 Checking the direction of rotation at initial pump start-up Before using the monitoring, check that the mechanical and electrical connections defined in the chapter B have been made. Before each pump start-up, check that oil levels of FB203 and Roots housings are visible in the middle of the sight glass: do this check with the pump stopped.
- Page 49 B 51 Checking the direction of rotation at initial pump start-up Controlling the pump The hand-held remote allows using the hand-held to control the pump and remote to configurate the parameters. ENTER CONTROL WATER START STOP PURGE ROOTS At the first hand-held remote connection, the monitoring ALCATEL AVT-F...
- Page 50 B 51 Checking the direction of rotation at initial pump start-up Check the direction of rotation at initial pump start-up (continued) Electric shock hazard on touching. When the main isolator is switched to the «0» position, items located between the mains connection and the isolator are still under mains voltage.
- Page 51 B 60 Connection to the pumping circuit Make sure the direction of rotation has been checked (see B 51). Do not expose any part of the human body to vacuum. The product is supplied with the inlet and exhaust sealed. Remove these blanking plates when you are ready to connect the product on your vacuum system.
- Page 52 B 60 Connection to the pumping circuit At the pump inlet Make sure that any vacuum accessories connected to the inlet of the pump can withstand a negative pressure of 1 · 10 hPa, with reference to the atmospheric pressure. To get the best pumping speed, ensure that the vacuum line is the minimum length possible and has an internal diameter not less than the inlet connection of the pump.
- Page 53 B 70 J14 remote control plug connection Study the preliminary precautions (see B 00). Make sure that the main switch is off to avoid any short circuit during remote control plug disconnection/connection. Dry contact outputs are rated 30V - 1 A max. Overvoltage and overcurrent can cause internal electrical damages.
- Page 54 B 70 J14 remote control plug connection Cover plug wiring Cover plug type: Sub D - 50 pin connector. Factory wired (soldered side view) J14 wiring Remote select Pump Start/Stop Roots Start/Stop Purge Start/Stop Standby purge Start/Stop Inlet valve Open/Close Valve control authorization In not used Out exhaust pressure warning...
- Page 55 B 70 J14 remote control plug connection Control contacts These inputs are considerated to be activated when a DC voltage (inputs) between 5 and 30V is applied. Wiring customer supplied 5 to 30 VDC. Inputs can be used by pins 47, 48 (OV) and pins 49, 50 (12V), in order to be controlled by external contacts of the customer equipment.
- Page 56 B 70 J14 remote control plug connection Control contacts All dry contacts are normally opened. (inputs) (cont’) CONTACT FUNCTION Local mode or Contact closed, local mode. Remote control (18-19) Contact open, remote control mode. mode Contact closed, pump starts. Contact open, pump stops. Pump Start/Stop (20-21) This function is only valid when remote control mode is validated with...
- Page 57 B 70 J14 remote control plug connection Available outputs Available dry contacts 30V - 1A. These contacts open in CONTACT FUNCTION the presence of a fault 1-34 Pump fail (pump running, valve opened, no warning) (normally closed): Warning presence Alarm presence - Unit stoppage Maintenance warning Pump running, correct purge and inlet valve opened Pump running (FB + Roots running)
- Page 58 B 100 Emergency stop plug connection “J1“ connector This connector allows the control or remoting of the location emergency stop function from the front panel of the unit. This connector is located at the rear of the pump. Cover plug wiring In local mode, the pump can run only if the cover plug (delivered with the pump) is fitted on “J1“...
- Page 59 B 110 RS 232 or RS 485 link wiring At the first power-on, the user will find the factory set configuration C 42). The settings can be modified through the M5 corresponding menu C 42). The commands and messages reception syntax is available on C 90.
- Page 60 B 110 RS 232 or RS 485 link wiring Examples of possible connection RS232 link with single monitoring system M4 (M4) Serial link RS485 Series type connection: all communications will be lost if any one pump is disconnected. V(+) V(-) RS 485 9 pin male DB 9 pin female DB...
- Page 61 Operation Operating instructions – A3H Series C 000 Safety recommendations for harch processes C 010 Operating modes C 020 M4 monitoring system parameters C 040 Operating mode with HHR C 041 Start-up of the M4 monitoring system C 042 M4 monitoring system function table C 043 Use of the M4 monitoring system for pumping operation C 044...
- Page 62 C 00 Safety recommendations for harsh processes Shutdown procedure for discontinuous operation All process pumps are designed for continuous operation in pumping process gas and should not be stopped. adixen Vacuum Products will be released from any warranty and liability claims if a process pump is stopped for a prolonged time leading to condensation of by-products, powder build-up or corrosion inside the pump.
- Page 63 C 00 Safety recommendations for harsh processes Safety information related to SIH processes Processes using high H2 or SiH4 flows require extended safety to prevent any problem. In order to avoid any safety issue or risks relative to process and pumping conditions, it is necessary to set up the pump with correct settings, following adixen recommendations.
- Page 64 C 00 Safety recommendations for harsh processes Safety information related to SIH processes (cont’.) GENERAL RECOMMENDATIONS It is necessary to pay particular attention to: Leak tightness of the whole system: – Be sure there is no air leak on pumping system itself and on vacuum line. Leak rate has to be lower than 1 ·...
- Page 65 C 00 Safety recommendations for harsh processes SPECIFIC adixen RECOMMENDATIONS for processes using SiH and H For these applications, using SiH or H , adixen recommends: 1) To avoid O in process vacuum line after process chamber maintenance : O may likely react with trapped gases and deposited dusts &...
- Page 66 C 10 Operating mode Different According to the monitoring configuration and wiring, the pump can be: control modes locally controlled by the hand-held remote (HHR), remote controlled by the equipment (remote control connector), remote controlled by serial link (RS232 connector) If the EMO connector is not connected to the tool, it is necessary to connect the EMO cover to the EMO (J1) connector B 100.
- Page 67 C 10 Operating mode Remote control operating modes Remote control via Pump alone J14 remote control The pump is monitored by the equipment in which it is installed connector (such as an automated pumping system or an industrial equipment). The pump is remote controlled by the opening or closing of different dry contacts wired on remote control connector ( B 70).
- Page 68 C 10 Operating mode control operation Software monitoring The absence or a too low flow of N is software monitored. This is defined by three parameters that can be adjusted through the HHR C 42: Purge level warning; Purge sensor warning time (W13); Purge sensor alarm time (D13).
- Page 69 C 10 Operating mode The use of the stand-by purge is not recommended in case of process generating powder, as the protection against powder is drastically reduced. The use of this funtion must be carefully studied in order to be sure that no process gases or by-products are present in the pump or in the exhaust line when this function is activated.
- Page 70 C 20 M4 monitoring system parameters Purpose of the sensors Thresholds Unit Mini. Maxi. Signals insufficient water with a threshold mecanically Waterflow sensor adjusted in factory. Allows the display of the nitrogen flowrate. Mass-flowmeter Signals insufficient gas purge during a warning time, and stops the pumping at the end of alarm time.
- Page 71 C 40 Operating mode with HHR C 41 C 41 Start-up of the M4 monitoring system ........C 42 C 42 M4 monitoring system function table ........C 43 C 43 Use of the M4 monitoring system for pumping operation .. C 44 C 44 Saving and loading of pump configuration (with M4) ..
-
Page 72: Start-Up Of The M4 Monitoring System
C 41 Start up of the M4 monitoring system The hand-held The keyboard is used to configure the parameters. remote module Parameter selection and configuration keys ENTER CONTROL Indicators WATER START STOP PURGE ROOTS Manual control key The functions of Symbol Description Functions... - Page 73 C 41 Start up of the M4 monitoring system Pump start-up Position the main switch to position 1. The “mains on“ light indicator comes on : «pump ready». The monitoring displays the state of the pump. The star appears on the left side of * 1H LOC N2 ROOTS the display and indicates that the...
- Page 74 C 41 Start up of the M4 monitoring system To ensure correct fault monitoring and customized parameters, it is necessary to initialize time and date of the machine. Reset the clock Press the SET key to enter the DEFINITION (at the initial start-up) menu.
-
Page 75: M4 Monitoring System Function Table
C 42 M4 monitoring system function table Pump configuration Gain access to parameter programing using the hand-held remote control. The programing made at the factory is protected by an access code which disables the entry of new parameters. Press the key SET. ENTER PASSWORD : Valid the code with ENTER. - Page 76 C 42 M4 monitoring system function table DEFINITION MENU ENTER ENTER Initial Selection Choice Description configuration ENGLISH LANGUAGE All the menus are in the selected language. ENGLISH FRENCH A203H Select the pump monitored by the monitoring A803H According system. A1503H SYSTEM SELECT to the (“c”...
- Page 77 C 42 M4 monitoring system function table SETTING ENTER ENTER Selection Selection Setting limits Initial configuration WARNING time 0 to 60 mn / DISABLED 0 mn PURGE SENSOR 0 to 60 mn / DISABLED ALARM time DISABLED PURGE WARNING Set WARNING 10 to 120 slm 15 slm 70 to 100 °C...
- Page 78 C 42 M4 monitoring system function table MAINTENANCE ENTER ENTER Initial Selection Setting limits configuration 0 to 65500 h RUN TIME 0 to 65500 h OVERHAUL MAINT 1000 to 34000 h OVERHAUL WARNING 17000 MANAGEMENT ENTER ENTER Initial Selection Selection Setting limits configuration PASSWORD...
-
Page 79: Use Of The M4 Monitoring System For Pumping Operation
C 43 Use of the M4 monitoring system for pumping operation Study the preliminary precautions ( B 00). Before using the monitoring, check that the mechanical and electrical connections defined in the chapter B have been made. The performance and operational safety of this product are guaranteed provided it is used normally in the operating conditions defined in this manual. - Page 80 C 43 Use of the M4 monitoring system for pumping operation The user and /or OEM are ultimately responsible for operating the equipment in a safe manner. The manufacturer has no control over the types of gases exposed to this pump. This is the user and/or the OEM’s responsibility to follow the necessary safety requirements.
- Page 81 C 43 Use of the M4 monitoring system for pumping operation Operation monitoring During operation, the user is warned of an operating incident by: one or several faults are displayed on the screen, alternating with monitoring parameters. When these faults are activated, the monitoring system triggers the warning phase followed by the alarm phase.
- Page 82 C 43 Use of the M4 monitoring system for pumping operation Auto-restart In standard configuration (factory configuration), when there is a loss of voltage, system is stopped. When the voltage comes back, to restart configuration the system, it is necessary to press START. The automatic restarting is possible if AUTO RESTART is set on ENABLED.
-
Page 83: Saving And Loading Of Pump Configuration (With M4)
C 44 Saving and loading of pump configuration (with HHR) At pump installation or replacement, it may be interesting to copy the configuration (set of all the parameters and operation setting programmed by the user) from a pump to another. Loading and saving the parameters with the pump in operation may result in a software conflict. - Page 84 C 44 Saving and loading of pump configuration (with HHR) Remote loading Connect the M4 to the pump to configure. Take the control of the pump from the HHR (blinking of “*” and “X” at left corner of the display). Load the configuration previously saved into the pump by selecting the CONFIG.
-
Page 85: M4 Monitoring Setting For Transport
C 45 M4 monitoring setting for transport Setting of Gain access to MANAGEMENT MAINTENANCE menu by successive press on +. “storage” mode >>>MANAGEMENT<<< for transports and OPERATING TIME Enter the sub menu STORAGE LAST ACTIONS by pressing ENTER then select prolonged storage ENABLED using the key +. - Page 86 C 50 Water flowrate on A803H Roots cooling The cooling circuit is equipped with a 3 - way - valve which allows circuit Roots cooling depending on the process. When the Roots is cooled: When the Roots is not cooled: It corresponds to the initial Depending on the process, it is not configuration.
- Page 87 C 60 Use of the “Power failure protection” This device includes a board installed in the electronic cabinet which supplies power to the electronics for a second in the event of main power failure. The option can be configured by the user in the hand held remote control DEFINITION menu.
- Page 88 C 70 Use of the inlet isolation valve (accessory) The operation describes the various factors involved in operating of the inlet valve. Inlet valve option The selection of the Inlet valve option can be performed by the setting RS 232 / 485 or the HHR. To change the parameter of the Inlet valve option with the HHR, perform the following operations: Connect the HHR plug to the HHR connector on the front or rear...
- Page 89 C 70 Use of the inlet isolation valve (accessory) Controlled by the For the valve operating mode as described below, contact J14-S1 customer’s equipment via and J14-S7 must be open B 70. J14 (remote control mode) The valve closes if contact J14-S6 controlled by the customer’s equipment is closed B 70.
- Page 90 C 80 Use the bellows heater Controller location In the A3H pump, behind the left cover. Description EUROTHERM 2132 Press to step across the list headings. Press to step down the parameters within a particular list. You will eventually return to the list heading. Press to view the value of a selected parameter.
- Page 91 C 80 Use the bellows heater Parameters navigation Example of setting Depending on the customer configuration, the temperature set point can be configured from 0°C to 120°C. When temperature set point is defined, alarm must be adjusted arround the set point as follows: Temperature 2FSH...
- Page 92 C 80 Use the bellows heater To hide, reveal and promote parameters adixen Vacuum Products - A3H Series Operating instructions...
- Page 93 C 80 Use the bellows heater Parameters list Menu Parameter Description Parameter value Display process value and set point accessed by pressing the and buttons Regulated Value – set DiSP point value 120 °C Alarm on High value (max. temperature allowable in continuous on RSV 140 °C 2FSH heaters device )
- Page 94 C 90 Use of the serial link (M4 monitoring) M4 Monitoring The initial configuration of the serial link is as follows: system parameter Type: RS 232 configuring ECHO: ENABLED Transmission SPEED: 9600 bauds Parity: NO 2 Stop bits : DISABLED Address: 0 Setting / Observations Action / Observations...
- Page 95 C 90 Use of the serial link (M4 monitoring) Instruction syntax The control <CR> ORDer sent Associated (see list) PARameter (see list) Message end character Heading (ASCII code 13) ; character The character <LF> is not taken account by the unit. ADDress of unit, varies from 000 to 999 The response R E S P O N S E...
- Page 96 C 90 Use of the serial link (M4 monitoring) List of controls Order Parameter Response Action To allocate a specific adress to a product making up a network. OK or ERR2 From 000 to 255 (can be modified only when the pump is stopped).
- Page 97 C 90 Use of the serial link (M4 monitoring) List of controls (continued) Order Parameter Response Action Start up the ROOTS with the command ROOON and stop with ON or OFF OK or ERR2 ROOOFF. ON or OFF OK or ERR2 Start up the purge with PURON and stop with PUROFF.
- Page 98 C 90 Use of the serial link (M4 monitoring) Modifying the separator character Order Parameter Response Action <val> Change the separator character between two consecutive data val = decimal items in the response. value of the Note: ASCII code of OK or ERR3 - The factory configuration is the decimal code «032»...
- Page 99 C 90 Use of the serial link (M4 monitoring) Interpreting OK or a specific response to the order if everything is correct. responses supplied by ERR0 : setting fault the serial link ERR1 : order fault ERR2 : parameter fault ERR3 : context fault ERR4 : checksum fault Note: “The Remote control mode“...
- Page 100 Maintenance Operating instructions – A3H Series D 000 Safety instruction related to maintenance D 010 First level of maintenance D 030 Diagnosis and troubleshooting D 400 Pump or Roots does not start D 500 The pump is running and then is showing a warning or fault message D 600 The pump is running but the performances are not correct adixen Vacuum Products - A3H Series Operating instructions...
- Page 101 D 00 Safety instructions related to maintenance This chapter D describes the main preventive maintenance operations and provides a guide for first diagnosis in the event of an incident. Maintenance must be performed by a skilled maintenance operator trained in the relevant health and safety aspects (EMC, electrical hazards, chemical pollution, etc.).
- Page 102 D 00 Safety instructions related to maintenance Remaining process gases in the pump may cause severe injury or death. Before removing the pump, continue N flow from the process tool for 30 min. Nitrogen pressure and flow rate should be identical to the programmed values during process.
- Page 103 D 00 Safety instructions related to maintenance Decontamination – product dismantling According to the regulations 2002/96/CE about Waste of electrical and electronical equipments, and 2002/95/CE about Restriction of Hazardous substances, the manufacturer provides a recycling paid service for the end of-life of waste electrical and electronic equipment. Any obligation of the manufacturer to take back such equipment shall apply only to complete not amended or modified equipment, using adixen Vacuum Products original spare parts, delivered by adixen Vacuum Products,...
- Page 104 D 10 First level of maintenance D 00 Study the safety instructions related to maintenance ( When a problem occurs, the user is informed by: the relevant fault indicator light which is located on the front panel: yellow lit in case of warning, red lit in case of fault (followed by a pump stop or not, depending on setting parameters, C 42),...
- Page 105 D 10 First level of maintenance Location of electrical The diagnosis and troubleshooting guide (from D 30) may lead to components check the electrical components of the monitoring cabinet described below: (electrical cabinet) WATT Transformer Protection Electronic Electrotechnic BF203 power protection protection protection...
- Page 106 D 10 First level of maintenance Breaker rating Pump Voltage 200 to 230 V - 50/60 Hz 16 A A203H 380 to 460 V - 50/60 Hz 13 A 200 to 230 V - 50/60 Hz 16 A 10 A A803H 380 to 460 V - 50/60 Hz 13 A...
- Page 107 D 10 First level of maintenance Sensors connectors lay-out at the rear of the monitoring system M4 Therm. Therm. Stby Water Water Motor Massflow AUX. ROOTS valve valve flow temp. sensor PT100 temp. (not used) Purge Inlet Check Ana. pump valve valve Temp.
- Page 108 D 30 Diagnosis and troubleshooting Pump or Roots does not start ......D 400 D 400 Mains presence light indicator does not switch on Hand-held remote control display is not lighting up Display is showing a message or an alarm The pump is running and a message numbered is showing ......
- Page 109 D 400 Pump or Roots does not start Mains presence light indicator does not switch on ..page 1 page 1 Hand-held remote control display is not lighting up ..page 3 page 3 Display is showing a message or an alarm ......page 4 page 4 Mains presence light indicator does not switch on...
- Page 110 D 400 Pump or Roots does not start HHR doesn’t work or displays a message Incident Cause Troubleshooting • Hand-held remote is on soft HHR is showing Set the switch S1 to “OFF” loading configuration D 10). ALCATEL-AVTF ALCATEL-AVTF • Switch OFF for 10s, then switch MONITORING V2.0F MONITORING V2.0F...
- Page 111 D 500 The pump is running and then is showing a Warning or Alarm message Warning message «WXX» the yellow light is lighting up. the buzzer is activated (if parameter configurated C 42). the pump is not stopped. Alarm message «DXX» the red light is lighting up.
- Page 112 D 500 The pump is running and then is showing a Warning or Alarm message Incident Cause Troubleshooting • Warning message Exhaust pressure > 1650 hPa Check the N2 flowrate setting value ( B 40). W01 EXHAUST PRESSURE W01 EXHAUST PRESSURE •...
- Page 113 D 500 The pump is running and then is showing a Warning or Alarm message Incident Cause Troubleshooting • Warning message Incorrect monitoring configuration Check that “SYSTEM SELECT” menu is properly configurated W07 SPEED CONTROL W07 SPEED CONTROL • Check the RP cover plug ( D 10).
- Page 114 D 500 The pump is running and then is showing a Warning or Alarm message Incident Cause Troubleshooting • Warning message FB203 motor temperature is Refer to warning W08 WATER FLOW. > 120 °C W10 FB MOTOR TEMP. W10 FB MOTOR TEMP. •...
- Page 115 D 500 The pump is running and then is showing a Warning or Alarm message Incident Cause Troubleshooting • Warning message Temperature control valve supply Check the temperature control valve connection on THERM. ADP problem W15 T° HIGH FB HP W15 T°...
- Page 116 D 500 The pump is running and then is showing a Warning or Alarm message Incident Cause Troubleshooting • Alarm message Roots motor temperature is Refer to warning W08 WATER FLOW. > 150 °C D17 ROOTS MOTOR T° D17 ROOTS MOTOR T° •...
- Page 117 D 500 The pump is running and then is showing a Warning or Alarm message Incident Cause Troubleshooting • Alarm message KM1 FB203 contactor not closed Check CB2 ( D 10). • Connect the EMO cover plug D36 FB CONTACTOR D36 FB CONTACTOR B 100).
- Page 118 D 600 The pump is running but the performances are not correct Incident Cause Troubleshooting • Bad vacuum or no vacuum Polluted or clogged pump FB203 maintenance Call customer service center. • Internal oil leak FB203 maintenance Call customer service center. •...
- Page 119 Maintenance sheet Operating instructions – A3H Series E 010 Exchange standard repair E 011 Safety instructions for pump relocation E 012 Draining of the water cooling circuit E 013 Saving and loading of the pump configuration E 014 Disconnecting the pump from the installation E 015 Conditioning the pump for shipping E 020...
- Page 120 E 10 Exchange standard repair Exchange standard repair has been detailed into several key steps. These are detailed in specific sheets as listed below. The key steps must be followed in chronological order: E 11 E 11 Safety instructions for pump relocation ......... E 12 E 12 Draining of the water cooling circuit ........
-
Page 121: Safety Instructions For Pump Relocation
E 11 Safety instructions for pump relocation Users are advised to observe the precautions presented below during any maintenance operation on the pump and, more especially, any operations requiring the disassembly of sub-assemblies. Maintenance must be performed by a skilled maintenance operator trained in the relevant health and safety aspects (EMC, electrical hazards, chemical pollution, etc.). - Page 122 E 11 Safety instructions for pump relocation Protection against corrosive gases Remaining process gases in the pump may cause severe injury or death. Before removing the pump, continue N2 flow from the process tool for 30 min. Nitrogen pressure and flow rate should be identical to the programmed values during process.
-
Page 123: Draining Of The Water Cooling Circuit
E 12 Draining of the water cooling circuit Disconnecting the Water must be drained to avoid hoses freezing up during shipment. Disconnect the water inlet and outlet pipe quick connectors. cooling circuit compressed 1/4 NPT 1/4 NPT récipient vessel Prepare a flexible pipe (A) with a quick 1/4 NPT female connector and another flexible pipe (B) with 1/4 NPT male connector. -
Page 124: Saving And Loading Of The Pump Configuration
E 13 Saving and loading of the pump configuration Back up the settings of the pump to be replaced in order to enter them into the new pump and ensure identical operations. We advise not returning the HHR to the adixen service center. Loading and saving the parameters with the pump in operation may result in a software conflict. -
Page 125: Disconnecting The Pump From The Installation
E 14 Disconnecting the pump from the installation Study the safety instructions for pump relocation before disconnecting the pump (see E 11). Switch off Switch off the pump by positionning the main switch to “0”. the pump Switch off the customer main circuit breaker. Disconnect the main plug or the main wires from the main disconnect switch (see B 50). -
Page 126: Conditioning The Pump For Shipping
E 15 Conditioning the pump for shipping Study the safety instructions for pump relocation before disconnecting E 11 the pump ( Preparing the pump Water line must be drained to avoid hoses freezing up during for expedition shipment ( E 12). Pumps that are to be shipped must first be pressurized with dry nitrogen ( E 11). - Page 127 E 15 Conditioning the pump for shipping Flange the pump Remove 2 hoisting rings to install the clamping bar. A803H model Re-install the hoisting rings and screw them. Install the flanging plate, position the assembling screws on the clamping bar without blocking them.
- Page 128 E 20 Increase of the mainteance parameters When the maintenance of an element has been done, it is necessary to increase to the next maintenance time to stop the warning of this element. The zero-set-up of the maintenance parameters will be done in a service center during a total maintenance.
-
Page 129: Maintenance Components
Maintenance components Operating instructions – A3H Series F 000 Spare parts - Instructions of use F 010 Delivered accessories (spare parts) adixen Vacuum Products - A3H Series Operating instructions... - Page 130 F 000 Spare parts - Instructions of use Replacement of Our products are designed to comply with current EC regulations and guarantee optimal operating conditions with parts and use of non maximum safety conditions for the user. genuine parts Any modification of the product made by the user is liable to lead to non-compliance with the regulations, or even to put into doubt the performance of the product and the user’s safety.
- Page 131 F 10 Delivered accessories (spare parts) Accessories provided Part number with the pump A1503H Equipment A203H A803H A1803H Operating instructions 114515 Funnel 107381 EMO plug 106587 Remote control plug 107222 Nitrogen quick connector 107142 A113 oil (2.5L) 064659 A113 oil (0.5L) 064657 Water quick couplings Part number...
-
Page 132: Appendix
Appendix Operating instructions – A3H Series G 100 Declaration of conformity G 110 A3H Series – Electrical schematic G 200 Declaration of contamination adixen Vacuum Products - A3H Series Operating instructions... - Page 133 G 100 adixen Vacuum Products - A3H Series Operating instructions...
- Page 134 G 110 A3H Series – Electrical schematic MAIN MAIN PLUG PURPLE OPTION GREY PURPLE REMOTE RS 485 480V 460V 415V RS 232/485 380-400V 220-230V 200-208V ORANGE ORANGE YELLOW J1 EMO OPTION POWER FAILURE PROTECTION WHITE BROWN FRONT PANEL DISPLAY WHITE WHITE/GREEN BROWN/GREEN EMER.
- Page 135 G 110 A3H Series – Electrical schematic Summary of To identify the wiring of the FB 203 and Roots for the pump version corresponding to yours, use the following table. FB 203 and Roots configurations Pump model Version refer to diagrams* Standard A203H Large Volume...
- Page 136 G110 A3H Series – Electrical schematic The following diagrams must be used to complement the first one (p1/8). All these diagrams describe the electric wiring depending on the model of the pump. FB203 without frequency converter J131 J131 Display panel Display panel white white...
- Page 137 G110 A3H Series – Electrical schematic FB203 wiring equipped with a frequency converter L2 L3 L2 L3 FILTER FILTER L’1 L’2 L’3 L’1 L’2 L’3 Common OUT Common OUT FREQUENCY FREQUENCY CONVERTER CONVERTER V1000 V1000 J131 J131 IN Default IN Default Display panel Display panel ON VAR...
- Page 138 G110 A3H Series – Electrical schematic Roots 603 Roots 603 wiring Wiring with frequency Wiring with frequency without frequency converter on Roots 603 only converter on Roots 603 and converter FB203 L2 L3 L2 L3 FILTER FILTER L’1 L’2 L’3 L’1 L’2 L’3 PE R...
- Page 139 G110 A3H Series – Electrical schematic Roots 1203 Wiring with frequency converter on Wiring with frequency converter on Roots 1203 only Roots 1203 and FB203 FILTER FILTER L’1 L’2 L’3 L’1 L’2 L’3 alarm alarm Common OUT Common OUT FREQUENCY FREQUENCY CONVERTER CONVERTER...
- Page 140 G110 A3H Series – Electrical schematic Roots 1803 Wiring with frequency converter on Roots 1803 only FILTER FILTER L’1 L’2 L’3 L’1 L’2 L’3 alarm alarm Common OUT Common OUT FREQUENCY FREQUENCY CONVERTER CONVERTER V1000 V1000 INPUT ON VAR ON VAR (HV) (LV) alarme...
- Page 141 G110 A3H Series – Electrical schematic Roots 1803 Wiring with frequency converter on FB203 and Roots 1803 FILTER FILTER L’1 L’2 L’3 L’1 L’2 L’3 alarm alarm Common OUT Common OUT FREQUENCY FREQUENCY CONVERTER CONVERTER V1000 V1000 INPUT INPUT ON VAR ON VAR (LV) (HV)
-
Page 142: Declaration Of Contamination
In compliance with European Community’s L360 directives, French labor code L231 - R231 and Fede- ral OSHA Safety Standard 1910-1200, adixen by Pfeiffer Vacuum requires this form to be completed to preclude the potential health risk to its service personnel that can occur when receiving, disas- sembling, or repairing potentially contaminated products. - Page 143 G 200 adixen Vacuum Products - A3H Series Operating instructions...
- Page 144 Vacuum Solutions Vacuum Solutions Pfeiffer Vacuum stands for innovative and custom vacuum Pfeiffer Vacuum stands for innovative and custom vacuum from a single Source from a single Source solutions worldwide, for technological perfection, competent advice solutions worldwide, for technological perfection, competent advice and reliable service.
Need help?
Do you have a question about the Adixen A3H Series and is the answer not in the manual?
Questions and answers