
Related Manuals for Pfeiffer Vacuum A3P Series


Summary of Contents for Pfeiffer Vacuum A3P Series
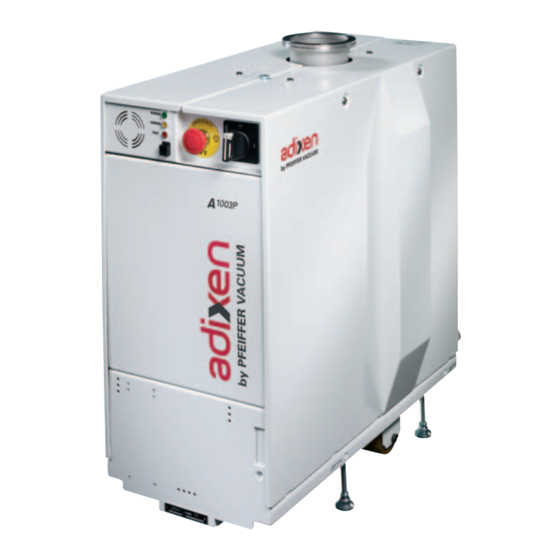
- Page 1 A3P SERIES Dry pumps for medium duty applications Operating instructions Operating instructions...
- Page 2 Easy to integrate. Clean room compatibility. Highest reliability. Low operating cost. Failure of circuit protection. Special feature Standby purge (option). Standby power / high speed option. Semi S2-0706 standard compatible (option). adixen Vacuum Products - Operating instructions - A3P Series...
- Page 3 All rights reserved, including copying this document in whole or any part without prior written authorization from adixen Vacuum Products. Specifications and information are subject to change without notice by from adixen Vacuum Products. adixen Vacuum Products - Operating instructions - A3P Series...
-
Page 4: General Contents
Standard repair exchange E 11 Preliminary precautions E 12 Draining of the water cooling circuit E 14 Disconnecting the pump from the installation E 15 Shipping procedure E 20 Increase the maintenence parameters adixen Vacuum Products - Operating instructions - A3P Series... - Page 5 Indicates a potentially hazardous situation which, if not avoided, could result in death or severe injury. Indicates an imminently hazardous situation that, if not avoided, will result in death or severe injury (extreme situations). adixen Vacuum Products - Operating instructions - A3P Series...
- Page 6 Introduction Operating Manual - A3P Series Detailed contents A 10 Operating principle A 20 Description A 30 Monitoring system A 40 Technical characteristics A 50 Accessories A 60 Options adixen Vacuum Products - Operating instructions - A3P Series...
-
Page 7: Operating Principle
Neutral gas purging of the bearings is imperative. Tightness at high pressure The bearings are lubricated by oil splashing. side The tightness is achieved with a deflector and a seal. adixen Vacuum Products - Operating instructions - A3P Series... - Page 8 Tightness at shutdown The pump is fitted with an antisuckback valve in the pump exhaust pipe, preventing the exhaust being sucked back. The pump in a pumping installation adixen Vacuum Products - Operating instructions - A3P Series...
- Page 9 A RS 232/485 connector located on the electrical interface panel allows pump control and communication with the process tool by means of the serial link protocol. Interfaces A103P pump adixen Vacuum Products - Operating instructions - A3P Series...
- Page 10 A 20 Description A603P / A1003P pump adixen Vacuum Products - Operating instructions - A3P Series...
- Page 11 Water solenoid valve Pump temperature sensor (warning and hazard) Motor temperature switch (warning and hazard) Roots temperature switch (warning and hazard) IS : Inlet stage TS : Transfer stage ES : Exhaust stage adixen Vacuum Products - Operating instructions - A3P Series...
- Page 12 10 : Inert gas purge nozzles 11 : Pressure sensor (warning and hazard) 12 : Pressure switch (hazard) (Semi configuration) IS : Inlet stage TS : Transfer stage ES : Exhaust stage adixen Vacuum Products - Operating instructions - A3P Series...
-
Page 13: Monitoring System
The hand held display module accessory can be connected either at the front or at the rear side of the pump. accessory It ensures a friendly access to the pump operating settings as well as the display of pump status during operation. adixen Vacuum Products - Operating instructions - A3P Series... -
Page 14: Main Functions
Note : the monitoring system can be interfaced with the process tool via the remote control connector or RS 232 / 485 connectors. Main functions Pump temperature monitoring and control. Exhaust pressure monitoring. flow monitoring. Maintenance time control. Hardwire safety sensor control. Power consumption. adixen Vacuum Products - Operating instructions - A3P Series... -
Page 15: Technical Characteristics
100 (A103P) oil type : A 113 700 (Roots) Weight 275.6 595.2 Inlet flange ISO-K DN50 DN100 Exhaust flange I S O - DN25 Secondary exhaust port Ø50 adixen Vacuum Products - Operating instructions - A3P Series... - Page 16 Oil charge is filled at factory. Do not modify the oil level. A 113 Material safety data sheet is available on request. For Semi hardwire option, the Short Circuit Current Rate (SCCR) of the pump is rated of 5kA. adixen Vacuum Products - Operating instructions - A3P Series...
- Page 17 A 40 Technical characteristics Dimensions and interfacing A103P pump adixen Vacuum Products - Operating instructions - A3P Series...
- Page 18 A 40 Technical characteristics Dimensions and interfacing A603P / A1003P pumps adixen Vacuum Products - Operating instructions - A3P Series...
- Page 19 A 40 Technical characteristics Seismic tie down dimensions A103P A603P / A1003P inch 12.79 26.89 233.5 233.5 inch 9.19 9.19 inch 15.16 15.16 adixen Vacuum Products - Operating instructions - A3P Series...
- Page 20 Front view Foot Top view A103P A603P / A1003P inch inch 5.71 6.02 Gravity center 13.58 14.21 6.02 12.28 Weight 275.6 595.2 103.6 196.2 90.4 191.8 Gravity center 37.5 105.8 44.1 101.4 adixen Vacuum Products - Operating instructions - A3P Series...
- Page 21 The purpose of the secondary exhaust enclosure is to exhaust gas and vapors that might leak from the pump. P/N: 110872S enclosure (Semi configuration) Secondary exhaust enclosure installation (accessory) B 60 adixen Vacuum Products - Operating instructions - A3P Series...
-
Page 22: Remote Control
- compatibility levels in industrial plants for low-frequency conducted disturbances. Description ESD connector kit 114572S A wide range of accessories are available in Adixen product catalog Fitting accessories (fitting rings, valves, bellows...). adixen Vacuum Products - Operating instructions - A3P Series... -
Page 23: Electrostatic Discharge
Lonworks interface is used to interface the dry pump with Lam tool. It Lonworks means that this interface should be ordered for each installation on Lam tool. It completely replaces the electrical interface you were used to connect to our pumps. adixen Vacuum Products - Operating instructions - A3P Series... - Page 24 B 90 User plug connection B 100 EMO plug connection (on A603P / A1003P pump models) B 110 RS 232 or RS 485 link wiring B 120 Removable handle (accessory) installation adixen Vacuum Products - Operating instructions - A3P Series...
-
Page 25: Pump Installation
When the main switch is set to «0», the part supply between the power and the main electrical switch, is energized. Risk of electrical shock in case of contact. Disconnect main electrical cable before any intervention. adixen Vacuum Products - Operating instructions - A3P Series... - Page 26 If loss of cooling water creates a significant risk, then the water flow must be monitored externally by the process equipment. adixen Vacuum Products - Operating instructions - A3P Series...
- Page 27 (external surfaces > 70°C on exhaust connections). Contact may cause burns. Wait 30 min before servicing and always use gloves. The protective gloves should be used in accordance to the protective gloves supplier’s instructions. adixen Vacuum Products - Operating instructions - A3P Series...
- Page 28 The pump EMO can also be externally monitored through J1 B 100 «emergency stop» connector pins 2 and 3 The EMO circuit consists of electromechanical components, and resetting it will not re-energize the pump. adixen Vacuum Products - Operating instructions - A3P Series...
- Page 29 The user must keep all body parts away from moving parts. A 329 982 - 4 Located on the upper cover, this label indicates that the internal electrical circuit is energized when EMO is activated. adixen Vacuum Products - Operating instructions - A3P Series...
- Page 30 Any obligation of the manufacturer to take back such equipment shall apply only to complete not amended or modified equipment, using adixen Vacuum Products original spare parts, delivered by Pfeiffer Vacuum, containing i.e. all its components and sub-assemblies. This obligation will not cover the shipping cost to an adixen Vacuum Products service center.
- Page 31 A1003P Nitrogen flow 15 to 60 slm Pressure 200 - 700 kPa absolute (15 - 87 PSIG) Connection - inlet type Swagelock for tube 6.35 mm (0.25 inch) material Stainless steel adixen Vacuum Products - Operating instructions - A3P Series...
- Page 32 Stainless Steel remarks a bellow is necessary Exhaustable enclosure (B 60) A103P A603P A1003P Flow 22 cfm Static pressure* 0.125 wg Exhaust Ø 50 mm * Measured at the secondary exhaust port. adixen Vacuum Products - Operating instructions - A3P Series...
- Page 33 Japanese and Korean language, 1 EMO cover plug, 1 remote control cover plug, 1 maintenance cover plug, 1 safety cover plug, 1 power plug (only for A3-P Range pump configurated with plug electrical connection). adixen Vacuum Products - Operating instructions - A3P Series...
- Page 34 The pump is equipped with 2 fixed wheels and 1 swivelling front wheel. A removable handle is available as an accessory to move easily the B 120. pump Swiveling front wheel Fixed wheels adixen Vacuum Products - Operating instructions - A3P Series...
-
Page 35: Equipment Storage
Equipment storage If the pump is going to be put into storage, the anti-corrosion bag should not be removed. This equipment can be stored at an ambient temperature between -10°C and +60°C. adixen Vacuum Products - Operating instructions - A3P Series... -
Page 36: Positioning The Pump
Risk of tilting: compliance with the EEC safety rules is guaranteed (normal range ±10°). However, precautions should be taken against the risk of A 40 tilting during product handling, installation and operation. See location of the center of gravity. adixen Vacuum Products - Operating instructions - A3P Series... -
Page 37: Connection To The Cooling Circuit
- Water inlet marked «IN» [1/4 inch NPT quick female connector Water OUT (customer supply)]. - Water outlet marked «OUT» [1/4 inch NPT quick male connector (customer supply)]. Minimum pressure rating for connections and pipework: 174 PSIG (1400 kPa absolute). adixen Vacuum Products - Operating instructions - A3P Series... - Page 38 Lower Explosive Limit. adjustment The N flow rate can be adjusted with the pressure regulator according to the process. The N flow level is read on the hand held display module. adixen Vacuum Products - Operating instructions - A3P Series...
-
Page 39: Customer Electrical Installation Protection
15 A 10 A A603P / A1003P 30 A 20 A Line voltage Check that the line voltage corresponds to the pump label, voltage located on the upper cover. See B 01 adixen Vacuum Products - Operating instructions - A3P Series... - Page 40 It is necessary to check the direction of rotation at first start up. B 51. Check that the cable is correctly protected against ground defects and that earth wire is longer than the three conducting wires. adixen Vacuum Products - Operating instructions - A3P Series...
- Page 41 M4 nut. Replace the left upper panel. Check that the cable is correctly protected against ground defects and that earth wire is longer than the three conducting wires. adixen Vacuum Products - Operating instructions - A3P Series...
- Page 42 10 kA 240 VAC 10 kA 480 VAC 10 kA Check that the cable is correctly protected against ground defects and that earth wire is longer than the three conducting wires. adixen Vacuum Products - Operating instructions - A3P Series...
-
Page 43: Preliminary Operations
PUMPING STOPPED 15/10/05 10H10 Because it is the first connection, it is necessary to take the pump control via the CONTROL key: a star appears on the left side of the display. adixen Vacuum Products - Operating instructions - A3P Series... - Page 44 Wait 1 minute after switching off before opening the pump. In order to prevent foreign bodies from entering the pump, while waiting to be installed, replace blank-off flanges on inlet and exhaust ports again. adixen Vacuum Products - Operating instructions - A3P Series...
- Page 45 B 60. pump start-up However, if the pump has to be remote controlled, proceed to specific (continued) wiring instructions B 70. adixen Vacuum Products - Operating instructions - A3P Series...
-
Page 46: Connection To The Pumping Circuit
Incorporate flexible stainless steel flanged bellows in the vacuum pipeline to reduce the transmission of vibration. adixen Vacuum Products - Operating instructions - A3P Series... - Page 47 Hold them in position with the 4 screws Chc M4x12. The plate must be in contact with the exhaust box soldered nuts. Connect the secondary exhaust port to the customer application. adixen Vacuum Products - Operating instructions - A3P Series...
- Page 48 Connection A103P A603P / A1003P Inlet connection DN50 ISO-KF DN100 ISO-K Several fitting accessories are available in the adixen catalog. adixen Vacuum Products - Operating instructions - A3P Series...
-
Page 49: Connector Location
Connector location The remote control connection is done via the «remote control connector», located on the rear side of the pump. Connector type : 50 pins - male Sub D adixen Vacuum Products - Operating instructions - A3P Series... -
Page 50: Plug Wiring
B 70 Remote control plug connection Cover plug wiring The remote control cover plug is fitted on the «remote control connector» when the pump is configured in local mode. Plug wiring adixen Vacuum Products - Operating instructions - A3P Series... - Page 51 Contact open: remote control mode. (18-19) A3-P Range Contact closed: A3-P Range starts. Start/Stop Contact open: A3-P Range stops. (20-21) This function is only valid when remote control is validated, with contact S1 open. adixen Vacuum Products - Operating instructions - A3P Series...
- Page 52 “AUX” of (local mode only) hand held display module. This function is only valid when ”INLET VALVE OPTION” is “valid” in the DEFINITION menu of hand held display module. adixen Vacuum Products - Operating instructions - A3P Series...
- Page 53 Contact closed, in the presence of a fault (normally open) 12-13 Warning signal 10-11 Hazard signal Contact opened = Local Contact closed = Remote Contact opened = valve closed Contact closed = valve opened adixen Vacuum Products - Operating instructions - A3P Series...
- Page 54 Enclosure switch (open in case of secondary exhaust failure) (customer use) (Semi confi guration). 13-14 Safety start / stop of the pump. D 10 Note : A maintenance cover plug can be connected on the safety connector adixen Vacuum Products - Operating instructions - A3P Series...
- Page 55 User plug Plug wiring for 15 V DC standby power option Standby power ON/OFF This plug wiring allows the standby power option operation when the C 10 monitoring setting is ENABLED adixen Vacuum Products - Operating instructions - A3P Series...
- Page 56 ENABLED Wiring: 1st case Wiring: 2nd case Pump connection User plug Pump connection User plug 15 V DC I max = 20mA 0 - 10V 0 - 10V adixen Vacuum Products - Operating instructions - A3P Series...
- Page 57 When units containing control circuits are equipped with dry contacts outputs, it is the customer’ responsibility to wire these outputs in compliance with safety extra low voltage installation and security standards. It concerns «Remote control», «emergency stop» and «RS232/485» connectors. adixen Vacuum Products - Operating instructions - A3P Series...
- Page 58 Connector type (RS 232 / 485): 9-pin male DB connector. Connector type (RS 485): 9-pin female DB connector. A103P / A603P / A1003P pump Rear side RS 232 / 485 connector RS 485 connector RS 232 / 485 plug wiring adixen Vacuum Products - Operating instructions - A3P Series...
- Page 59 Communication will be lost only on the disconnected pump. RS 485 communication box 9 pin male DB RS 232/485 RS 232 / 485 RS 232 / 485 RS 485 End of the line wiring adixen Vacuum Products - Operating instructions - A3P Series...
-
Page 60: Installation
Push or pull the removable handle to move the pump. B 20. When the pump is in the desired location, position it Then store the removable handle on the right upper panel by proceeding in reverse manner. Stop Support adixen Vacuum Products - Operating instructions - A3P Series... -
Page 61: Operation
C 44 Saving and loading of pump configuration C 45 Monitoring system setting for transport C 70 Use of the inlet isolation valve (accessory) C 90 Use of the serial link adixen Vacuum Products - Operating instructions - A3P Series... - Page 62 - Remove the exhaust and inlet blank-off flanges and connect the pump to the equipment. - Turn on the cooling water. - Power on the pump and press start button. In case of trouble to restart the pump, contact adixen Customer Service. adixen Vacuum Products - Operating instructions - A3P Series...
- Page 63 – Immediate corrective actions must be scheduled in case of N signals (warning or alarm). adixen Vacuum Products - Operating instructions - A3P Series...
- Page 64 8) To respect a safety area around the pump of 4 m minimum. This will prevent any damage on operators ears due to overpressure shock wave propagation, as well as little fragments ejection - if any. adixen Vacuum Products - Operating instructions - A3P Series...
-
Page 65: Operating Modes
The pump is remote controlled by the commands transmitted on the serial link (refer to B 110 for wiring and C 90 for commands). adixen Vacuum Products - Operating instructions - A3P Series... -
Page 66: Software Monitoring
Let’s consider that the setting of the N flow sensor parameters in the SETTING menu C 42 is the following: fl ow sensor Warning time Hazard time 2 min 5 min adixen Vacuum Products - Operating instructions - A3P Series... - Page 67 N loss or too low flow. However all the information to handle safety operations linked to the process gas panel are provided through the «remote control connector» and the «safety connector». adixen Vacuum Products - Operating instructions - A3P Series...
- Page 68 When the pump has been configured for automatic restart after a power failure, it is the responsibility of the user to take all the measures required to prevent risks resulting from this type of operation. adixen Vacuum Products - Operating instructions - A3P Series...
- Page 69 C 42 as follows: Setting of the monitoring Equipment command HHDM message B 90 High speed option for A103P Via User connector Enabled Possible to adjust the speed Disabled Impossible to modify the speed adixen Vacuum Products - Operating instructions - A3P Series...
-
Page 70: Monitoring System Parameters
Monitors the N injection into the pump. When fl ow is under the preset threshold, a N warning is generated. * These thresholds are factory set and can not be customized. adixen Vacuum Products - Operating instructions - A3P Series... -
Page 71: Safety Management
1.6 hPa, a hazard breaker is activated activation diately stops the pump after and the pump stops Safety hazard: D43 Safety hazard: D42 Safety hazard: D41 Safety hazard: D44 Soft message adixen Vacuum Products - Operating instructions - A3P Series... - Page 72 Start up of the monitoring system C 42 Monitoring system function table C 43 Starting mode definition «Hand held display module» C 44 Saving and loading of pump configuration C 45 Monitoring system setting for transport adixen Vacuum Products - Operating instructions - A3P Series...
-
Page 73: Start Up Of The Monitoring System
Fast scroll can be obtained by holding down the keys. For all the other keys, press several times. adixen Vacuum Products - Operating instructions - A3P Series... - Page 74 Press the SET key. ENTER PASSWORD When the code is displayed, (0 set at factory), * 0 * press the ENTER key. Access code and parameters can be customized C 42. adixen Vacuum Products - Operating instructions - A3P Series...
- Page 75 Access to the selected parameters with key MONTH Validate with the ENTER key. YEAR Update the needed parameters and validate. DEFINITION MENU SETTING Return to the main menu by pressing SET MAINTENANCE successively. MANAGEMENT adixen Vacuum Products - Operating instructions - A3P Series...
- Page 76 * 0 * Parameters can be load from one pump to another. This can be done if the pump is to be replaced or when installing a new pump C 44. adixen Vacuum Products - Operating instructions - A3P Series...
- Page 77 Inlet valve validation. Disabled DISABLED ROOTS T° OPTION ENABLED Disabled DISABLED INTERN. T° OPTION ENABLED Temperature regulation validation. Disabled DISABLED KEY MODE OPTION ENABLED Authorizes mode (for Disabled maintenance only). DISABLED adixen Vacuum Products - Operating instructions - A3P Series...
- Page 78 0 to 60 min / DISABLED Disabled PURGE WARNING 15 to 60 slm (standard liter per minute) INTERNAL T° INPUT VALUE 70 to 110°C ALARM THRESHOLD +10°C above the set value adixen Vacuum Products - Operating instructions - A3P Series...
- Page 79 0 to 65500 h OVERHAUL. WARNING 1000 to 42000 h 17000 PART. MAINT. WARNING 1000 to 42000 h 8500 ROOTS MAINT. WARNING 1000 to 42000 h 17000 EXHAUST WARNING 1000 to 42000 h 8500 adixen Vacuum Products - Operating instructions - A3P Series...
- Page 80 Allow to transfer the remote display memory into the pump memory. Valid by pressing Enter Key. * Storage Parameter : Just before transport, set the storage mode on «Enabled». At switching on storage mode is automatically C 45 deleted adixen Vacuum Products - Operating instructions - A3P Series...
- Page 81 Defi nition Displays the operating times of the various components. LAST WARNING (S) Defi nition Displays the 10 last recorded warnings. LAST ALARM (S) Defi nition Displays the 10 last recorded alarms. adixen Vacuum Products - Operating instructions - A3P Series...
-
Page 82: Pump Start Up
The pumps are equipped with an exhaust pressure monitoring sensor. It is the responsability of the user to prevent the risks related to excess overpressure. adixen Vacuum Products - Operating instructions - A3P Series... -
Page 83: Operation Monitoring
When the STOP IN PROGRESS message appears on the display, don’t intervene on the pump: risk of injury by contact with hot surfaces. Wait for the PUMPING STOPPED message before intervening on the pump. adixen Vacuum Products - Operating instructions - A3P Series... - Page 84 If the message «NOT ALLOWED» appears after an action of any key, check the presence of the star on the display, showing that the control has been taken. adixen Vacuum Products - Operating instructions - A3P Series...
-
Page 85: Saving The Configuration
Validate with the ENTER key. The pump configuration is then transfered into the hand held dislay module memory. Return to main menu and exit the setting mode by SET. Disconnect the hand held display module. adixen Vacuum Products - Operating instructions - A3P Series... - Page 86 RS link, time and date, language. Loading parameters may result in creating software conflicts. After loading, configure manually the following parameters (temperature unit, pressure unit, serial link, time and date). adixen Vacuum Products - Operating instructions - A3P Series...
-
Page 87: Monitoring System Setting For Transport
The pump start up is no longer possible and the hour counter is stopped. Note : When power comes on, STORAGE mode is automatically deleted. C 41 Date and time reset is only necessary adixen Vacuum Products - Operating instructions - A3P Series... - Page 88 3 seconds after the pump start up. Controlled by the hand held display module (local mode) For the valve operating mode as described below, contact S1 and S7 must be closed B 70. adixen Vacuum Products - Operating instructions - A3P Series...
- Page 89 Note : stopping or starting the pump has no effect on the valve. Controlled by the RS 232 serial link (RS control mode) The valve open control message on the serial link is only taken into account if contact S7 is closed. adixen Vacuum Products - Operating instructions - A3P Series...
-
Page 90: Use Of The Serial Link
Return to main menu with SET key. Controlling the unit The controls are used to manage information relative to the working pump. pumping using the The pumping remote controls are however managed as a priority. serial link adixen Vacuum Products - Operating instructions - A3P Series... -
Page 91: Instruction Syntax
ADDress of unit, varies from 000 to 999 R e s p o n s e <CR> The response Example of dialog : #000 SYS ON #000 OK #000 ROO ON #000 ERR2 adixen Vacuum Products - Operating instructions - A3P Series... - Page 92 Start up the pumping unit with SYSON and stop with SYSOFF ON or OFF OK or ERR2 (see CTRL order). Take the pump control with CTRLON and let the pump control CTRL ON or OFF OK or ERR2 with CTRLOFF. adixen Vacuum Products - Operating instructions - A3P Series...
- Page 93 22-25 power (W) reserved separator character reserved 27-29 pump temp. (°C) reserved separator character reserved 31-33 separator character separator character 69-72 purging on second 35-37 reserved adixen Vacuum Products - Operating instructions - A3P Series...
- Page 94 The code «000» corresponds to «no header character». Example : The value «047», the decimal ASCII code of the character «/». command #002HDR047<CR> response /002OK command 002IDN<CR> /002M4ADP100X V1.XX response adixen Vacuum Products - Operating instructions - A3P Series...
- Page 95 ERR3 : context fault ERR4 : checksum fault Note : The RS 232 or RS 485 commands have priority on the remote control (dry contacts / 50 pins plug). adixen Vacuum Products - Operating instructions - A3P Series...
-
Page 96: Troubleshooting
Operating Manual - A3P Series Detailed contents D 00 Safety instruction related to maintenance D 10 First level of maintenance D 20 Fault message number table D 30 Diagnosis and trouble shooting adixen Vacuum Products - Operating instructions - A3P Series... - Page 97 A 329 982 - 3 Manufacturer contact The partial and full overhaul must be performed by Manufacturer trained personnel. Contact Manufacturer nearest service center or the service support at the following e-mail address: support.service@adixen.fr adixen Vacuum Products - Operating instructions - A3P Series...
- Page 98 The period of time for these phases can be set C 42. Only installed and configured parameters are displayed. Indicator lights on the hand held display module are illuminated. adixen Vacuum Products - Operating instructions - A3P Series...
- Page 99 Connect the «maintenance cover plug» instead of the cover plug on the safety connector. Cover plug wiring Note : An overtemperature of the motor and an overpressure of the exhaust still stops the pump. adixen Vacuum Products - Operating instructions - A3P Series...
-
Page 100: Maintenance Operations
ADP switch Temp. Temp. Temp. Temp. N2 LP Inlet Enclos. R.P. Heater Motor temp ANA.I.2 ANA.I.1 Check press Mass flow valve valve switch Roots sweraturitch ANA. See section Maintenance operations adixen Vacuum Products - Operating instructions - A3P Series... -
Page 101: Warning Message
SAFETY ROO. TEMP. MAINT. ROOTS EXHAUST. MAINT. ADP LP MAINT. ADP MAINT. EM. STOP; ADP. CONT EMERGENCY STOP ADP CONTACTOR ROOTS CONTACTOR ROOTS BREAKER SAF. CABINET PRES START UNABLED ROOTS FREQUENCY CONVERTER adixen Vacuum Products - Operating instructions - A3P Series... -
Page 102: Diagnosis And Trouble Shooting
In remote mode Check the wiring of the remonte Message on display B 70 control connector no cover plug or bad connection Monitoring problem Call the customer service center. adixen Vacuum Products - Operating instructions - A3P Series... - Page 103 D42 SAFETY EXH PRESS D 10 Check the exhaust pipe. Other problem Call the customer service center. Call the customer service center. Hazard D07 FREQ. CONVERT. 50 adixen Vacuum Products - Operating instructions - A3P Series...
- Page 104 Check compressed air supply. There is an isolating valve at inlet stop or does not open at start- Check valve condition. Other problem Call the customer service center. adixen Vacuum Products - Operating instructions - A3P Series...
- Page 105 Pump temperature is > of 10 °C to (see W08). the temperature control setting value Defective control valve Call the customer service center. Other problem Call the customer service center. adixen Vacuum Products - Operating instructions - A3P Series...
- Page 106 W17 ROOTS TEMP. Check the sensor connection on Sensor problem the «Motor temp. Roots switch» A603P and A1003P only D 10 connector Call the customer service center. Other problem adixen Vacuum Products - Operating instructions - A3P Series...
- Page 107 D34 EM. STOP; ADP. CONT Check that there is a strap between pins 2 and 3 of the A603P and A1003P only B 100 Call the customer service center. Other problem adixen Vacuum Products - Operating instructions - A3P Series...
- Page 108 Check that «SYSTEM SELECT» Incorrect monitoring Hazard configuration (for A103P) on «DEFINITION MENU» is set C 42 to «A3R0» D39 ROOTS CONTACTOR Call the customer service center. Other problem adixen Vacuum Products - Operating instructions - A3P Series...
- Page 109 Connect the safety or maintenance Safety hazard disconnected plugs. W45 START UNABLED Other problem Call the customer service center. Call the customer service center. Hazard D62 ROOTS FREQ. CONV. adixen Vacuum Products - Operating instructions - A3P Series...
-
Page 110: Maintenance Instructions
Standard repair exchange E 11 Preliminary precautions E 12 Draining of the water cooling circuit E 14 Disconnecting the pump from the installation E 15 Shipping procedure E 20 Increase the maintenance parameters adixen Vacuum Products - Operating instructions - A3P Series... -
Page 111: Standard Repair Exchange
Draining of the water cooling circuit E 14 Disconnecting the pump from the pumping installation E 15 Shipping procedure G 200 Safety questionnaire B 10 to B 60 Installing a new pump adixen Vacuum Products - Operating instructions - A3P Series... -
Page 112: Preliminary Precautions
- Do not dispose of residue in the usual waste disposal network but, have it destroyed by a qualified organization. - Install the inlet and exhaust blanking plates, thus delivered with the pump. adixen Vacuum Products - Operating instructions - A3P Series... - Page 113 (A) and (B). This operation must be performed quickly, because without any water cooling, the pump will overheat after a few minutes and will be in warning / hazard mode. adixen Vacuum Products - Operating instructions - A3P Series...
-
Page 114: Turning Off The Pump
Cap the equipment exhaust piping. Description A 20 Disconnect the pump Remove the anti-earthquake squares (if equipped). from the installation Raise the four locking screw jacks. Remove the pump from the installation. adixen Vacuum Products - Operating instructions - A3P Series... - Page 115 Place the centering ring equipped with O-ring on the exhaust port. Place the outlet blank-off flange. Secure it with the quick connect clamp. A103P / A603P / A1003P Exhaust connection DN25 ISO-KF adixen Vacuum Products - Operating instructions - A3P Series...
- Page 116 MIN: 1000 H duration time. MAX: 34000 H Validate with the ENTER key. Return to the main menu and exit the setting mode using the SET key. adixen Vacuum Products - Operating instructions - A3P Series...
-
Page 117: Maintenance Components
Maintenance components Operating Manual - A3P Series Detailed contents F 00 Spare parts - Instruction of use F 10 Spare part list adixen Vacuum Products - Operating instructions - A3P Series... - Page 118 The manufacturer urges the user not to use «imitation parts», or the misappropriation and pirating of intellectual property performed by some dishonest operators. The manufacturer supplies maintenance components, spare parts or kits to perform the maintenance of its products ( adixen Vacuum Products - Operating instructions - A3P Series...
-
Page 119: Spare Part List
F 10 Spare part list A103P A603P / A1003P Blank-off fl ange kit 112311 112313 Emergency plug connector 106587 106587 Remote control plug connector 107222 107222 adixen Vacuum Products - Operating instructions - A3P Series... - Page 120 Declaration of conformity G 101 Semi certificate G 110 A103 - Electrical schematic G 120 A603 - Electrical schematic G 130 A1003 - Electrical schematic G 170 Electronic cabinet G 200 Service adixen Vacuum Products - Operating instructions - A3P Series...
- Page 121 G 100 adixen Vacuum Products - Operating instructions - A3P Series...
- Page 122 G 101 Semi certificate adixen Vacuum Products - Operating instructions - A3P Series...
- Page 123 G 110 A103 - Electrical schematic adixen Vacuum Products - Operating instructions - A3P Series...
- Page 124 G 120 A603 - Electrical schematic adixen Vacuum Products - Operating instructions - A3P Series...
- Page 125 G 130 A1003 - Electrical schematic adixen Vacuum Products - Operating instructions - A3P Series...
- Page 126 G 170 Electronic cabinet Valve and sensor electrical diagram adixen Vacuum Products - Operating instructions - A3P Series...
- Page 127 Fill out the «Service Request/Product return» form and send it to your Service Center local Pfeiffer Vacuum Service contact. Include the confirmation on the service request from Pfeiffer Vacuum with your shipment. Fill out the declaration of contamination and include it in the shipment (mandatory!).
- Page 128 Pfeiffer Vacuum stands for innovative and custom vacuum Pfeiffer Vacuum stands for innovative and custom vacuum Vacuum Solutions Vacuum Solutions from a single Source from a single Source solutions worldwide, technological perfection, competent advice solutions worldwide, technological perfection, competent advice and reliable service.
Need help?
Do you have a question about the A3P Series and is the answer not in the manual?
Questions and answers