Table of Contents
Advertisement
Advertisement
Table of Contents
Troubleshooting

Related Manuals for Nilfisk-Advance BA 600S


Summary of Contents for Nilfisk-Advance BA 600S
- Page 1 SCRUBBER BA 600S - BA 650S - BA 750S SERVICE MANUAL 909 5484 000(1)2004-03...
-
Page 2: Table Of Contents
SERVICE MANUAL GENERAL INFORMATION ......................3 MACHINE LIFTING ............................3 MACHINE TRANSPORTATION ........................3 OTHER AVAILABLE MANUALS FOR BA 600S - BA 650S - BA 750S .............3 SAFETY ................................4 GENERAL SAFETY RULES ..........................4 TECHNICAL DATA ............................6 MAINTENANCE ..............................8 Scheduled Maintenance ..........................8 SCHEDULED MAINTENANCE CHART ......................8 MACHINE NOMENCLATURE ...........................9... - Page 3 SERVICE MANUAL RECYCLING SYSTEM ......................33 RECYCLING WATER TANK, VACUUM GRID WITH FLOAT AND RECYCLING WATER FILTER CLEANING (OPTIONAL) ........................33 VACUUM MOTOR ELECTRICAL INPUT CHECK ..................34 VACUUM MOTOR CARBON BRUSH CHECK AND REPLACEMENT ............35 VACUUM MOTOR DISASSEMBLY ........................ 36 SQUEEGEE CLEANING/CHECK AND BLADE REPLACEMENT ..............
-
Page 4: General Information
The following manuals are available by Nilfisk Literature Service Department: – BA 600S - BA650S - BA750S Parts List - Nilfisk 909 5320 000. – BA 600S - BA650S - BA750S Use and Maintenance Manual - Nilfisk 909 5319 000. 909 5484 000(1)2004-03... -
Page 5: Safety
SERVICE MANUAL SAFETY The following symbols indicate potentially dangerous situations. Always read this information carefully and take the necessary precautions to protect people and objects. DANGER! It indicates a dangerous situation (risk of death) for the User. WARNING! It indicates the risk for people of being injured and for objects of being damaged. CAUTION! It indicates a caution or a remark related to important or useful functions. - Page 6 SERVICE MANUAL WARNING! – Carefully read all maintenance/repair instructions before performing any maintenance/repair procedure. – Before using the battery charger apparatus, ensure that frequency and voltage values, indicated in the machine serial number plate, match the mains voltage. – Take all necessary precautions to prevent hair, jewels and loose clothes from being caught by the machine moving and vacuum parts.
-
Page 7: Technical Data
SERVICE MANUAL TECHNICAL DATA Dimensions BA 600S BA 650S BA 750S Scrubbing width 24.0 in (610 mm) 26.0 in (660 mm) 29.0 in (740 mm) Squeegee width 32.0 in (812 mm) 34.0 in (860 mm) Machine length (max) 59 in (1,500 mm) - Page 8 SERVICE MANUAL BA 650 dimensions BA 600 dimensions 1470 1473 BA 750 dimensions 1489 S300617 909 5484 000(1)2004-03...
-
Page 9: Maintenance
SERVICE MANUAL MAINTENANCE Scheduled Maintenance The lifespan of the machine and its maximum operating safety are ensured by regular maintenance. WARNING! See “GENERAL INFORMATION” and “SAFETY” paragraphs. The following chart provides the Scheduled Maintenance. The intervals shown may vary according to particular working conditions, which are to be defined by the person in charge of the maintenance. -
Page 10: Machine Nomenclature
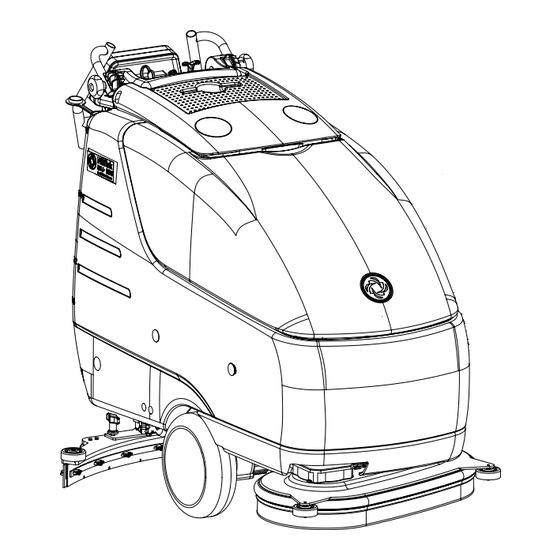
SERVICE MANUAL MACHINE NOMENCLATURE Throughout this Manual you will find numbers in brackets – for example: (2). These numbers refer to the components indicated in these two nomenclature pages. Refer to these pages whenever it will be necessary to identify a component mentioned in the text. - Page 11 SERVICE MANUAL S300618 909 5484 000(1)2004-03...
- Page 12 SERVICE MANUAL S300619 909 5484 000(1)2004-03...
- Page 13 SERVICE MANUAL S300620 909 5484 000(1)2004-03...
-
Page 14: Solution Supply System
SERVICE MANUAL SOLUTION SUPPLY SYSTEM SOLUTION SUPPLY SYSTEM SOLUTION TANK AND SUPPLY SYSTEM CLEANING Place the machine in the area designed for the detergent and recycling water disposal. Empty the solution tank (71) through the pipe (94). Turn the solution flow control lever (4) to the wide-open position, then operate the machine until the solution inside the machine runs out. -
Page 15: Solution Flow System Solenoid Valve/Faucet/Filter Unit Disassembly
SERVICE MANUAL SOLUTION FLOW SYSTEM SOLENOID VALVE/FAUCET/FILTER UNIT DISASSEMBLY Drain the recycling water, if any, from the related tank (70) by using the pipe (36). Drain the solution, if any, from the related tank (71) by using the pipe (37). Position the machine on a level ground. - Page 16 SERVICE MANUAL Figure 2 S300622 909 5484 000(1)2004-03...
-
Page 17: Solution Flow Control Cable And Lever Disassembly
SERVICE MANUAL SOLUTION FLOW CONTROL CABLE AND LEVER DISASSEMBLY Drain the recycling water, if any, from the related tank (70) by using the pipe (36). Drain the solution, if any, from the related tank (71) by using the pipe (37). Position the machine on a level ground. - Page 18 SERVICE MANUAL Figure 4 S300624 909 5484 000(1)2004-03...
-
Page 19: Solution Flow Control Cable And Lever Check And Adjustment
SERVICE MANUAL SOLUTION FLOW CONTROL CABLE AND LEVER CHECK AND ADJUSTMENT Drain the recycling water, if any, from the related tank (70) by using the pipe (36). Drain the solution, if any, from the related tank (71) by using the pipe (37). Position the machine on a level ground. -
Page 20: Troubleshooting
SERVICE MANUAL TROUBLESHOOTING Small amount of solution or no solution flows to the brush Possible cause: The brush switch (2) is not in the ON position or it is faulty (turn ON or repair/replace). The solution filter is clogged/dirty (clean). The solution flow control lever does not control the related faucet (check the operation of the control cable from the lever to its faucet). -
Page 21: Sweeping System
SERVICE MANUAL SWEEPING SYSTEM SWEEPING SYSTEM BRUSH CLEANING CAUTION! It is advisable to use protective gloves when cleaning the brushes/pads/cylindrical brushes as there may be cutting debris. Remove the brushes (84) by using the switch (6). Clean and wash the brushes with water and solution. Check that the brush bristles are integral and not excessively worn;... - Page 22 SERVICE MANUAL Figure 1 S300626 909 5484 000(1)2004-03...
-
Page 23: Brush Motor Carbon Brush Check And Replacement
SERVICE MANUAL BRUSH MOTOR CARBON BRUSH CHECK AND REPLACEMENT Drain the recycling water, if any, from the related tank (70) by using the pipe (36). Drain the solution, if any, from the related tank (71) by using the pipe (37). Position the machine on a level ground. -
Page 24: Brush Motor Disassembly
SERVICE MANUAL BRUSH MOTOR DISASSEMBLY Drain the recycling water, if any, from the related tank (70) by using the pipe (36). Drain the solution, if any, from the related tank (71) by using the pipe (37). Position the machine on a level ground. Remove the brushes (84) by using the switch (6). - Page 25 SERVICE MANUAL Figure 4 S300629 909 5484 000(1)2004-03...
-
Page 26: Brush Rotation Microswitch Adjustment
SERVICE MANUAL BRUSH ROTATION MICROSWITCH ADJUSTMENT Position the machine on a level ground. Turn the ignition key (10) to “0” position. Disconnect the battery connector (40). Unscrew the screws (A) and remove the paddle (C) cover (B). With the paddle (C) released, check that the microswitch (E) actuator (D) is in the cam (I) housing (F); also check that the contacts connected to the cables (N) are open (use a tester). -
Page 27: On-Board Adjustment Of The Brush Deck Lifting/Lowering Actuator Limit Switch Positions
SERVICE MANUAL ON-BOARD ADJUSTMENT OF THE BRUSH DECK LIFTING/LOWERING ACTUATOR LIMIT SWITCH POSITIONS Drain the recycling water, if any, from the related tank (70) by using the pipe (36). Drain the solution, if any, from the related tank (71) by using the pipe (37). Position the machine on a level ground. -
Page 28: Extrapressure Deck Position Inspection
SERVICE MANUAL Extrapressure deck position inspection 14. Turn the ignition key (10) to “I” position and lower the brush deck (22) in the extrapressure position by using the switch (3). Turn the ignition key (10) to “0” position. 15. When the brush deck (A) is lowered in the extrapressure position, check that the lever (J) is at about 20-25 mm from the stop (K), as shown in the figure. - Page 29 SERVICE MANUAL Figure 6 S300632 909 5484 000(1)2004-03...
-
Page 30: Adjustment Of The Brush Deck Lifting/Lowering Actuator Limit Switch Positions At The Workbench
SERVICE MANUAL ADJUSTMENT OF THE BRUSH DECK LIFTING/LOWERING ACTUATOR LIMIT SWITCH POSITIONS AT THE WORKBENCH NOTE The spare actuator provided has already been adjusted. When performing the following adjustment at the workbench, it is not necessary to adjust the actuator after installing it on the machine. -
Page 31: Disassembly Of The Brush Deck Lifting/Lowering Actuator Limit Switch Position Microswitches
SERVICE MANUAL DISASSEMBLY OF THE BRUSH DECK LIFTING/LOWERING ACTUATOR LIMIT SWITCH POSITION MICROSWITCHES Drain the recycling water, if any, from the related tank (70) by using the pipe (36). Drain the solution, if any, from the related tank (71) by using the pipe (37). Position the machine on a level ground. -
Page 32: Brush Deck Lifting/Lowering Actuator Disassembly
SERVICE MANUAL BRUSH DECK LIFTING/LOWERING ACTUATOR DISASSEMBLY Disassembly Drain the recycling water, if any, from the related tank (70) by using the pipe (36). Drain the solution, if any, from the related tank (71) by using the pipe (37). Position the machine on a level ground. Make sure that the brushes (I) are installed on the machine. -
Page 33: Troubleshooting
SERVICE MANUAL TROUBLESHOOTING Open circuit The fuse (56) causes an open in the circuit supplying the Function electronic board (54). This system allows to prevent the circuits from being damaged in case of failure. If there is an open in the fuse, the possible causes are the following. Function electronic board (54) wiring harness damaged or short-circuit (inspect the function electronic board (54) power cables and their connectors). -
Page 34: Recycling System
SERVICE MANUAL RECYCLING SYSTEM RECYCLING SYSTEM RECYCLING WATER TANK, VACUUM GRID WITH FLOAT AND RECYCLING WATER FILTER CLEANING (OPTIONAL) Place the machine in the area designed for water disposal and washing. Turn the ignition key (10) to “0” position. Lift the cover (A). Clean and wash with fresh water the cover (A), the tank (B) and the vacuum automatic shut-off screen (C). -
Page 35: Vacuum Motor Electrical Input Check
SERVICE MANUAL VACUUM MOTOR ELECTRICAL INPUT CHECK WARNING! This procedure must be performed by qualified personnel only. Drain the recycling water, if any, from the related tank (70) by using the pipe (36). Drain the solution, if any, from the related tank (71) by using the pipe (37). Position the machine on a level ground. -
Page 36: Vacuum Motor Carbon Brush Check And Replacement
SERVICE MANUAL VACUUM MOTOR CARBON BRUSH CHECK AND REPLACEMENT Drain the recycling water, if any, from the related tank (70) by using the pipe (36). Drain the solution, if any, from the related tank (71) by using the pipe (37). Position the machine on a level ground. -
Page 37: Vacuum Motor Disassembly
SERVICE MANUAL VACUUM MOTOR DISASSEMBLY Drain the recycling water, if any, from the related tank (70) by using the pipe (36). Drain the solution, if any, from the related tank (71) by using the pipe (37). Position the machine on a level ground. Turn the ignition key (10) to “0”... -
Page 38: Squeegee Cleaning/Check And Blade Replacement
SERVICE MANUAL SQUEEGEE CLEANING/CHECK AND BLADE REPLACEMENT CAUTION! It is advisable to use protective gloves when cleaning the squeegee as there may be cutting debris. Disassembly and cleaning Position the machine on a level ground. Turn the ignition key (10) to “0” position. Lower the squeegee (26) by means of the lever (35). -
Page 39: Troubleshooting
SERVICE MANUAL TROUBLESHOOTING The vacuum motor does not turn on The electronic board directly powers the vacuum motor; the possible causes of the motor failure are: Malfunction of the microswitch positioned on the squeegee lever (35) (check it for proper operation). Microswitch - Function electronic board wiring harness damaged (inspect and repair). -
Page 40: Drive System
SERVICE MANUAL DRIVE SYSTEM DRIVE SYSTEM DRIVE MOTOR ELECTRICAL INPUT CHECK WARNING! This procedure must be performed by qualified personnel only. Drain the recycling water, if any, from the related tank (70) by using the pipe (36). Drain the solution, if any, from the related tank (71) by using the pipe (37). Position the machine on a level ground. - Page 41 SERVICE MANUAL Figure 1 S300640 909 5484 000(1)2004-03...
-
Page 42: Drive Motor Carbon Brush Check And Replacement
SERVICE MANUAL DRIVE MOTOR CARBON BRUSH CHECK AND REPLACEMENT Drain the recycling water, if any, from the related tank (70) by using the pipe (36). Drain the solution, if any, from the related tank (71) by using the pipe (37). Position the machine on a level ground. -
Page 43: Drive Motor Differential Removal
SERVICE MANUAL DRIVE MOTOR DIFFERENTIAL REMOVAL Remove the battery and its frame (see the procedure in the related paragraph). Sling the machine by means of two ropes (A) of the same length (as shown in the figure) to hoist the machine front part. -
Page 44: Potentiometer Adjustment
SERVICE MANUAL POTENTIOMETER ADJUSTMENT Position the machine on a level ground. Turn the ignition key (10) to “0” position. Disconnect the battery connector (40). Unscrew the screws (A) and remove the paddle (C) cover (B). Disconnect one of the two microswitch (H) terminals. Connect a 20 K Ohm tester to the potentiometer (G) connectors (D) and (E) and check the following values under the following conditions: –... -
Page 45: Drive Microswitch Adjustment
SERVICE MANUAL DRIVE MICROSWITCH ADJUSTMENT Position the machine on a level ground. Turn the ignition key (10) to “0” position. Disconnect the battery connector (40). Unscrew the screws (A) and remove the paddle (C) cover (B). With the paddle (C) released, check that the microswitch (E) actuator (D) is in the cam (I) housing (F); also check that the contacts connected to the cables (N) are open (use a tester). -
Page 46: Troubleshooting
SERVICE MANUAL TROUBLESHOOTING Open circuit The fuse (55) determines the open circuit. This system allows to prevent the circuits and the drive motor from being damaged under overload conditions. If there is an open in the electrical circuit, the possible causes are the following. Drive motor: the fuse opens the circuit Possible cause: Bulky debris or cords under the machine or around the driving wheels (remove the debris). -
Page 47: Electrical System
SERVICE MANUAL ELECTRICAL SYSTEM ELECTRICAL SYSTEM BATTERY REMOVAL Drain the recycling water, if any, from the related tank (70) by using the pipe (36). Drain the solution, if any, from the related tank (71) by using the pipe (37). Position the machine on a level ground. Turn the ignition key (10) to “0”... -
Page 48: Function Electronic Board Replacement
SERVICE MANUAL FUNCTION ELECTRONIC BOARD REPLACEMENT NOTE It is not necessary to perform the electronic programming of the new board. Position the machine on a level ground. Turn the ignition key (10) to “0” position. Disconnect the battery connector (40). Pull the handle out (63) from the squeegee lifting lever. -
Page 49: Fuse Check/Replacement
SERVICE MANUAL FUSE CHECK/REPLACEMENT Position the machine on a level ground. Turn the ignition key (10) to “0” position. Disconnect the battery connector (40). Pull the handle out (63) from the squeegee lifting lever. Remove the screws (64) and carefully move the cover (57) moving as necessary the rubber panel (59). Check/replace the fuses: –... -
Page 50: Function Board Connectors
SERVICE MANUAL For failure or open wiring harness testing, refer to the wiring diagram and following connection tables. Function board connectors C1 (see next figures) Description Ref. voltage (*) Board IN/OUT Logic power supply from key (+) Logic power supply for drive board (+) Return from paddle microswitch Undef. -
Page 51: Diagnostic Led On Function Board
SERVICE MANUAL SCREWED CONNECTIONS (M6) Screw (**) Description Connected cables - red cable from fuse (9) Battery positive - red cable from battery charger (if equipped) - red cable from C2 connector - brush motor red cable marked (OUT +) OUT+ Motor positive - vacuum motor red cable marked (OUT +) - Page 52 SERVICE MANUAL Possible cause: – open jack cable (red and blue); – foreign material prevents the correct movement of the deck actuator; – faulty deck actuator; – microswitch cams incorrect adjustment; – faulty microswitch. (**) The microswitch status in non compatible with deck actuator potentiometer. Possible cause: –...
-
Page 53: Component Layout
SERVICE MANUAL COMPONENT LAYOUT NOTE The symbol in brackets (...) after the name of the component refers to the wiring diagram (see the following page). 24V battery (BAT) Battery connector (C1) Battery charger signal connector (C2) 24V, 25A battery charger (optional) (CH) Function electronic board (EB1) Drive electronic board (EB2) LED electronic board (EB3) - Page 54 SERVICE MANUAL Figure 3 S300649 909 5484 000(1)2004-03...
- Page 55 SERVICE MANUAL Figure 4 S300650 909 5484 000(1)2004-03...
- Page 56 SERVICE MANUAL Figure 5 S300651 909 5484 000(1)2004-03...
-
Page 57: Wiring Diagram
SERVICE MANUAL WIRING DIAGRAM Legend 24V battery Battery connector Battery charger signal connector 24V, 25A battery charger (optional) Function electronic board Drive electronic board LED electronic board Water solenoid valve Function electronic board fuse Drive electronic board fuse Hour meter Key switch Brush switch warning light Extrapressure warning light... - Page 58 SERVICE MANUAL S300642 909 5484 000(1)2004-03...
- Page 59 SERVICE MANUAL 909 5484 000(1)2004-03...
- Page 61 Località Novella Terza 26862 Guardamiglio (Lodi) Italy www.nilfisk-advance.com Phone: +39 0377 451124 Fax: 0377 51443 Printed in Italy...
Need help?
Do you have a question about the BA 600S and is the answer not in the manual?
Questions and answers