Table of Contents
Advertisement
Quick Links
Advertisement
Table of Contents

Related Manuals for Eliminator Lighting MEGA GO PAR 64E


Summary of Contents for Eliminator Lighting MEGA GO PAR 64E
- Page 1 MEGA GO PAR 64E User Manual...
- Page 2 All non-Eliminator brands and product names are trademarks or registered trademarks of their respective companies. Eliminator Lighting and all affiliated companies hereby disclaim any and all liabilities for property, equipment, building, and electrical damages, injuries to any persons, and direct or indirect economic...
-
Page 3: Table Of Contents
C O N T E N T S General Information Limited Warranty (USA Only) Warranty Registration | Features | Installation Safety Guidelines Battery Precautions DMX Set Up Operation Instructions Primary-Secondary Configuration ADJ LED RC2 Operation UC IR Remote Control DMX Traits Color Macros Chart Battery Status and Recharging | Power Cord Daisy Chain 24 Photometric Chart | Dimmer Curve... -
Page 4: General Information
G E N E R A L I N F O R M AT I O N INTRODUCTION This device is a DMX intelligent, high powered LED par fixture which can be used in stand alone mode or connected in a Primary/Secondary configuration. It also features five operating modes: Sound Active mode, Auto mode, RGB + UV Dimmer mode, Static Color mode, and DMX control mode. -
Page 5: Limited Warranty (Usa Only)
ADJ Products, LLC Service Department at 800-322-6337. Send the product only to the Eliminator Lighting factory. All shipping charges must be pre-paid. If the requested repairs or service (including parts replacement) are within the terms of this warranty, Eliminator Lighting will pay return shipping charges only to a designated point within the United States. -
Page 6: Warranty Registration | Features | Installation
WA R R A N T Y R E G I S T R AT I O N This device carries a 2 year (730 days) limited warranty. Please fill out the enclosed warranty card to validate your purchase and warranty. You may also register your product online at www.adj.com. The R.A. -
Page 7: Safety Guidelines
S A F E T Y G U I D E L I N E S • To reduce the risk of electrical shock or fire, do not expose this unit to rain or moisture • Do not spill water or other liquids into or on to your unit. •... -
Page 8: Battery Precautions
B AT T E R Y P R E C A U T I O N S 1. Handling of Batteries 1.1 Do Not Short Circuit the Battery Never short circuit the battery, as doing so generates a very high current which could cause the bat- tery to overheat, potentially resulting in electrolyte gel leakage, harmful fumes, or explosion. - Page 9 B AT T E R Y P R E C A U T I O N S 3. Battery Storage Store the battery at room temperature, with a charge of at least 50%. During long periods of storage, it is recommended to charge the battery every 6 months. Doing so will prolong the life of the battery, and will also ensure that the battery is ready for use.
-
Page 10: Dmx Set Up
D M X S E T U P Power Supply: This device contains an automatic voltage switch, which will automatically sense the voltage when it is plugged into the power source. With this switch there is no need to worry about the correct power voltage, and this unit can be plugged in almost anywhere. - Page 11 D M X S E T U P Notice: Be sure to follow figures two and three when making your own cables. Do not use the ground lug on the XLR connector. Do not connect the cable’s shield conductor to the ground lug or allow the shield conductor to come into contact with the XLR’s outer casing.
-
Page 12: Operation Instructions
O P E R AT I N G I N S T R U C T I O N S System Menu: The display will lock after 30 seconds.To unlock, press and the MODE button for 3 seconds. LED Display On/Off: To set the display press the MODE button until “dXX”... - Page 13 O P E R AT I N G I N S T R U C T I O N S Sound Active Mode: In this mode, the unit will react to sound and chase through the different colors. 1. Plug the fixture in and press the MODE button until “SoXX” is displayed. “XX” represents the cur- rent sound active mode (1-16).
- Page 14 O P E R AT I N G I N S T R U C T I O N S DMX State: This mode determines how the unit will behave when the DMX signal is lost or interrupted. It can also be used to select the operating mode that the unit will default to when powered on.
-
Page 15: Primary-Secondary Configuration
P R I M A R Y- S E C O N D A R Y C O N F I G U R AT I O N This function will allows you to link units together to run in a Primary-Secondary set-up, in which one unit will act as the controlling unit and the others will react to the controlling unit’s built-in programs. -
Page 16: Adj Led Rc2 Operation
A D J L E D R C 2 O P E R AT I O N The ADJ LED RC2 infrared remote (sold seperately) has many different functions and provides com- plete control of this fixture. The controller must be aimed at the front of the fixture, and the fixture’s infrared sensor must be switched on, as described in the Operating Instructions section of this man- ual. - Page 17 A D J L E D R C 2 C O N T R O L DMX Control: Operating through an DMX controller gives the user the freedom to create custom programs tailored to his or her own individual needs. Follow the directions below to set your DMX channel mode and ad-dress.
-
Page 18: Uc Ir Remote Control
U C I R R E M O T E C O N T R O L The UC-IR infrared remote gives you control of various functions. To control the fixture you must aim the remote at the front of the fixture, and the fixture’s infrared sensor must be switched on, as de- scribed in the Operation Instructions section of this manual. -
Page 19: Dmx Traits
D M X T R A I T S CHANNEL DMX VALUES FUNCTION 4CH 5CH 6CH 9CH 10CH Red, 0% to 100% 000 - 255 Green, 0% to 100% 000 - 255 Blue, 0% to 100% 000 - 255 UV, 0% to 100% 000 - 255 Shutter/Strobe 000 - 031... - Page 20 D M X T R A I T S CHANNEL DMX VALUES FUNCTION 4CH 5CH 6CH 9CH 10CH Color Change Programs (continued) 208 - 223 Color Change 14 224 - 239 Color Change 15 240 - 255 Color Change 16 Color Fade Programs 000 - 015 Color Fade 1...
- Page 21 D M X T R A I T S CHANNEL DMX VALUES FUNCTION 4CH 5CH 6CH 9CH 10CH Sound Active Programs (continued) 224 - 239 Sound Active Mode 15 240 - 255 Sound Active Mode 16 Program Speed, slow to fast 000 - 255 Sound Sensitivity 000 - 031...
-
Page 22: Color Macros Chart
C O L O R M A C R O S C H A R T COLOR INTENSITY COLOR NO. DMX VALUE GREEN BLUE Color 0 Color 1 001 - 004 Color 2 005 - 008 Color 3 009 - 012 Color 4 013 - 016 Color 5... - Page 23 C O L O R M A C R O S C H A R T COLOR INTENSITY COLOR NO. DMX VALUE GREEN BLUE Color 37 145 - 148 Color 38 149 - 152 Color 39 153 - 156 Color 40 157 - 160 Color 41 161 - 164...
-
Page 24: Battery Status And Recharging | Power Cord Daisy Chain
B AT T E R Y S TAT U S A N D R E C H A R G E Battery Status: This function is used to check the remaining battery life. Plug the fixture in and press the MODE but- ton until “bXXX”... -
Page 25: Photometric Chart | Dimmer Curve
P H O T O M E T R I C C H A R T D I M M E R C U R V E (Fade Time) (Fade Time) Ramp Effect Standard Stage Architectural Theatre... -
Page 26: Fuse Replacement | Trouble Shooting | Cleaning
F U S E R E P L A C E M E N T Disconnect the unit from its power source, then remove the power cord from the unit. Locate the fuse holder inside the power socket. Carefully insert a flat-head screw driver into the power socket and gently pry out the fuse holder. -
Page 27: Specifications
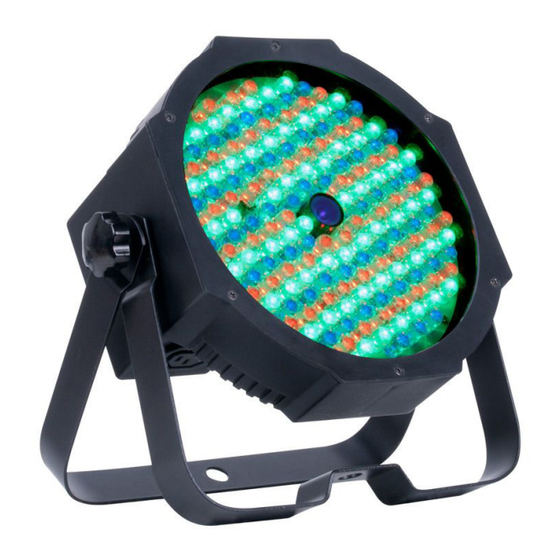
S P E C I F I C AT I O N S • Battery powered ultra bright Par 64 with 172, 10mm, 0.07W LEDs (56 Red, 60 Green, 56 Blue and 1 x 3W UV LEDs) • Smooth RGB+UV color mixing with rich palettes of color created by mixing the Red, Green, Blue and UV LEDs (fast or slow color change operation) •... -
Page 28: Dimensional Drawings
D I M E N S I O N A L D R AW I N G S 195.64mm/7.70” 111.74mm/4.39” 210mm/8.26” 262.14mm/10.32”... - Page 29 This page intentionally left blank.
Need help?
Do you have a question about the MEGA GO PAR 64E and is the answer not in the manual?
Questions and answers